


Having your email sent straight to your phone, instead of waiting to jump on a computer to see what’s going on, is very convenient. If you are not familiar with a Windows phone interface, it might take some getting used to.
This step-by-step guide will help you on how to set up your email on your windows phone. Depending on which Windows Phone version you have, the instructions for setting up your email will vary.
How to setup Email on Windows 8.1 or Earlier Email Setup
- Open up the App list on your device (phone or tablet) and click “Settings.”
- Once the settings are open, you will then tap “Email.” Then you will tap on “Accounts.”
- From “Accounts,” you will then click on “Add an account.”
4. Next, you will choose your account type. Depending on your email provider, you will choose the right provider. If you have an Outlook.com account: you will then tap “Outlook.com” or “Outlook” (If you happen to be using Windows 7/7.5, you will click “Windows Live.”If you have an O365 account: you will tap “Exchange” (If you happen to be using Windows 7/7.5, you will tap “Outlook”. If you have a Gmail account, click Google. If you have a Yahoo Mail account, you will click Yahoo, etc.

5. Once you have chosen your account type, you will then type in your full email address. Then you will be prompted to type in your password that is associated with your email address. Then click “sign in.”
If you have any problems connecting to your email provider, it is possible that you will need to set up your email via IMAP or POP.
6. After you have clicked on “sign in,” you may be prompted to verify your identity before you continue if two-step verification is turned on. To verify your identity, simply follow the instructions that you are given and enter the code provided.
7. Once this is completed, you are done setting up your email on your Windows phone. Syncing all emails and calendar settings may take a couple of minutes once the process is complete.
Windows 10 Email Setup
When setting up your email on a Windows 10 phone, there may be some slight variations to the instructions given. The variations depend on where you are living and what make and model of Windows phone you have If the button that is instructed to tap is not immediately noticeable, you may have to scroll down on your phone a bit to get to where you need to go.
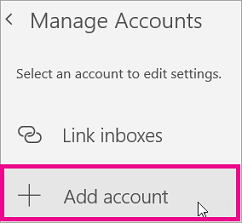
- To get started on your Windows 10 phone, tap the three dots that are at the bottom of your home screen to open up your Settings. From here you will want to tap on “Manage Accounts” then click on “Accounts.”
- Next, you want to click on the type of account that you would like to add. Windows successfully allows you to add your existing email accounts such as Outlook, Google, Yahoo!, or any others. More than likely you will be required to first sign in using a two-step verification code if that extra security feature has been selected. Once you’ve entered the code, tap “Allow” in order to give Windows access to your email account and complete the process of verification.
- If for some reason you receive an error message while trying to set up your Google account, you will have 3 chances to check your email address before you are taken to Advanced Settings setup. (This error message is due to POP or IMAP settings not being properly set up).
- If you do not receive an error message move to this step. Once you have entered all the requested information that is required for the type of email provider you are using, you will want to tap on “Sign in” in order to fill in your email address and password.
- After you have filled in your full email address and password associated with this email account, you will tap “Done” to complete the setup process. Your phone will begin synchronizing with your email account. This might take a couple of minutes, but once it has synced you will begin receiving all emails right to your phone.
Notes
When trying to sign in to Office from your Microsoft account, it is possible that you may receive a message that asks you for parental permission or to verify your age to proceed. This is due to parental consent guidelines that need to be turned off.
If you are required to use advanced setup, keep in mind that you may need to contact your service provider or network administrator in order to type in the right email server.
Setting up notifications on your phone will keep you up to date on any emails you are receiving
If you’re looking for a software company you can trust for its integrity and honest business practices, look no further than SoftwareKeep. We are a Microsoft Certified Partner and a BBB Accredited Business that cares about bringing our customers a reliable, satisfying experience on the software products they need. We will be with you before, during, and after all the sales.
That’s our 360 Degree SoftwareKeep Guarantee. So, what are you waiting for? Call us Today on +1 877 315 1713 or email sales@softwarekeep.com. As well, you can reach us via Live Chat.