
Have you ever wondered what those mysterious files are that take up space on your hard drive? You may have tried to delete them, only to find out they returned. These files are known as Windows Temporary Files and can be both a blessing and a curse.
Temporary files, also known as “temp files,” for short, store data applications require to run and contain unnecessary files that can quickly fill up your disk space. In this article, we'll explore the purpose of temporary files. Find out why they exist in the first place and how you can manage them properly and free up valuable disk space for other tasks.
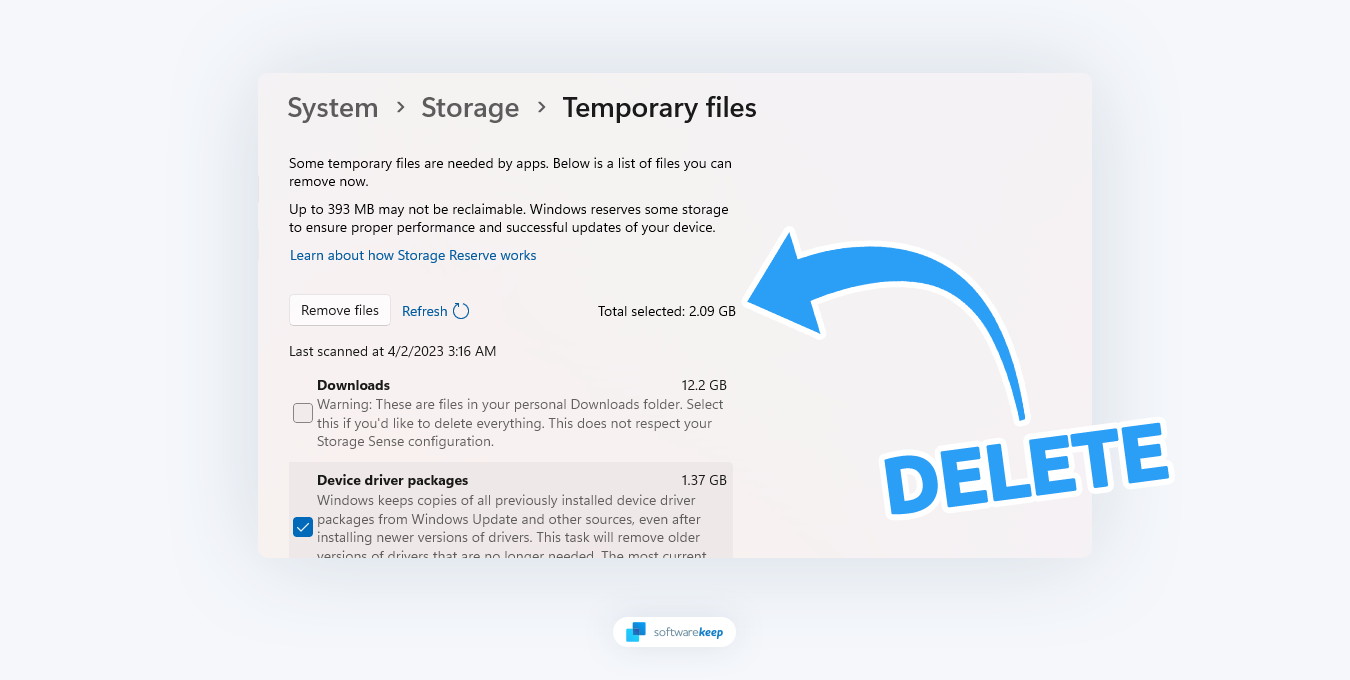
Table of Contents
- What are Windows Temporary Files?
- Windows Temporary Files Location
- Why do Windows Temporary Files Exist?
- Why Do Temporary Files Accumulate?
- The Types of Windows Temporary Files
- How To Manage Windows Temporary Files Effectively
- How to Clear Windows Temporary Files
What are Windows Temporary Files?
Temporary files are files created to temporarily hold information to free up system resources when the files aren’t needed. In Windows, temporary files can be of different types, such as installation files, log files, and backup files. These files get stored in locations depending on the type of file.
As you use your computer, temporary files are created by apps and services to hold important information temporarily. These may be cached images, videos, and other data related to the service you’re using. This practice helps retrieve the information quickly, making apps run faster.
Although they may seem unimportant, temporary files are a vital component of our computing experience, helping to keep us organized and efficient. So next time you see a temporary file, know it's serving a purpose more significant than what meets the eye.
Windows Temporary Files Location
Typically, you can find temporary files in two main locations:
- %systemdrive%\Windows\Temp
- %userprofile%\AppData\Local\Temp
If you try to access C:\Windows\Temp, you may see a message saying you don't have permission to access it. In that case, click on the "Continue" button to proceed. You'll notice that the folder contains mainly ".tmp," ".temp," and ".txt" files.
Another folder where temporary files are usually stored is C:\Users\username\AppData\Local\Temp. This folder is created for each user and is hidden by default. You must first enable "Show hidden items" from the Folder Options to see it.
The Windows operating system creates temporary files in the %system%\Windows\Temp folder, while users' temporary files created by running any software are stored in their user profiles at %userprofiles%\AppData\Local.
Sometimes, temporary files of a particular software may be in a subfolder inside the parent folder of that software. In rare cases, an app may create a temporary file or folder in the root directory of the system drive. In such a case, you should sift through the folder and delete it if you are sure it contains temporary files.
Why do Windows Temporary Files Exist?
Windows temporary files exist to improve your computer's performance and ensure programs run smoothly. For example, when you open a program like Microsoft Word, it must access data stored in temporary files. So these files act as a buffer between your computer and the program, allowing you to work without significant performance lags.
In addition to optimizing your system’s performance, Windows temporary files help maintain the integrity of your documents. Whenever you save a document on Windows, a copy is stored in the temp file until that document is saved. If anything happens while saving the file (like a power failure), you can open it again using its Temp File version.
Why Do Temporary Files Accumulate?
Temporary files can accumulate over time, leading to slow system performance. The accumulation can be due to various reasons, such as software installation and updates, system crashes, or even malware infections. The more temporary files accumulate, the more space they take up, which can cause the system to slow down.
Some apps do remove their temp files, but many don’t. So, keeping an eye on the temporary files and deleting them regularly to free up disk space is essential.
The Types of Windows Temporary Files
There are several types of Windows temporary files:
- Installation Files: These files contain all the data your computer needs to install a program. They help keep track of the components and settings used during installation.
- Log Files: These log files show what processes were running on your computer at any moment and can help you troubleshoot problems if something goes wrong.
- Backup Files: As their name implies, backup files are copies of documents or other vital information saved by Windows just in case something happens to the original.
- Cached Files: These are system files that contain data that doesn’t need to be downloaded again when you access a website or program. This helps improve your computer's performance by allowing it to retrieve data quickly without downloading it from the internet whenever you access an application.
Each type of Windows temporary file serves a different purpose, and it is crucial to understand what each one does to manage them properly.
How To Manage Windows Temporary Files Effectively
Windows temporary files can take up significant space on your hard drive if left unchecked, so it’s important to manage them properly. Here are a few tips on how to do this:
- Regularly delete the temporary files – You can do this manually by going into each folder and deleting the files individually, or you can use a program like CCleaner, which will automate the process.
- Disable unnecessary programs – If some programs are rarely used, it may be a good idea to disable them so they don’t create temporary files. This will free up space on your hard drive and reduce clutter in the Temp folder.
- Limit how often Windows creates backups – By default, Windows creates backups whenever something is changed or installed on your system. You can adjust this setting in the System Properties window.
- Regularly scan for malware – Malware can cause problems with your temporary files by creating additional ones or corrupting existing ones. Periodically scanning for malware will help keep your system healthy and running smoothly.
By following these tips, you can ensure that your Windows temporary files are managed correctly and that your computer is running optimally. This will free up disk space for other tasks and help keep your system performing at its best.
How to Clear Windows Temporary Files
If you’re trying to free up some disk space and don’t need the temporary files, you can delete them quickly. There are a few ways to do this:
1. Remove Temporary Files Manually
The most straightforward solution to clearing temporary files is manually deleting them from each folder. This involves going into the Windows Temp folder and deleting all its files.
-
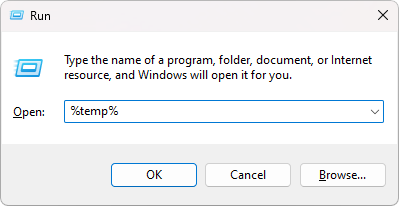
Press the Windows + R keyboard shortcut to bring up the Run utility. Here, type in “%temp%” without the quotes, and press the OK button.
-
Press the Ctrl + A keyboard shortcut to select everything in the folder. Right-click on the selected files, and click Delete from the context menu.
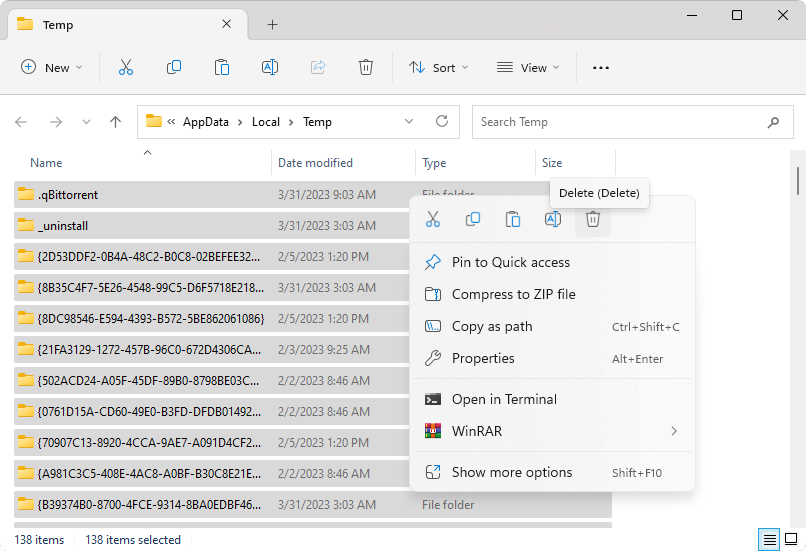
- After deleting the files, go over to your desktop and empty the Recycle Bin. This will entirely remove the temp files from your system.
2. Delete Temporary Files Using the Settings App
The Settings app in Windows contains a section that allows you to clear out temporary files quickly and easily. Here's how to do it:
- Open the Start menu and click the “Settings” button on the left side of the screen. This will open the Windows Settings page. You can also use the Windows + I keyboard shortcut.
-
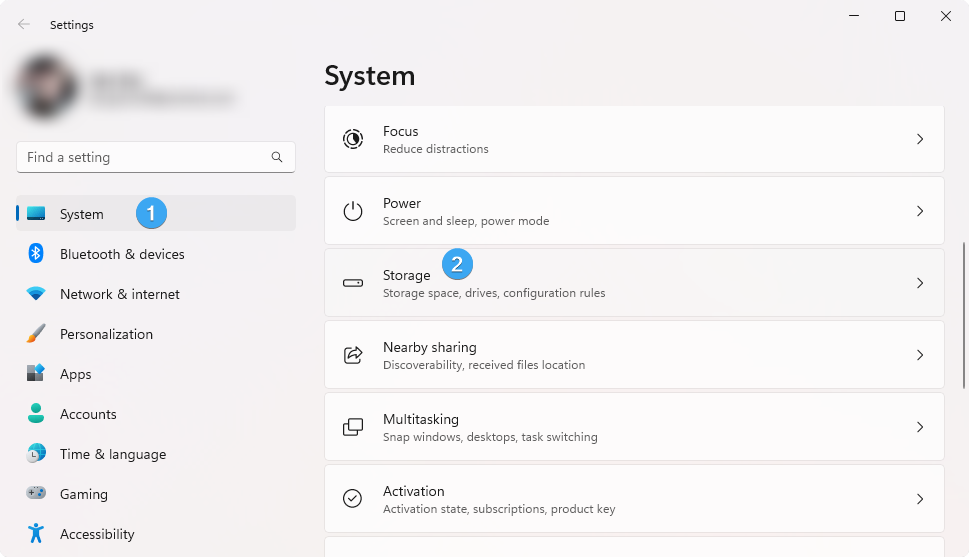
Once you're on the Settings page, navigate to the “System” > “Storage” tab.
- You'll see your disk options on the right side of the screen. Click on the disk you want to clean and select the “Temporary files” option.
-
Windows will begin scanning the temporary files folder. Once finished, you can choose which files you'd like to remove. To delete the selected files, check the boxes next to them and click the “Remove files” button.
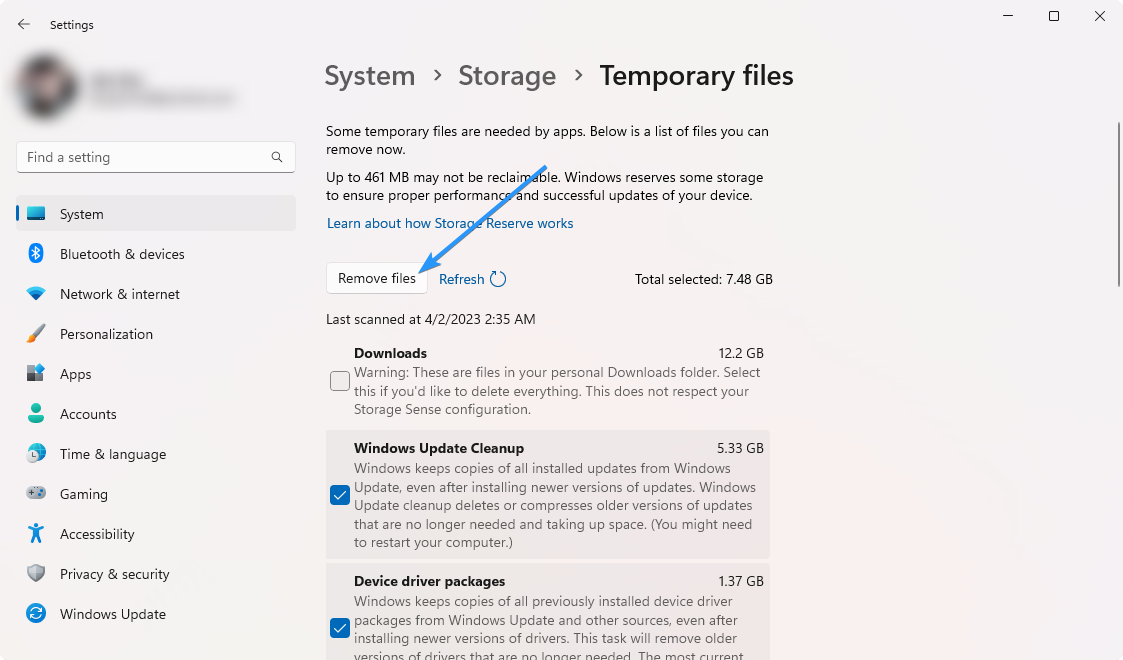
- Click “Continue” to confirm your selection, and wait for Windows to remove your selected temporary files.
3. Configure Storage Sense
Storage Sense is a Windows feature that automatically deletes temporary files when your disk space runs low. To enable it, follow these steps:
- Open the Settings application from your Start menu or press Windows + I on your keyboard.
-
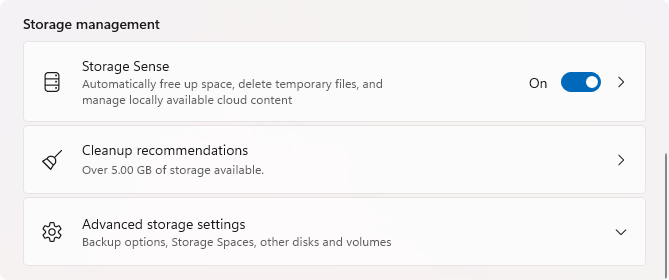
Navigate to "System" > "Storage," and scroll down until you see "Storage Sense" in the “Storage management” section. Make sure that the option is toggled on.
-
After enabling Storage Sense, click on it to customize your settings. You can change how often Windows deletes temporary files and customize what folders it should ignore.
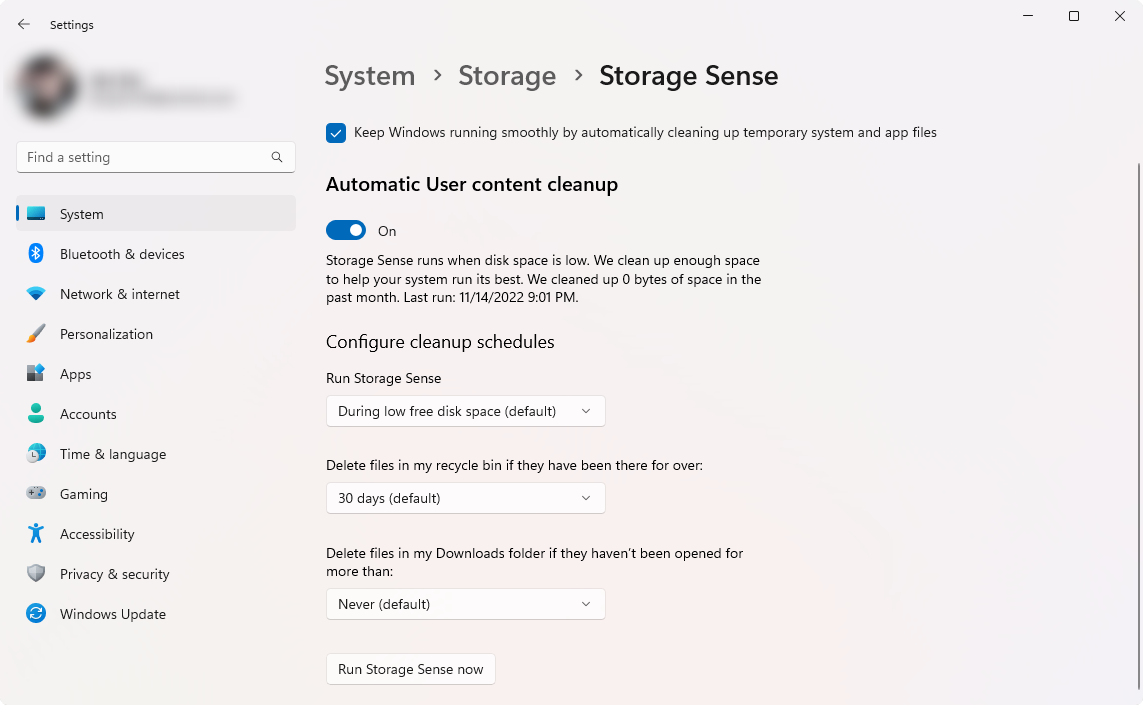
- Click the "Run Storage Sense now" button to start Storage Sense manually, or wait for the next scheduled automatic clean.
4. Use a BAT File
You can create a BAT file to clean your temporary files automatically. BAT files are text files that you can use to execute commands. Here's how to make one:
- Open the Notepad application.
-
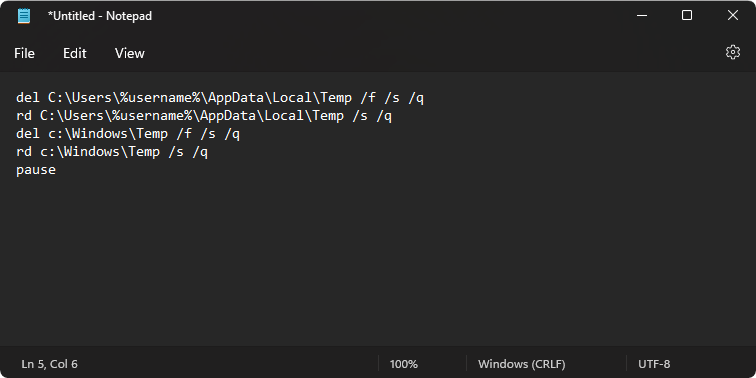
Copy and paste the following text into a new Notepad file:
-
del C:\Users\%username%\AppData\Local\Temp /f /s /q
rd C:\Users\%username%\AppData\Local\Temp /s /q
del c:\Windows\Temp /f /s /q
rd c:\Windows\Temp /s /q
pause
-
del C:\Users\%username%\AppData\Local\Temp /f /s /q
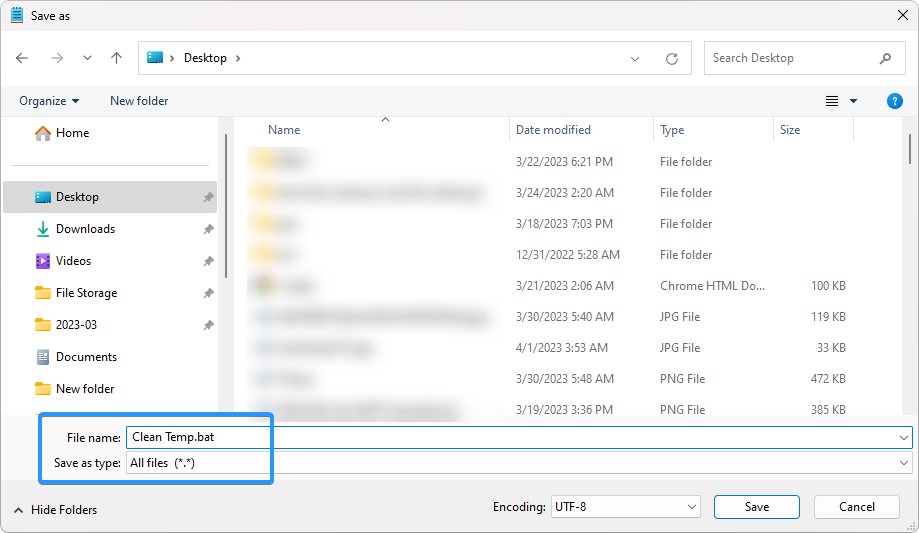
- Click "File" and select "Save as" from the context menu.
-
Change the file type to "All files" and then name the file "Clean Temp.bat" without the quotes. Save the file to your desktop by clicking the "Save" button.
-
Navigate to your desktop and right-click on the "Clean Temp.bat" file, then select "Run as administrator" from the context menu.
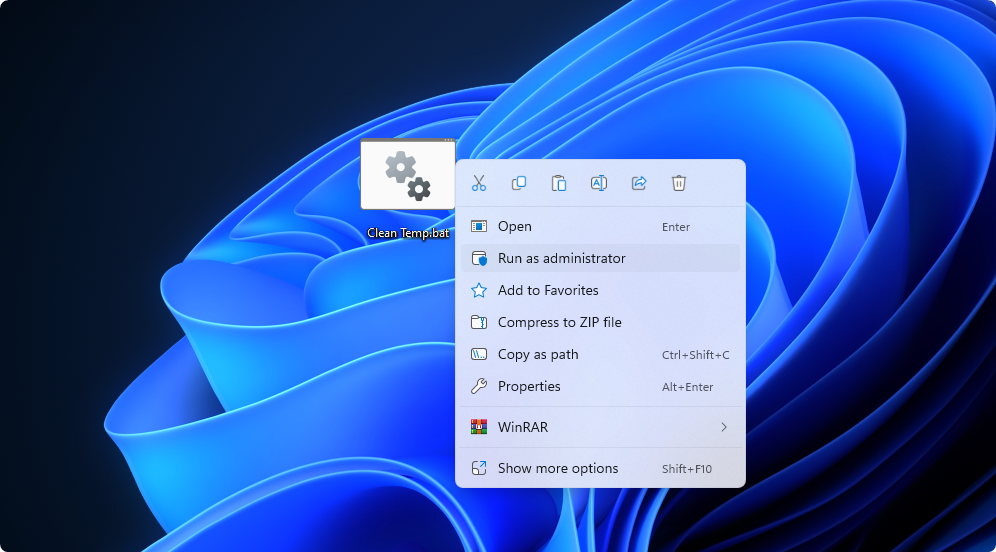
- Wait for the batch file to finish clearing your temporary files.
This method is more advanced than the other options but can be helpful if you have to clear out multiple computers at once or want an automated solution for cleaning up temporary files.
5. Delete Temp Files With Command Prompt
The Command Prompt is a powerful tool for executing commands in Windows. You can also use it to delete temporary files quickly and easily. Here's how:
-
Use the Search function in your taskbar, and look for “Command Prompt.” Launch the app from the search results by clicking “Run as administrator.” Note that you need an administrator account to do this.
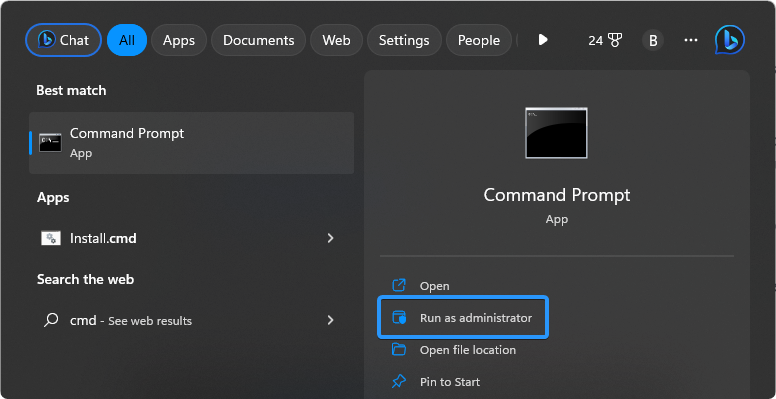
- Click “Yes” when prompted. This will launch the Command Prompt with elevated permissions.
-
After the Command Prompt loads, input the following command, and then press the Enter key on your keyboard to execute it: cleanmgr /d c
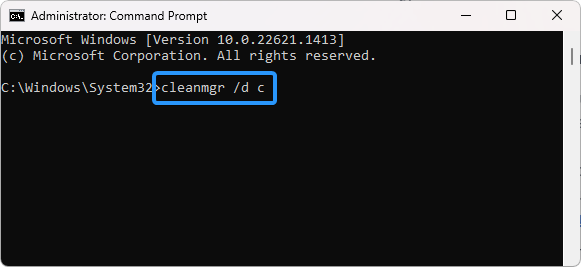
- This command is going to clear the “C:” drive. If your temporary files are on a different drive, change the drive letter to that one.
6. Run the Disk Cleanup Utility
Disk Cleanup is a built-in tool in Windows that you can use to remove unnecessary files from the system. It can even delete temporary files, so it's a good idea to run it regularly to keep your disk space clutter-free. Here's how:
-
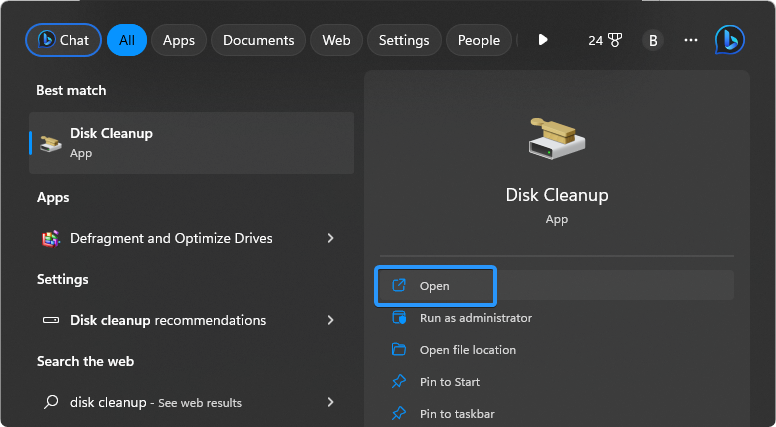
Bring up the Search feature from your taskbar or by pressing the Windows + S keyboard shortcut, and type in “Disk Cleanup.” Launch the app from the search results.
-
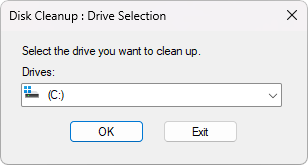
Use the drop-down menu to select the drive you want to clear. In most cases, temporary files get stored on the C: drive. Click the OK button to proceed.
-
Place a checkmark next to everything you want to delete. When you click on an item in the list, Windows will tell you what the files contain and how much space you’ll gain from deleting them.
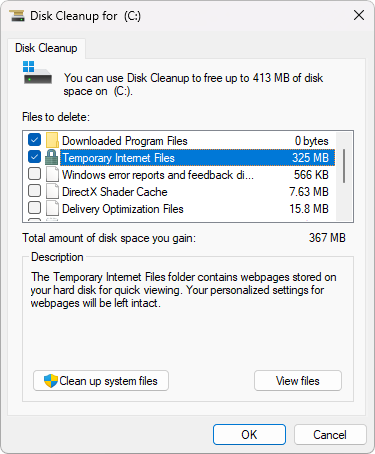
- After selecting everything you want to delete, click OK and allow the utility to run.
7. Install a Third-party Disk Cleaner
While Windows has a built-in tool for cleaning temporary files, third-party disk cleaners can help you do the job. These software applications are designed to scan your system for temporary files and delete them, freeing up valuable disk space and potentially improving system performance.
Here are five recommended third-party disk cleaners for deleting temporary files:
- CCleaner: This is one of the most popular disk cleaners available, and it includes a specific option for cleaning temporary files. It's free to use and can also clean up other types of junk files and registry errors.
- BleachBit: Another free option, BleachBit is an open-source tool that can help you clean up temporary files, cache files, and other system junk. It's available for Windows, Linux, and macOS.
- CleanMyPC: This is a commercial disk cleaner that offers a free trial. It includes various cleaning options, including temporary files, logs, and caches. It also has an uninstaller and a registry cleaner.
- Wise Disk Cleaner: This free option can scan your system for temporary files, system logs, and other junk files. It includes both quick and deep scan options for more thorough cleaning.
- Glary Utilities: This is a suite of system tools that includes a disk cleaner module. It can scan your system for temporary files, browser cache, and other types of system junk. It's available for free, but there's also a paid version that includes additional features.
These third-party disk cleaners can help delete temporary files and other types of system junk. Just research and choose a reputable tool to avoid potential issues.
Conclusion
Temporary files are essential to the Windows operating system; managing them is crucial to keep your system running smoothly. By understanding what temporary files are, their types, their location, and how to manage them, you can optimize your system's performance and prevent it from slowing down. Use the best practices discussed in this article to keep your system in top shape.
We hope this article has helped you understand how temporary files work and how to manage them properly. With the right tools and practices, you can ensure your system runs optimally and free up disk space for other files.
One More Thing
We’re glad you’ve read this article. :) Thank you for reading.
If you have a second, please share this article on your socials; someone else may benefit too.
Subscribe to our newsletter and be the first to read our future articles, reviews, and blog post right from your inbox. We also offer deals, promotions, and updates on our products and share them via email. You won’t miss one.
Related Articles
» How to Find and Delete Duplicate Files in Windows 11
» How to Restore deleted files in Windows
» How to Find Large Files on Windows 10