
Learn how to fix the "Windows needs your current credentials" error on Windows warning you about your credentials to continue working on your computer.
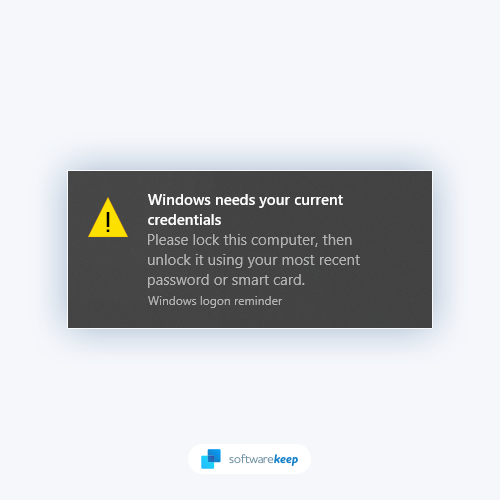
After the computer startup, you may receive the error message "Please lock this computer, then unlock it using your most recent password or smart card."
Even after entering the right Windows credentials, the error notification may continue. And the error manifests itself on the screen with an error message and a suggestion that, in most cases, will not assist you in resolving the issue.
When trying to access a locked system, Windows users who have ever encountered the "Windows needs your current credentials" notification know how frustrating it can be. Fortunately, there are a few ways to fix this problem.
This article will outline multiple methods for correcting the problem. We hope you find this information helpful!
Table of Contents
- What Causes the "Windows Needs Your Current Credentials" Error?
- Solved: Windows Needs Your Current Credentials Error on Windows 11/10
- Method 1. Check Your Computer for Malware
- Method 2. Modify the Group Policy Configuration
- Method 3. Re-Authenticate Your User Account
- Method 4. Remove Windows Credentials
- Method 5. Activate Windows 10 Trial Version
- Method 6. Update Windows to the Latest Version
- Method 7. Use the System Restore Tool
- TL;DR
- Conclusion
What Causes the "Windows Needs Your Current Credentials" Error?
- Group Policy Misconfiguration: The underlying problems or misconfiguration with the Group Policy are the most likely reason why Windows throws an error in this situation.
- System file corruption: When system files are corrupted, it can compromise OS functionality and cause error messages when performing particular tasks. So, either run the SFC, use the DISM repair scans to see if they help, or do a clean install.
- Malware attacks: If your System is infected with a virus or malware infection, it's probably the cause of the problem. The virus infiltrates your machine and gains complete control over its operation, resulting in numerous problems and unexpected errors.
- User account or Microsoft account authentication problem: There may be an issue with your user account preventing you from posting. And perhaps re-verifying the user account will solve your problem in this situation.
These are some possible reasons behind the "Windows needs your current credentials" error. Let us now see how to fix this problem in different scenarios.
Solved: Windows Needs Your Current Credentials Error on Windows 11/10
Here are the solutions to fix the "Windows needs your current credentials" error on Windows 10 and Windows 11.
Method 1. Check Your Computer for Malware
When you see this error, the first thing you should do is scan your computer for malware using a good anti-malware program. We recommend Malwarebytes as it is one of the best anti-malware tools available.
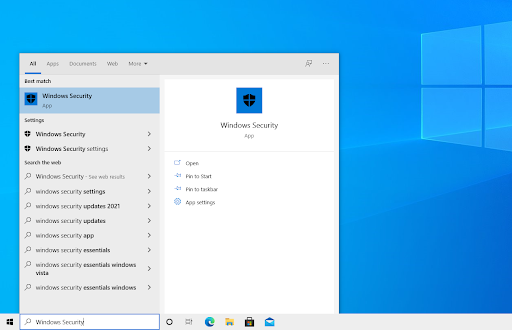
- Open the search bar in your taskbar by clicking on the magnifying glass icon. You can also bring it up with the Windows + S keyboard shortcut.
-
Type in Windows Security and launch it from the search results.
-
Switch to the Virus & Threat Protection tab using the home screen or the menu in the left-side pane. Click on the Scan Options link.

-
Select the Full scan option. This is going to check every single file on all of your drives to ensure no threats can hide. This Scan may last over 1-2 hours, depending on how many files you have on your System.
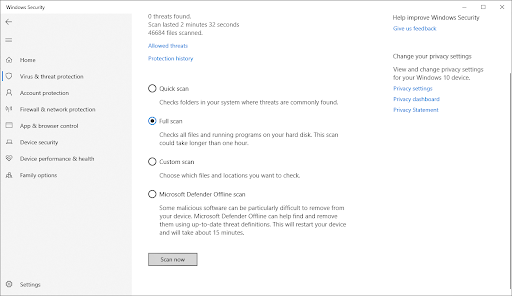
- Click on the Scan now button to begin the Scan. If a threat is detected, Windows will automatically quarantine or remove it entirely. You can review the scan results afterward.
Method 2. Modify the Group Policy Configuration
This procedure is for Windows 10 Pro and later versions with a linked domain account. It's supposed to be changed in the Group Policy as if they've been misconfigured, resulting in serious issues on the Windows system.
Note: Keep in mind that if you're using Windows 10 Home, you'll need to enable the group policy editor.
Many Windows 10 users found that reverting to the default settings fixed the problem. Follow the steps below to get started:
-
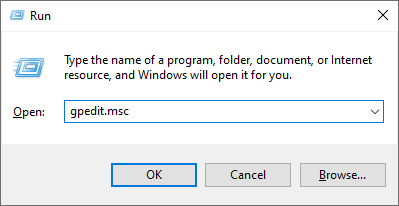
Press the Windows + R keys on your keyboard to launch the Run utility, and then type in "gpedit.msc" without quotation marks. Hit the OK button to proceed.
-
A new window should pop up. Click on Computer Configuration on the left side, then double-click on Administrative Templates.
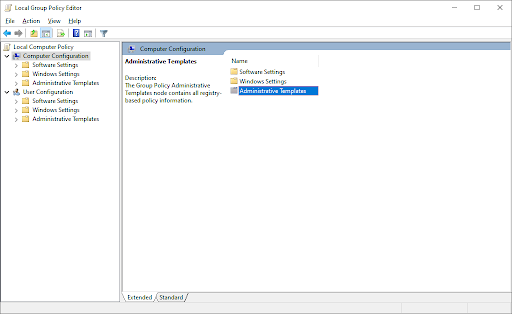
-
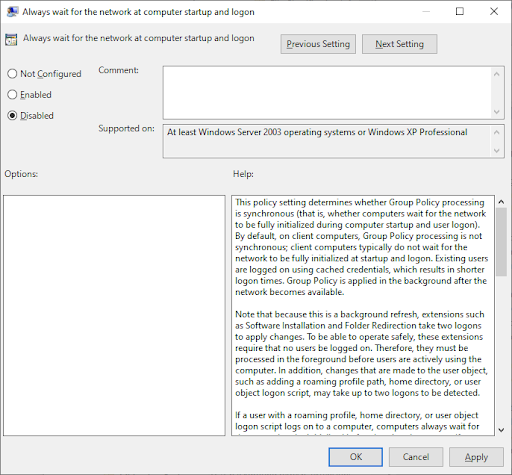
Next, navigate to the System> Logon folder, and then double-click on the Always wait for the network at computer startup and login option.

-
Make sure to set the configuration to either Disabled or Not Configured, and then click on the Apply button. You can close all windows now to exit the Group Policy utility.
- After that, restart your computer and try to log in to Windows 10 with your Pin or password as soon as the machine powers up to see if you get the same error.
If the problem persists, moving on to the next solution may be the best option.
Method 3. Re-Authenticate Your User Account
If you can log in with the same account on several platforms, there may be a problem with authentication on your Windows 10 system. Many users reported that validating the user account solved the "Windows needs your current credentials" warning.
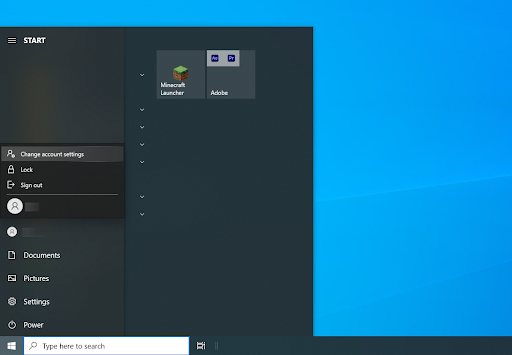
- Click on the Start menu in your taskbar. Its symbol is the classic Windows logo and can be found in the bottom left of your screen.
-
You'll see the profile picture of the currently logged-in user on the left side of the Start menu panel. Click on the image and select Change account settings from the context menu.
- A new window will appear. Go to the Your Info tab, then, on the right side, choose the option Verify Link, which will take you to a series of on-screen prompts.
- Continue to verify your information by following the instructions.
After the verification procedure is completed, restart your Windows 10 machine, and it is expected that you will be able to log in to Windows 10 without encountering the issue.
Method 4. Remove Windows Credentials
If the problem is with your Microsoft account, you can try to remove the Windows credentials to fix it. To do this, follow these steps:
- Open the Search bar in your taskbar by clicking on the magnifying glass icon. You can also bring it up with the Windows + S keyboard shortcut.
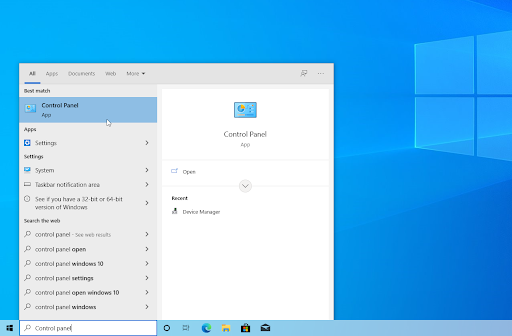
-
Type Control Panel in the search box. When you see it in the results, click on it to launch the application.
-
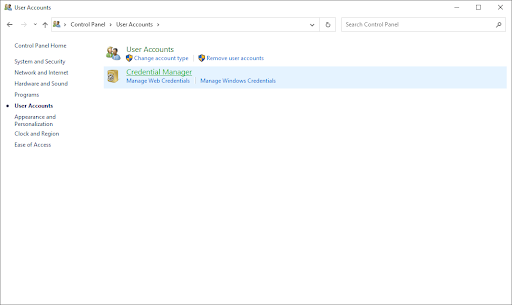
Navigate to User Accounts > Credential Manager. Ensure that your view mode is set to Category if you can't see this.
-
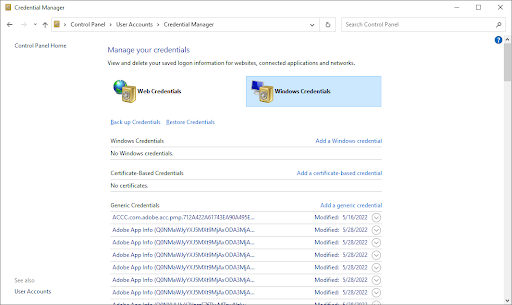
Select Windows Credentials from the available options and remove all of the listed credentials.
- Restart your PC and log into your Windows account. After removing these credentials, see if you still get the "Windows needs your current credentials" warning.
Method 5. Activate Windows 10 Trial Version
Many Windows 10 customers have indicated that upgrading from Home to Pro fixed the problem for them. This is a time-consuming method, but if you're running Windows 10 Home and the other options don't work, this will undoubtedly work.
-
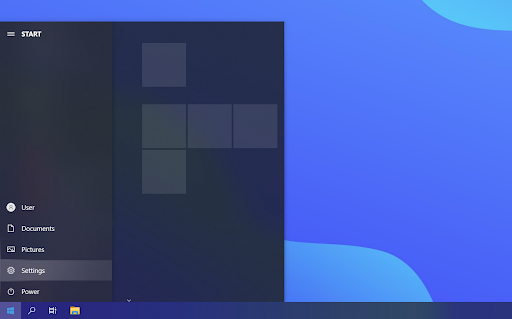
Click on the Windows icon in the bottom left of your screen to bring up the Start menu. Choose Settings, or use the Windows + I shortcut.
-
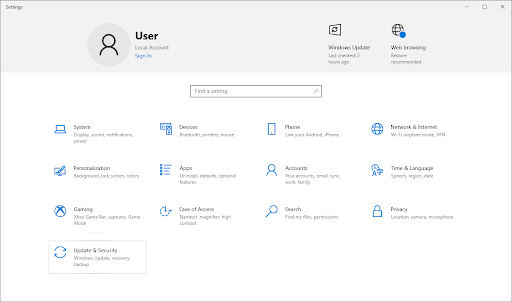
Click on the Update & Security tile. This is where you can find most of your Windows Update settings.
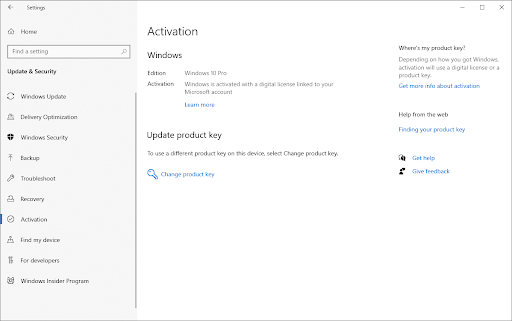
-
Switch to the Activation tab from the left-side menu. Click on the Change product key link to bring up the interface needed for the next step.
-
When prompted, input the VK7JG NPHTM C97JM 9MPGT 3V66T code into the Product key field and click Next. It will start the trial edition of Windows 10 Pro, which has not yet been enabled.
- Now you must locate and click the Start Upgrade button in the following step.
Wait until the process is completed and the System has finished shutting down and rebooting. You will notice the following message: "Working on upgrades Don't turn off your computer."
Once the procedure is complete, you will be presented with a similar features screen; you must wait until it reaches 100% completion before receiving the message: Edition update done. And that's it; your System is now up and running.
Method 6. Update Windows to the Latest Version
Make sure your device is running the most recent version of Windows. Check for updates by going to Settings, selecting Windows Update, and checking updates. If the problem persists, restart your computer after installing the latest OS version.
- Click on the Windows icon in the bottom left of your screen to bring up the Start menu. Choose Settings, or use the Windows + I shortcut.
- Click on the Update & Security tile. This is where you can find most of your Windows Update settings and choose when to receive updates.
- Make sure to stay on the default Windows Update tab. Click on the Check for updates button and wait for Windows to find available updates.
- If you see any updates displayed, click on the View all optional updates link to see and install them.
- When Windows finds a new update, it'll automatically start installing on your computer. Wait for Windows to download and apply the necessary updates.
Method 7. Use the System Restore Tool
Installing third-party programs or allowing third-party services to start creating issues on the Windows system is a common occurrence. As a result, restoring your System to an earlier image will assist you in overcoming the mistake. However, this will only work if you have already made a System Restore point.
Remember that running System Restore will not harm your data; it will simply undo your recent modifications.
To use the System Restore tool, follow these steps:
- Open the search bar in your taskbar by clicking on the magnifying glass icon. You can also bring it up with the Windows + S keyboard shortcut.
- Type in System Restore and click on Recovery from the search results. This should be on the top, in the Best match category.
- This will take you to the Control Panel. Here, click on the Open System Restore link that can be seen in the Advanced recovery tools section.
- Follow the on-screen instructions to restore a past point in time. You can select a restore point yourself or use the recommended one if Windows 10 shows the option. Don't forget to check what files and applications will be affected!
- After choosing the options you're happy with, click on the Finish button and wait for Windows to restore your computer. You'll be able to tell whether or not this worked after your computer restarts with the loaded restore point.
TL;DR
- If you see the "Windows needs your current credentials" error, it's most likely due to a Group Policy misconfiguration or system file corruption. The message prompts you to check your current credentials.
- Such a message may come up if your System is infected with malware.
- You can try to fix the problem by modifying the Group Policy or re-authenticating your user account.
- Using the Windows Credential Manager, you can fix this same issue by removing current credentials and reset the same credentials needed.
- Check your Windows activation state and use the activation screen to start the Windows 10 trial version.
- To get a Windows 10 activation key for cheap, check out the SoftwareKeep store! We offer Microsoft products at up to 50% off retail price.
- You can use the System Restore tool to roll back your computer to a previous working state as a last resort.
Conclusion
If you see the "Windows needs your current credentials" error, don't worry – we have your back. Such an error message can easily be restored with a few steps. In this article, we walked through how to fix the issue so that you can continue using your Windows PC without any problems.
We recommend reading more articles on our Blog for helpful tips and tricks about software and technology. Thanks for reading!
One More Thing
Looking for more tips? Check out our other guides in our Blog or visit our Help Center for a wealth of information on how to troubleshoot various issues.
Sign up for our newsletter and get early access to our blog posts, promotions, and discount codes. Plus, you'll be the first to know about our latest guides, deals, and other exciting updates!
Recommended Articles
» How to Fix Windows Update Standalone Installer Stuck at Searching for Updates
» Fixed: Windows Could Not Automatically Detect This Network's Proxy Settings
» Fix "Windows Update components must be repaired" Error on Windows 10
Feel free to reach out with questions or requests you'd like us to cover.