

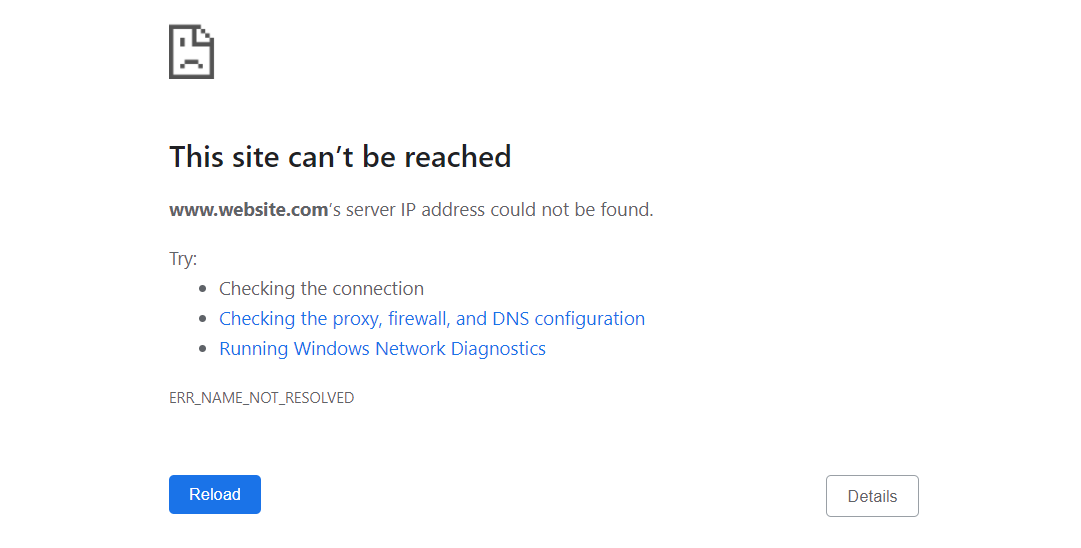
In this guide, you can find out what to do when the ERR_NAME_NOT_RESOLVED error appears on your computer or laptop when browsing.
You can access an almost infinite number of websites thanks to the internet. To visit a certain website, all you need is your browser and domain name-which is found by DNS servers (Domain Name System). When resolving it through these local networks, your computer will automatically translate this address into its numerical IP format.
When this process isn’t possible for some reason, you might encounter the ERR_NAME_NOT_RESOLVED error. The most common cause for this is when your computer is unable to connect to the internet, or your DNS servers are down. If you've recently changed or updated your DNS server and your device(s) aren't connecting properly, ERR_NAME_NOT_RESOLVED might occur.
Table of contents
- What causes the ERR_NAME_NOT_RESOLVED error?
- How to fix ERR_NAME_NOT_RESOLVED
- Method 1. Flush your DNS cache
- Method 2. Clear host cache in Google Chrome
- Method 3. Clear browsing data
- Method 4. Disable preloading pages
- Method 5. Reset the Windows Firewall
- Method 6. Reset the Winsock catalog
- Method 7. Change your DNS server
- Method 8. Scan your computer for malware
- Method 9. Temporarily disable your antivirus app
- Final thoughts
What causes the ERR_NAME_NOT_RESOLVED error?
There are a few causes for ERR_NAME_NOT_RESOLVED, but the most common is when your device can't connect to the internet or your DNS servers are down.
To fully comprehend how the ERR_NAME_NOT_RESOLVED problem occurs, you must first understand what DNS is. When you type in a website URL like softwarekeep.com into your web browser and then hit Enter, your browser sends out a request via DNS (Domain Name System) for your IP address. This is for information related to establishing connectivity between you (the client) and the said site's server.
If your browser or ISP has previously cached the website’s IP address, this is a seamless process. Otherwise, it will use the DNS domain name resolution method to obtain the IP address within seconds. However, this is where problems may arise. If the website is relocated to a different IP address, but the system still caches the previous address, you’ll see the ERR_NAME_NOT_RESOLVED error.
Your browser may try to use the incorrect cached address, resulting in the domain name being unable to be resolved and an error message being shown.
How to fix ERR_NAME_NOT_RESOLVED
Follow these steps to solve the ERR_NAME_NOT_RESOLVED error on your web browser.
Method 1. Flush your DNS cache
You may manually delete the DNS cache stored on your device to see if the problems it creates are resolved. The procedure takes only a few minutes and includes the use of a Command Prompt.
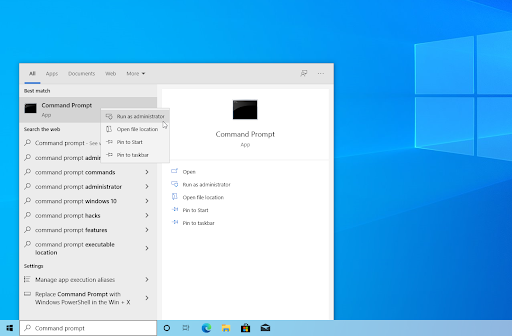
- Open the search bar in your taskbar by clicking on the magnifying glass icon. You can also bring it up with the Windows + S keyboard shortcut.
-
Type Command Prompt in the search box. When you see it in the results, right-click on it and choose Run as Administrator. If you're using a local account that doesn't have administrator permissions, click here first.
- When prompted by the User Account Control (UAC), click Yes to allow the app to launch with administrative permissions.
-
Input the commands below in the following order, pressing the Enter key on your keyboard after each line:
ipconfig /flushdns
ipconfig /registerdns
ipconfig /renew
ipconfig /release

- Close the Command Prompt and open any web browser. Check if you’re able to access a website without running into the ERR_NAME_NOT_RESOLVED error.
Method 2. Clear host cache in Google Chrome
If you use Google Chrome as your browser, this solution may do the trick for you. Chrome maintains track of all DNS entries in order to speed up the loading of the websites you visit frequently. If wrong entries are stored, it might cause errors like ERR_NAME_NOT_RESOLVED. To fix this, clear the host cache in Google Chrome.
-
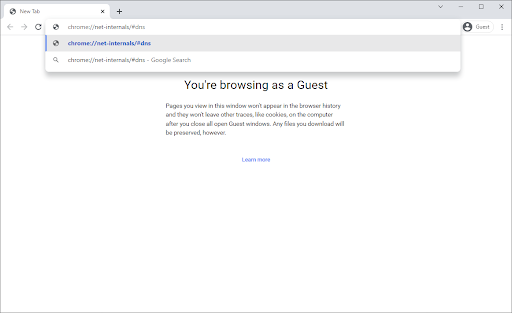
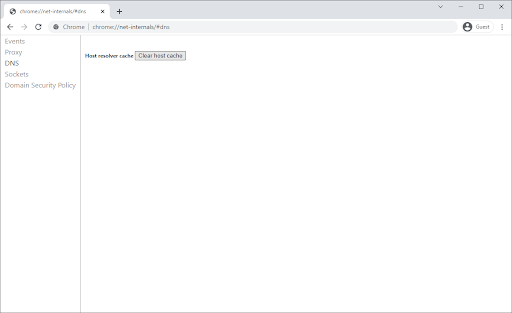
Launch Google Chrome and type chrome://net-internals/#dns into the address bar, and then hit Enter on your keyboard.
-
Click on the Clear host cache button. You’ll be prompted to relaunch Google Chrome for the changes to take effect. When you’re done, check if this method has helped you with the DNS error at hand.
Method 3. Clear browsing data
Clearing your browsing data will offer your DNS settings a clean slate. This reduces the chances of the ERR_NAME_NOT_RESOLVED error being caused by defective or outdated DNS requests. Simply follow the steps below for your preferred web browser.
How to clear browsing data in Google Chrome
If you use Google Chrome for browsing, follow the steps below to clear your browsing data.
-
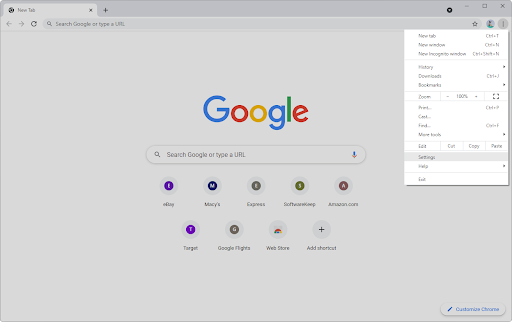
Click on the More icon (the three dots placed vertically next to your Chrome user icon), and then hover over More tools. Select Clear browsing data from the drop-down menu.

-
Make sure the time range is set to All time.

-
Enable all of the following options:
- Browsing history
- Cookies and other site data
-
Cached images and files
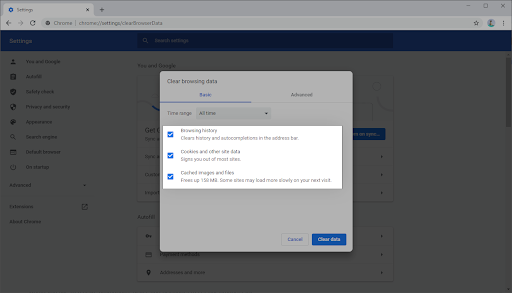
- Click on the Clear data button. After the process is over, restart Google Chrome and check if this helped you resolve the DNS problem.
How to clear browsing data in Firefox
If you use Mozilla Firefox for browsing, follow the steps below to clear your browsing data.
-
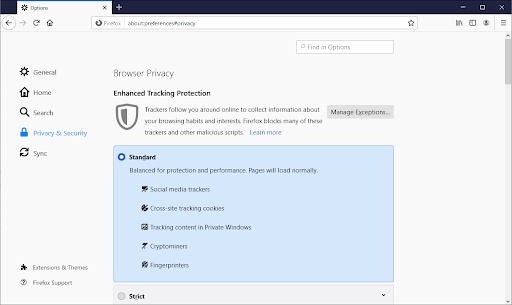
Type about:preferences#privacy into the address bar and press the Enter key on your keyboard. You’ll be redirected to Firefox’s settings page.
-
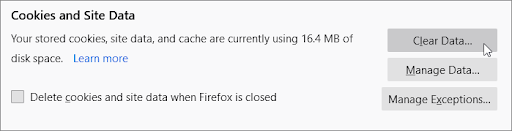
Scroll down to the Cookies and Site Data section. Here, click on the Clear Data button.
-
Select both Cookies and Site Data and Cached Web Content, and then click on the Clear button to proceed. Wait for Firefox to process your request and delete the data.

- Restart your browser after the task has concluded. You can try accessing the website that previously gave you the ERR_NAME_NOT_RESOLVED error.
How to clear browsing data in Microsoft Edge
If you use Microsoft Edge for browsing, follow the steps below to clear your browsing data.
-
Click on the Edge menu button in the top-right corner of the browser, and then click on Settings from the available options.
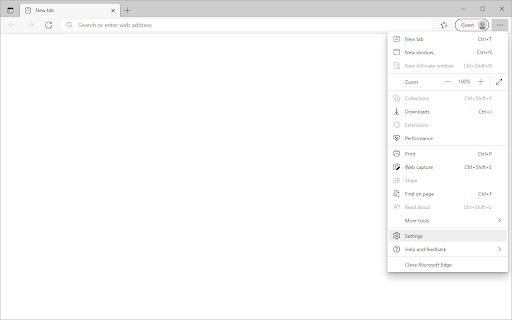
-
Switch to the Privacy, search, and services tab using the pane on the left side. Here, scroll down until you see the Choose what to clear button, and then click on it.
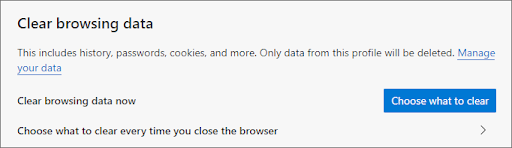
-
Make sure to set the time range to All time.

- Select Browsing history, Download history, Cookies, and other site data, and Cached images and files then press the Clear now button. Wait for the process to finish, and then test if the same error occurs when you browse with Edge.
Method 4. Disable preloading pages
Most browsers will try to preload websites or prefetch information before you click on a link in order to speed up loading times when you eventually visit the destination. This is very useful for many users but may cause problems such as the ERR_NAME_NOT_RESOLVED error.
To ensure it doesn’t interfere with your connection, follow the steps for your browser and turn off all preloading and prefetching features.
How to disable preloading in Google Chrome
-
Click on the More icon — the three dots in the upper-right corner of your browser, — and then click on Settings. Alternatively, if you prefer the speedier route, you can also just type chrome://settings in your address bar and hit go.
-
Click on Privacy and security from the sidebar. On the main page, click on the Cookies and other site data button to be redirected.
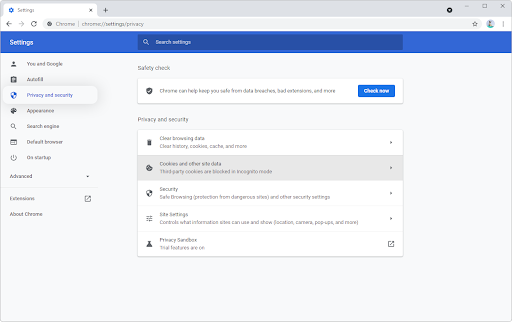
- Tip: On older versions of Google Chrome, you may need to scroll all the way to the bottom of the Settings page, and then click on the link that says Advanced settings. You should see a new section open up, extending the page further.
-
Scroll down until you see the Preload pages for faster browsing and searching setting. Click on the toggle so that the feature is turned off (shows up gray).
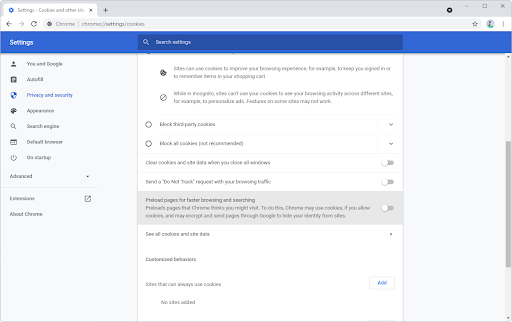
- Restart Google Chrome and see if you’re able to access the problematic website after making this small change to your settings.
How to disable DNS prefetch in Firefox
- Launch the Firefox browser, and then type about:config in the address bar and press Enter on your keyboard. You’ll be redirected to the Firefox configuration page.
- It's possible that a warning page may display. To go to the about:config page, click the Accept the Risk and Continue buttons.
- Once you’re on the about:config page, use the search function to look for the preference network.dns.disablePrefetch. Look at the Value column associated with the entry, and make sure it’s set to true.
- Save your changes and restart Firefox.
How to disable preloading pages in Microsoft Edge
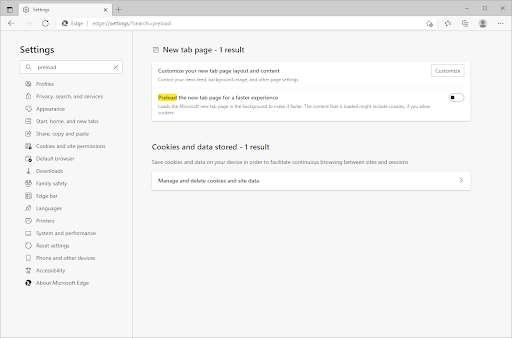
- Click on the Edge menu button in the top-right corner of the browser, and then click on Settings from the available options.
-
Use the search input box to look up “preload”. From the search results, make sure that the Preload the new tab page for a faster experience option is turned off.
Method 5. Reset the Windows Firewall
If your firewall settings have been changed, it’s possible that something you modified is now interfering with your internet connection. To resolve this problem we recommend resetting the Windows Firewall to its default settings.
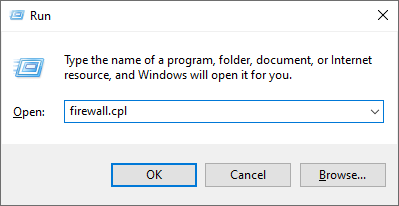
-
Press the Windows + R keys on your keyboard to launch the Run utility. Type in “firewall.cpl” (without the quotation marks) and click on the OK button.
-
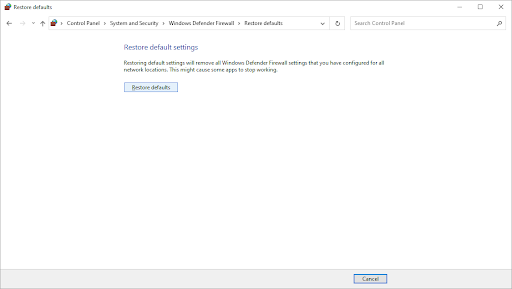
Click on the Restore defaults link in the left-side menu. You may need administrative authentication to proceed, so make sure you have the appropriate account or have your IT professional nearby.
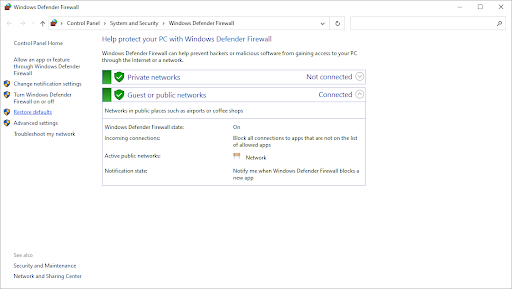
-
Click on the Restore defaults button to reset your firewall to its original settings. Take note that you may need to reconfigure some applications or your network after making this change!
Method 6. Reset the Winsock catalog
Running this simple command to reset the Winsock library can help you resolve DNS issues and restore the default Windows Sockets API settings, allowing everything to work smoothly once again!
- Open the search bar in your taskbar by clicking on the magnifying glass icon. You can also bring it up with the Windows + S keyboard shortcut.
-
Type Command Prompt in the search box. When you see it in the results, right-click on it and choose Run as Administrator.
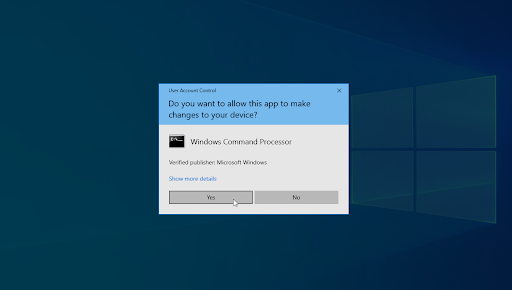
- When prompted by the User Account Control (UAC), click Yes to allow the app to launch with administrative permissions.
-
Input the commands below in the following order, pressing the Enter key on your keyboard after each line:
netsh int ip set dns
netsh winsock reset

- Close the Command Prompt and see if you’re able to browse the internet using Google Chrome without the ERR_NAME_NOT_RESOLVED error.
Method 7. Change your DNS server
If your issue is network-related, you may need to modify your DNS address to something else. There are several public DNS providers to choose from. Alternatively, you can switch your device to get the information you need automatically. On Windows, here's how to go to the DNS settings.
-
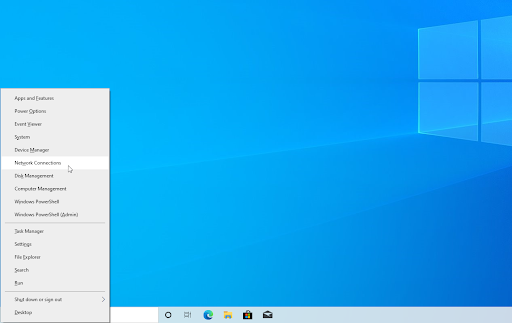
Press Ctrl + X on your keyboard, and then click on Network Connections from the context menu.
-
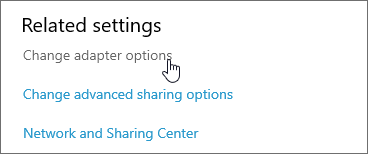
Select your current connection type (for example “Wi-Fi” or “Ethernet”) in the left pane, and then click on Change adapter options on the right pane.
-
Right-click on the connection you’re currently using and select Properties.

-
Scroll down until you see the Internet Protocol Version 4 (TCP/IPv4) option. If there’s no checkmark next to it, click on the box once to enable it. Afterward, click on the Properties button to open a popup window.
-
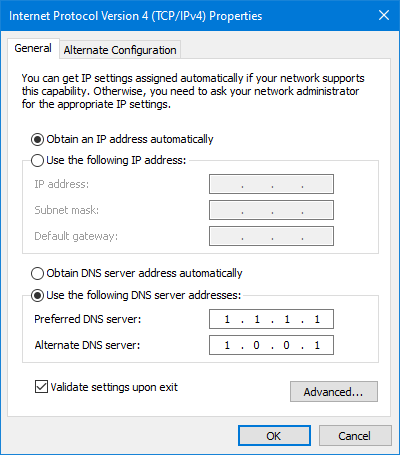
Select Use the following DNS Server addresses. Now, you have some choices for what DNS server you want to use:
- Type 1.1.1.1 into the first row, then 1.0.0.1 into the second row. This will change your DNS to the popular 1.1.1.1 server, which you can read more about by clicking here.
- Alternatively, use Google’s DNS server by typing in 8.8.8.8 as the Preferred DNS server and 8.8.4.4 as the Alternate DNS server.
- You can also use OpenDNS if you type in 208.67.222.123 and 208.67.220.123 instead.
Select the Validate settings upon exit option if you don’t want to restart your computer — otherwise, and then click OK and reboot. See if the changes have helped you access the website that was giving you problems previously.
Method 8. Scan your computer for malware
We recommend scanning your computer to make sure that it does not have any viruses. Some harmful programs can cause the computer and apps to crash, or might trigger the “This web page is not available (ERR_NAME_NOT_RESOLVED)” error in your browser.
We’ll use the Windows Defender built-in program to scan, which is available in both Windows 10 and Windows 11 for free. To get a more thorough assessment of your device’s health, we recommend purchasing a third-party application that specializes in real-time protection and internet protection.
- Open the search bar in your taskbar by clicking on the magnifying glass icon. You can also bring it up with the Windows + S keyboard shortcut.
- Type in Windows Security and launch it from the search results.
- Switch to the Virus & Threat Protection tab using the home screen or the menu in the left-side pane. Click on the Scan Options link.
- Select the Full scan option. This is going to check every single file on all of your drives to ensure no threats can hide. Take note that this scan may last over 1-2 hours, depending on how many files you have on your system.
- Click on the Scan now button to begin the scan. If a threat is detected, Windows will automatically quarantine or remove it entirely. You can review the scan results afterward.
Method 9. Temporarily disable your antivirus app
Your antivirus program may occasionally detect sites as false positives, which means it incorrectly identifies a safe website as suspicious. In this instance, you'll need to temporarily disable your antivirus software before connecting to the website that's now giving you the ERR_NAME_NOT_RESOLVED issue.
- Right-click on an empty space in your taskbar and choose Task Manager from the context menu.
- Switch to the Start-up tab using the header menu located at the top of the window. Here, find your antivirus application from the list and select it by clicking on it once.
- Click on the Disable button now visible in the bottom-right of the window. This will disable the application from launching when you start your device.
- Restart your computer and see if you’re able to access the website giving you an error. Don’t forget to turn your antivirus app back on afterwards!
Final thoughts
If there are any questions left unanswered or problems not addressed, please feel free to reach out — our team of experts would love to help! In the meantime be sure to keep up with all things tech by checking back for more articles about troubleshooting, and following us on social media.
Follow our Blog for more great articles like this one! In addition, you can check our Help Center for a wealth of information on how to troubleshoot various issues.
One more thing
Sign up for our newsletter and access our blog posts, promotions, and discount codes early. Thank you for reading! We hope to see you again soon.
Recommended articles
» How to Fix the ERR_CONNECTION_REFUSED Error in Google Chrome
» What Is the “A Web Page Is Slowing Down Your Browser” Warning in Firefox?
» How to Fix "Audio Renderer Error" on YouTube
» How to Fix "ERR_NAME_NOT_RESOLVED" in Google Chrome
Feel free to reach out with questions or requests you’d like us to cover.