
Duplicate files can be a huge problem on Windows 11. If some of your files appear to be duplicated, they're taking up unnecessary space on your hard drive. These duplicates can cause confusion and clutter, and they may slow down your computer's performance over time.
Fortunately, Windows 11 has tools to help you find and delete duplicate files with ease. In this guide, we'll show you step-by-step how to use these tools to clean up your computer and reclaim valuable storage space. We'll also provide tips and tricks to help you avoid creating duplicate files in the future.
By the end of this guide, you'll have a better understanding of how to manage your files in Windows 11 and keep your computer running smoothly. So let's get started and learn how to find and delete those pesky duplicate files!
Table of Contents
- What Are Duplicate Files?
- How Can I Find Duplicate Files in Windows 11?
- How to Remove Duplicate Files in Windows 11
- Use File Explorer
- Use the Command Prompt
- Run a PowerShell Command
- Use Third-party Software
What Are Duplicate Files?
A duplicate file is an exact copy of another file. It contains the same data but has a different name or path. Duplicate files are generated for a variety of reasons. For example, if you copy and paste files without removing the original, or install the same application twice to different locations.
Whatever their source, duplicate files are annoying and take up unnecessary space on your hard drive. Removing them is important for keeping your computer running smoothly, and it can free up some much-needed storage space as well.
How Can I Find Duplicate Files in Windows 11?
In Windows 11, there are several methods you can use to find duplicate files. Before we can start getting rid of those pesky duplicate files in Windows 11, we need to figure out how to locate them first. Luckily, there are a few different ways you can do this! Here are our top recommendations:
- Built-in tools - Windows 11 comes with built-in tools that help you find duplicate files, such as PowerShell and the Command Prompt.
- Third-party tools - There are plenty of apps out there designed specifically to help you find duplicate files on your computer. Just be sure to only use trusted apps from reputable sources!
- Sorting - If you're using File Explorer, you can sort your files by Name, Size, and other parameters to quickly locate any duplicates.
- File Explorer - You can use File Explorer's "View" option to scan through your folders for any duplicate files.
Now that we know how to find those duplicates, let's dive into the best ways to delete them on Windows 11!
How to Remove Duplicate Files in Windows 11
There are several ways to remove duplicate files in Windows 11. We'll go through our top recommendations below:
1. Use File Explorer
File Explorer is the built-in file manager in Windows 11. It's used to navigate and manage your files, and it can also be used to delete any duplicate files you may have. To use File Explorer to remove duplicates:
- First, open a File Explorer window. You can do this by clicking on the File Explorer icon in your taskbar, or pressing the Windows + E keyboard shortcut.
-
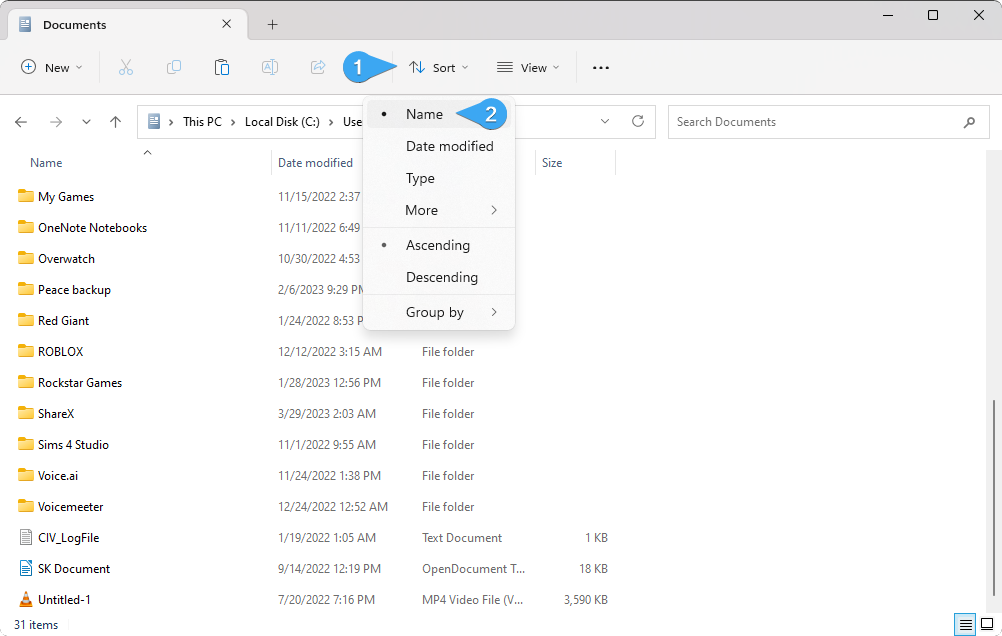
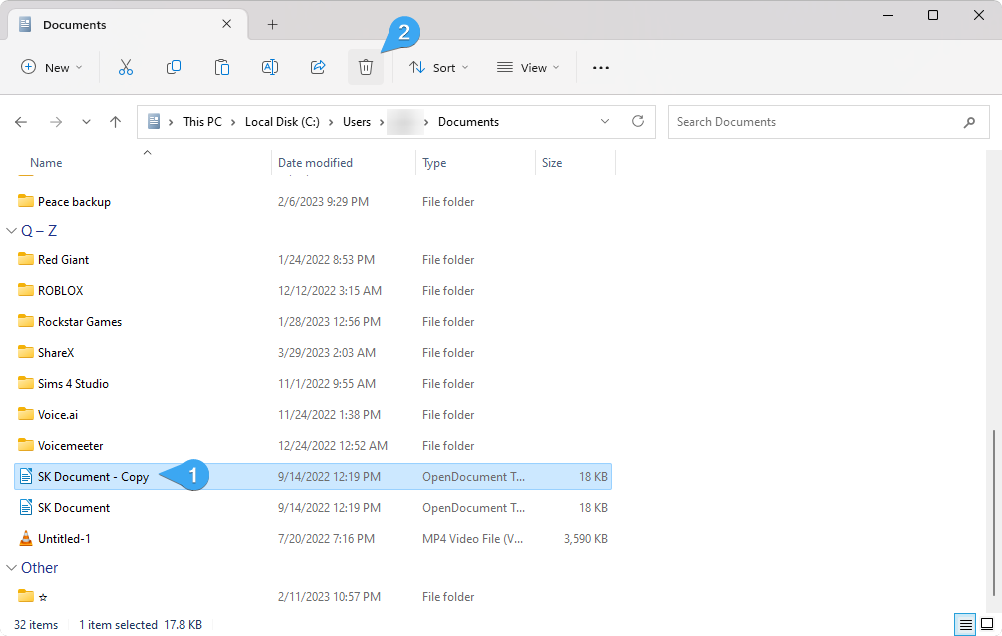
Navigate to a folder where you want to look for duplicate files. Using the toolbar on top of the window, click on Sort > Name. This will sort your documents in alphabetical order.
-
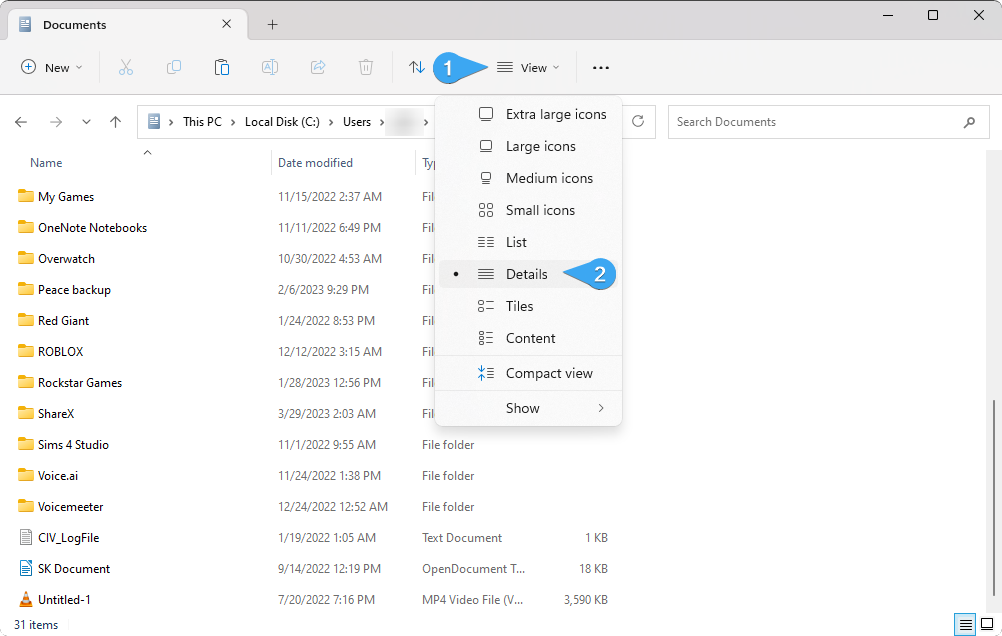
Next, from the same toolbar, select View > Details. This will help you spot duplicate files easier by showing you details of the files.
-
Next, you want to sort your files. Go to Sort > Group by and select any of the options that make it easier for you to spot duplicates.
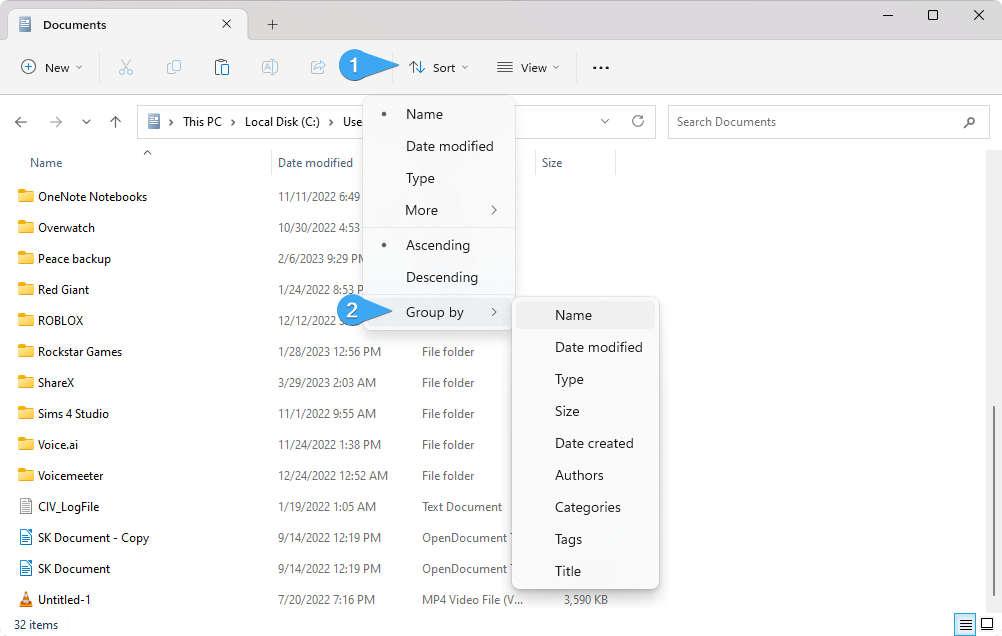
- In the screenshot below, we selected the “Name” option. This will group files together based on the file name. It makes it easy to spot a duplicate if the file name has something like “- Copy” or “(1)” next to the original name.
-
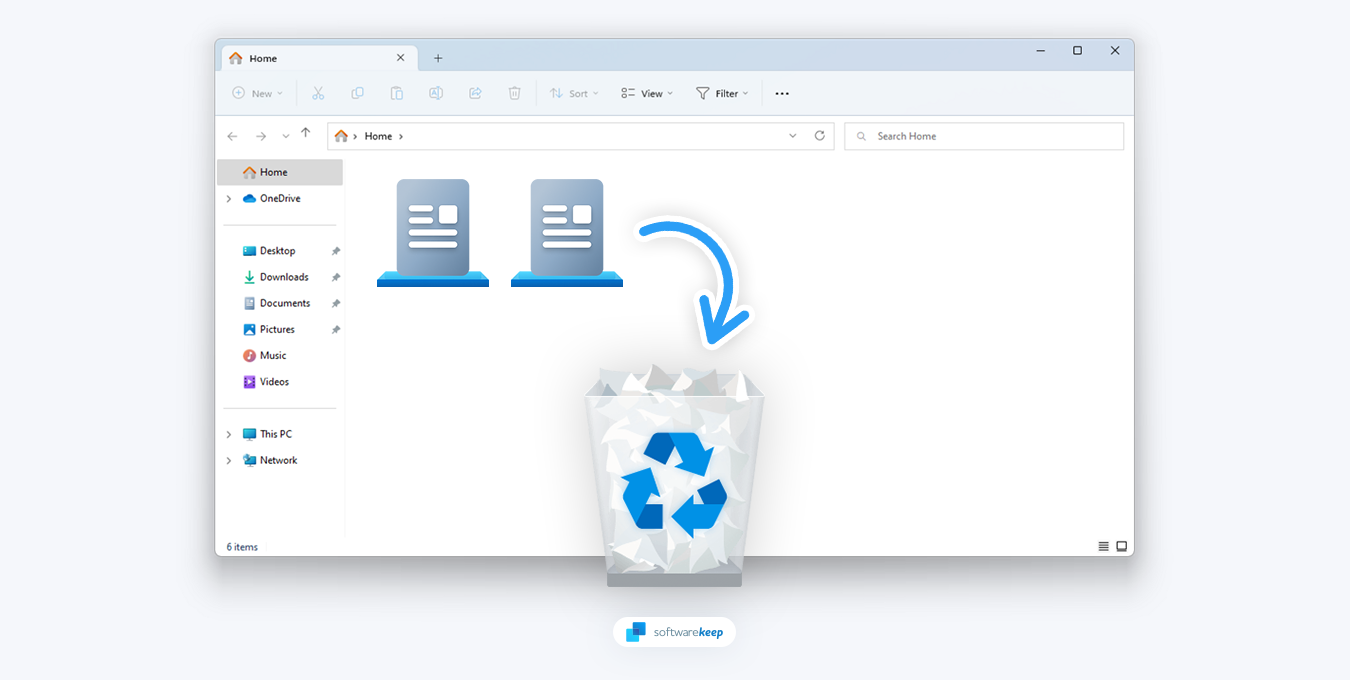
Once you find a duplicate, all you have to do is select it and click on the “Delete” button, or press the Del key on your keyboard.
-
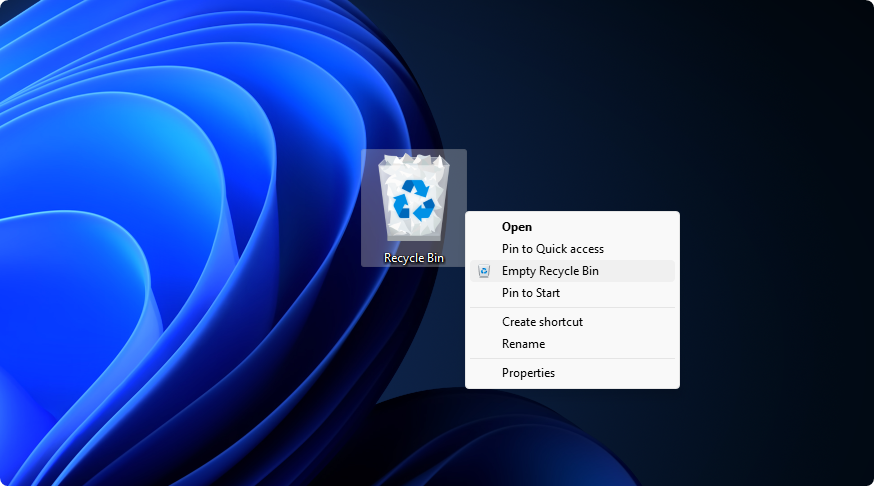
After deleting a duplicate file, navigate to your desktop and right-click on the Recycle Bin, then select “Empty Recycle Bin.” This will completely remove the file from your computer, freeing up space and removing all other issues that stem from duplicate files.
- Repeat these steps for any other folders where you suspect duplicate files are present. This method is manual and can be time-consuming, but it’s easy and reliable if you know where your duplicate files are.
2. Use the Command Prompt
The Command Prompt is a text-based interface that allows you to run commands on your computer. It's perfect for power users and can be used to delete duplicate files. If you want a reliable way to locate and remove duplicates, and you're comfortable with using commands, this is the perfect option for you.
Here's how to use the Command Prompt to delete duplicate files in Windows 11:
-
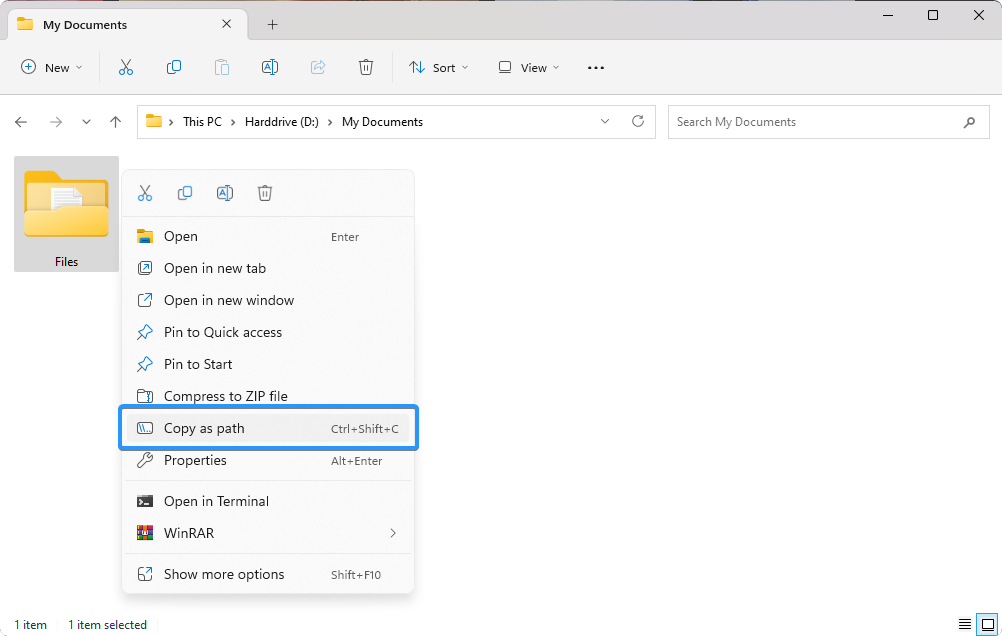
Find a folder you want to check for duplicate files. Right-click on it and select “Copy as path” from the context menu.
- Open the search bar in your taskbar by clicking on the magnifying glass icon. You can also bring it up with the Windows + S keyboard shortcut.
-
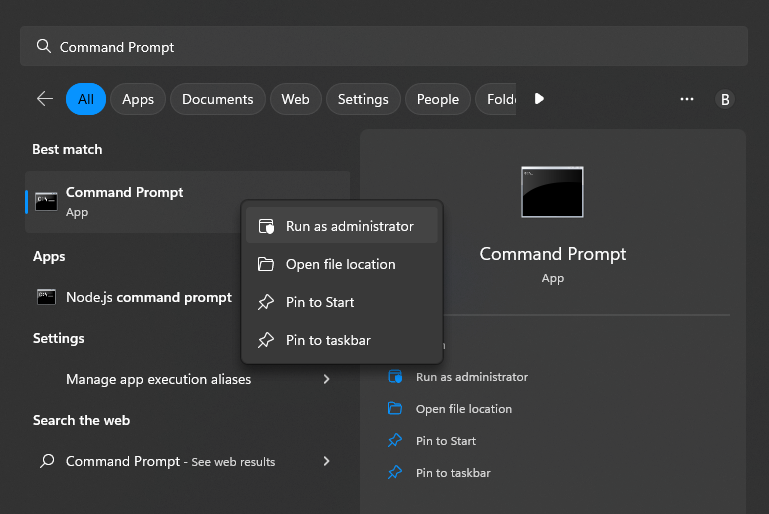
Type “Command Prompt” in the search box. When you see it in the results, right-click on it and choose Run as Administrator. When prompted by the User Account Control (UAC), click Yes to allow the app to launch with administrative permissions.
-
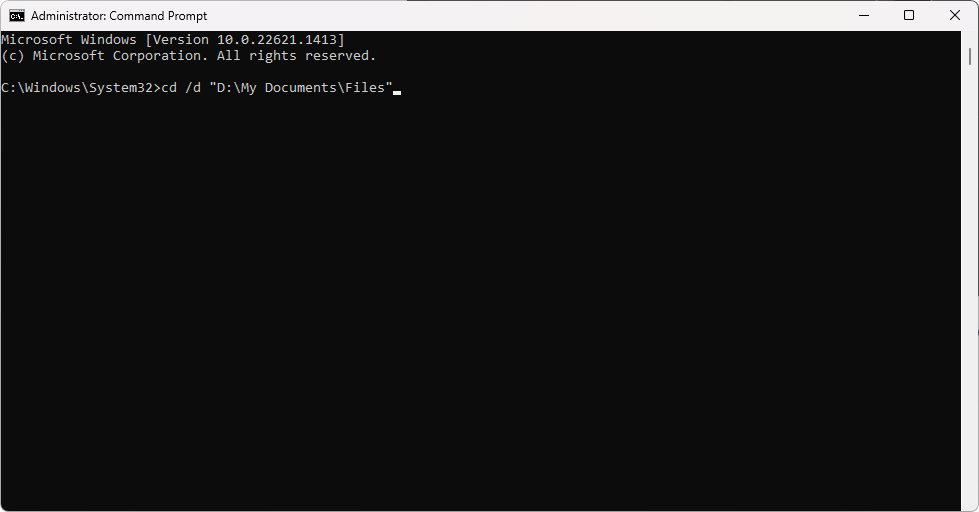
Input the following command. Make sure to replace the word “Folder” with the path to the folder from the first step.
-
cd /d "folder"
Example: cd /d "D:\My Documents\Files"
-
cd /d "folder"
-
Press the Enter key on your keyboard. You should see that the Command Prompt selected the appropriate folder.
-
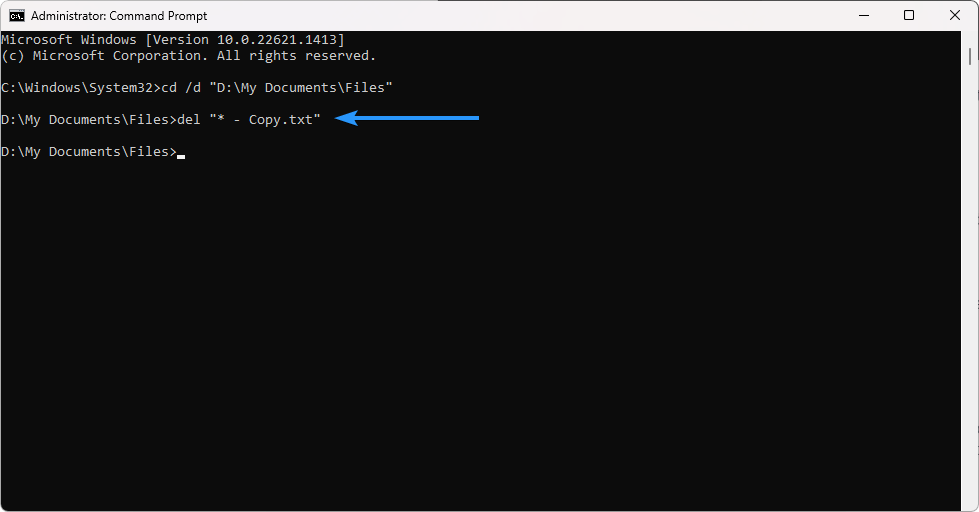
Next, copy and paste the following commands to remove duplicate files. These commands will delete any files that end with “- Copy” and “(1)” which are common traits of duplicate files.
- del "* - Copy.png"
- del "* (1).txt"
-
Change the file extension to match the duplicates you want to remove. For example, some common extensions are “.png” for images, and “.txt” for documents.
- Repeat these steps for all file extensions and file name endings that you want to remove. You can also switch to a different folder by copying its path and repeating the steps again.
3. Run a PowerShell Command
PowerShell is a powerful scripting language used to automate tasks on Windows systems. It can be used to quickly search for and delete duplicate files. Here's how to use it to identify and remove duplicate files on Windows 11:
-
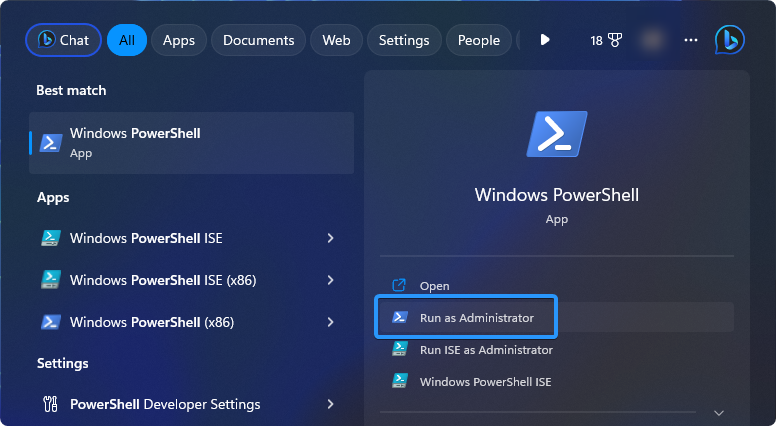
Open PowerShell on your computer. You can do this by typing "PowerShell" into the Windows search bar and clicking on the “Run as Administrator” option.
-
Use the following command to generate a list of duplicate files on your computer. You can replace the second asterisk (*) symbol with a file format, such as “txt” or “png” to search for only that format: ls *.* -recurse | get-filehash | group -property hash | where { $_.count -gt 1 } | % { $_.group | select -skip 1 } | echo
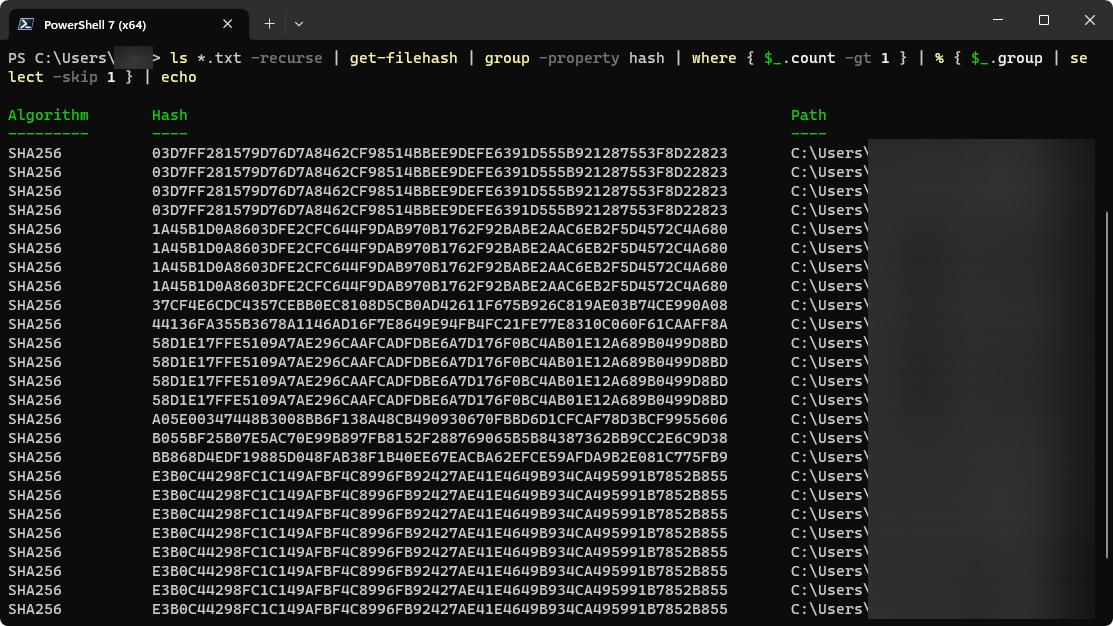
- Before you delete any files, you should double-check the list of duplicates that PowerShell generates to make sure you're only deleting the files you want to get rid of.
- If you're satisfied with the list of duplicates, you can use the following command to delete them all at once. Once again, you should replace the second asterisk with the file format you used in the previous scan: ls *.* -recurse | get-filehash | group -property hash | where { $_.count -gt 1 } | % { $_.group | select -skip 1 } | del
Warning: Please be aware that executing PowerShell code without fully understanding what it does can have serious consequences. You could accidentally delete more than just duplicate files. Therefore, it's important to proceed with caution and thoroughly research the code before executing it on your machine.
4. Use Third-party Software
If you're looking for a quick and easy way to find and remove duplicate files on your Windows 11 computer, using third-party software can be a great option. There are plenty of apps out there designed specifically for this purpose, and they can save you a lot of time and effort compared to manually sifting through your files. Here's what you need to know:
- First things first, you'll need to find and download a reputable duplicate finder app. Some options are free, while others require payment. Be sure to read reviews and do your research before making a choice!
- Once you have your chosen app installed, you can start scanning your files for duplicates. The process may take some time, depending on how many files you have.
- After the scan is complete, the app will likely show you a list of all the duplicate files it found. Take some time to review the list and ensure that the files are truly duplicates before removing them.
- Finally, you can delete the duplicate files using the app's built-in deletion function. Be sure to double-check that you're deleting the right files, as this process is usually irreversible.
Here are 5 different duplicate finder apps to consider:
- Easy Duplicate Finder - This free application is perfect for beginners and offers a simple, intuitive interface.
- Czkawa - A free, open-source duplicate finder with advanced features.
- AllDup Portable - Find and remove duplicate files in Windows 11 without having to install the software.
- DupeKill - Streamlined solution to finding and deleting duplicate files with minimal user input.
- Auslogics Duplicate File Finder - An advanced yet easy-to-use duplicate finder with a variety of customization options.
Using third-party software can be a great way to save time and streamline the process of finding and removing duplicate files on your Windows 11 computer. Just be sure to use trusted apps and take the time to review your duplicates before deleting them.
Conclusion
Duplicate files can take up a lot of unnecessary space on your computer, and it's important to get rid of them as soon as possible. In this article, we discussed how to find and remove duplicate files in Windows 11 using various methods such as File Explorer, the Command Prompt, PowerShell commands, and third-party applications. We also gave you some tips on how to avoid creating duplicate files in the future by organizing your folders properly.
We hope this article has provided you with the information and tools needed to easily find and delete duplicate files on your Windows 11 computer. Remember, it's important to take the time to review the list of duplicates before removing them so that you don't accidentally delete important files.
One More Thing
We’re glad you’ve read this article. :) Thank you for reading.
If you have a second, please share this article on your socials; someone else may benefit too.
Subscribe to our newsletter and be the first to read our future articles, reviews, and blog post right from your inbox. We also offer deals, promotions, and updates on our products and share them via email. You won’t miss one.
Related Articles
» How To Find Duplicate, Large and Hidden Files on a Mac
» Which Duplicate File Finder Should I Use in Windows 10
» How to Find Large Files on Windows 10