


If you’re experiencing issues with your wired headphones not being recognized by your Windows 11 device, don’t worry – you’re not alone. This can be a frustrating problem, but fortunately, several solutions can help you fix it. In this article, we’ll provide you with some troubleshooting steps to help you get your headphones working again.
Many Windows 11 users experience this same issue, and in this blog post, we will help walk you through a few of the most effective ways to troubleshoot so that your headphones can function normally. Let’s explore some solutions for getting wired headphones recognized by Windows 11.
Jump To
- Restart Your Computer
- Check for Hardware Issues
- Run the Playing Audio Troubleshooter
- Set Your Default Playback Device
- Update Your Audio Drivers
- Reinstall Audio Drivers
- Run the System File Checker
- Update Windows 11
- Update Your BIOS
Why is Windows 11 Not Recognizing My Headphones?
If your wired headphones are not recognized by Windows 11, there could be hardware and software-related issues. Some potential reasons for this could be:
- A faulty headphone wire that prevents a stable connection
- A corrupted or damaged audio jack
- Outdated or corrupt audio drivers
- Incorrect default audio device settings
To troubleshoot the problem, it's essential to check these potential causes and determine if Windows 11 is the culprit or if another issue prevents you from using your headphones.
How to Check if Windows 11 Can Recognize Headphones
First, you should check if Windows 11 detects your headphones or if there's a problem with the connection. To do this, follow these steps:
If you can't find your headphones listed in the Sound dialog, it could indicate that Windows has not detected them. In such a situation, you should use the troubleshooting techniques listed below.
How to Fix Windows 11 Not Detecting or Recognizing Headphones
You can use a few solutions to get your Windows 11 device to recognize your wired headphones. Here are some troubleshooting steps that may help:
1. Restart Your Computer
Restarting your computer is one of the easiest and quickest ways to fix issues with wired headphones not being recognized by Windows 11. This can help reset any system processes that may be causing the problem.
- Click on the Start menu in your taskbar. Alternatively, you can also simply press the Windows button on your keyboard.
-
Click the “Power” button, then select “Restart” from the available options.
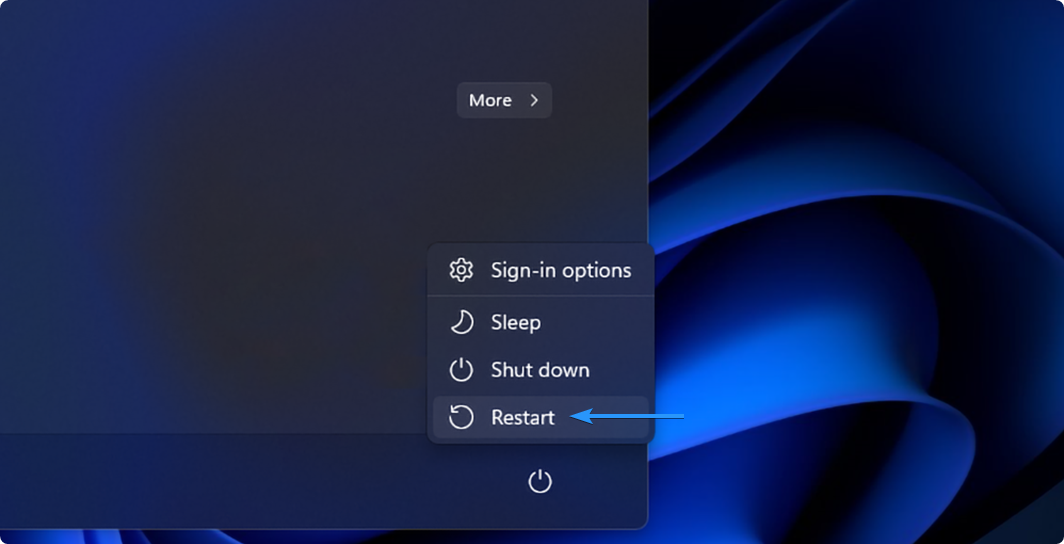
- If you have any apps open preventing the restart process, click “Restart anyway” or cancel and close all apps manually. Make sure you save any progress and files you haven’t saved yet.
After your system reboots, try using your headphones again and see if it works now. If you’re still dealing with any problems, continue to the next solution.
2. Check for Hardware Issues
Check for any hardware issues, such as loose cables or damaged ports. These issues can prevent your wired headphones from being recognized by Windows 11.
It’s possible that your headphone jack might be dirty or damaged, which could be causing your headphones not to be recognized by your Windows 11 device. To check for this issue, inspect your headphone jack and ensure it’s clean and debris-free. You can use a small brush or cotton swab to clean it if it looks dirty. If you notice any damage, you may need to have it repaired or replaced.
Try plugging your headphones into another device to see if they work. This will help you determine whether the problem is with your headphones or Windows 11 itself.
3. Run the Playing Audio Troubleshooter
Windows 11 has a built-in troubleshooter that can help you identify and fix issues with your headphones. Use the built-in Playing Audio Troubleshooter in Windows 11 to diagnose and fix any audio-related issues, including problems with unrecognised wired headphones.
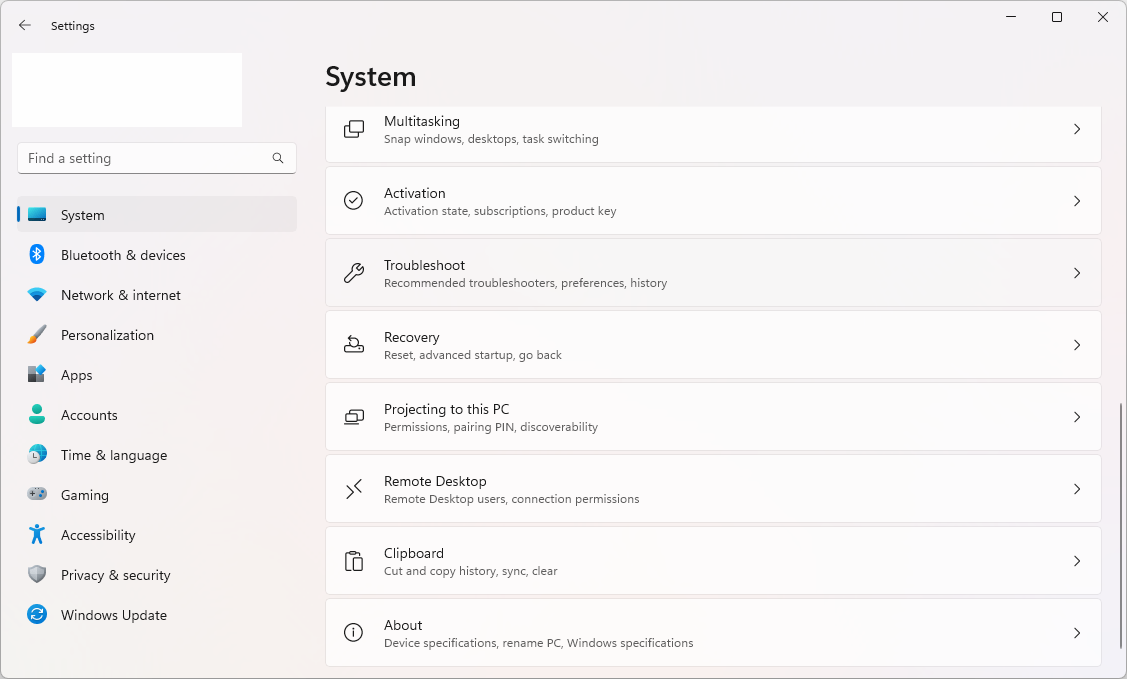
- Open the Settings app on your Windows device. You can do this by clicking on the Start menu, selecting the gear icon, or using the Windows + I keyboard shortcut.
-
Click on "System." In the right-hand menu, select "Troubleshoot."
-
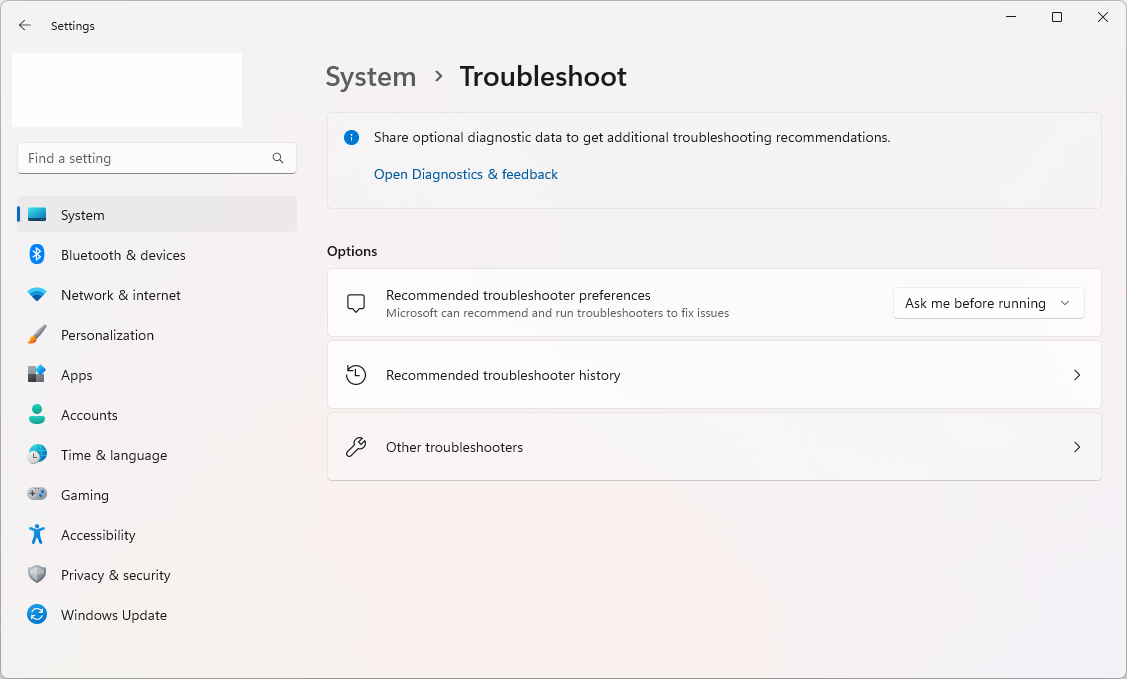
Click on "Other troubleshooters."
-
Scroll down and click the Run button next to the "Playing Audio" troubleshooter.
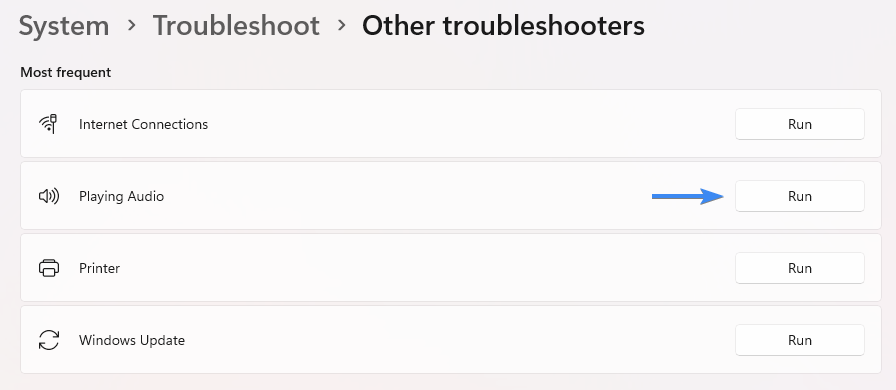
- The troubleshooter will begin scanning your system for any issues with audio-related features, such as the Volume Mixer. Follow any on-screen instructions to resolve any issues found.
Once the troubleshooter is finished, restart your device to ensure that any changes made take effect.
4. Set Your Default Playback Device
Ensure that your wired headphones are set as the default playback device in Windows 11. This can be done through the Sound settings and may help fix recognition issues.
-
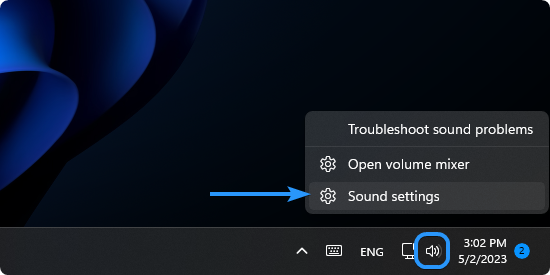
Right-click on the Volume icon in your taskbar. This is in the bottom right corner, next to your system clock. Select “Sound settings” from the context menu.
-
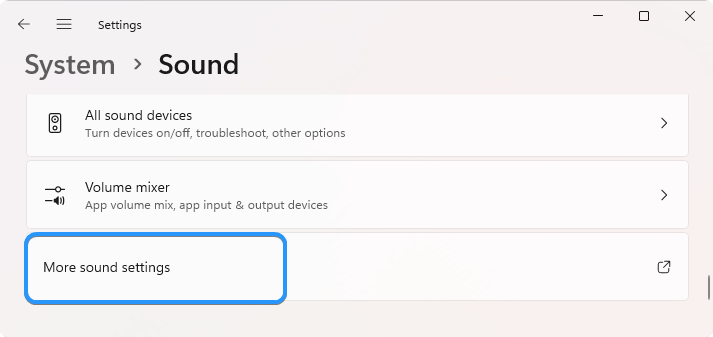
Scroll down to the bottom of the page, and click on the “More sound settings” button. This will open up a new window.
-
Select your wired headphones from the list by clicking on it once, and then click on the downward pointing arrow next to “Set Default.” Select “Default Device” to make your wired headphones the default output.
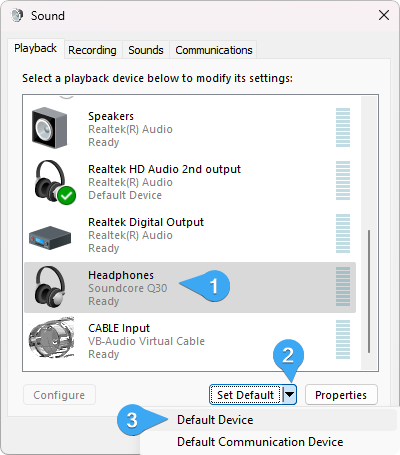
- Click OK to close the window. See if this resolved the issue with Windows 11 not recognizing your headphones.
5. Update Your Audio Drivers
Outdated or missing audio drivers can cause problems with unrecognised wired headphones. Update your audio drivers to the latest version to ensure compatibility with Windows 11.
-
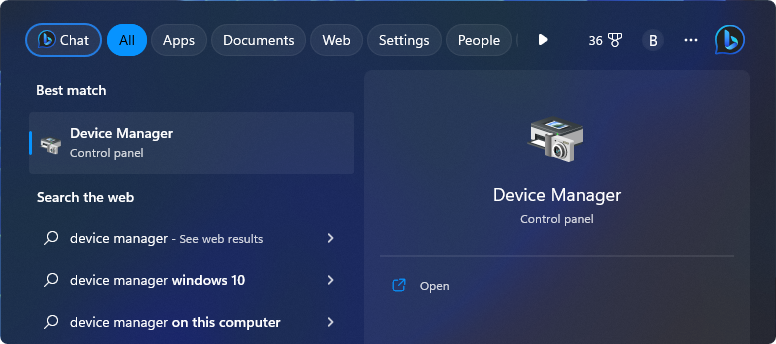
Click on the search icon located in the taskbar and type in "Device Manager." Then, select the first result that appears.
-
Once in the Device Manager, find the "Sound, video and game controllers" category, click on the arrow to expand it, and right-click on the sound driver you wish to update.
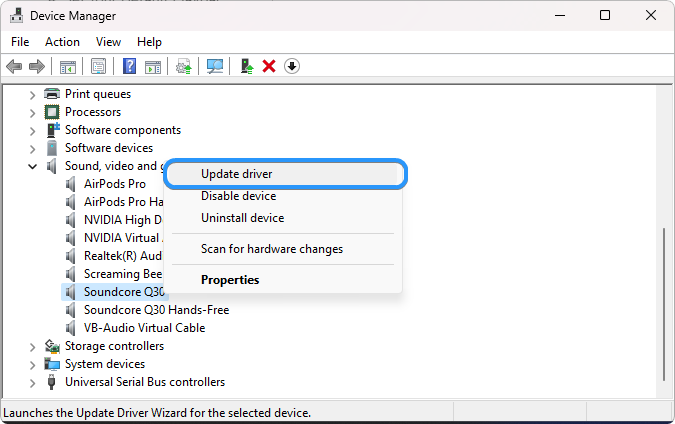
- Select "Update driver" from the drop-down list and follow the on-screen instructions to complete the process.
6. Reinstall Audio Drivers
Reinstalling audio drivers can help to fix any corrupted or damaged files that may be causing issues with wired headphones not being recognized by Windows 11.
-
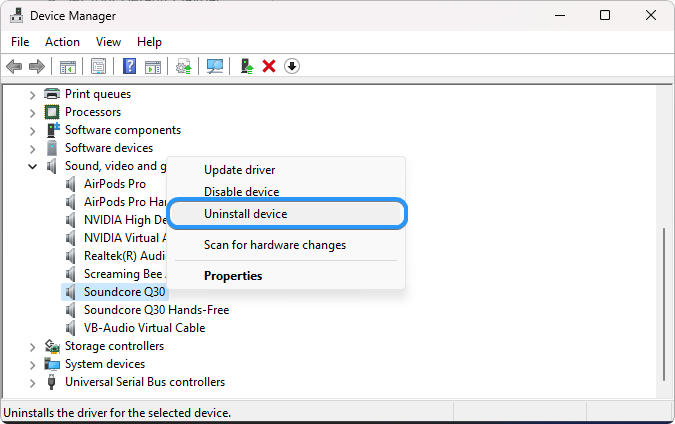
Navigate to your sound driver in the Device Manager using the method above. Right-click on the sound driver you wish to reinstall and select “Uninstall device” from the context menu.
-
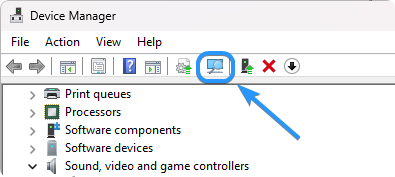
Follow any instructions on the screen to remove the driver. Next, you can try to click the “Scan for hardware changes” button to see if Windows will install the driver.
- Alternatively, look for the correct driver that your headphones need. You might have received the driver with your headphones, or you can download it from the manufacturer’s website.
7. Run the System File Checker
The System File Checker is a built-in tool in Windows 11 that can help to scan and repair any corrupted system files that may be causing problems with wired headphones not being recognized.
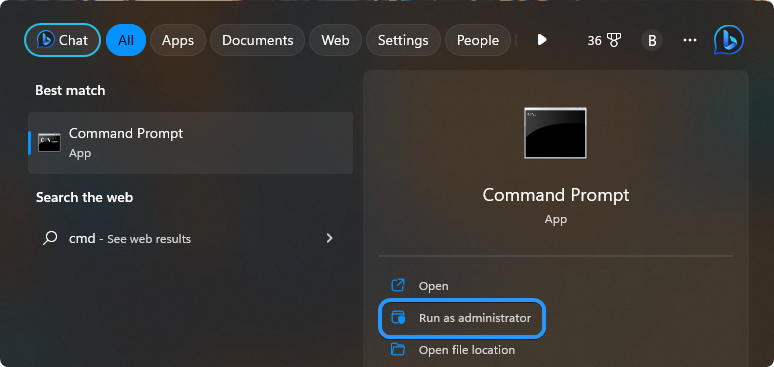
- Open the search bar in your taskbar by clicking the magnifying glass icon. Press Windows + S on your keyboard as a shortcut.
-
Type “Command Prompt” in the search box and choose Run as Administrator. When prompted by the User Account Control (UAC), click Yes to allow the app to launch with administrative permissions.
-
When the Command Prompt interface shows on the screen, input the following command and press the Enter key on your keyboard: sfc /scannow
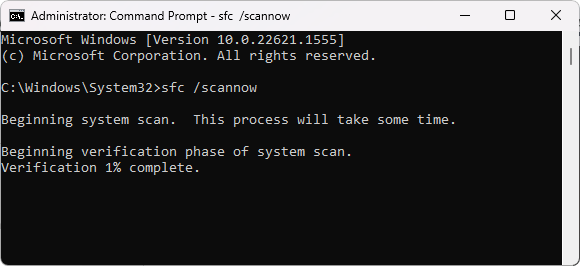
- Wait for the scan to complete.
8. Update Windows 11
Ensure your Windows 11 device is current with the latest software updates. Sometimes, new updates help fix compatibility issues that may be causing your headphones not to be recognized. Updating your operating system to the latest version can help to fix any bugs or issues that may be causing wired headphones not to be recognized.
- Click the Windows icon in the screen's bottom-left corner to open the Start menu, then select Settings. You can also use the keyboard shortcut Windows + I.
-
Switch to the “Windows Update” tab using the menu on the left, then click the “Check for updates” button. Windows will automatically detect if there’s a new update compatible with your device.
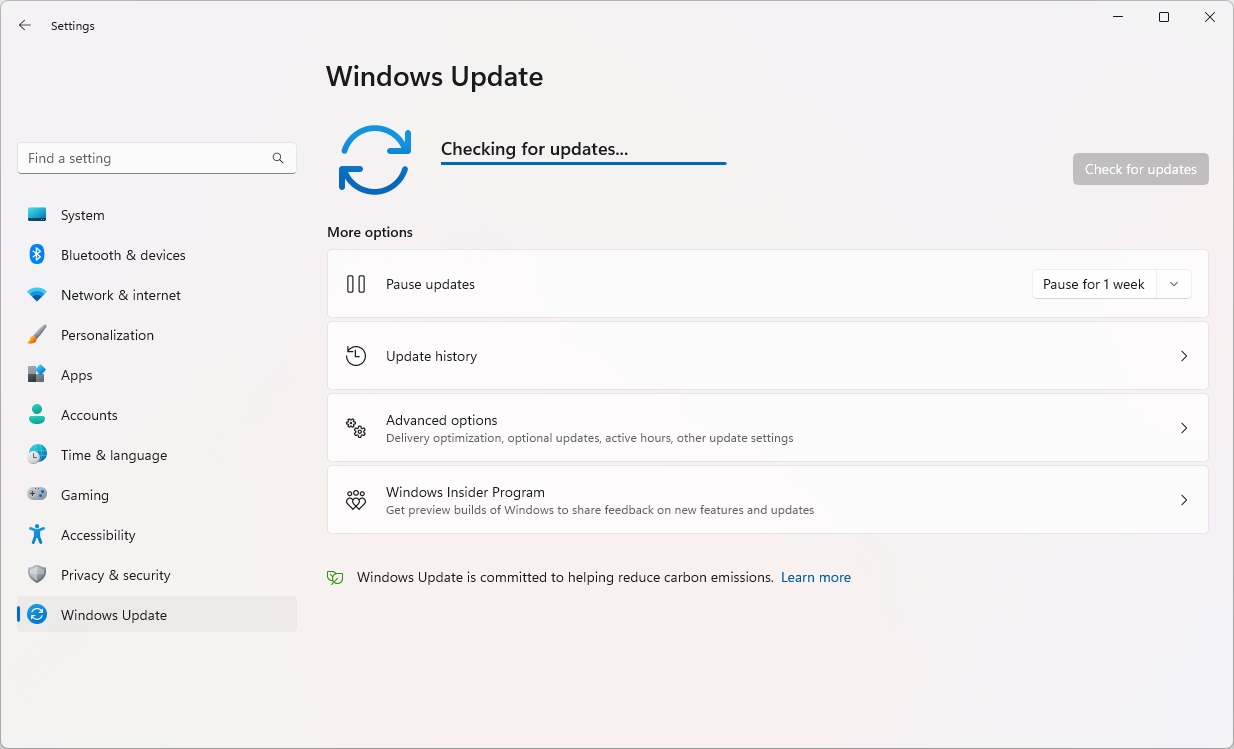
- If a new update is available, allow Windows to install it, and then follow the instructions to restart your computer.
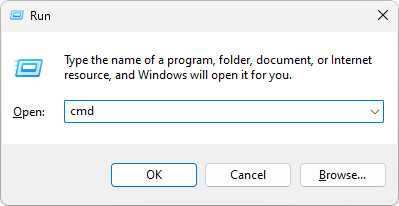
9. Update Your BIOS
Updating your BIOS to the latest version can help ensure compatibility with Windows 11 and fix any issues preventing wired headphones from being recognized.
- Press the Windows + R keys on your keyboard. This is going to bring up the Run utility.
-
Type in “cmd” without quotation marks and press the Enter key on your keyboard. This will launch the Command Prompt application.
-
Next, type the following commands one by one. Hit the Enter key after each command line to execute the command:
- systeminfo | findstr /I /c:bios
-
wmic bios get manufacturer, smbiosbiosversion
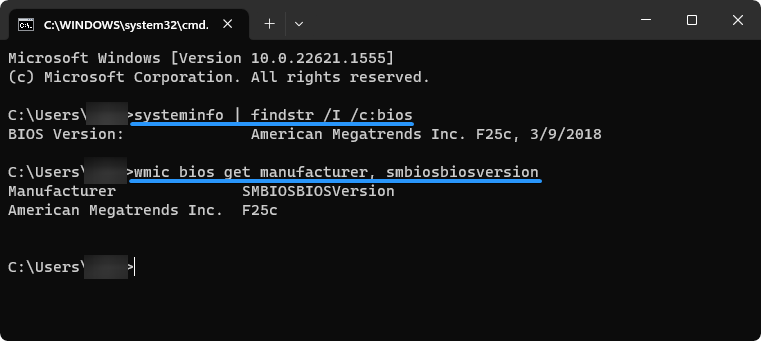
- These commands will help you identify the BIOS version. Use it to find the latest files required to update your BIOS unless you’re already on the latest version.
Conclusion
It's frustrating when Windows 11 won’t recognize your wired headphones, but you can try a few solutions to fix this issue. Using the steps outlined in this article, you can troubleshoot and diagnose any problems with your headphones not being recognized by Windows 11.
We hope that you found these steps helpful in fixing your headphones not being recognized by Windows 11. If you have any other questions or need further assistance, please contact us for help. Good luck!
One More Thing
We’re glad you’ve read this article. :) Thank you for reading.
If you have a second, please share this article on your socials; someone else may benefit too.
Subscribe to our newsletter and be the first to read our future articles, reviews, and blog post right from your inbox. We also offer deals, promotions, and updates on our products and share them via email. You won’t miss one.
Related Articles
» How to fix the "No speakers or headphones are plugged in" error
» How to Fix the Volume Mixer Not Opening in Windows 11
» How To Fix When You Have No Sound on YouTube