Computers need a device to be able to output audio. Let it be speakers, headphones, or earbuds, these are the devices that allow you to hear music, videos, and other sounds.
There is a common issue with Windows 10 not recognizing your audio device. You can diagnose this error by looking at the volume icon on your taskbar. If there is an X symbol next to the icon, your device isn’t working.
When this error happens, you won’t be able to hear any audio output from your PC or laptop.
We have compiled some useful tips and methods to help you solve this issue. These solutions are easy and quick, even if you aren’t too tech-savvy.
Note: Before we begin troubleshooting the issue, it’s worth noting that our instructions were written for Windows 10 operating systems. However, this issue also happens on Windows 8 and Windows 7, meaning that our instructions can still help you solve the error.
Here are six methods to help you solve your issues with your speakers or headphones. Make sure you have a local Windows account with administrator permissions - this will be needed for some methods.
Try your device on another computer or audio jack
The very first thing you should do is identify what type of issue you’re dealing with. If your headphones or speakers have a hardware fault, there is no need to try and fix the issue within Windows.
Plug your device into the audio jack of a different computer, laptop, or even a smartphone. If you can hear audio correctly, then the issue is indeed on your own Windows 10 device.
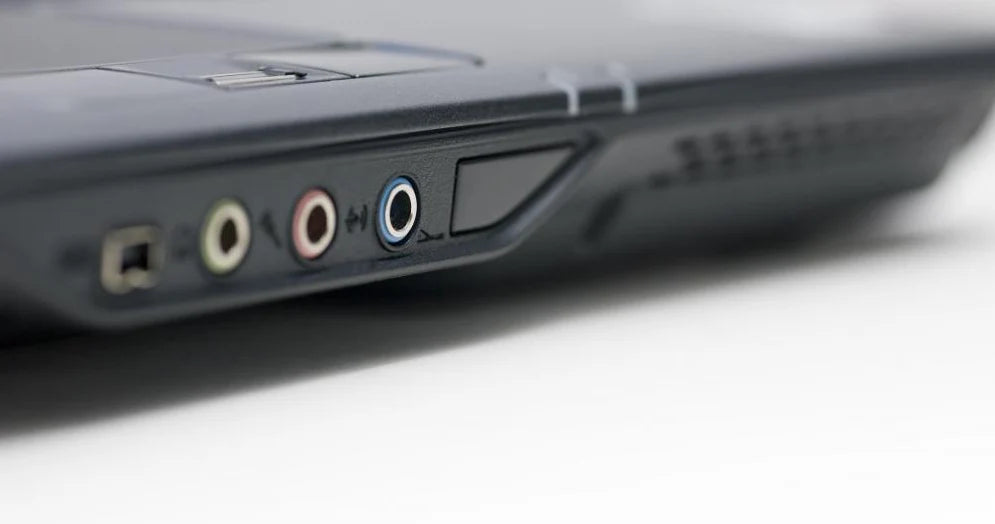
Something you can also try is using a different jack on your computer, if available. Most PC cases come with two jack inputs for audio, one on the front and one on the rear.
On the other hand, if the audio doesn’t work anywhere else, you should either buy a new device or try to get your current one fixed.
Solution 1: Run the Sound Troubleshooter
Windows 10 comes equipped with some pretty useful troubleshooters. Luckily, there is even one for audio and sound issues!
These troubleshooters are easy to run and are accessible to everyone. Though it’s not guaranteed that the Sound Troubleshooter will successfully find and resolve your issue, it’s worth giving it a shot.
Here are the steps to run the Sound Troubleshooter in Windows 10:
- Open the Settings app by pressing down the Windows + I keys on your keyboard. Alternatively, you can click on the gear icon in the Start menu.
-
Click on the Update & Security section.

-
Choose Troubleshoot from the left-side menu.

-
Click on Playing Audio under the Getup and running category.

-
Click the Run the troubleshooter button.

- Wait for the troubleshooter to look for issues. If anything is detected, you have the option to fix it automatically.
After the troubleshooter attempted a solution, try and play some audio on your device. Don’t worry if you still can’t hear anything - we have several other methods for you to try!
Solution 2: Re-Enable your Sound Card
You can get rid of "No speakers or headphones are plugged in" error by restarting your sound card. You can disable then re-enable it by following the steps below.
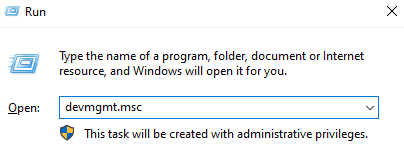
- Press Windows + R keys on your keyboard. This will bring up a utility called Run.
-
Type in devmgmt.msc and hit the OK button. By doing this, you’re launching Windows 10’s Device Manager.

- Expand Sound, video, and game controllers by clicking on the arrow in front of it.
- Right-click on your sound card and select Disable device.
- Restart your computer or laptop. This is very important for your changes to finalize.
- When your device turns back on, repeat steps 1 to 3.
- Right-click on your sound card and select Enable device.
You can try playing some audio now to test if your issue is resolved.
Solution 3: Update your sound card driver
Regularly updating your drivers is something you should do all the time. Outdated audio drivers can cause more trouble than you’d think.
There are multiple ways in which you can update your drivers. Follow one of the guides which suit your approach.
Update your driver from Windows itself
In this method, we will be using the Device Manager to find a new, updated driver.
- Press and hold the Windows key, then press R. This will launch the Run application.
-
Type in devmgmt.msc and hit OK to bring up the Device Manager.

- Expand the Sound, video, and game controllers section by clicking on the arrow icon.
- Right-click on your audio driver and select Update Driver.
-
Click on Search automatically for updated driver software.

- If Windows can find an updated driver, it will automatically download and install the update to your computer.
- Restart your PC and test if the issue is solved.
Update your driver with a third-party app
You can also find and download third-party updater tools such as Driver Booster, DriverHub or DriverPack Solution. These three tools are all free and easy to use, but you can always look around the web for more advanced apps.
Note: Always make sure that the app you’re using is trustworthy. Many applications that promise to fix or update your drivers contain malware, adware or spyware. We recommend searching the name of the product and reading reviews made by real people.
Solution 4: Disable front panel jack detection (Realtek)
If you have a Realtek sound card, you can attempt to fix this issue by disabling the detection of the front panel jacks.
Don’t worry - this doesn’t necessarily mean that the front panel jack will be unable to use anymore. In some cases, it’s quite the opposite. This method is capable of fixing the issue of your front panel jack not working.
-
Search for Control Panel in your search bar, then open the application from your results.

-
Change your view mode to Large icons.

-
Scroll down and click on the Realtek HD Audio Manager.

-
Click on the Connector Settings icon.

-
Turn on the Disable front panel jack detection option, then press the OK button.

After doing this, try plugging your device in and out and play some audio.
Solution 5: Disable HDMI Sound
Are you using an HDMI cable for transferring audio? Disabling it might do the trick in order to fix your speakers and headphones. Here are the steps to do just that:
-
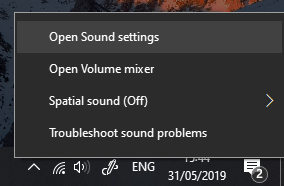
Right-click on the volume icon in your system tray, then choose Open Sound settings from the menu.

-
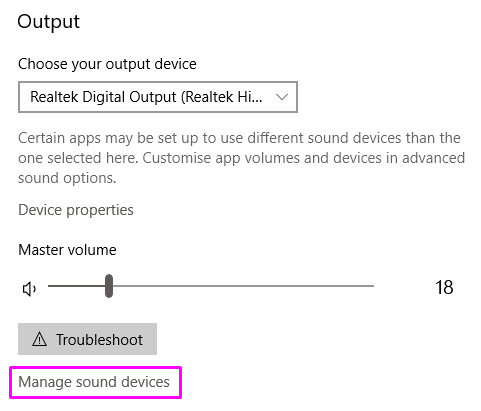
Click on the Manage sound devices link.

-
Click on the High Definition Audio Device you’re currently using to expand it, then click on the Disable button. When done, attempt to play some audio and see if your speakers or headphones work.

We hope that by following our guides and tips, you were able to solve your issues with the audio on your computer or laptop. If you experience anything in the future, feel free to return to this article.
How to Connect Bluetooth Speaker to PC ✅
Once you've fixed your audio issues, you can now connect your Bluetooth speaker and listen to your favorite sound. If you have a Bluetooth speaker to connect to, here is a video that helps you connect the speaker. Watch how to connect Bluetooth speaker on YouTube:
Also, Read
> How to Install and Fix Bluetooth Drivers in Windows 10
» How to Change Your Mouse DPI in Windows 10
» How to Optimize Your Outlook Inbox in 5 Easy Steps
