

Microsoft Teams has become a popular platform for virtual meetings and collaboration. Ensuring that your audio and video camera work properly is essential for a successful meeting experience. Correctly working audio and video equipment makes a significant difference in how you present yourself in meetings and calls.
This article will guide you through testing your audio and video camera in Microsoft Teams. By the end of this guide, you will be equipped with the knowledge to troubleshoot and optimize your setup for seamless communication.
How to Test Your Audio or Mic in Microsoft Teams

Testing your audio or microphone in Microsoft Teams is straightforward to ensure clear communication. You'll find it easy to navigate and complete.
Checking Your Audio Settings
Before you start a meeting, it's a good idea to check your audio settings in Microsoft Teams.
- Launch Microsoft Teams on your device.
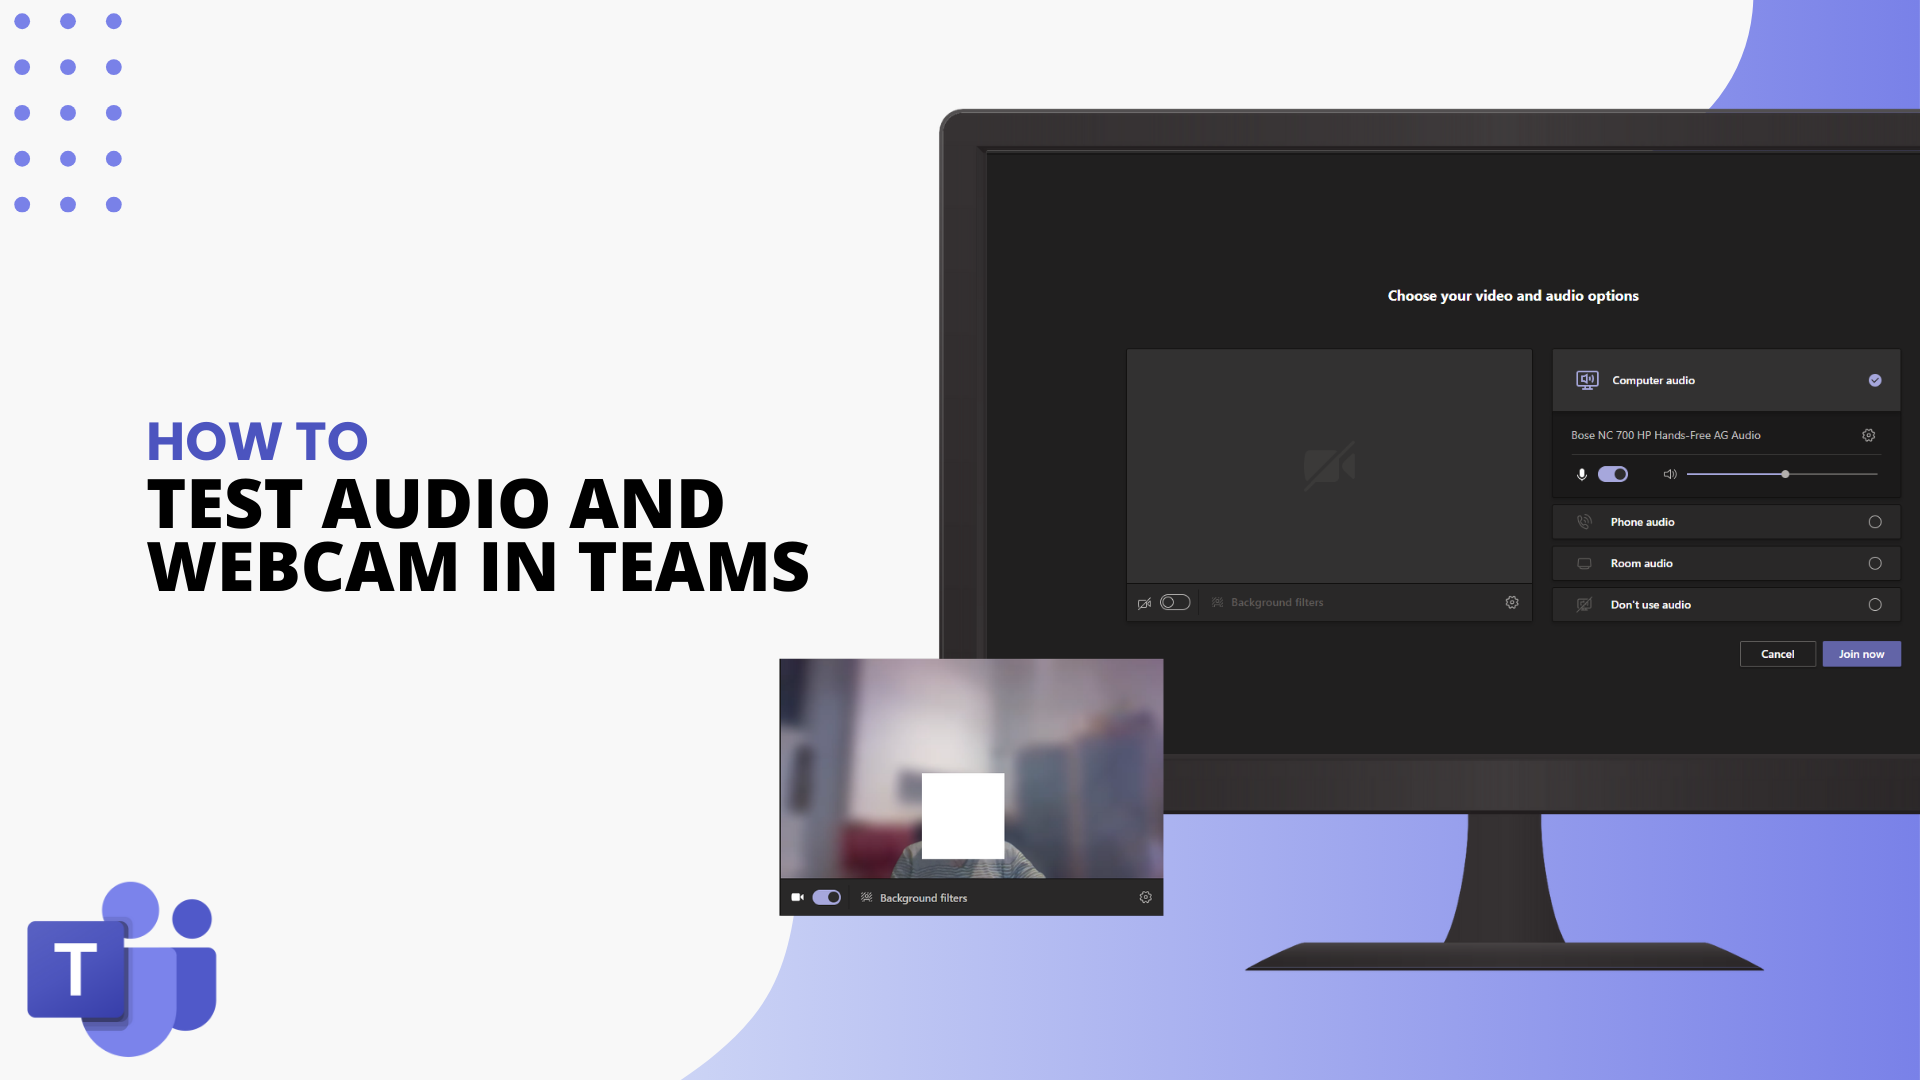
- Click on your profile picture in the upper right corner and select "Settings" from the dropdown menu.
- In the Settings menu, click on "Devices" to access your audio settings.
Verify that the correct devices are connected and selected in Microsoft Teams. If you use multiple microphones, select the best quality or the one you wish to test.
Testing Your Microphone
You can test your microphone once in the Devices settings to ensure it works correctly.
- Ensure the correct microphone is selected under the "Audio devices" section.
- Click on the "Make a test call" button. This will prompt Teams to call a test bot that will allow you to record a short message and then play it back to you.
If the playback is unclear, you can adjust the microphone volume or switch to a different microphone if available.
Audio Enhancements in Teams
Audio enhancements in Microsoft Teams include noise suppression and high-fidelity audio modes, which help improve sound quality by reducing background noise and enhancing voice clarity. These are particularly useful in noisy environments or when using external microphones to ensure clear and professional communication.
- External Microphones and Headsets: If using external devices, ensure they are properly set up and selected in Teams.
- Noise Suppression: Microsoft Teams offers noise suppression features. If you're in a noisy environment, ensure this is enabled.
- Advanced Settings: In the "Devices" settings, explore advanced options like adjusting the audio codec or switching to high-fidelity mode if available.
How to Test Video Camera in Microsoft Teams
Testing your video ensures you are visible and your camera functions correctly during meetings. Similar to audio settings, you must check your video settings to ensure everything is set up correctly.
- In the Microsoft Teams settings menu, navigate to "Devices."
- Under the "Camera" section, select the camera you want to use from the dropdown menu.
- In the Devices settings, you will see a preview window showing the video feed from your camera. Ensure that the video feed is clear and properly framed.
- Start a new meeting or join a test meeting to see your video's appearance in an actual call scenario.
Video Enhancements in Teams

Video enhancements in Microsoft Teams offer features such as background blur and custom backgrounds, which help minimize distractions and focus attention on the speaker. These enhancements are beneficial in maintaining a professional appearance during meetings, especially when the physical background isn't ideal.
- Lighting and Background: Ensure you are in a well-lit area and use the background blur or replacement feature in Teams to avoid distractions.
- Camera Quality: If your camera quality is poor, consider investing in a higher-quality external camera.
- Network Connection: Ensure you have a stable internet connection, as poor connectivity can affect video quality.
How to Fix Video and Audio Issues in Microsoft Teams
While many Microsoft Teams problems may come up when using your microphone or webcam in Teams, many of them are easy to fix with a few troubleshooting tips. The guide below walks you through the general steps you can take to fix the most common audio and video issues in Microsoft Teams.
1. Check Your Device Connections
- Ensure that your microphone and camera are properly connected to your device. Try unplugging and replugging USB devices into a different USB port.
- Go to your device's "Device Manager" (Windows) or "System Preferences" (Mac) and check if your microphone and camera are recognized and functioning.
- If the devices are not listed or have a warning symbol, troubleshoot the connection or reinstall the drivers.
- Open another application that uses the microphone and camera, such as Zoom or Skype, to confirm whether the issue is specific to Microsoft Teams or persists across other applications.
2. Check and Update Device Drivers
- Right-click on the Start menu and select "Device Manager".
- Locate the "Sound, video and game controllers" section for audio devices and "Imaging devices" for cameras.
- Right-click on your microphone or camera and select "Update driver."
- Choose "Search automatically for updated driver software" and follow the prompts to install any available updates.
- After updating the drivers, restart your computer to ensure the changes take effect.
If updating the drivers does not resolve the issue, try uninstalling and reinstalling the device. Right-click on the device, select "Uninstall device," and restart your computer. Windows should automatically reinstall the drivers.
3. Adjusting Permissions and Privacy Settings

- Go to "Settings"> "Privacy"> "Microphone" or "Camera".
- Ensure that the toggle switch for allowing apps to access your microphone or camera is turned on.
- Scroll down to find Microsoft Teams in the application list and ensure it is allowed to access your microphone and camera.
- Go to "System Preferences"> "Security & Privacy"> "Privacy" tab.
- Select "Microphone" and "Camera" from the sidebar and ensure Microsoft Teams is checked.
- Close and reopen Microsoft Teams to apply the new settings.
4. Configure Teams Settings

- Click on your profile picture in the top right corner and select "Settings" from the dropdown menu.
- In the Settings menu, click on "Devices" to access your audio and video settings.
- Ensure that the correct microphone and camera are selected from the dropdown menus.
- Use the "Make a test call" feature to verify your microphone and camera settings. Follow the prompts to record a short message and play it back to ensure everything works correctly.
If issues persist, reset Teams by signing out and then signing back in. This can sometimes resolve configuration conflicts.
5 Improve Your Network Connection
- Ensure you have a stable internet connection. Use a wired connection if possible for more reliability. Run a speed test to ensure your internet speed meets the requirements for video calls (typically at least 1 Mbps for both upload and download).
- Close any unnecessary applications or browser tabs that may be using bandwidth.
- Make sure your network drivers are up to date. Follow similar steps as updating audio and video drivers.
- Restart your router to refresh your internet connection. Unplug it for 10 seconds and then plug it back in.
- In Teams, go to "Settings"> "Devices" and select "Low bandwidth mode" to reduce the quality of the video, which can help if you have a poor connection.
Conclusion
Testing your audio and video setup in Microsoft Teams is essential for clear and effective communication. Following the steps outlined in this guide, you can ensure your microphone and camera function correctly, leading to a more professional and seamless virtual meeting experience.
Whether you're a beginner or looking for advanced troubleshooting tips, this guide has everything you need. Stay prepared and confident for all your virtual interactions on Microsoft Teams.