Windows 10 users have reported that they're experiencing a strange error when trying to open an application. The message pop-up says that the "side-by-side configuration is incorrect," and fails to proceed with the application's launch.
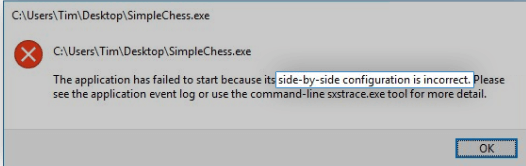
If you're also dealing with this frustrating issue when trying to open, install, or uninstall apps, you're not alone. This is a known issue with Windows 10, however, not one that couldn't be resolved.
A common cause for this error is a conflict between the C++ run-time libraries and the application you’re trying to open or install. Our article aims to bring you the most effective solutions when dealing with the error on Windows 10 no matter what the source is.
Steps to fix the "side-by-side configuration is incorrect" error
There are multiple ways to fix this rather frustrating error on your Windows 10 system. We’ve made sure to outline the best methods used to troubleshoot such issues, allowing you to enjoy using your device to its fullest once again.
Method 1: Re-download the installer file
If you’re having trouble installing an application, you can simply re-download its installer and attempt the process once again. Some installers run into errors due to corruption or damage during the download process, or they’re simply outdated and no longer work with your operating system.
Navigate to the manufacturer’s website and download the latest available installer for your software. We highly recommend that you only download from trusted sources, as downloading from anywhere else may put you at risk of receiving malware.
Method 2: Reinstall the problematic application
The first thing you should attempt when an application won’t launch is to reinstall it. This can be done by removing the software first, then downloading or running the installer to get it back on your system. Below are the steps outlining how you can uninstall an application and get the latest version.
- Open the Start menu by clicking on the Windows icon in the bottom left corner of your screen. You can also press this key on your keyboard to bring the menu up.
- Click on Settings from the left side of the pop-up menu. It’s indicated with a gear icon. For faster access, simply use the Windows + S keyboard shortcut.
- You’ll see a new window displaying many system options. Click on Apps.
- Stay on the default page, and wait for your applications to load. This may take some time depending on the number of applications you have installed on your device.
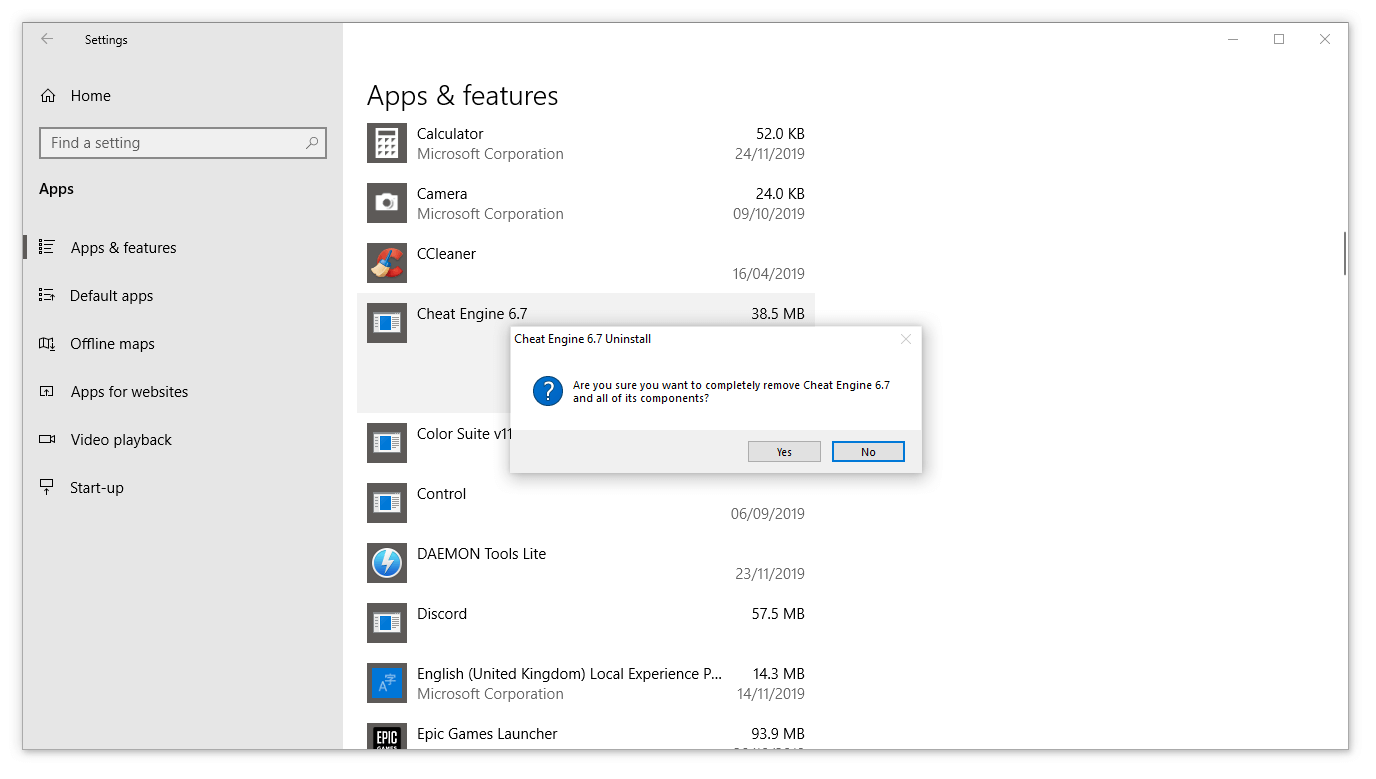
- Use the Search function to quickly find the problematic application.
- Select the app you want to reinstall, then choose the “Uninstall” option.
- Perform the on-screen instructions to remove the software. Restart your computer once the uninstallation is complete to ensure all files are permanently deleted.
- Follow our steps in Method 1 to download a new installer package and get the software back on your PC.
Method 3: Check your Registry
The Registry is responsible for many parts of your operating system. A poorly configured Registry entry can cause issues with your system, including the error you’re trying to solve right now.
Luckily, you can easily confirm if the Registry is configured properly by following our steps below. This process may seem complicated, but it’s necessary to ensure you’re not dealing with an incorrect Registry key.
Warning: Before beginning this guide, we recommend you to backup your Registry.
- Press the Windows + R keys on your on-screen keyboard to open Run, then type “regedit” into the input field. Press the OK button to launch the Registry Editor.
- You can navigate the Registry Editor by expanding folders using the arrow icon next to their names. Using this, locate the following Registry key: Computer\HKEY_LOCAL_MACHINE\SOFTWARE\Microsoft\Windows NT\CurrentVersion\SideBySide\Winners\x86_policy.9.0.microsoft.vc90.crt_1fc8b3b9a1e18e3b_none_02d0010672fd8219\9.0 The second to last entry varies from computer to computer — we used ours as an example. You need to look for an entry with both “9.0” and “crt” in the name.
- If you’re in the correct Registry key, you should be able to see three values: one called Default, then two strings of numbers.
-
Check the data value of the Default entry, and ensure that it matches the longer number entry (see the image below.)

- If the Default value isn’t the same as the longest number, double-click on the Default value and manually input the number. Make sure to do this correctly so each number and character matches.
- Close the Registry Editor and restart your computer.
Method 4: Install the latest Microsoft Visual C++ Redistributable Packages
To ensure that your issue doesn’t come from damaged or corrupt Visual C++ files, you can easily download and install the latest versions from the official Microsoft website. First, you need to download and install Microsoft Visual C++ Redistributable files, then simply restart your computer to verify if the problem still exists.
Method 5: Perform a System File Checker scan
The System File Checker is a tool available in Windows 10 by default. It’s also called an “SFC scan,” and it’s your quickest way to automatically fix corrupted system files and other issues.
Running this scan has proven to get rid of issues with Windows 10. Here’s what you need to do to run it.
- Press the Windows + R keys on your keyboard. This is going to bring up the Run utility.
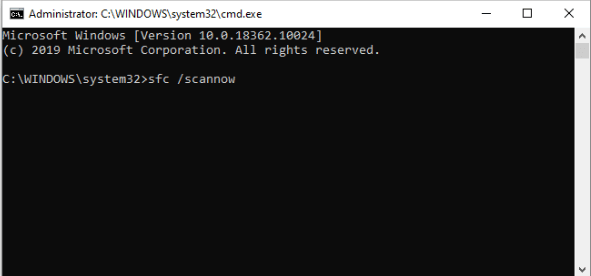
- Type in “cmd” and press the Ctrl + Shift + Enter keys on your keyboard. By doing so, you’re launching the Command Prompt with administrative permissions.
- If prompted, click Yes to allow the Command Prompt to make changes on your device.
- Once in the Command Prompt, type in the following command and press Enter to execute it: sfc /scannow
- Wait for the SFC scan to finish scanning your computer and repairing corrupt files. This may take a long time; ensure that you don’t close the Command Prompt or shut your computer down.
- Restart your device after the scan is complete.
Method 6: Reset Windows 10
While this is the least desirable option, it can certainly help when dealing with serious system issues. Many users turn to reset Windows 10 in an attempt to get a clean start and fix messy problems that otherwise would require hours and hours of troubleshooting.
Here are the steps to reset Windows 10. You have the option of keeping all of your personal data, but you may also choose to entirely wipe all data and start with a fresh system.
- Click on the Start menu and choose “Settings.” You can alternatively use the Windows + I keyboard shortcut as well.
- Click on the “Update & security” tile.
- Switch to the “Recovery” tab.
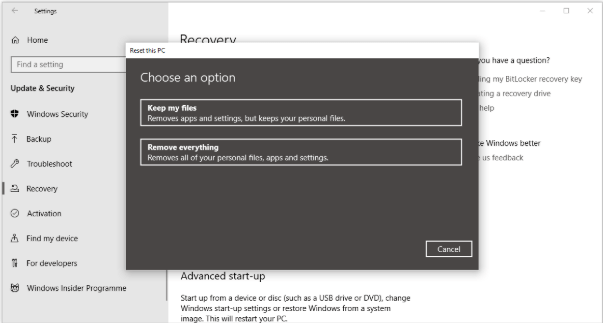
- You should see a header that says “Reset this PC.” Simply click on the “Get started” button under it.
- Choose whether or not you want to keep personal files. Both options mean that your applications will be removed, but you can easily keep personal documents safe.
- Proceed with the on-screen prompts and reset your PC.
We hope that our tips were able to guide you when restoring your PC after running into the “side-by-side configuration is incorrect” error. You should be able to enjoy your apps, install new ones, or remove unwanted programs without having to see the same pop-up.
If you notice in the future that your system is experiencing similar issues, feel free to return to our article and apply some other fixes. If nothing works, we recommend turning to either Microsoft’s customer support team or looking for an IT specialist in regard to your PC’s health.
Are you interested in learning more about Windows 10? Do you need help fixing any other Windows 10 errors and issues? You can browse our dedicated Help Center section and find articles about everything related to Microsoft’s groundbreaking operating system.
If you’re looking for a software company you can trust for its integrity and honest business practices, look no further than SoftwareKeep. We are a Microsoft Certified Partner and a BBB Accredited Business that cares about bringing our customers a reliable, satisfying experience on the software products they need. We will be with you before, during, and after all the sales.