Windows 10, as well as the newly released Windows 11, come with a lot of great features. They’re solid operating systems that can handle huge workloads, gaming, and entertainment. But there are some issues that users have been experiencing that lower system performance beyond expected. One such issue is the WaasMedic.exe high CPU issue.
In this article, we'll show you how to fix this problem on the Windows 10 and Windows 11 platforms. Keep reading for more information!
Table of Contents
- What is WaasMedic.exe?
- Solved: WaasMedic.exe high CPU and Disk usage on Windows 10 and Windows 11
- Prerequisite: Wait for the process to finish running
- Method 1. Scan your computer for malware
- Method 2. Temporarily disable your antivirus app
- Method 3. Pause Windows updates
- Method 4. Use the Disk Cleanup utility
- Method 5. Fix corrupted system files
- Method 6. Update Windows to the latest version
- Method 7. Disable the WaasMedic service (Not recommended)
- Final thoughts
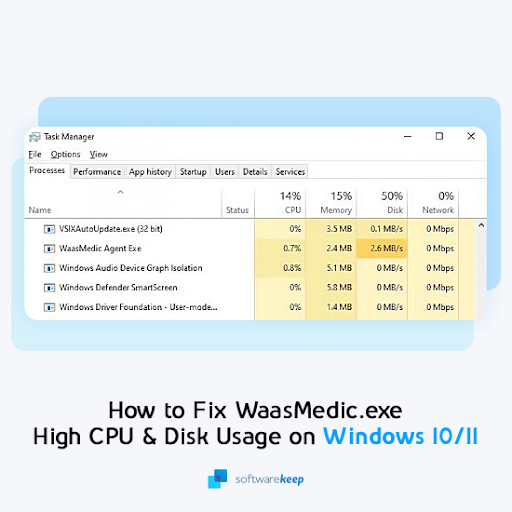
What is WaasMedic.exe?
WaasMedic.exe also called the Waas Medic agent, represents the Windows Update medic service. It helps to ensure that updates are smooth and uninterrupted so you can receive patches without any problems in a timely manner.
Luckily, WaasMedic.exe is not a virus. It’s an essential Windows service in both Windows 10 and 11, handling important update tasks. You should never delete the original file, as it may break key system functions and cause more problems than before.
In a small number of cases, the WaasMedic.exe causing high CPU usage is malware disguised as a genuine Windows service process. If this happens, you’ll be able to verify that the file location is different from the one listed by Microsoft. All you have to do is delete the suspicious file, or use reputable antivirus software to quarantine it automatically.
Solved: WaasMedic.exe high CPU and Disk usage on Windows 10 and Windows 11
Here are all the solutions to this frustrating problem that impacts your computer’s performance. The instructions are written using the latest version of Windows 10, but the steps are vastly similar on the Windows 11 operating system as well. If you need any assistance, don’t hesitate to reach out to us!
Prerequisite: Wait for the process to finish running
The simplest thing you can do is just wait for WaasMedic.exe to finish its functions and close itself afterward. In some cases, this may take a long time depending on the type of update and installation process; but when everything has finished running smoothly (depending on your download speed), it's possible that WaasMedic will stop using high CPU or disk usage immediately!
If you’ve waited at least two hours and the process is still depleting your system resources, jump into the troubleshooting methods below. We’ll help you find a solution that restores your device to how it’s supposed to work!
Method 1. Scan your computer for malware
Since one of the reasons that WaasMedic.exe is using too much of your computer's resources is because you might have malware, we recommend scanning for viruses first. That way you can find and remove any harmful scripts or apps running on your device.
To scan your computer, you can use the built-in Windows Defender application. We recommend investing in proper antivirus software if you want to do a deep scan.
Here’s how to scan your computer using Windows Defender on both Windows 10 and Windows 11 operating systems.
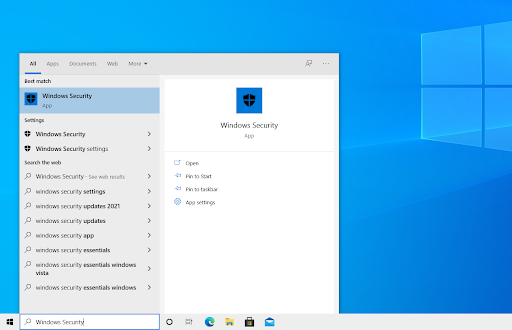
- Open the search bar in your taskbar by clicking on the magnifying glass icon. You can also bring it up with the Windows + S keyboard shortcut.
-
Type in Windows Security and launch it from the search results.
-
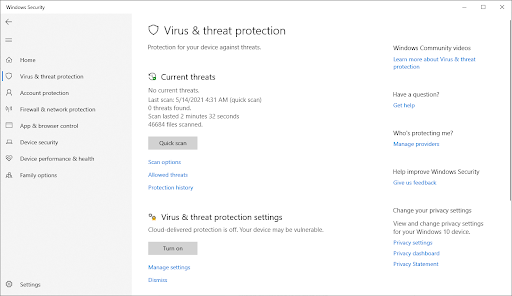
Switch to the Virus & Threat Protection tab using the home screen or the menu in the left-side pane. Click on the Scan Options link.
-
Select the Full scan option. This is going to check every single file on all of your drives to ensure no threats can hide. Take note that this scan may last over 1-2 hours, depending on how many files you have on your system.
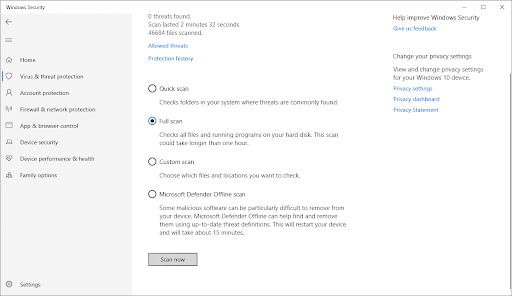
- Click on the Scan now button to begin the scan. If a threat is detected, Windows 10 will automatically quarantine or remove it entirely. You can review the scan results afterwards.
Method 2. Temporarily disable your antivirus app
Misconfiguration and conflict with third-party antivirus software installed on your computer are one of the reasons why WaasMedic.exe might have high CPU or disk usage. The best way to find out if this problem lies with your antivirus is by temporarily disabling the app from running on your computer.
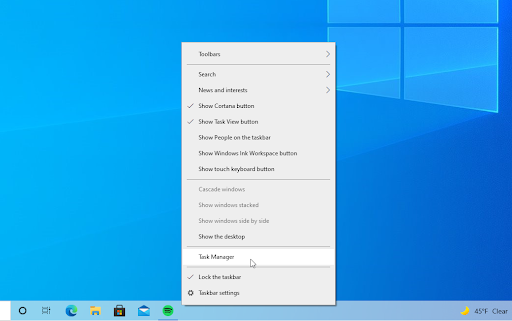
- Right-click on an empty space in your taskbar and choose Task Manager from the context menu.
-
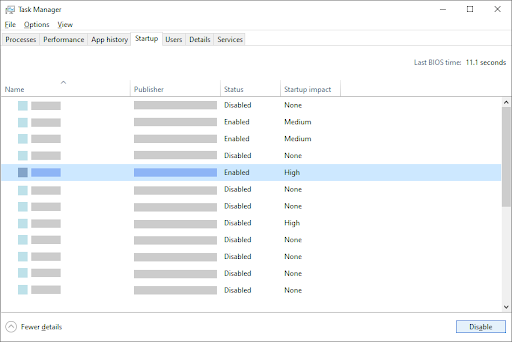
Switch to the Start-up tab using the header menu located at the top of the window. Here, find your antivirus application from the list and select it by clicking on it once.
-
Click on the Disable button now visible in the bottom-right of the window. This will disable the application from launching when you start your device.
- Restart your computer and see if the WaasMedic.exe agent high disk usage problem has gotten better. If you’re still experiencing the same issue, we highly recommend turning your antivirus back on.
Method 3. Pause Windows updates
Pausing updates on Windows can potentially fix this problem, as it doesn't need to run WaasMedic.exe and use high CPU and disk resources.
- Open the start menu by using the Windows icon in the bottom left of your screen. Choose Settings, or alternatively use the Windows + I shortcut.
-
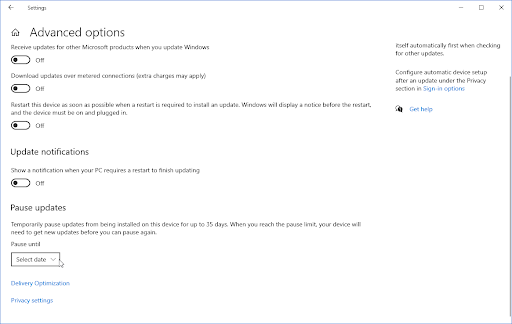
Click on the Update & Security tile. This is where you can find most of your security settings. Here, stay on the default Windows Update tab and click on the Advanced options button.

-
Scroll down until you see the Pause updates header. Here, click on Select date to open the drop-down menu and scroll all the way to the furthest date. You can pause updates for a maximum of 35 days at a time.
- After pausing updates, restart your device and see if the high CPU or 100% disk usage has gone down.
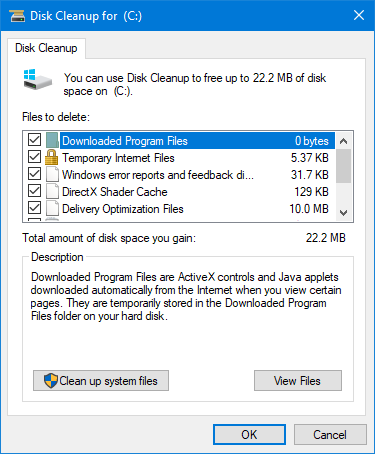
Method 4. Use the Disk Cleanup utility
The Disk Cleanup utility in Windows 10 helps clean up temporary files, obsolete drivers, and other junk on your computer. This can save you from browsing through an ocean of unnecessary information that may be slowing down the speed at which programs function or even preventing them entirely!
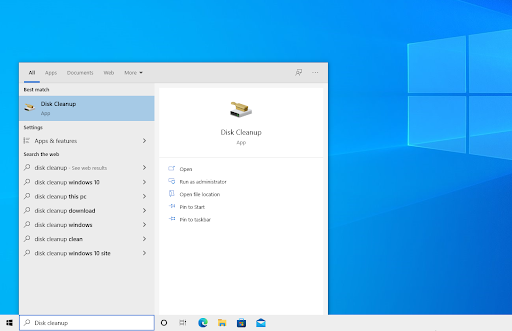
- Open the search bar in your taskbar by clicking on the magnifying glass icon. You can also bring it up with the Windows + S keyboard shortcut.
-
Type in Disk Cleanup and click on the first search result.
- Select the Windows 10 system drive, and then click the OK button. By default, your system should be installed on the C: drive.
-
In the new window, you’ll see all space taken by temporary files. Make sure that Temporary Internet Files and Temporary Files are selected. You may also delete other junk files, such as Thumbnails or DirectX Shader Cache.
-
When you're done selecting what you want to remove, click OK. Click on the Delete Files button in the dialog box that pops up. The removal process will start and free up space on your device.

- Wait for Windows to find and remove your temporary and other bothersome files. After the process is done, reboot your device and check if the CPU usage has gone down.
Method 5. Fix corrupted system files
Corrupt system files are the most common cause of this error. You can easily restore all damaged files with a utility found in Windows itself, called the System File Checker; SFC scan for short. This tool checks for all of your system files take note of any missing or corrupted ones and replaces them with the default unaltered files.
By running the SFC scan, you’ll restore all possibly corrupt or missing system files on your device, which may lead to fixing the high CPU and disk usage of the WaasMedic.exe process.
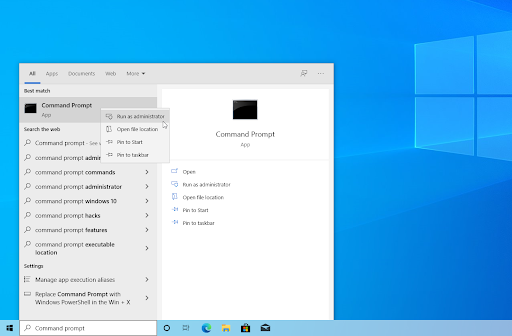
- Open the search bar in your taskbar by clicking on the magnifying glass icon. You can also bring it up with the Windows + S keyboard shortcut.
-
Type Command Prompt in the search box. When you see it in the results, right-click on it and choose Run as Administrator. If you're using a local account that doesn't have administrator permissions.
- When prompted by the User Account Control (UAC), click Yes to allow the app to launch with administrative permissions.
-
Type in the following command and press Enter to execute it: sfc /scannow
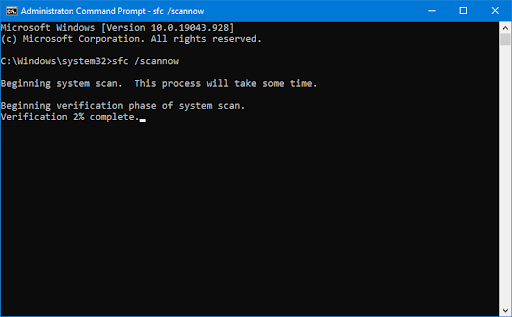
- Wait for the System File Checker to finish scanning your computer. In the case of a discrepancy, the utility will restore system files and fix all errors related to them.
Method 6. Update Windows to the latest version
An update to your operating system may fix many underlying issues, such as slow performance caused by the WaasMedic.exe process depleting your resources. Download the latest version of Windows and see if the problem is fixed!
- Click on the Windows icon in the bottom left of your screen to bring up the Start menu. Choose Settings, or use the Windows + I shortcut.
- Click on the Update & Security tile. This is where you can find most of your Windows Update settings and choose when to receive updates.
-
Make sure to stay on the default Windows Update tab. Click on the Check for updates option and wait for Windows to find available updates. If you see any updates displayed, click on the View all optional updates link to see and install them.
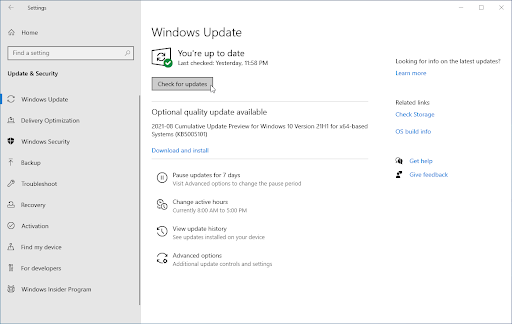
- When Windows finds a new update, click on the Install option. Wait for Windows to download and apply the necessary updates.
Method 7. Disable the WaasMedic service (Not recommended)
If the above methods failed, you can attempt to manually disable WaasMedic.exe, and then make some changes in your registry so it doesn’t start again. Be aware that this could potentially break Windows Update and keep you from updating your computer.
-
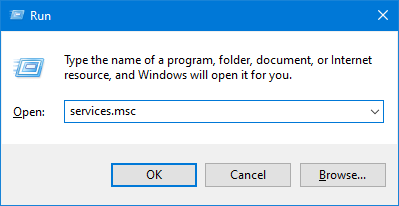
Press the Windows + R keys on your keyboard at the same time to bring up the Run utility. Type in “services.msc” without the quotation marks, then hit the OK button. This is going to launch the Services in a separate window.
-
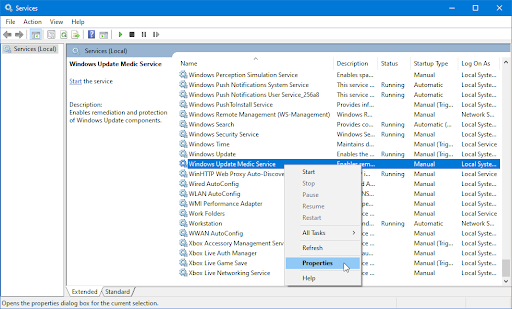
Scroll down until you locate Windows Update Medic Service in the list of services. Right-click on it, and pick Properties from the context menu.
-
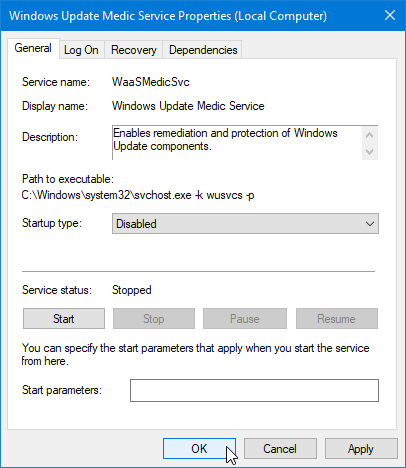
Expand the Startup type drop-down menu, and then choose Disabled from the available options. Doing so will ensure that the Windows Update Medic Service (which starts WaasMedic.exe) is never running when you boot your computer.

-
Click OK. If you successfully disabled the service, simply reboot your computer and see if the CPU and disk usage has gone down. However, if you see the “Access is denied” error, continue reading.
-
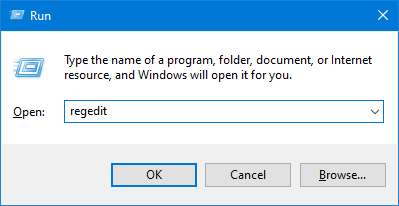
To solve this error, you need to make an edit in the Registry. Press the Windows + R keys on your keyboard at the same time to bring up the Run utility. Type in “regedit” without the quotation marks, then hit the OK button.
-
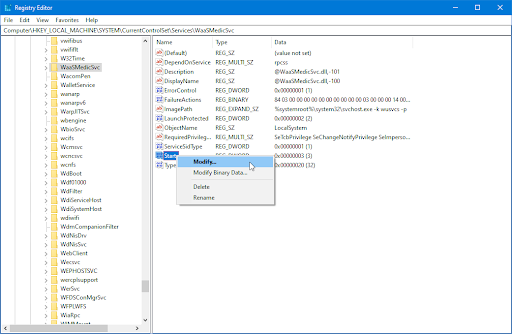
Use the navigation pane on the left side of the window to reach the following Registry key, or use the address bar and copy-paste the location:
HKEY_LOCAL_MACHINE\SYSTEM\CurrentControlSet\Services\WaaSMedicSvc
- You should see a list appear in the right-side area. Here, right-click on the value that’s named Start and select Modify from the context menu. This will cause a pop-up window to appear.

-
Change the Value data to 4. Make sure that it’s set to Hexadecimal before you click on the OK button.
- After completing these steps, return to the Services window and apply the changes made to the Windows Update Medic Service. You should be able to disable it now.
After you successfully disable the WaasMedic.exe process from starting, restart your computer to ensure the service isn’t started. When it boots up, you can monitor your CPU and disk usage and determine if this method was successful.
Final thoughts
We hope this article has helped you fix your high CPU usage or 100% disk usage caused by WaasMedic.exe on Windows! If not, make sure to get in touch with our support team for more ideas. As always, feel free to reach out with any questions and we’ll be happy to help.