Whether you use a wired connection such as an ethernet cable or prefer to keep it wireless with WiFi, many issues can arise while trying to set up your internet connection. One of these issues comes up when running the network troubleshooter included in Windows 10: the default gateway is not available.
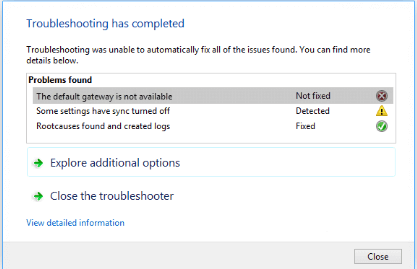
This error usually appears when your IP configuration is faulty, your router has been misconfigured, or in rare cases can be due to your ISP settings. But don’t worry — our article aims to bring you a solution to this error no matter what the source is.
Fixed: “Default gateway not available”
Below is a detailed guide on how you can potentially fix this problem on your system. Our methods require no past expertise in Windows 10 troubleshooting, allowing anyone to successfully fix the “Default gateway is not available” error.
Method 1: Temporarily disable your antivirus software
Antivirus applications are known to cause issues with Windows 10’s network and internet connections. You can easily test whether or not your antivirus software is interfering with connections by temporarily disabling it.
If you’re able to connect to the internet without the “Default gateway is not available” error after disabling such apps, it’s most likely that they caused the error.
Here’s how you can temporarily disable any antivirus app.
Note: Make sure you turn on Windows Defender while operating your system without a third-party antivirus. It’s Windows 10’s integrated security solution that doesn’t cause issues and provides basic protection against most threats.
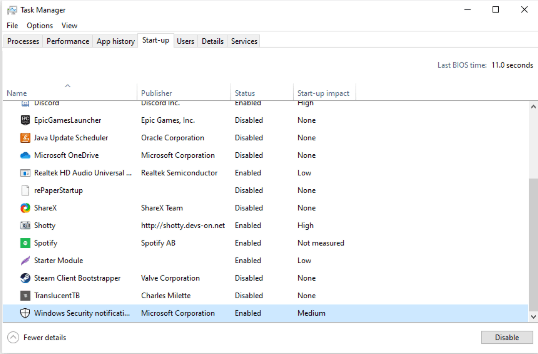
- Right-click on an empty space in your taskbar and choose Task Manager.
- If the Task Manager launched in compact mode, make sure to expand details by clicking on the “Mode details” button.
- Switch to the Start-up tab using the header menu located at the top of the window.
- Find your antivirus application from the list and select it by clicking on it once.
- Click on the Disable button now visible in the bottom-right of the window. This will disable the application from launching when you start your device.
- Restart your computer and attempt connecting to your network again.
Method 2: Remove McAfee from your computer
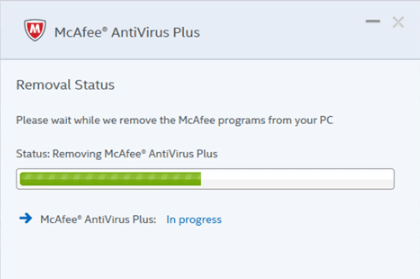
Many users have reported that removing McAfee applications from their devices has helped them resolve the “Default gateway is not available” error. If you use this kind of application, we advise you to temporarily remove them and check if they interfered with your network connection.
If you find that the McAfee product you own has caused Windows 10 network errors, we recommend getting in touch with the customer service team. You can contact them by clicking this link and reviewing the available options.
- Open the Start menu by clicking on the Windows icon in the bottom left corner of your screen. You can also press this key on your keyboard to bring the menu up.
- Click on Settings from the left side of the pop-up menu. It’s indicated with a gear icon. For faster access, simply use the Windows + S keyboard shortcut.
- You’ll see a new window displaying many system options. Click on Apps.
- Stay on the default page, and wait for your applications to load. This may take some time depending on the number of applications you have installed on your device.
- Use the Search function to look for “McAfee.”
- Select your McAfee product, then choose the “Uninstall” option.
- Follow the on-screen instructions to remove your McAfee product from the device. If any other McAfee applications are listed, repeat these steps to remove them as well.
- Restart your computer once the uninstallation is complete. You should be able to test your internet connection right away.
Note: If your system came with McAfee pre-installed, you might have some leftover files even after uninstalling the app. Look for these files and manually delete them. This could potentially resolve your issues.
Method 3: Disable the auto-login feature
While the automatic logon feature changed the game back in Windows 8’s time, it may cause network conflicts on newer systems. Luckily, you can use the Registry Editor included with all copies of Windows to disable this feature and test whether or not your connection is restored.
Warning: Before beginning this guide, we recommend creating a backup of your Registry. If you’re not sure how to create and import Registry backups, watch “Registry Backup, Restore, Import And Export” from Windows Ninja.
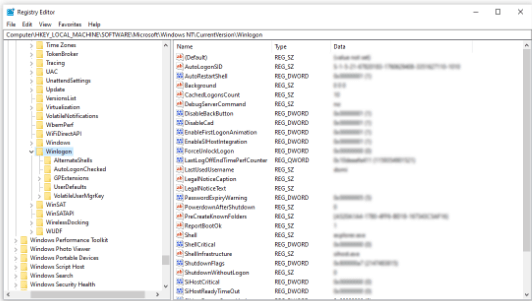
- Press the Windows + R keys on your on-screen keyboard to open Run, then type “regedit” into the input field. Press the OK button to launch the Registry Editor.
- You can navigate the Registry Editor by expanding folders using the arrow icon next to their names. Using this, locate the following Registry key: HKEY_LOCAL_MACHINE\SOFTWARE\Microsoft\Windows NT\CurrentVersion\Winlogon
Alternatively, you can also copy and paste the key into the Registry Editor’s address bar for faster navigation.
- Right-click on the “AutoAdminLogon” key, then choose “Modify” from the context menu.
- Change the data value from “1” to “0” and click the OK button. Make sure not to modify any other settings!
- Close the Registry Editor and restart your computer.
Method 4: Reset TCP/IP with the Netsh command
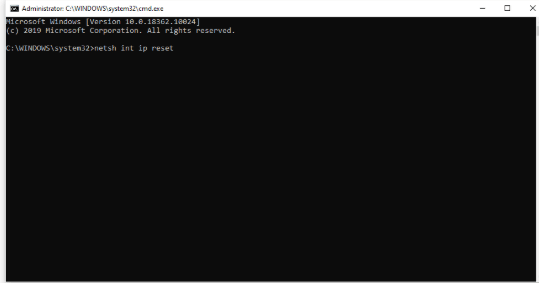
The Command Prompt can be used for resetting your TCP/IP settings and possibly resolving issues with the default gateway. Simply follow the steps below to learn how you can do this.
- Press the Windows + R keys the on-screen keyboard. This is going to bring up the Run utility.
- Type in “cmd” and press the Ctrl + Shift + Enter keys on your keyboard. Doing so, you’re launching the Command Prompt with administrative permissions.
- If prompted, click Yes to allow the Command Prompt to make changes on your device.
- Once in the Command Prompt, type in the following command and press Enter to execute it: netsh int ip reset
- Wait for the command to finish processing. Ensure that you don’t close the Command Prompt or shut your computer down.
- Restart your device after the command is completely done and reset your TCP/IP settings.
Method 5: Update your network adapter drivers
Drivers are incredibly important to be kept up to date with recent releases. As bugs are reported to the manufacturer, they’re able to roll out new fixes that may solve the “Default gateway is not available” error on Windows 10.
Here’s how you can update your network adapter drivers within no more than a few minutes. This process is automatic, meaning that you can easily perform it.
- Click on the Search icon in your taskbar, located next to the Windows icon. The function is indicated by a magnifying glass. You can also open it by using the Windows + S keyboard shortcut.
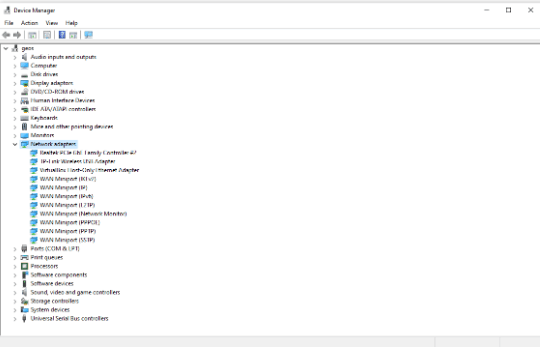
- Type in “Device Manager” and click on the matching result to launch it in a new window.
- Click the arrow icon next to “Network adapters” to expand it.
- Right-click on your adapter and choose “Update driver.”
- Select “Search automatically for updated driver software” and follow the on-screen instructions to update your drivers.
- After a successful update, restart your computer and check whether or not you still experience issues with the default gateway.
Method 6: Change the Power Management settings for your network adapter
There are users who have noticed that a specific power management setting may cause issues with internet connections. This is due to your system momentarily turning off your network adapter, causing it to lose communication and return the “Default gateway is not available” error.
- Click on the Search icon in your taskbar, located next to the Windows icon. The function is indicated by a magnifying glass. You can also open it by using the Windows + S keyboard shortcut.
- Type in “Device Manager” and click on the matching result to launch it in a new window.
- Click the arrow icon next to “Network adapters” to expand it.
- Right-click on your adapter and choose “Properties.”
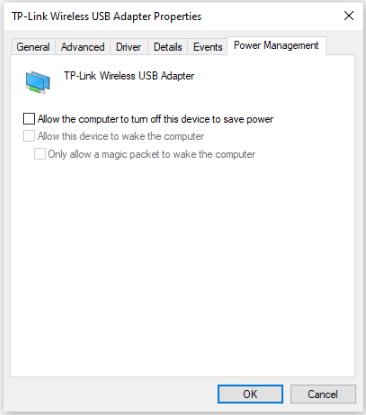
- Switch to the “Power Management” tab by using the header menu located in the top portion of the window.
- Make sure that the “Allow the computer to turn off this device to save power” option is not enabled. If it is, simply remove the checkmark by clicking on the box.
- Click the OK button to finalize your changes. You can attempt to use your internet connection and see if the error returns.
We hope that this guide was able to help you troubleshoot the “Default gateway not available” error on Windows 10. You should be able to connect to the internet without this issue present now.
If you're interested in learning more about Windows 10 or you need help fixing any other Windows 10 errors and issues, you can browse our dedicated Help Center section and find articles about everything related to Microsoft’s groundbreaking operating system.