If you are experiencing the KMODE_EXCEPTION_NOT_HANDLED blue screen error on Windows, don’t worry, you are not alone. Various factors can cause this error, but there are several ways to fix it. In this blog post, we’ll discuss some of the most common causes of this error and how to fix them.
We will also provide a few tips for preventing the KMODE_EXCEPTION_NOT_HANDLED blue screen error from occurring in the future.
Read on to learn more!
Table of Contents
- What is the KMODE_EXCEPTION_NOT_HANDLED error in Windows?
- What causes the KMODE_EXCEPTION_NOT_HANDLED error?
- Solved: KMODE_EXCEPTION_NOT_HANDLED in Windows
- Method 1. Disable the Fast Startup feature
- Method 2. Clean boot your computer
- Method 3. Update your network drivers
- Method 4. Run the Windows Memory Diagnostics
- Method 5. Temporarily disable your antivirus app
- Method 6. Run the System File Checker
- Method 7. Update your BIOS
- Final thoughts
What is the KMODE_EXCEPTION_NOT_HANDLED error in Windows?
When you get a “blue screen” error on your computer, it can be an unpredictable and frustrating experience. It often occurs when something is wrong with one of the system files in Windows or another program that runs simultaneously that causes this issue.
Most blue screen errors are associated with system-related issues that send a STOP code to Windows, leading to an immediate system crash. This happens without warning, meaning work can be lost, and files can occasionally get corrupted. Make sure to save frequently!
But don’t worry! There’s always a solution to any blue screen error. You will want to check out these things before giving up hope:
- Make sure all system updates are installed;
- Repair any damaged configurable settings using built-in tools like the System File Checker and DISM;
- Update your drivers;
- Check your boot settings.
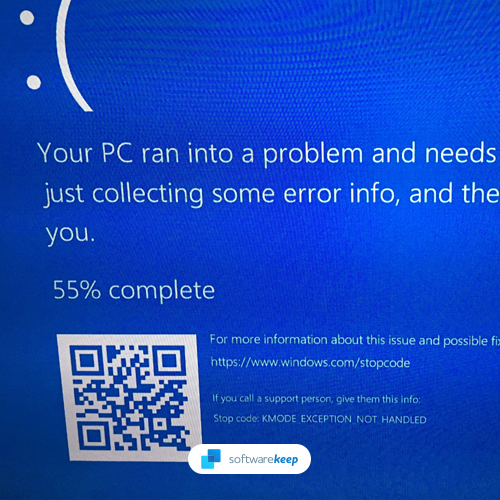
Windows users have reported many instances of a driver-related blue screen error, one of which is the “KMODE_EXCEPTION_NOT_HANDLED” error code, also known as stop code. Luckily, there are several potential solutions you can apply to get rid of it and return to using your computer as usual.
What causes the KMODE_EXCEPTION_NOT_HANDLED error?
The error message “KMODE EXCEPTION NOT HANDLED” does not appear to be particularly useful at first look. Even users with plenty of Windows experience may have trouble deciding on the next step when this stop code appears as Windows starts up. So, what does it mean?
When software or apps overwrite one other’s memory, the KMODE_EXCEPTION_NOT_HANDLED error occurs. It causes the software to crash and make your system crash with a Blue Screen of Death.
Solved: KMODE_EXCEPTION_NOT_HANDLED in Windows
It’s critical to address this Windows issue as soon as possible because it will almost certainly continue to occur until you resolve it! We’ve developed a list of seven viable options to assist you in quickly restoring your PC.
Method 1. Disable the Fast Startup feature
Fast startup is enabled by default on practically all Windows computers. The function helps your computer boot quicker or recover from hibernation more quickly, but it can also cause Windows to fail to launch correctly or revert to earlier faults.
-
Click on the Windows icon in your taskbar and search for the Control Panel. Launch the application from the search results.
-
Click on Power Options. If you can’t see this, make sure to switch the view mode to either Large icons or Small icons.
-
Click on the Choose what the power button does link in the left-side pane. You’ll be redirected to a new page.
-
Before making changes, you need to click on the “Change settings that are currently unavailable” link. This will unlock your options.
-
Make sure to uncheck the Turn on fast startup (recommended) option. Click the Save changes button to apply the changes before restarting your computer.
Method 2. Clean boot your computer
Start in “clean boot” mode to guarantee that your computer operates without third-party services. Before booting, this will remove any apps and third-party conflicts. Check whether Windows experiences the KMODE_EXCEPTION_NOT_HANDLED BSOD when in this boot mode.
- Press the Windows + R keys on your keyboard to bring up the Run utility in a new window.
-
Type in “msconfig” without the quotation marks and press the Enter key on your keyboard. This will launch the System Configuration window.
-
Switch over to the Services tab. Make sure that you check the Hide all Microsoft services box. This is going to ensure that you only see third-party services.
-
After hiding all system services, click the Disable all button to disable every third-party service on your device.
- Click the Apply button and restart your computer. When you boot next, your computer will only initiate essential Microsoft services.
- Restart your computer. You’ll be in a clean boot state with only official Microsoft services.
If you observe that the KMODE_EXCEPTION_NOT_HANDLED blue screen problem disappears after a clean boot, a service likely is to blame. You must locate it and either replace the linked driver or app or turn off the service entirely.
Method 3. Update your network drivers
Windows Update has a feature that allows you to update outdated drivers automatically. This can help you quickly find and get some of your drivers up-to-date without individually checking for new versions.
Use the steps below to update a network driver that may be outdated manually. Keep in mind that only legitimate sites should be used to download drivers! Some fraudulent websites may try to trick you into downloading malware-infected driver files.
-
Press the Windows + X keys on your keyboard and choose Device Manager from the context menu to access the needed utility.
-
Expand the Network adapters category and right-click on your current network adapter—select Update driver from the context menu.
- Choose how you want to update your driver. You may either let Windows find a driver for you automatically or manually seek a new driver file on your machine.
Method 4. Run the Windows Memory Diagnostics
The Windows Memory Diagnostic tool is a built-in Windows utility for locating and resolving system memory issues. It will test your RAM and notify you if any problems interfere with its operation.
-
Press the Windows + R keys on your keyboard to bring up the Run utility. Here, type in “mdsched.exe” and press the OK button.
-
Choose “Restart now and check for problems (recommended)” to instantly begin a memory scan. Make sure to save any files and close all open applications before clicking on this option.
- Alternatively, choose “Check for problems the next time I start my computer” and restart the device at a more convenient time.
- The Windows Memory Diagnostics Tool interface will then show up and automatically start testing your PC’s memory problems. The process may take a few minutes, so you should be patient and let it run till completion and display the test results.
If the Windows diagnostic tool finds and displays no faults, your PC’s memory is most likely in good condition and functioning as intended. If this is the case, use a different approach from this article to try to fix the KMODE_EXCEPTION_NOT_HANDLED BSOD error.
Method 5. Temporarily disable your antivirus app
Antivirus apps are a necessity on your computer if you want to stay safe while online. However, many of them cause errors, and some may even mess up your drivers. If this happens, you need to disable your antivirus temporarily.
- Right-click on space in your taskbar and choose Task Manager from the context menu.
- Switch to the Startup tab using the header menu located at the top of the window. Find your antivirus application from the list and select it by clicking on it once.
-
Click on the Disable button now visible in the bottom-right of the window. This will disable the application from launching when you start your device.
- Check whether you can use your computer after making this update by restarting it. Remember to restart your antivirus program subsequently, or purchase a new one if your present one was the source of the problem!
Method 6. Run the System File Checker
Corrupted system files can cause various issues on your computer, one of which happens to be blue screen errors and unnatural resource consumption. If some essential Windows files have been tampered with or damaged somehow, they need to be repaired.
Use the built-in System File Checker (SFC scan) to detect and replace any damaged system files you may have.
- Open the search bar in your taskbar by clicking on the magnifying glass icon. You can also bring it up with the Windows + S keyboard shortcut.
-
Type Command Prompt in the search box. When you see it in the results, right-click on it and choose Run as Administrator. If you’re using a local account that doesn’t have administrator permissions, click here first.
- When prompted by the User Account Control (UAC), click Yes to allow the app to launch with administrative permissions.
-
Type in the following command and press Enter to execute it: sfc /scannow
- Wait for the System File Checker to finish scanning your computer. In the case of a discrepancy, the utility will restore system files and fix all errors.
Method 7. Update your BIOS
The computer might not be working correctly because its BIOS has become outdated. You can fix this by updating your system’s software, which could also improve performance and stability issues related to older versions of the BIOS you’re using!
- Press the Windows + R keys on your keyboard. This is going to bring up the Run utility.
-
Type in “cmd” without the quotation marks and press the Enter key on your keyboard. This will launch the Command Prompt application.
-
Next, type the following commands one by one. Hit the Enter key after each command line to execute the command:
- systeminfo | findstr /I /c:bios
- wmic bios get manufacturer, smbiosbiosversion
- These commands will help you identify the BIOS version. Use it to find the latest files required to update your BIOS, unless you’re already on the latest version.
Final thoughts
We hope that this article was able to guide you in resolving the KMODE_EXCEPTION_NOT_HANDLED blue screen error message. Feel free to reach out to us and tell us how we did! If you have any more questions or require assistance, don’t hesitate to contact our team.
If any questions are left unanswered, or problems are not addressed, please feel free to reach out — our team of experts would love to help! In the meantime, keep up with all things tech by checking back for more troubleshooting articles and following us on social media.
Follow our Blog for more great articles like this one! In addition, you can check our Help Center for a wealth of information on how to troubleshoot various issues.
One more thing
Sign up for our newsletter and get early access to our blog posts, promotions, and discount codes. Thank you for reading! We hope to see you again soon.
Feel free to reach out with questions or requests you’d like us to cover.