For laptop users, managing battery life is extremely important. Once you run out, there’s no way to gain access to your files and system other than charging your device. However, Windows 7 has a known issue where your device appears to be plugged in but is not charging.
This error can be devastating and might make it so you’re unable to use your laptop outside of your home.
If you’re looking for an easy but effective fix for this problem, we’re here to help you restore everything into working order. Our article brings you some of the most effective methods to resolve the “Plugged in, not charging” error on Windows 7.
Method 1: Check for issues with your hardware
The very first thing you should do in this situation is to check out some of your physical hardware components. If these are damaged or simply no longer functioning properly, they can cause many issues on your device including battery errors.
Here’s what we recommend checking when attempting to identify whether or not you have a hardware issue.
- Re-insert the battery of your laptop. If your device uses a removable battery, you should try to reset it by removing it and then inserting it back in. Make sure to entirely power off your laptop, then detach the battery and wait at least a minute before putting it back in. Power on the device and see if you can charge it.
- Look for physical damage to your charger. Wired chargers are vulnerable to cable damage. Something you should try is disconnecting your charger and closely inspecting it for any signs of damage. You can also attempt to connect the charger to a different laptop to verify if the same issue happens on a different device.
- Plug your charger directly into a wall socket. In the case that your extension cord is damaged, you should try directly plugging the charger into a wall outlet. If your device starts charging, you can confirm that the issue is with your extension cord.
- Make sure your device isn’t overheating. When your laptop starts to overheat, the battery is likely going to drain faster than ever. To combat this issue, you can use a cooling system and test whether or not your device is able to charge with the help.
Method 2: Adjust your power settings
In order to adjust the power settings on Windows 7, follow the procedure below.
- Click on the Start Menu
- Next, select Control Panel.
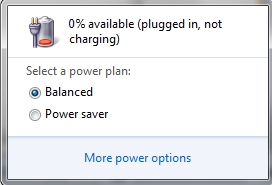
- Choose Power Options and click on change battery settings.
- Select the power options of your choice.
Method 3: Update the battery drivers
Drivers make everything work on your device. Make sure to update your battery drivers to ensure they don’t cause any conflict with your updated system.
Update battery drivers manually
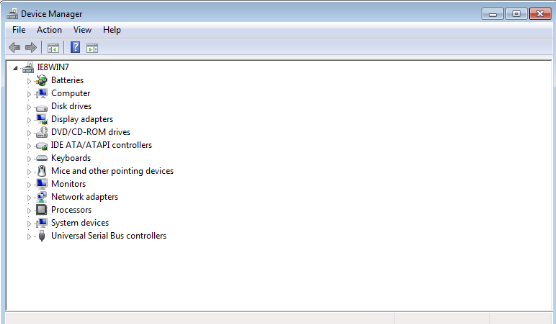
- Press the Windows + R keys on your keyboard to open the Run utility. Here, type in “devmgmt.msc” and click the OK button.
- Expand the “Batteries” category.
- Right-click on “Microsoft ACPI Compliant Control Method Battery” listed amongst the batteries, then select “Update Driver Software.”
- Choose “Search automatically for updated driver software.”
- Wait for Windows 7 to find and download an updated driver. If none are found, you can try to manually search for a driver on the internet using the device name or use the automated method below.
Update battery drivers automatically
Many people prefer automated methods to take care of driver updates and installations. Luckily, there are many applications on the market that allow you to automatically update your drivers without having to do much more than click a button.
We want to keep this article as accessible as possible, so we did the search for you. We’ve compiled some of the best-rated, most recommended free applications that automatically update your drivers.
- Driver Booster from Iobit allows you to download drivers directly from the application. With automatic restore points, scheduled scans, and no limitations, this app is a must-try.
- DriverPack Solution from Artur Kuzyakov allows you to install drivers even when offline. Its easy and modern interface has won over many users, and we recommend you give it a try.
- DriversCloud from CYBELSOFT caters to tech-savvy users, as it shows you loads of information about the drivers you download. If you want complete knowledge, definitely download DriversCloud.
- Driver Easy from Easeware Technology Limited offers both free and paid features to easily and automatically keep your drivers updated. Scans are quick, the interface is pleasing, and many experts recommend the application for both personal and work use.
Method 4: Turn off the battery life extender
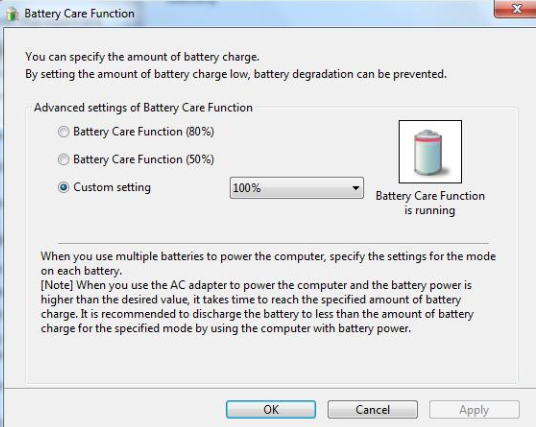
Some users report that features aiming to extend the battery longevity can mess up charging the device. These apps and features may be enabled on your device by default, which means that turning them off may solve your issues.
Make sure to follow the methods for your laptop below to turn off any battery life extender software or feature.
- Instructions for Samsung branded laptops:
- Open the Start menu by clicking on the Windows icon in the left corner of your taskbar. You can also open this menu by pressing the corresponding Windows icon on your keyboard.
- Select All programs → Samsung → Battery Life Extender.
- Make sure that “Normal Battery Mode (100% Charge)” is selected, then click the OK button.
- Restart your laptop and check if charging works.
- Instructions for other Windows 7 operating laptops:
- Turn your laptop off entirely.
- Start to power the device back on, but hold either the F2 or the F10 key down while your laptop is booting. Note that on some laptops you might have to hold down the Fn key as well.
- You should see that you’ve entered the BIOS interface. Switch to the “Advanced” tab.
- Locate “Battery Life Cycle Extension” and make sure that it’s disabled.
Method 5: Update your BIOS
If none of the methods above seemed to help your issue, we recommend simply updating your BIOS to the latest version. This can fix a number of system errors, however, we recommend making a backup of your important files in case the installation goes south.
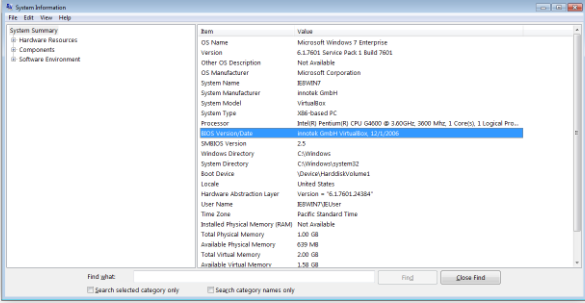
- Press the Windows + R keys on your keyboard to bring up the Run utility.
- Type in “msinfo32” without quotation marks and press the OK button.
- Locate the “BIOS Version/Date” line and check what your system is currently running with.
- Visit the manufacturer’s website and look for an updated version of your BIOS. If so, simply download and install it onto your laptop.
- Check if you still have the “Plugged in, not charging” problem after updating the BIOS.
We hope that this guide was able to help you troubleshoot the “Plugged in, not charging” error on Windows 7. You should be able to charge your device up and enjoy it to the fullest again.
If you notice in the future that your system is experiencing similar issues, feel free to return to our article and apply some other fixes. If nothing works, we recommend turning to either Microsoft’s customer support team or looking for an IT specialist in regard to your PC’s health.