If you're a frequent Outlook user, you might want to set up a number of different email accounts within Outlook. Doing this allows you to have a unified view of all your messages in different inboxes within the same application.
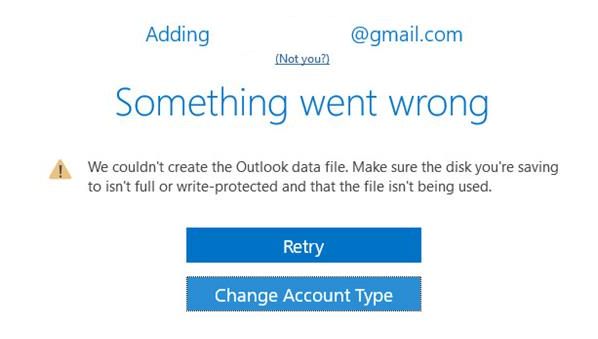
Some users might run into issues when adding new email accounts to Outlook. One of these errors prevents you from adding an account to Outlook and returns the "We couldn't create the Outlook data file" message.
To learn how to fix this error, we compiled four easy-to-follow methods, allowing anyone to troubleshoot efficiently. You will also find possible causes to learn what to look out for when you experience this error.
What causes the 'We couldn't create Outlook Data File' error?
This error is fairly well known among Outlook users, so people have found possible causes that led to this error happening.
- Gmail account: The error seems to only occur when you’re trying to add a Gmail account to Outlook. The exact cause of this is unknown, however, it might have something to do with Gmail’s security options.
- Outlook bug: A common cause of this issue is a bug within Outlook itself. The bug prevents you from adding an email account via the Add account option.
- Simplified Account Creation Wizard: This is a relatively new Outlook feature. Generally, whenever a new feature is added to an application, it’s bound to cause errors and bugs.
Fixed: We couldn't create an Outlook data file error
While an official patch hasn’t been released by Microsoft, you can find easy ways to fix the 'We couldn't create the Outlook data file' error below.
The first thing you should check when getting this error is your hard disk. If the disk you’re using is nearly full or is write-protected, Outlook won’t be able to create a data file on it.
How to Check my Available Hard Disk Space?
-
Open the File Explorer from your taskbar.

-
Click on This PC from the left side menu.

-
Under Devices and drives, you can see all of your currently attached hard disks. Check how much space is available on each by reading the text below them.

What to do if my hard disk is full?
You can make some space on your hard disk in a number of different ways:
- Run the Disk Cleanup tool. (video by Windows 10 Guru)
- Delete your Windows cache. (video by Britec09)
- Download and run CCleaner.
- Uninstall applications you don’t need or use.
How to Remove Write Protection from a Hard Disk
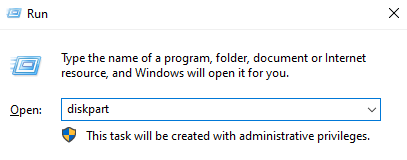
One of the easiest ways of removing write protection from a disk is by using the Diskpart utility:
- Hold the Windows and R keys down on your keyboard at the same time.
-
Type in diskpart and press OK.
- Type in the following command and press Enter after each one:
- list disk
-
select disk (number)
For example, if your Drive 1 is protected, you’re going to type in select disk 1. - attributes disk clear read-only
- Once the Diskpart utility finished clearing the Read-only protection, you can type in exit and hit Enter to close the command prompt.
Check Gmail's Security Options
Even if everything is fine on Outlook's end, your email provider might not have the right permissions to connect your Outlook client to your account.
Since the issue is most likely to happen with Gmail accounts, you can use Google’s App passwords to give Gmail proper access to Outlook.
Add your email to Outlook: An alternate way
There is a way of going around the Outlook bug that prevents you from using the ‘Add account’ feature.
By adding your account an alternate way, you can often successfully complete the setup without having to get into huge troubleshooting.
Use Manage Profiles
Follow the steps below to learn how you can add an email account to Outlook by using the manage profiles window:
- Launch Outlook.
-
Open the File menu from the top-left side of the application.
-
From the Info tab, click on Account Settings.
-
Click on Manage Profiles from the drop-down menu.
-
Click on the Email Accounts... button.
-
Click on New.
- Follow the on-screen instructions and enter your correct details.
- Restart Outlook if open. Once you’re done with the setup, Outlook should have your account properly added.
Use Mail in Windows
Another way of adding your email account to Outlook is by using the Mail option from the classic Windows Control Panel. To learn how to do it, follow the steps below:
-
Open the classic Control Panel:
- Hold the Windows and R keys down on your keyboard at the same time.
-
Type in "Control panel" and click on OK.
-
Click on the Search icon on your taskbar.
- Type in Control Panel.
-
Launch the Best match application.
- Using the Run app:
- Using the Search bar:
-
Change your view mode to Small icons.
-
Click on Mail. If you can’t find it, check for Email.
-
Click on the Email Accounts... button.
-
Click on New.
- Follow the on-screen instructions and enter your correct details.
- Restart Outlook if open. Once you’re done with the setup, Outlook should have your account properly added.
Changing registry values
Using the Registry Editor in Windows can be an intimidating task if you’re not familiar with the operating system.
By following our guides, you can ensure that no damage will be done to your computer even after going into the complicated Registry Editor and changing or creating values.
Disable Simplfied account Creation
If you’re trying to use the “Connect Outlook to Office 365” wizard included in Outlook, the issue might be caused by it.
This is a relatively new feature in Outlook that can cause errors with setting up a new email account within the app. When you disable it, the normal account creation wizard replaces it by default.
To disable the simplified account creation wizard, you’ll need to edit the registry files on your computer:
- Hold down the Windows and R keys on your keyboard at the same time to launch the Run application.
-
Type in Regedit and click on OK.
-
The Registry Editor will open. Use the pane on the left. By clicking on the down arrow symbol next to the name of a folder, you can navigate to the following path:
HKEY_CURRENT_USER\SOFTWARE\Microsoft\Office\16.0\Outlook\Setup. -
From the Edit menu, click on New then choose DWORD Value (32-bit).
-
Name this new value DisableOffice365SimplifiedAccountCreation.
-
Double click on the value. Set the Value data to 1 and press OK.
- Close the Registry Editor and restart Outlook.
We hope that you were able to fix the 'We couldn't create the Outlook data file' error in Outlook. Enjoy your additional email accounts and use Outlook’s powerful features to keep all of your inboxes safe and organized!