Windows updates are essential to keep your system up to date. Each update brings something new to users, which often includes security patches, feature introductions, and performance optimization. It’s easy to see how running into errors when updating can be a huge setback for all Windows users.
In this article, we’ll be going over a Windows Update error, specifically error code 80244019. If you want to know why this error happens and how to fix it, make sure to continue reading.

Common causes for Windows Update Error 80244019
There’s no exact cause for this error to appear, however, using user reports we were able to find some common things that trigger code 80244019.
- Corrupted system files
- Windows Update service not functioning properly
- An app or service is interfering with your Windows Update download
There are only some of the common occurrences that lead users to get the Windows Update error code 80244019. Your case might be unique — however, our guides below will talk you through the steps to ensure this error doesn’t appear again on your device.
If you can’t update Windows to the latest version because of this error, don’t panic. Such errors can be easily fixed by following our detailed guides below.
Note: You might be required to have access to an administrator account to perform all of the steps described below. If the account you’re currently using doesn’t have administrative permissions, make sure to change this in your settings.
Method 1: Repair corrupted system files
The DISM tool allows you to identify and fix corruption issues with your system by simply running commands in the Command Prompt application. It checks for corruption system-wide and automatically attempts to restore damaged or missing files.
- Press the Windows + R keys on your keyboard. This is going to bring up the Run utility.
- Type in “cmd” and press the Ctrl + Shift + Enter keys on your keyboard. Doing so, you’re launching the Command Prompt with administrative permissions.
- If prompted, click Yes to allow the Command Prompt to make changes on your device.
- Once in the Command Prompt, you need to start the DISM scan which will run and look for issues system-wide. Type in the following command and press Enter to execute it: DISM.exe /Online /Cleanup-image /Scanhealth
- Next, you need to execute a command to fix any issues found on your system. Simply type in the following line and press Enter again:DISM.exe /Online /Cleanup-image /Restorehealth
- Wait for the process to finish. Upon completion, close the Command Prompt window and restart your device. Check if the Windows Update error still comes up now.
Method 2: Run the System File Checker
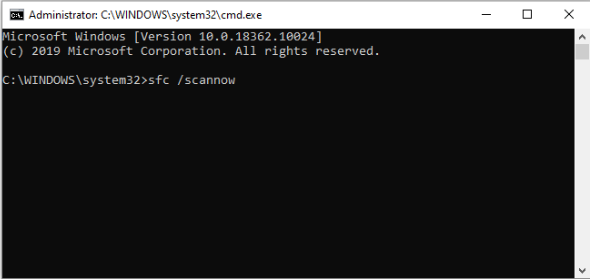
The System File Checker is a tool available in Windows 10 by default. It’s also called an “SFC scan,” and it’s your quickest way to automatically fix corrupted system files and other issues.
Some users have reported that running this scan fixed their issues with Windows Update failing, getting stuck, or not starting.
- Press the Windows + R keys on your keyboard. This is going to bring up the Run utility.
- Type in “cmd” and press the Ctrl + Shift + Enter keys on your keyboard. Doing so, you’re launching the Command Prompt with administrative permissions.
- If prompted, click Yes to allow the Command Prompt to make changes on your device.
- Once in the Command Prompt, type in the following command and press Enter to execute it: sfc /scannow
- Wait for the SFC scan to finish scanning your computer and repairing corrupt files. This may take a long time; ensure that you don’t close the Command Prompt or shut your computer down.
- Restart your device after the scan is complete. Check if you’re able to update Windows after the restart has finished.
Method 3: Restart the Windows Update Service
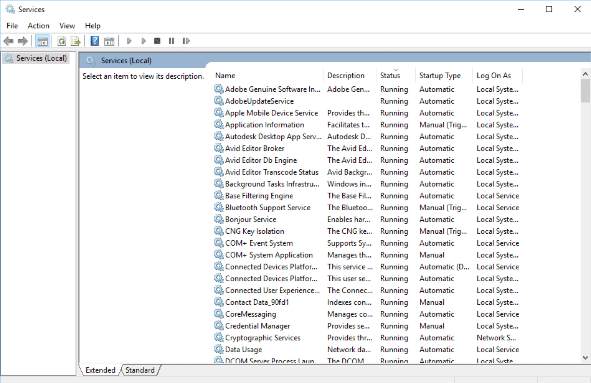
There’s a possibility that your Windows won’t update because the update service isn’t running properly. To check and fix this, simply follow the steps below.
- Press the Windows + R keys on your keyboard. This is going to bring up the Run utility.
- Type in “services.msc” and click the OK button to launch Services. This might take a moment to fully load.
- Scroll down until you find the Windows Update service. Right-click on it and select the “Stop” option.
- Wait for 30 seconds.
- Right-click on the Windows Update service again and select “Start.” This should fully restart the service.
- Attempt performing a Windows update again.
Method 4: Turn on Data Execution Prevention
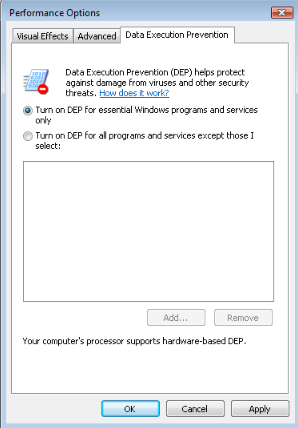
Turning on the Data Execution Prevention (DEP) feature has solved this error code for many Windows users. What this does is limit the ability of other processes to ensure Windows Update doesn’t get interrupted.
- Press the Windows + R keys on your keyboard. This is going to bring up the Run utility.
- Type in “sysdm.cpl” and click the OK button. This will open up a window called System Properties.
- Click on the Advanced tab, then Settings, and Data Execution Protection.
- Select the “Turn on DEP for Essential Windows Programs and Services only” option.
- Click Apply.
- Restart your system and attempt to perform a Windows update again.
Method 5: Use the Windows Update Troubleshooter
Microsoft themselves have issued a designated tool to help fix issues with Windows updates. This tool is free and available for download to anyone, even without a Microsoft Account. All you have to do is simply run the tool and see if it’s able to identify and fix any errors.
- Download the Windows Update Troubleshooter. This download link is directly from Microsoft’s website, which is verified as trustworthy and entirely safe.
- Open the WindowsUpdate.diagcab file you just downloaded by double-clicking on it. This will launch the troubleshooter window.
- Follow the on-screen instructions. If the troubleshooter is able to identify any issues, simply click on them to automatically apply a fix or get more information on your issue.
Note that the Windows Update Troubleshooter is not perfect. Even if it’s unable to find any errors on its own, you should continue with our methods until you find something that works to fix the Windows Update failing error.
Method 6: Manually install the failing update
If all else fails, you can try manually downloading the update that keeps producing the same error on your computer.
- Press the Windows + R keys on your keyboard. This is going to bring up the Run utility.
- Type in “control” and click the OK button. This will open up the Control Panel (not to be confused with Windows 10’s Settings panel.)
- Search for Windows Update in the Control Panel, then click View Update History.
- Copy the number of your update and search it on the internet. You should be able to find an official Microsoft download link that allows you to install the update manually.
We hope that this guide was able to help you troubleshoot the Windows Update Error 80244019 on your Windows system.
If you notice in the future that your system is experiencing similar issues, feel free to return to our article and apply some other fixes. If nothing works, we recommend turning to either Microsoft’s customer support team or looking for an IT specialist in regard to your PC’s health.