Grouping your worksheets allows you to get more functionality out of Excel. You’re essentially linking two sheets into one, making referencing and pulling data between sheets easier. You can also perform tasks on multiple worksheets at the same time, allowing you to be more efficient with your time. This skill essentially improves your excel productivity.

What happens when two or more Excel worksheets are in a group? It’s quite simple. In a group, the changes you make on one worksheet are made in all the other worksheets in the same location. It works best if the worksheets already have identical data structures.
So, let’s get started with learning all the ins and outs of Microsoft Excel worksheet groups.
Group selected worksheets
The guides below highlight the process of making groups out of worksheets you select. This way, other worksheets can stay independent and not have changes replicated in them when you edit another worksheet.
How to group 2 or more worksheets in Excel
Below are the instructions for grouping sheets in Excel for Windows. In this example, we used Excel 2019 — the steps are identical on all earlier releases.
- Open the workbook you want to work with, containing the worksheets you want to group together.
-
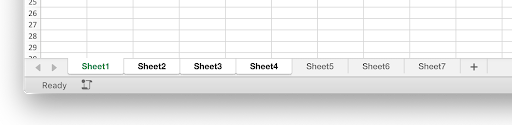
Press and hold down the Ctrl key, and then click on each of the worksheet tabs you want to group.

-
Alternatively, click the first worksheet tab you want to group, press and hold the Shift key, and then click the last worksheet tab to group consecutive worksheets.

- Now, make any change to one of the worksheets in the group. You should notice that this change happens in all of the worksheets, even if you only edited one of them. This is the power of groups in Excel.
Keep in mind that you need to ungroup your worksheets in order to disable the group function. To do this, follow our guides below.
How to group worksheets in Excel for Mac
The grouping process for Excel on macOS is nearly identical to other platforms. It’s a simple, quick way to increase your efficiency if you’re working with multiple sheets in one workbook. Let’s see how to group worksheets in Excel for Mac.
- Open the workbook you want to work with, containing the worksheets you want to group together.
-
Press and hold down the ⌘ (command) key, and then click on each of the worksheet tabs you want to group.

-
Alternatively, click the first worksheet tab you want to group, press and hold the Shift key, and then click the last worksheet tab to group consecutive worksheets.
- Now, make any change to one of the worksheets in the group. You should notice that this change happens in all of the worksheets, even if you only edited one of them.
Keep in mind that you need to ungroup your worksheets in order to disable the group function. To do this, follow our guides below.
How to ungroup worksheets in Excel
If you no longer want to use group functionality, you can easily ungroup the selected worksheets with the methods below. Don’t worry - you can always regroup them in the future!
- Hold the Ctrl key on your keyboard.
- Click on any of the worksheets in your group that you want to ungroup. This allows you to remove individual worksheets, but keep the rest of the group intact.
Continue reading to learn how you can group and ungroup all worksheets at once in Excel.
Group all worksheets
If you don’t want to waste time individually selecting each worksheet, there’s a method to quickly group (and ungroup) all worksheets in a workbook. This makes your workflow more efficient if you need to modify all sheets, remove something from all sheets, or add something to all sheets.
How to group all worksheets in Excel
- Open the workbook you want to work with, containing the worksheets you want to group together.
-
Right-click on any of the already existing sheets, and then choose Select All Sheets from the context menu.

- You should see that all sheets have been selected instantly, making them into a group.
Note: Bear in mind that you won’t be able to browse through your sheets while they’re all in a group. Doing so will instantly ungroup them, and you have to repeat the steps above to re-create the group.
How to ungroup all worksheets in Excel
- Right-click on any sheet that is currently in a group. This can be a group selected individually, or a group made of all worksheets in the document.
-
Select Ungroup Sheets from the context menu.
- All groups should be disabled now.
Alternatively, you may ungroup all worksheets by clicking on any worksheet tab outside the group. This only works if there is a worksheet outside of the group!
Video: How to Group Worksheets in Excel
Final thoughts
If you need any further help with Excel, don’t hesitate to reach out to our customer service team, available 24/7 to assist you. Return to us for more informative articles all related to productivity and modern-day technology!
Would you like to receive promotions, deals, and discounts to get our products for the best price? Don’t forget to subscribe to our newsletter by entering your email address below! Receive the latest technology news in your inbox and be the first to read our tips to become more productive.
You may also like
» How to Split Column in Excel
» How To Add and Remove Leading Zeros in Excel
» 14 Excel Tricks That Will Impress Your Boss