
Most of the time, applications that fulfill simple tasks are a risk to pick up. Usually, features are either non-functional, paid only or don't work as good as promised in the product description. A great example of this is applications used for taking personal notes. When writing down ideas, keeping track of tasks and planning events, you need an application that can fully support your needs and provide a good solution for organized note keeping. Microsoft OneNote is the perfect example of such an app.
For a long time, OneNote was a paid part of the Microsoft Office suite, however, it’s now a free-to-use application after Microsoft discontinued the desktop version. In recent times, OneNote became available as a Windows 10 app which comes pre-installed on your computer. Earlier versions such as OneNote 2016 are still available to download, but Microsoft isn't developing any more updates and mainstream support is expected to expire in 2020.
As this change is still quite new in the tech world, we’ve compiled a useful cheat sheet to use when working with OneNote for Windows 10. If you’re using an earlier version of OneNote, our tips and tricks might not be as useful - things have been heavily changed in this release, resulting in a lot of new opportunities and capabilities.
- Tip: Our cheat sheet is aimed towards new users who want to know how to get up and running with OneNote for Windows 10. We’ll cover the basics and a few useful tips for more experienced users who might have overlooked some parts of the software. If you know anyone that’s new to OneNote for Windows 10, share our article with them to help them learn faster and better!
An introduction to the Ribbon interface
Similarly to all other Microsoft Office applications, OneNote features the beloved Ribbon interface to handle navigation. The Ribbon has been a major part of Office suite applications for many years now, as it was first introduced back in Office 2007. It was designed with easier navigation in mind and put an end to the use of old-fashioned menus with multiple tiers of sub-menus.
Though OneNote’s Ribbon doesn’t feature as many tabs and tools as other Office apps, you still get simpler navigation with a visual interface that helps you locate the tools you know and love quickly. The Ribbon is your main and only way of navigating in OneNote, opening up the opportunities to format text, insert elements, access digital inking and change your view mode.


Unlike earlier OneNote releases, the Ribbon in OneNote for Windows 10 has a flatter, more appealing design to allow for less clutter on your screen distracting you from your notes. This minimalist interface gives OneNote a modern and stylish look that sets it apart from competitors.
Get started by creating notebooks, sections, and pages
When you open OneNote, you’ll notice that there’s a lot of options for the organization of your notes. Before we jump into the contents, it’s important to understand the multiple tiers of storage you have in OneNote.
Needless to say, you need a Microsoft account to be able to utilize OneNote to its fullest potential. This is the first tier in the hierarchy - every Microsoft account can have multiple notebooks, sections, and pages to store notes inside. This shows very well in the way OneNote is laid out on your screen.
Microsoft OneNote Cheat Sheat-Notebooks
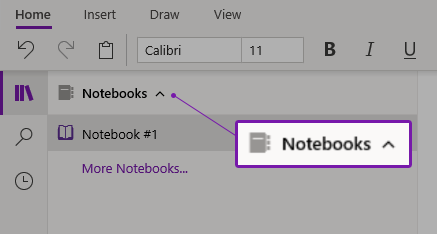
Your notebooks hold all the pages containing notes. A notebook is broken down into sections, which you can enter notes into on different pages. Clicking on the name of your currently active notebook will show you all available notebooks. We recommend keeping different notebooks for different parts of your life. For example, you can have an entire notebook dedicated to studies, work, and personal life.
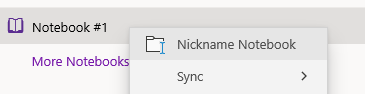
- Tip: You can rename a notebook by right-clicking on it and selecting the Nickname notebook option. Simply type in the new name and press enter!
Sections
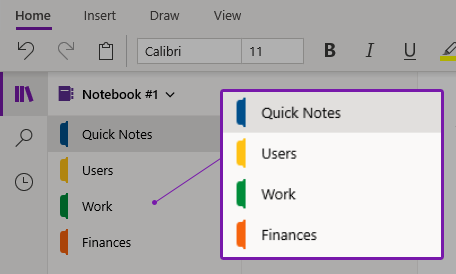
As mentioned above, each workbook is separated into different sections. By default, you have the Quick Notes section created for you, but you can always make new sections by pressing the Add section button on the bottom of the window. Alternatively, you can right-click on an empty space in the sections column and choose the New section or New section group to further organize your sections.
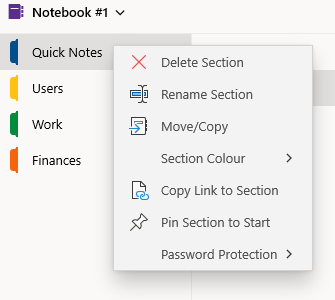
Each section has many available options for customization. When you right-click on a section, you can see these options right away. You can rename them, assign unique colors, move or copy the section and even password protect it. There’s also an option to pin a section to your Start menu tiles. This is also where you can delete sections when you no longer need them; just be careful! When you delete a section, all pages in it will be erased too.
Pages
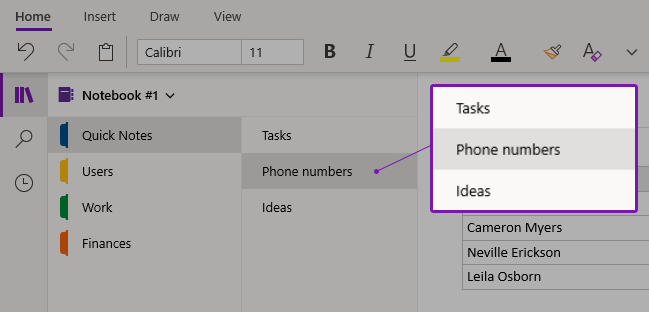
Your pages are essentially your notes. Similarly to sections, you can create new pages by pressing the Add page button on the bottom of the window, or right-click on an empty space in the pages column and click the New page option. Your pages can be renamed, copied and deleted at all times by right-clicking on them from the pages column.

When you start typing a note, you’ll notice that it appears in a gray frame. As you type more, the frame automatically adjusts its width and height to your text, but you can always modify it manually by dragging its sides. This frame is only visible when you’re typing a note or hovering your mouse over one, it won’t be visible otherwise.

This frame interface allows you to easily get around your notes and create layouts that are dynamic and interactive. By clicking on the three dots in the top-middle section of the frame, you can freely drag the notes contained within it, similarly to how you could re-locate sticky notes on a planning board.
All about formatting

When you select the Home tab from the Ribbon, you can see some handy options to format the text in your notes. Just select the text you want to modify and click on any of the icons to change the font itself, the text size, color, make text bold, italic, underline or even highlight text. You can also clear formatting with the click of a button. Simply hover over the names of the icons to see what they do. Don’t be afraid to click on them either - you can always undo.

Insert images, videos, and other elements
By clicking on the Insert tab from the Ribbon, you can see many options to insert different items to make your notes more efficient and dynamic. Here is a rundown on the three main things you’re most likely to be using when working with OneNote:
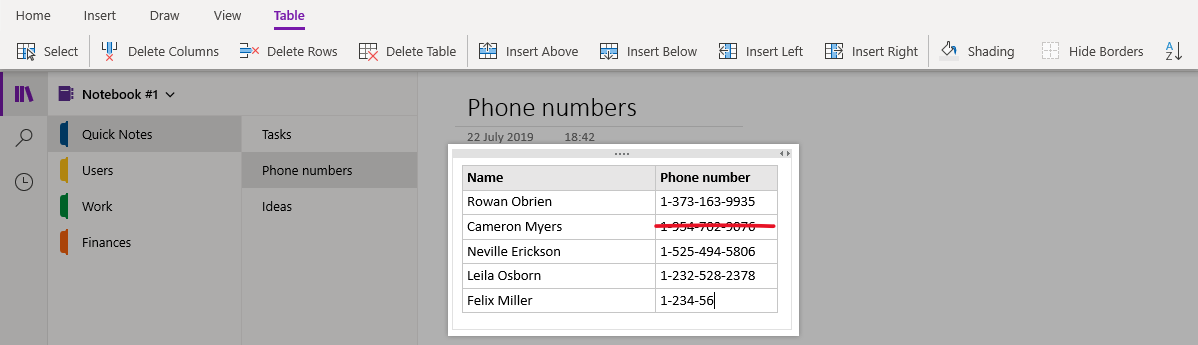
How to Insert Tables in OneNote
You can insert tables, mainly used for keeping track of data such as contact information. Once you insert a table to your page, a new Table tab will appear in the ribbon containing customization options. Each table can be adjusted and modified, you can insert new rows and even sort the entries in your table. With the same text formatting tools mentioned above, you can let your creativity flow and make your tables look appealing. You can also change the background of each cell and even make the borders disappear.
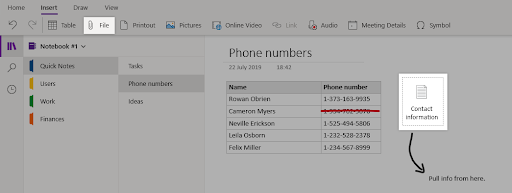
How to Insert Files in OneNote
Next on the list is inserting a file. This file can be basically anything stored locally on your computer or optionally inside your OneDrive. Once you insert a file, OneNote will essentially create a shortcut to open the file from within your notes. You can also insert PDF files specifically by clicking on the Printout icon instead.
How to Insert Images in OneNote
Now comes Pictures. You can insert virtually any image into your OneNote pages. Browse your local files, take a new picture with your camera or find a suitable image online, all from within OneNote. Once you’ve inserted an image, a new Image tab will appear in your Ribbon. Use the tools to resize, rotate, or flip images easily. You can also set an image as the background of your page.
How to Insert Videos in OneNote
You have the option to insert online videos from the internet right into your pages. Simply grab the link of the video you’d like to see on your page, click on the Online Video button and enjoy watching!
- Tip: OneNote currently supports a huge number of sites when it comes to inserting videos. Here’s the list of supported websites

Digital Inking
We all have moments when we'd rather just write something over the already existing digital page instead of using formatting and creating unnecessary notes. You can enhance your pages by using the Draw tab in the Ribbon, which lets you digitally ink on top of the content in your notes. OneNote comes with many customizable pens, pencils, and highlighters to make sure everyone finds what they're looking for.
- Tip: When you’re done inking, click on the Select objects or Type text button in the ribbon located next to the pen set. This allows you to switch between taking notes, moving frames and inking.

Search in your notes
Even though OneNote gives you the freedom to properly organize your notes, there are always times when your memory fails you and you can’t find something you’re looking for. This is why Microsoft included a search feature to browse through your notes and locate things quickly. To access the search feature, simply click on the magnifying glass icon on the left side of your screen, then enter what you’re looking for.
You can either search for a word or search for your tags - such as items marked as an important entry, a question, or a “To Do” task. Once the search bar finds a result, it’ll display which page, notebook and section returned a matching result and will highlight the word or tag in the page.
