Stable Diffusion is a recently developed text-to-image model that utilizes deep learning to generate high-quality images from textual descriptions. This new model has become increasingly popular due to its ability to generate realistic images from even the vaguest of textual inputs.
In today's fast-paced world, it's important to stay ahead of the curve, and one way to do that is by mastering the ultimate power of Stable Diffusion. Discover the ultimate power of Stable Diffusion - its advantages, how it can improve you and your business, and cost-free ways to get started.
In this article, we'll guide you through all that's necessary to successfully run Stable Diffusion locally or in the cloud, for free.
Table of Contents
- What is Stable Diffusion?
- How is Stable Diffusion Used?
- Getting Started with Stable Diffusion
- Local, Online, or Cloud? How to Decide
- How to Run Stable Diffusion for Free
- Use Automatc1111’s Web UI
- Use Google Colab
- Use Midjourney
- Use Leonardo AI
- Use RunDiffusion
- Frequently Asked Questions
What is Stable Diffusion?
Stable Diffusion is a deep learning model that utilizes a technique called diffusion processes to generate images from textual descriptions. To put it simply, when you give Stable Diffusion a prompt (such as "a beautiful sunset") the model is trained to generate a realistic image of something that matches your description.

The diffusion process involves adding noise to the input image and then gradually reducing the noise over time to produce a final image. This process results in images that are more detailed and realistic than traditional deep-learning models.
Stable Diffusion is a significant improvement over previous text-to-image models because it can handle complex and abstract textual descriptions. It does this by utilizing a new approach called stable training, which enables the model to generate high-quality images that are consistent with the textual input.
How is Stable Diffusion Used?
Stable Diffusion has a wide range of applications, including e-commerce, advertising, and video games. For example, e-commerce websites can use Stable Diffusion to generate images of products based on textual descriptions, enabling them to showcase products that may not have real-life photos available.
Ad agencies can use Stable Diffusion to create unique and eye-catching visuals for their campaigns. Similarly, game developers can use the model to generate game assets like characters and environments from textual descriptions.
Stability AI, the revolutionary company behind Stable Diffusion, has released this model under a permissive license. Users have access to generate images for any purpose – commercial or non-commercial – thanks to Stability AI's policy on commercial use. You can use Stable Diffusion with confidence and create stunning visuals whenever you need them!
Getting Started with Stable Diffusion
Stable Diffusion can be run in different ways, depending on your needs and resources. The two most common ways to run Stable Diffusion are through cloud-based services or locally on your machine.
Using Stable Diffusion Locally
Running Stable Diffusion locally requires installing and configuring the necessary libraries and dependencies. When used locally, beginners can greatly benefit from installing a GUI (Graphing User Interface) that simplifies the configuration process and makes it easier to manage and run experiments.
The minimum recommended VRAM (Video Random Access Memory) for running the model locally is 4GB, which may be too slow for some users. If you do have access to a machine with over 4GB of VRAM, then it is likely a better option to run Stable Diffusion locally. This way, you will save on costs and have more control over your image generations.
When you run Stable Diffusion on your local computer, installing new models, extensions, hypernetworks and training your own models becomes a breeze.
One disadvantage you'll run into with a minimum setup is speed. While a device with 4GB or less VRAM can run Stable Diffusion, even small generations can take up to several minutes. If you're in a hurry for your results and don't have the hardware to spare, then cloud services are likely your best bet.
Using Stable Diffusion in the Cloud
Cloud-based services offer a convenient way to run Stable Diffusion without requiring any significant hardware investment. Similar to running the model locally, you have many options to choose from when going the cloud route. Services like Google Colab, Runpod, and RunDiffusion provide users with an interactive environment for running experiments and generating images.
Cloud services allow you to take advantage of powerful hardware, such as the latest NVIDIA Tesla GPUs, NVIDIA 3090s, and AMD Ryzen Threadripper. With this type of hardware, you can expect to generate images with Stable Diffusion at much faster speeds than running it locally.
However, cloud services come with their own set of costs and limitations. For example, most cloud providers don't have a way to upload your custom Stable Diffusion models and other advanced models such as custom LoRa and VAE. If your generations heavily rely on your fine-tuned models, some cloud providers may not have the support you need.
Using Stable Diffusion Online
Websites like Clipdrop, HappyAccidents, and Leonardo.ai provide users with an easy-to-use platform for generating images based on text input. To make image generation accessible to everyone, some online services offer "Run Now" functions for a variety of models.
These platforms can be useful for those who don't have the time or resources necessary to learn and configure Stable Diffusion by themselves. However, the results of these online services won't be as good as running them locally or in the cloud. Online services often use obsolescent models and provide limited options for customization, if any.
Most online services offer free credits, or a limited amount of free generations before requiring a subscription or credit purchase. This makes it easy to hop in and generate AI images without having to spend any money upfront.
Local, Online, or Cloud? How to Decide
Whichever option you choose, it is important to remember that the better your hardware, the faster the model will run and the more detailed your results will be. You should also consider the limitations and terms of cloud providers, as they can vary greatly.
The easiest way to decide whether you should run Stable Diffusion locally or in the cloud is simply by looking at your hardware. The minimum recommended VRAM (Video Random Access Memory) for running the model locally is 4GB, which may be too slow for some users.
In conclusion, if you're looking for a quick and easy way to start using Stable Diffusion, cloud services may be the right choice for you. But if you're willing to invest in hardware, running Stable Diffusion locally is always an option that offers more power and control over your image generations.
How to Run Stable Diffusion for Free
After deciding which route to take, you may be wondering how to start using Stable Diffusion for free. Fortunately, there are a few ways to do so. We'll explore some options for beginners to get started with the model.
1. Use Automatc1111’s Web UI
Things You'll Need
- A Windows operating system
- 4GB or more VRAM (Recommended)
- 20 GB harddisk space
Running Stable Diffusion without a user interface is quite difficult for beginners. While many different user interfaces are available, Automatc1111 has created a user-friendly web UI that allows you to easily generate images with Stable Diffusion, manage your models, and even train your own models.
While many other interfaces exist, such as Gradio and Invoke.ai, the Automatic1111 Web UI remains on top with extensive features, stability, and ease of use. In this section, we'll show you how to install it on your computer locally and get started with generating images.
-
Open your web browser and go to the Python download page. Scroll down to the "Files" section at the bottom of the page and find "Windows Installer (64-bit)." Click on it once to start downloading.

-
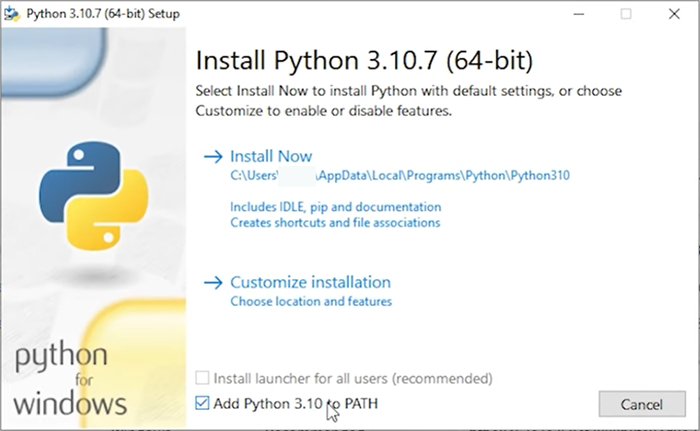
Once the download is complete, open the installer. You should see a pop-up window with a few options. Make sure to enable the "Add Python 3.10 to PATH" option. Then, click the "Install Now" button.
-
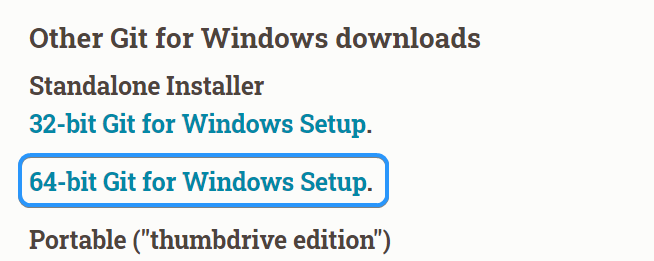
Open your web browser again and navigate to the Git for Windows download page. Under the "Standalone Installer" category, click on the "64-bit Git for Windows Setup" link to start downloading.
- Once the download is complete, open the installer. You may need a local administrator account or the password to one in order to install Git.
- Follow the prompts to install Git. When you reach the "Select Components" screen, make sure to enable every component by checking the boxes next to them. Then, click "Next" to continue.
-
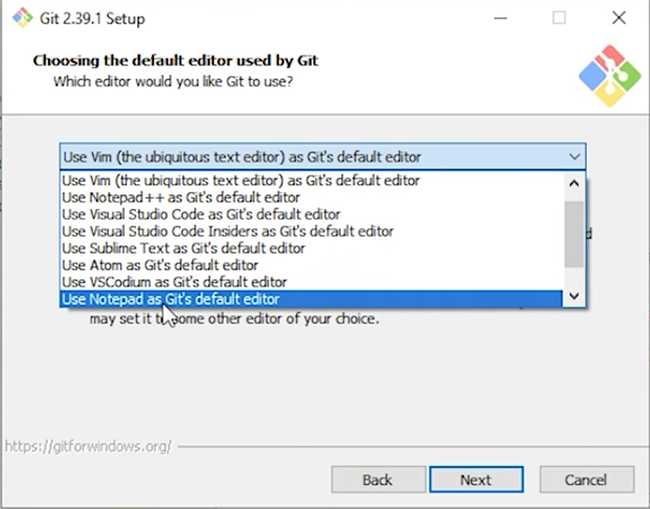
When you reach the "Choosing the default editor used by Git" page, select "Use Notepad as Git's default editor" from the drop-down menu.
- Click "Next" to continue with the default settings for the rest of the installation. Finally, click "Install" to begin installing Git.
- Create a new folder somewhere on your computer to store Stable Diffusion in. Note that you should pick a drive with ample storage space available, as the model requires at least 20GB of storage.
-
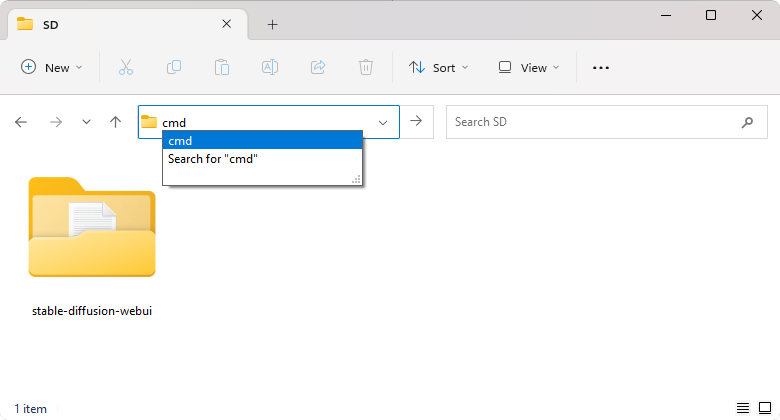
Open the folder you created and click on the File Explorer address bar. Replace the folder path with “cmd” and press Enter. You’ll see a Command Prompt window show up on the screen with the folder path shown, as seen in the image below.
-
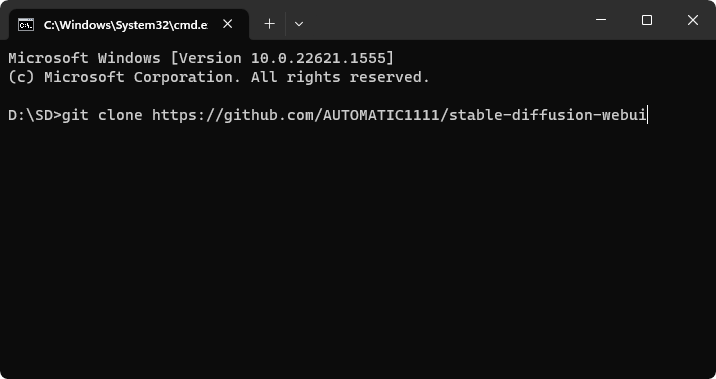
Input the following command, and press the Enter key on your keyboard to execute it: git clone https://github.com/AUTOMATIC1111/stable-diffusion-webui
-
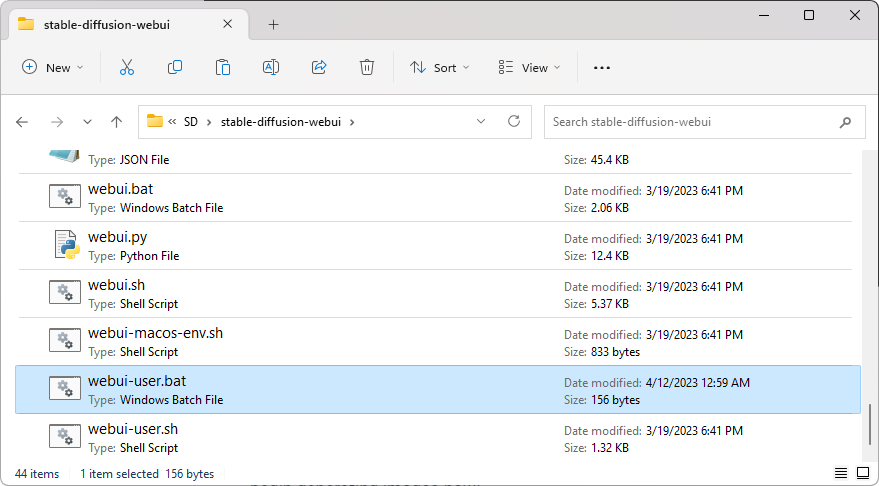
When the download is complete, open your Stable Diffusion folder, open the “stable-diffusion-webui” folder, and double-click on the “webui-user.bat” file.
-
Wait for the terminal to install all necessary files. This may take up to 20-30 minutes, and your computer may become unresponsive at times. You’ll know that the process is done when you see the “Running on local URL” text show up.
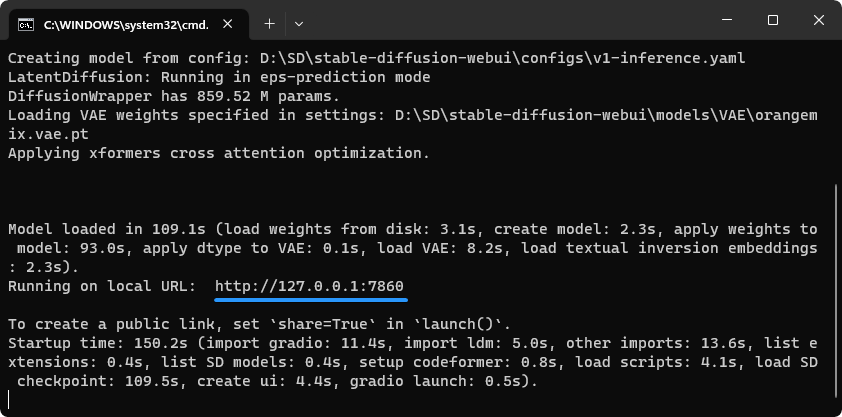
- Copy the local URL and place it in your web browser, then press Enter. You can begin generating images now!
Make sure to keep the terminal running in order to generate images. If you close the terminal, Stable Diffusion will stop and you’ll have to restart the model using the “webui-user.bat” file.
2. Use Google Colab
Things You'll Need
- A web browser
- A Google account
- A Google Colab notebook
Google Colab is a free online platform that allows users to write and execute code from a browser. By utilizing a Colab notebook, you'll be able to run Stable Diffusion on any device, including a smartphone, tablet, and of course, your computer. The best thing about Google Colab is that it's entirely free to use until you reach a 12-hour usage limit.
In addition, it provides access to powerful hardware, such as NVIDIA T4 Tensor Core GPUs, which are ideal for running Stable Diffusion models.
- Find a Google Colab notebook with the features you want to use. We recommend using the TheLastBen Fast Stable Diffusion AUTOMATIC1111 notebook. To launch it, click on “AUTOMATIC1111” from the available options on the GitHub page.
- Make sure you’re signed in with a Google account that has access to Google Colab. If you’ve exhausted your 12 hours of free use, switch to a different account.
-
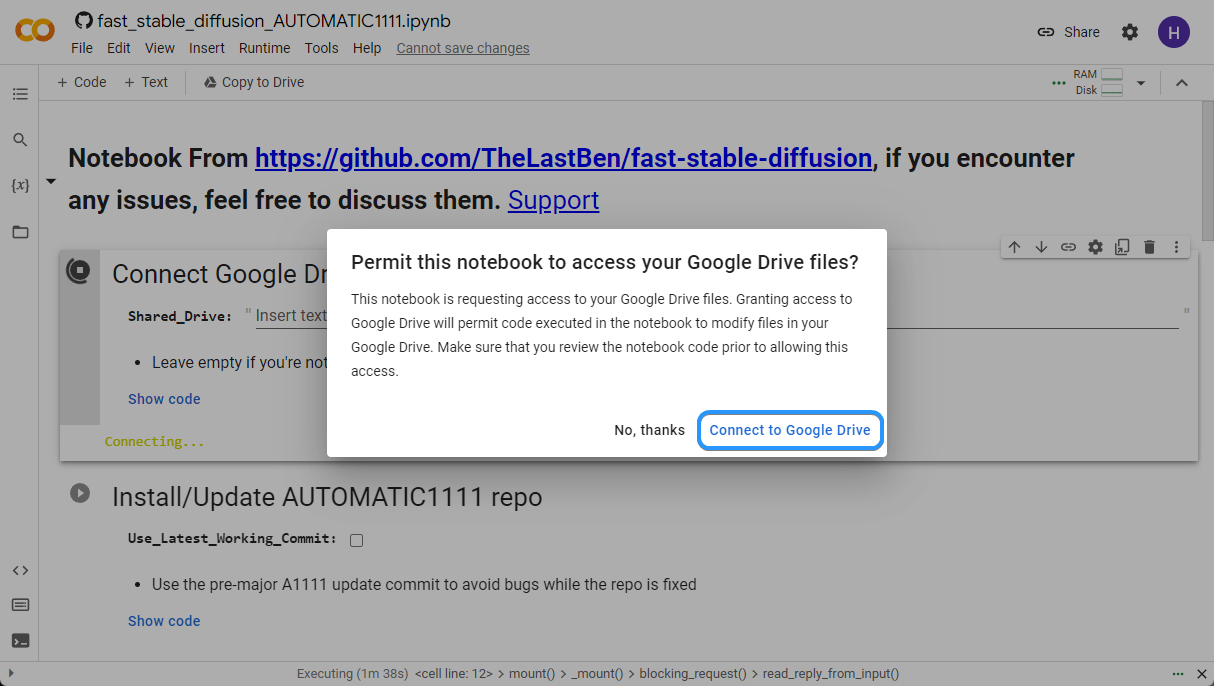
Run the first cell to connect your Google Drive account. When prompted, click “Run anyway” to allow the notebook to pull data from GitHub.
-
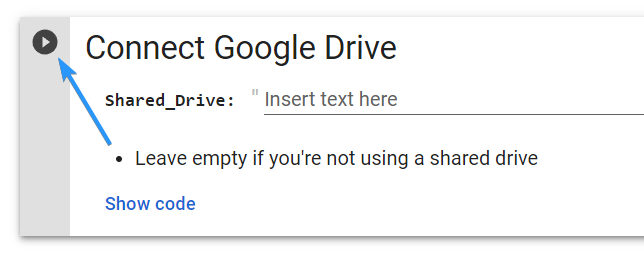
Click “Connect to Google Drive” and use the pop-up window to connect your account. Make sure to grant all the necessary Google Drive permissions.
-
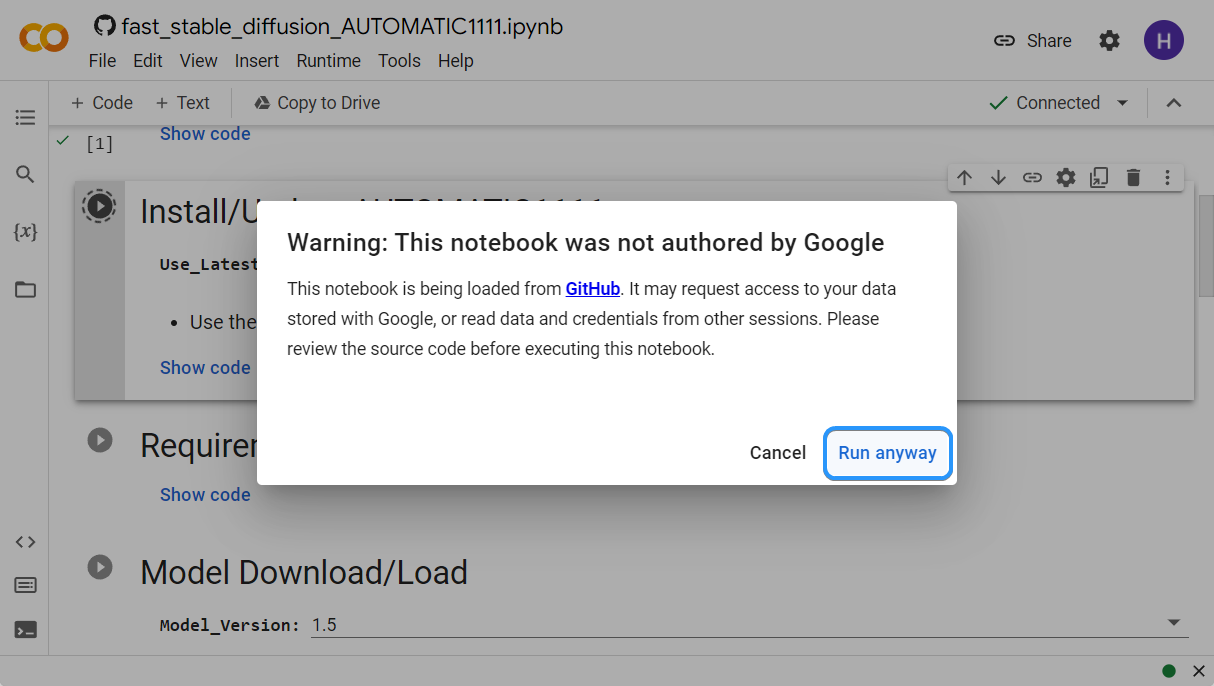
You’ll see a green checkmark next to the cell when it finishes running. Run the next cell to install the AUTOMATIC1111 repo on your Google Colab. Click “Run anyway” when prompted, and wait for the cell to complete.
-
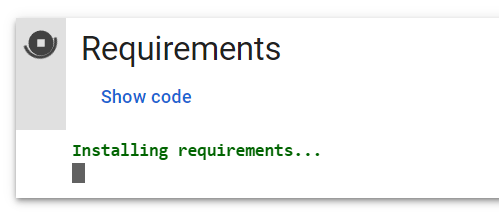
Run the “Requirements” cell and wait for it to install the necessary requirements before proceeding.
-
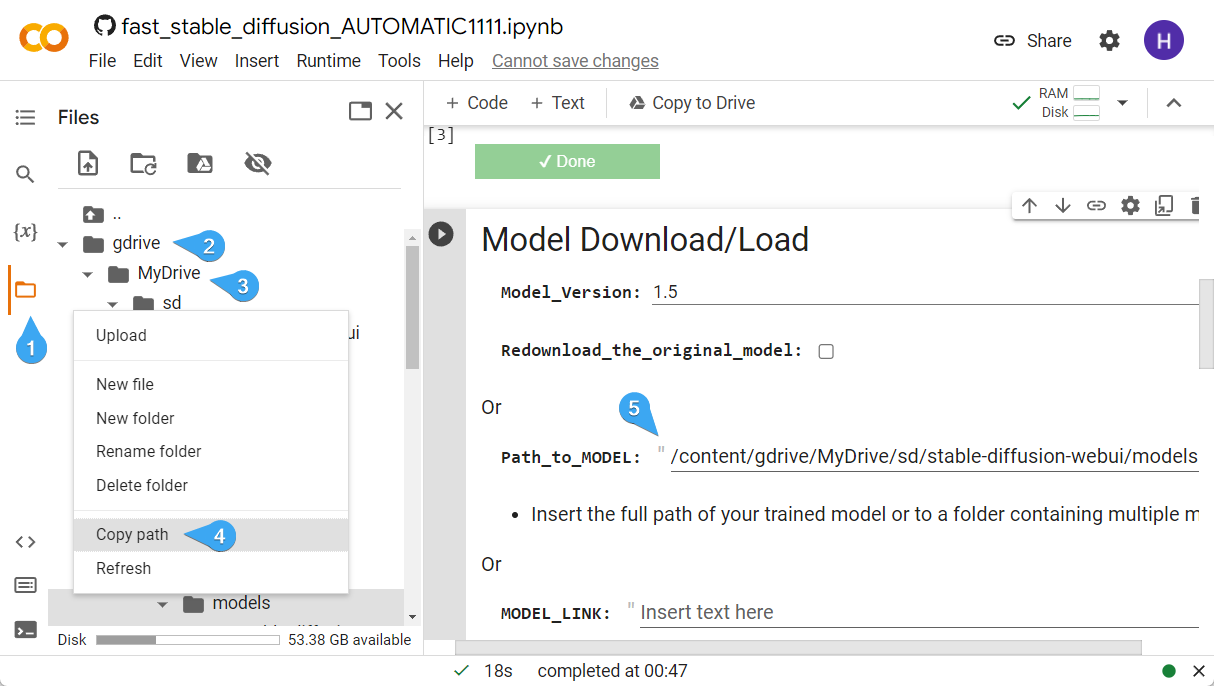
In the next cell, you have 3 different options for importing a model:
-
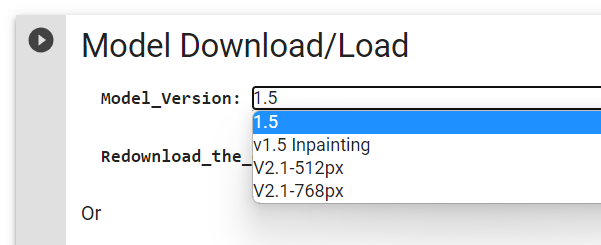
Model_Version: Select either the Stable Diffusion 1.5 or Stable Diffusion 2.1 models. These are the original models with no modification or training.
-
Path_to_MODEL: Input the Google Drive path to your model folder in the second field to import them all at once. Get the correct path by navigating to Files > gdrive, right-clicking on the model folder, and clicking "Copy path."
-
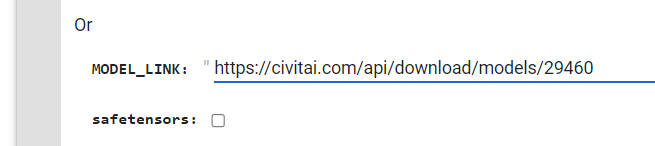
MODEL_LINK: Paste a direct link to your desired model, from websites such as Civitai or Hugging Face.
-
Model_Version: Select either the Stable Diffusion 1.5 or Stable Diffusion 2.1 models. These are the original models with no modification or training.
- After either selecting your model or inputting the correct source, run the cell and wait for it to download and import the model(s).
-
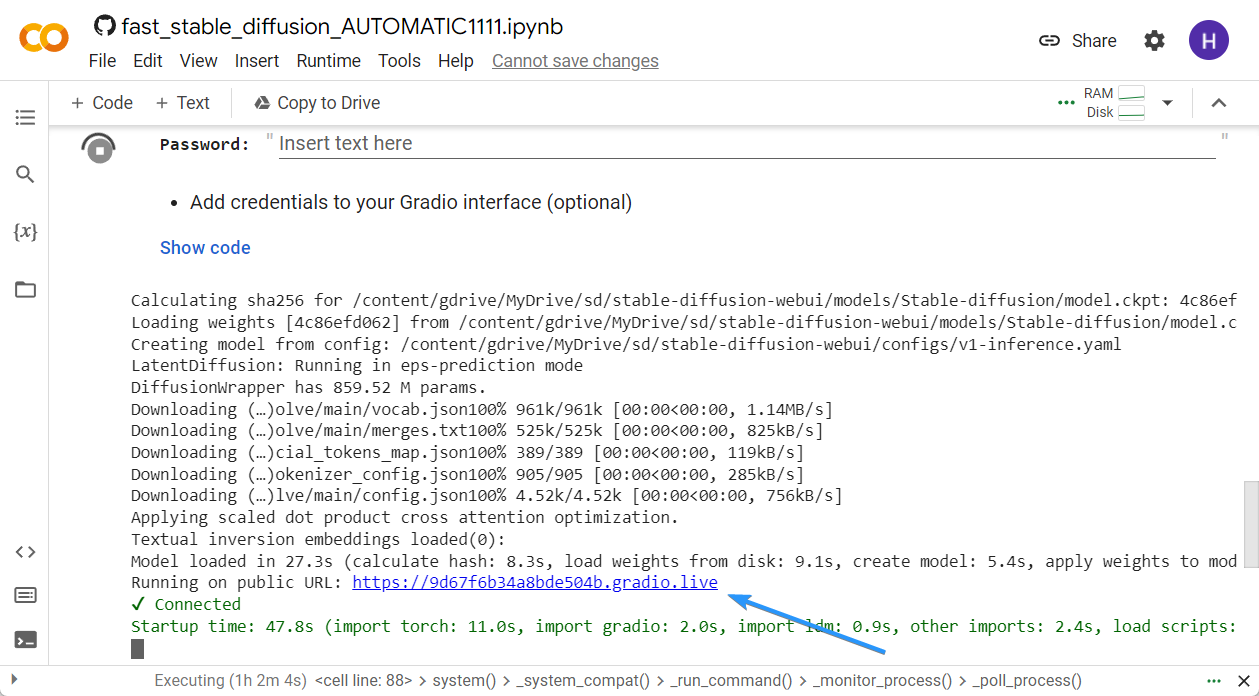
Skip to the “Start Stable-Diffusion” cell and run it. The first setup may take several minutes. You’ll see a link to the finished interface; click on it and start generating your images!
3. Use Midjourney
Things You'll Need
- Internet access
- A Discord account
Midjourney is a platform built on the foundation of Stable Diffusion. The service can generate images based on natural language descriptions, also known as "prompts." It was created by a San Francisco-based independent research lab called Midjourney, Inc. The service is similar to other AI image generation tools like OpenAI's DALL-E and Stable Diffusion.
To access Midjourney, users can submit a natural language description of the image they wish to generate in Discord bot commands. The corporation continually works on bettering its algorithms and unveils up-to-date versions of its models every few months.
- First, create a Discord account if you don’t already have one. After making an account, you can access Discord in your browser, download the desktop client, or install the app.
-
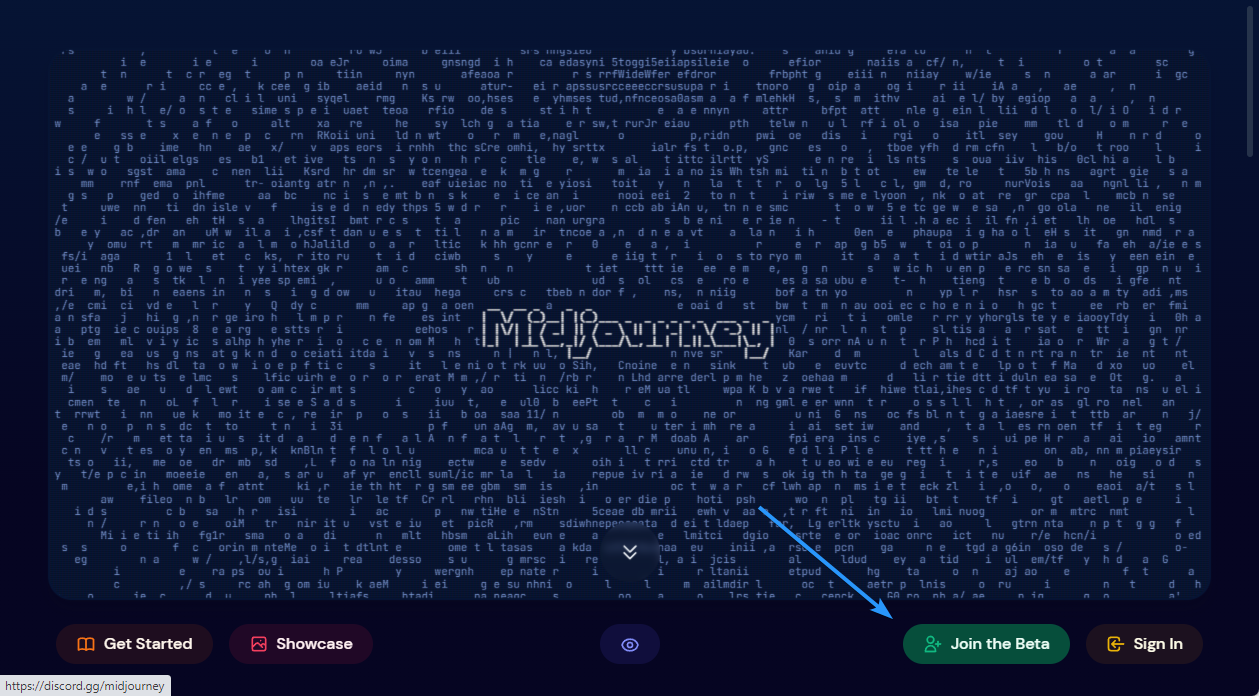
Go to the Midjourney website and click “Join the beta” button.
-
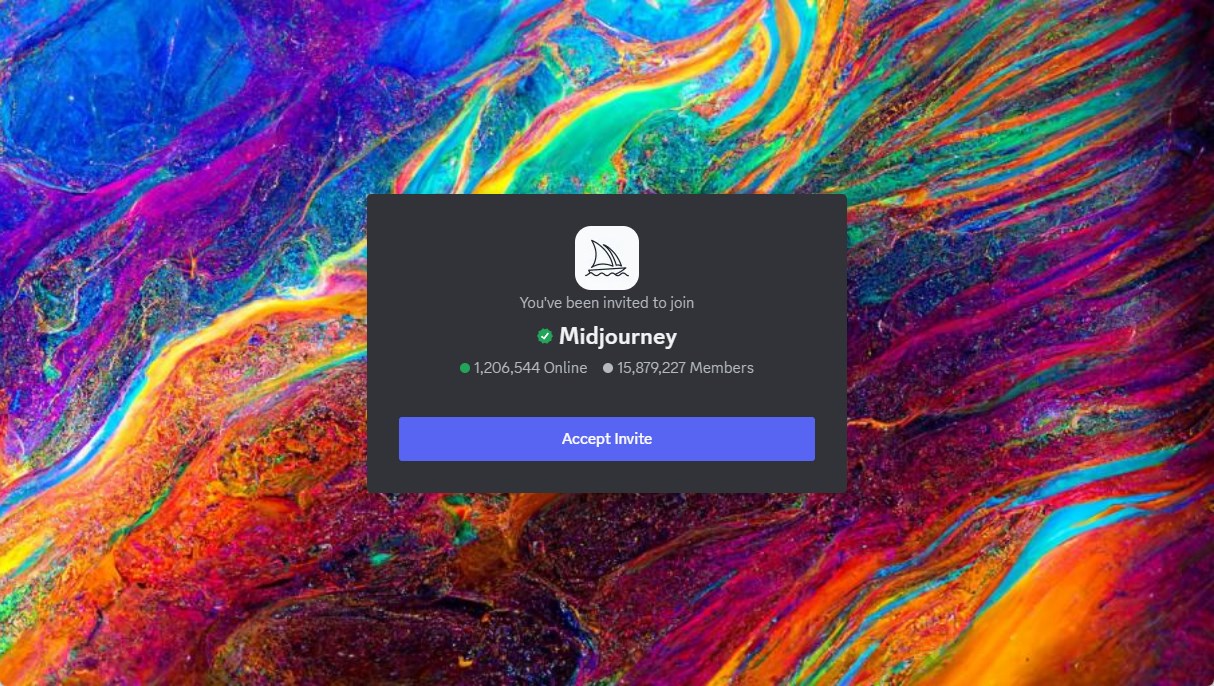
Click the “Accept Invite” button to join the Midjourney Discord server. This is where you’ll be generating images.
-
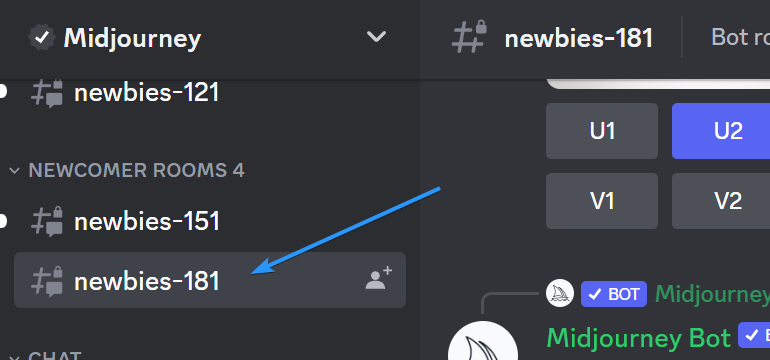
After successfully joining the server, use the sidebar and select one of the Newcomer Rooms available to use, such as “newbies-181.”
-
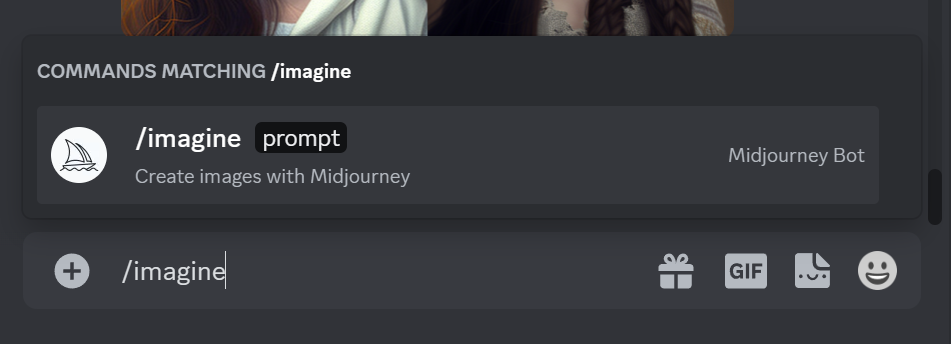
Type “/imagine” in the chat box and select the command. This will allow you to type in your prompt.
- Wait for the Midnourney Bot to generate your image according to the prompt. You’ll get 4 variations to start with, and you can generate more or upscale any you like to a higher resolution using the appropriate buttons.
4. Use Leonardo AI
Things You'll Need
- Internet access
- A whitelisted account
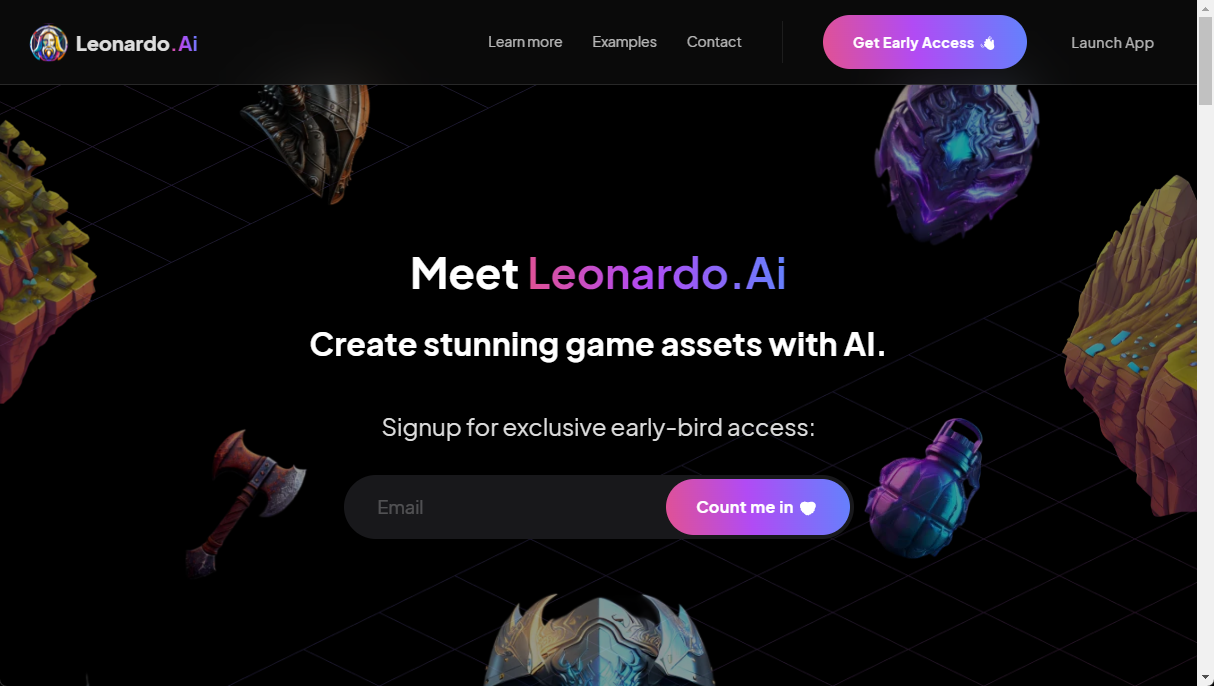
Leonardo AI provides general or fine-tuned models, so you can easily produce various types of art assets ready for production. By training your own AI model in a few simple steps, you can generate thousands of variations and alterations of your training data. You can continuously make changes until you are satisfied with the final outcome.
At the time of writing, Leonardo AI is in early access, meaning that you need to sign up to gain access. New testers are accepted in various intervals, with the average waiting time ranging anywhere from 24 hours to a week.
-
Open the Leonardo AI website in any browser of your choice, and sign up with your e-mail address. If you already have a whitelisted email, click “Launch App.”
-
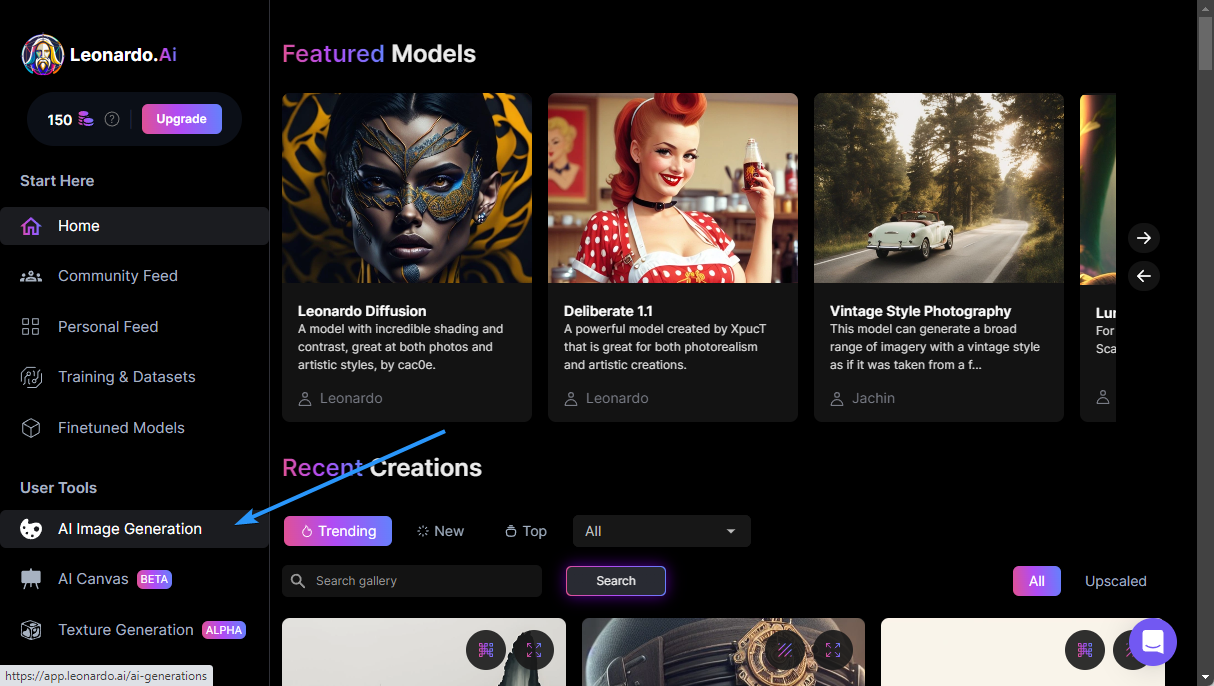
Sign in to your account and click “AI Image Generation” in the User Tools menu, which you can find in the sidebar.
-
Type in your prompt, and select “Stable Diffusion 1.5” or “Stable Diffusion 2.1” from the drop-down menu. Alternatively, you can try another model or even import a custom model.
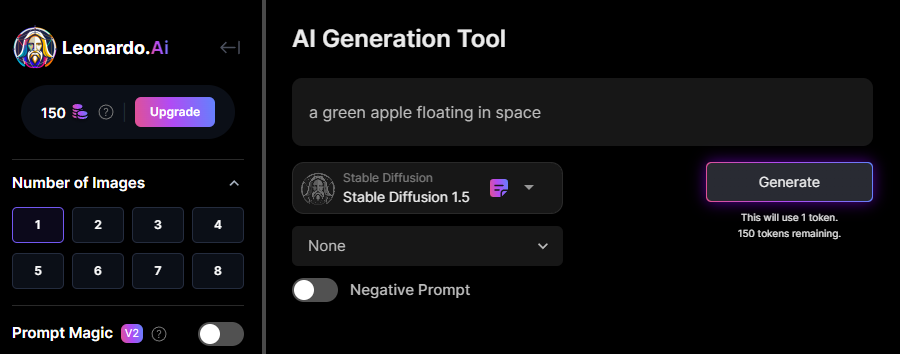
- Customize your image generation settings using the sidebar. When you’re ready, click the “Generate” button.
5. Use RunDiffusion
Things You'll Need
- A RunDiffusion account
- A web browser
- Internet access
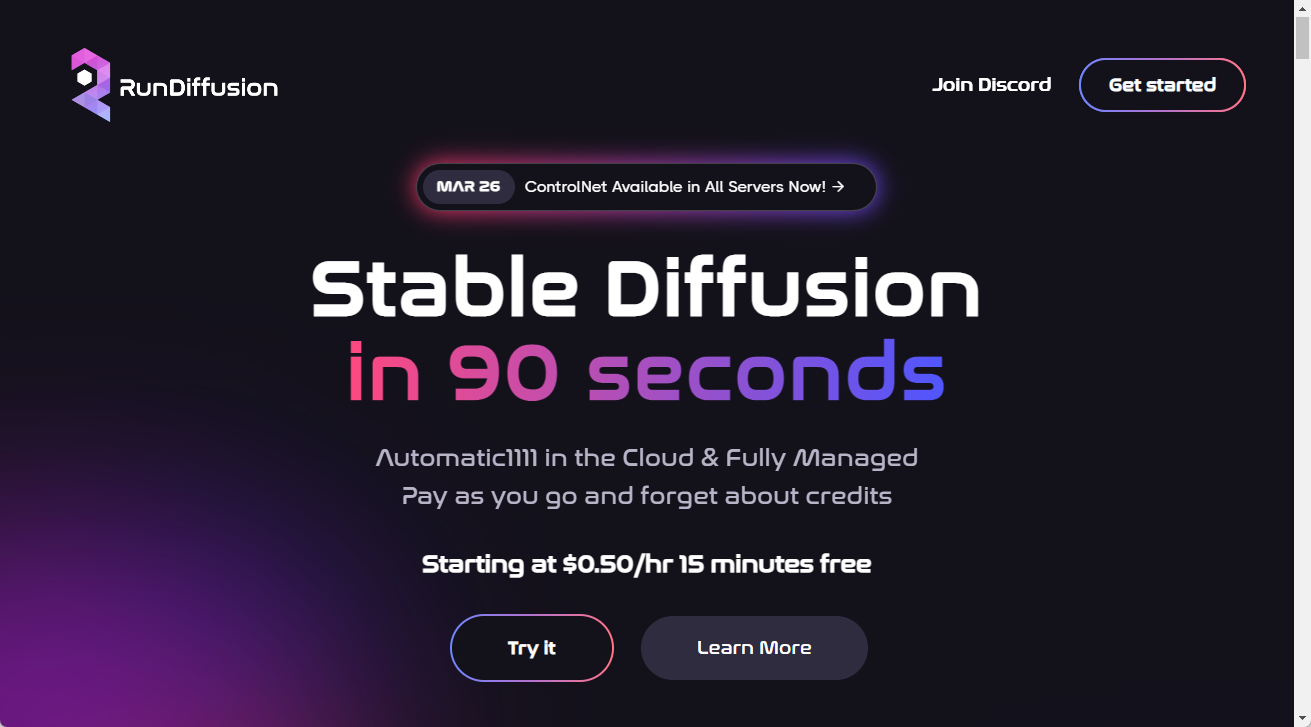
Another easy way to generate AI images is by using RunDiffusion. This cloud service allows you to run the Automatic1111 web UI on a powerful computer capable of generating beautiful images in seconds. While RunDiffusion is a paid service in the long run, they allow a 15-minute free trial to all new users.
Generate to your heart's content by taking advantage of this amazing deal and get your hands on the Automatic1111 web UI with RunDiffusion. It's never been easier to generate images with ease and speed.
-
Open RunDiffusion in any web browser of your choice and click on the “Try it” button.
-
Sign up for an account and verify your email address. After verifying your address, you’ll get $0.13 worth of credits to spend on generating images. This gives you 15 minutes to spend on RunDiffusion’s SM - Auto1111 - SD v1.5 computer.
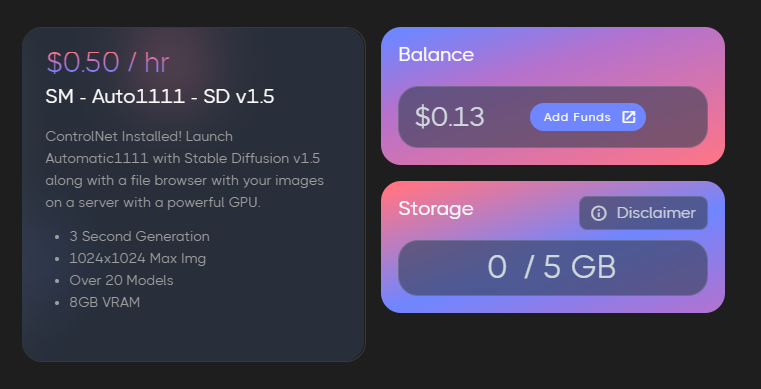
- Click the “Launch” button and wait for the system to boot up. You’ll see the Automatic1111 web UI ready to use in around 90 seconds.
FAQ
Is Stable Diffusion free?
Yes, using Stable Diffusion is free. Some cloud services and services that provide a user interface may however charge money.
Is Stable Diffusion open-source?
Yes, Stable Diffusion is the open-source version of the Latent Diffusion architecture that removes random Gaussian noise in lower dimensions to obtain an image or sample.
Is Stable Diffusion free for commercial use?
Stable Diffusion from Stability AI comes with a permissive license, allowing users to create images for both commercial and non-commercial use as long as the user adheres to Stability AI's policies on commercial usage.
Is Stable Diffusion completely offline?
Absolutely! Stable Diffusion AI is perfect for offline use, as it does not require an internet connection to function. You can easily store the synthetic data in your local environment and train your artificial intelligence models - all without having access to online networks.
Does Stable Diffusion need GPU?
Generally speaking, yes. At least 4GB of VRAM is essential for using Stable Diffusion. However, optimized versions and online services offer a GPU-free approach for users with fewer resources.
Conclusion
We hope that this guide gave you insight into how to use Stable Diffusion for your own AI image generation projects. This new deep learning, the text-to-image model is gaining popularity in the industry due to its ability to generate high-quality images with minimal effort.
By using services like Midjourney and Leonardo AI, or running it on RunDiffusion’s cloud computers, you can easily get started with Stable Diffusion and create beautiful art assets of any kind.
Whether you’re a hobbyist or a professional, we encourage you to give Stable Diffusion a try — you won’t be disappointed!
One More Thing
We’re glad you’ve read this article. :) Thank you for reading.
If you have a second, please share this article on your socials; someone else may benefit too.
Subscribe to our newsletter and be the first to read our future articles, reviews, and blog post right from your inbox. We also offer deals, promotions, and updates on our products and share them via email. You won’t miss one.