


Excel Auto Format is a powerful feature that enables you to quickly format your data in Microsoft Excel. With just a few clicks, you can transform your dataset into a visually appealing and professional-looking worksheet.
Read on to discover how Excel Auto Format can revolutionize your data formatting experience and create impressive worksheets that make a lasting impact. Let's delve into the world of Excel Auto Format and unlock its hidden potential for your data manipulation needs.
Table of Contents
- Where is the AutoFormat in Excel?
- 7 Easy Steps to Unhide the AutoFormat Option
- Removing the Formatting from the Dataset
- Limitations of AutoFormat Option in Excel
- FAQs
- Final Thoughts
Where is the AutoFormat in Excel?
If you can't locate the AutoFormat option in Excel, it may not be visible in the ribbon or the Quick Access Toolbar (QAT) by default. However, you can manually add it to the QAT for easy access. Here are the steps to add the AutoFormat option to the QAT:
-
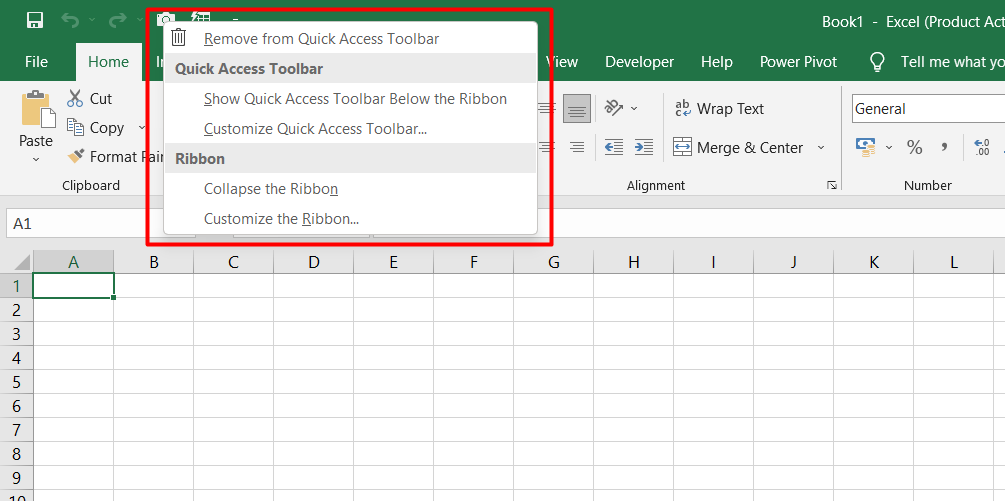
Right-click on any existing icon in the QAT: Find any icon in the Quick Access Toolbar (QAT) and right-click on it. This will open a contextual menu.
-
Select "Customize the Quick Access Toolbar" option: From the contextual menu, choose the "Customize the Quick Access Toolbar" option. This will open the Excel Options dialog box.

-
Choose "All Commands" from the dropdown: In the Excel Options dialog box, locate the "Choose commands from" dropdown menu and select "All Commands" from the list.
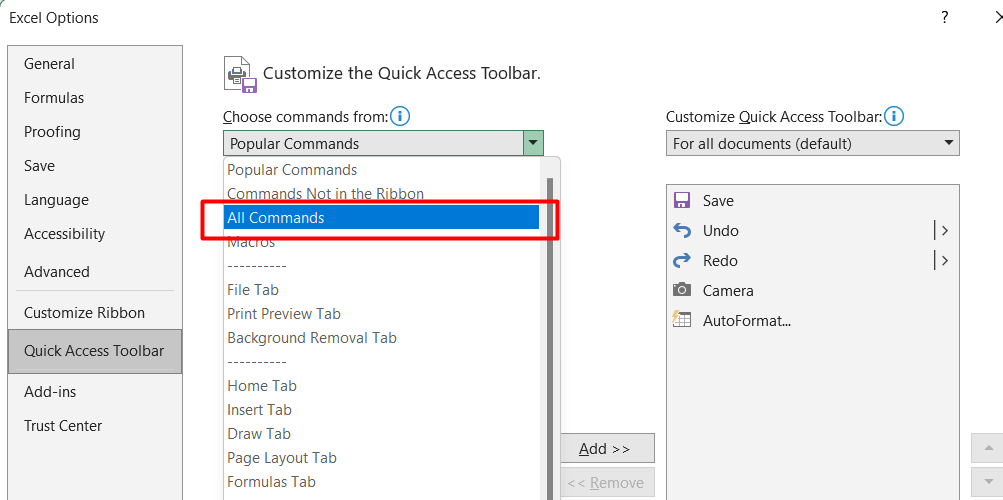
- Scroll down and select "AutoFormat": Scroll through the list of commands until you find "AutoFormat" and select it.
-
Click on the "Add" button: Once you have selected "AutoFormat," click on the "Add" button. This will add the AutoFormat option to the list of icons in the QAT.

- Click "OK": After adding the AutoFormat option, click on "OK" to save the changes.
7 Easy Steps to Unhide the AutoFormat Option
Here are 7 easy steps to unhide the AutoFormat option in Excel:
-
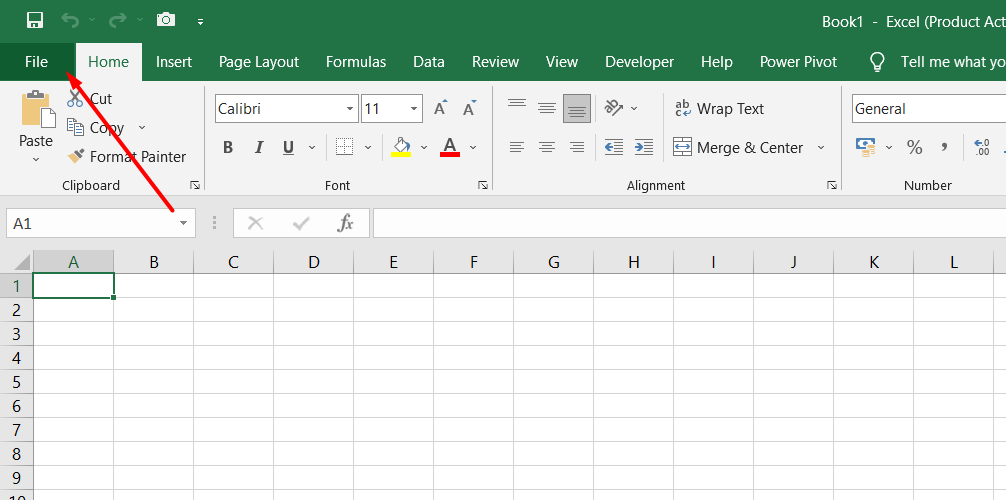
Click on the "File" tab: Locate and click on the "File" tab at the top-left corner of the Excel window. This will open the File menu.
-
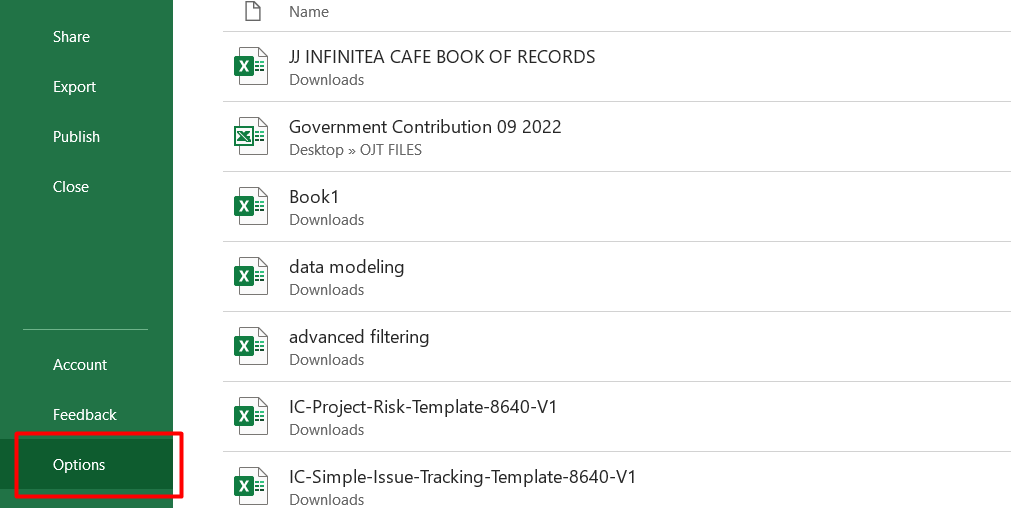
Access the Options menu: In the File menu, look for and click on the "Options" tab. This will open the Excel Options dialog box.
- Open the Quick Access Toolbar settings: Within the Excel Options dialog box, find and select the "Quick Access Toolbar" option from the left-hand side menu. This will display the customization options for the Quick Access Toolbar.
-
Choose "Command Not in the Ribbon": In the Quick Access Toolbar customization section, locate the drop-down list labeled "Choose commands from." Click on the drop-down list and select the "Command Not in the Ribbon" option.
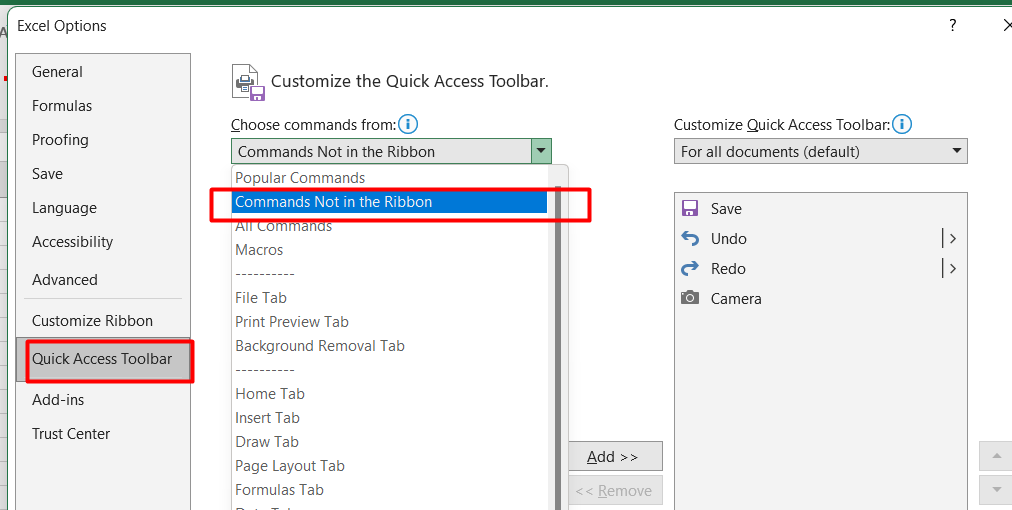
- Find the "AutoFormat" option: Scroll through the list of available commands until you find the "AutoFormat" option. You can use the search bar at the top of the dialog box to quickly locate it.
-
Add the "AutoFormat" option: Select the "AutoFormat" option and click on the "Add" button. This will add the AutoFormat command to the Quick Access Toolbar.

- Confirm and close the dialog box: After adding the "AutoFormat" option, click on the "OK" button to confirm your selection. The AutoFormat option will now be visible in the Quick Access Toolbar, which is located at the top-left corner of the Excel window.
Removing the Formatting from the Dataset
After applying formatting to your dataset using the AutoFormat option in Excel, you may find the need to remove the formatting at a later point. Here are two methods to accomplish this:
-
Remove individual elements: If you want to remove specific formatting elements, such as borders, you can use the inbuilt options to do so. For example, select the cells or range with the formatting you wish to modify, go to the formatting options (such as the borders menu), and deselect the specific formatting elements you want to remove.
This allows you to retain other formatting aspects while removing only the selected elements.

-
Remove the entire formatting: To remove all formatting applied through AutoFormat, you can choose to remove the entire formatting design. Simply select the cells or range that have the formatting applied, go to the AutoFormat dialog box, and select the last design option.
This will remove all formatting associated with the AutoFormat design, leaving your data in its original, unformatted state.
Limitations of AutoFormat Option in Excel
The AutoFormat option in Excel, while useful in certain scenarios, has certain limitations that you should be aware of. Here are some key points to consider:
- Declining utility: Over time, the AutoFormat option has become less commonly used due to the availability of more refined formatting and design options in the Excel ribbon. These newer options offer greater flexibility and control over formatting, making AutoFormat less essential for many users.
- Structured data requirement: AutoFormat works best with structured data that has clear header rows and columns. If your data does not adhere to this structure, the AutoFormat option may not yield the desired results. In such cases, it's advisable to use individual formatting options instead.
- Limited customization: AutoFormat provides predefined formatting styles, but it does not allow you to modify specific formatting options. For example, if you want to customize the thickness or style of borders, AutoFormat does not offer that level of control. Individual formatting options need to be used for more specific customization requirements.
While the AutoFormat option can still be handy for quickly applying basic formatting to structured data, it's important to be aware of its limitations. For more advanced or customized formatting needs, exploring other formatting options available in the Excel ribbon will provide greater flexibility and control over the appearance of your data.
FAQs
How do you auto format columns in Excel?
To auto format columns in Excel, select the entire column or range of columns, click on "AutoFormat" in the "Format" menu, and choose the desired formatting style from the available options.
What is the shortcut for auto format in Excel?
The shortcut for auto format in Excel is Alt + O, then Ctrl + T.
How do I auto format and auto complete in Excel?
To auto format and auto complete in Excel, start typing a value in a cell, press Enter, and then select the cell. Use the fill handle (small square at the bottom-right corner) to drag and auto complete the series or pattern.
How do I auto fill formatting?
To auto fill formatting in Excel, select the cell with the desired formatting, double-click on the fill handle to apply the formatting to adjacent cells automatically.
What is an example of auto format?
An example of auto format in Excel would be applying a predefined style to a range of cells, such as a table style with alternating row colors, headers, and formatted borders, to enhance the visual appeal and readability of the data.
Final Thoughts
The AutoFormat option in Excel provides a quick and convenient way to format your data. While it may have some limitations, it can still be valuable in certain situations.
When using AutoFormat, make sure your data follows a structured format with header rows and columns to achieve the best results. Additionally, remember that AutoFormat offers predefined styles and doesn't allow for granular customization.
One more thing
If you have a second, please share this article on your socials; someone else may benefit too.
Subscribe to our newsletter and be the first to read our future articles, reviews, and blog post right in your email inbox. We also offer deals, promotions, and updates on our products and share them via email. You won’t miss one.
Related articles
» How to Prevent Excel From Changing Numbers [Automatic Number Formatting]
» Excel Formatting: Functions, Conditions, Styles, and More
» Master Excel Conditional Formatting with this Easy Tutorial