The "0x80004005" error code is a common issue that can occur on Windows operating systems. A variety of factors, including incorrect configuration settings, outdated or corrupt drivers, and malware or virus infections can cause this error. This guide will explore the causes of the "0x80004005" error code and provide steps for resolving the issue.
We will cover topics such as System Restore, updating and reinstalling drivers, and running a full system scan to eliminate malware. This guide is aimed at providing a comprehensive solution to fix this error code, which can be a frustrating experience for Windows users.
Causes of the "0x80004005" Error Code
Like most errors in Windows, the "0x80004005" error code can be caused by a number of different factors. These include:
- Incorrect configuration - Installing new applications, making changes in the Registry, or changing your settings manually can lead to incorrect configuration settings. Restoring your previous configuration or manually resetting the affected settings will fix this problem.
- User permissions - If your Windows User account does not possess ownership of the file or folder, or is lacking proper access permissions, then this error may be generated.
- Archive files - If you're attempting to open an encrypted archive file without suitable software, such as a ZIP file, then this error can appear.
- Malware - Malicious programs can corrupt system files and cause conflicts with the operating system, often resulting in this error code.
Now that you know the possible causes of the "0x80004005" error code, let's look at some methods for resolving it.
How to Fix the "0x80004005" Error Code
The solutions below can be used to troubleshoot and fix the "0x80004005" error code on Windows.
1. Check for Archive Errors
Archive files are useful for compressing files so they take up less space, bundling multiple files into one package, encrypting documents, and splitting large files into smaller pieces. Microsoft's File Explorer can open ZIP archives, but it cannot open more advanced file formats like RAR or 7Z.
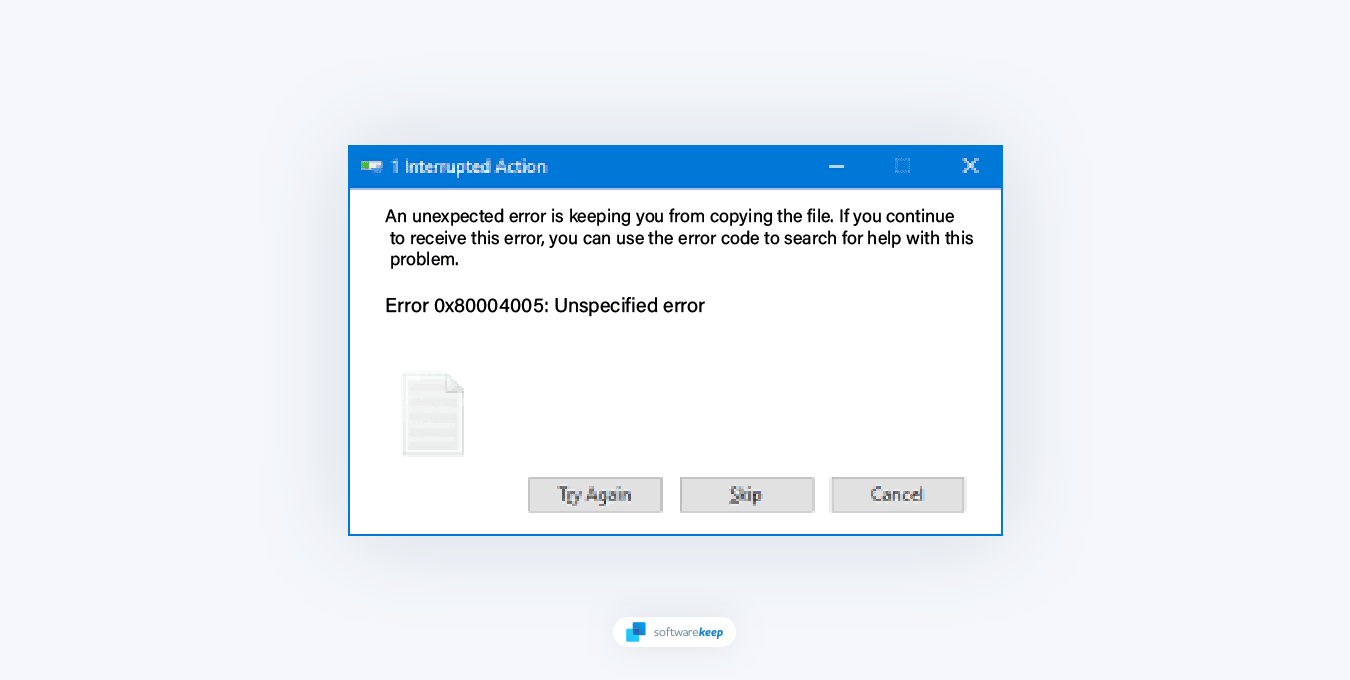
Even support for the ZIP format is limited. If you want to do more advanced things like encrypting the files or trying to open an encrypted ZIP file using File Explorer, you will get "Error 0x80004005: Unspecified Error." This means that the program cannot handle encrypted ZIP files.
The solution is to find a program that can open encrypted archive files. There are many programs that can do this. Some of them, like 7-Zip and PeaZip, are free. There are other good choices, but they cost money after the trial period is over. For example, WinRAR has a trial period, but you can continue using it even after the trial period ends (although it will nag you about paying).
2. Use the Windows Update Troubleshooter
Windows comes with a built-in update troubleshooter, which can help diagnose and fix issues with Windows Updates.
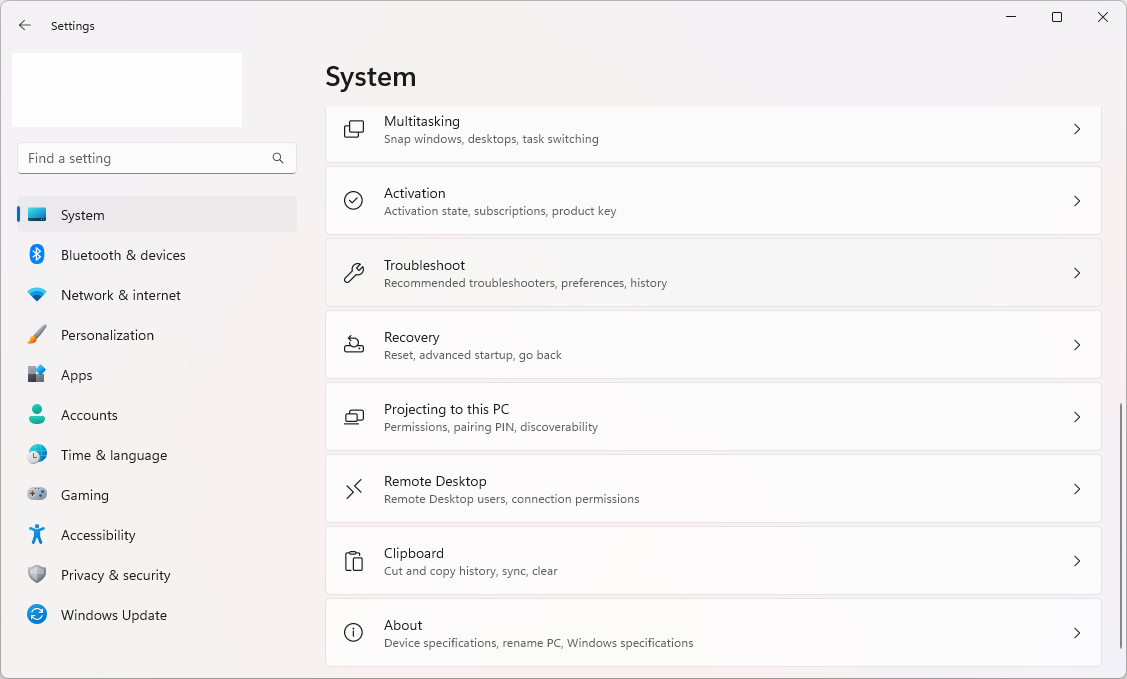
- Open the Settings app on your Windows device. You can do this by clicking on the Start menu and selecting the gear icon, or using the Windows + I keyboard shortcut.
-
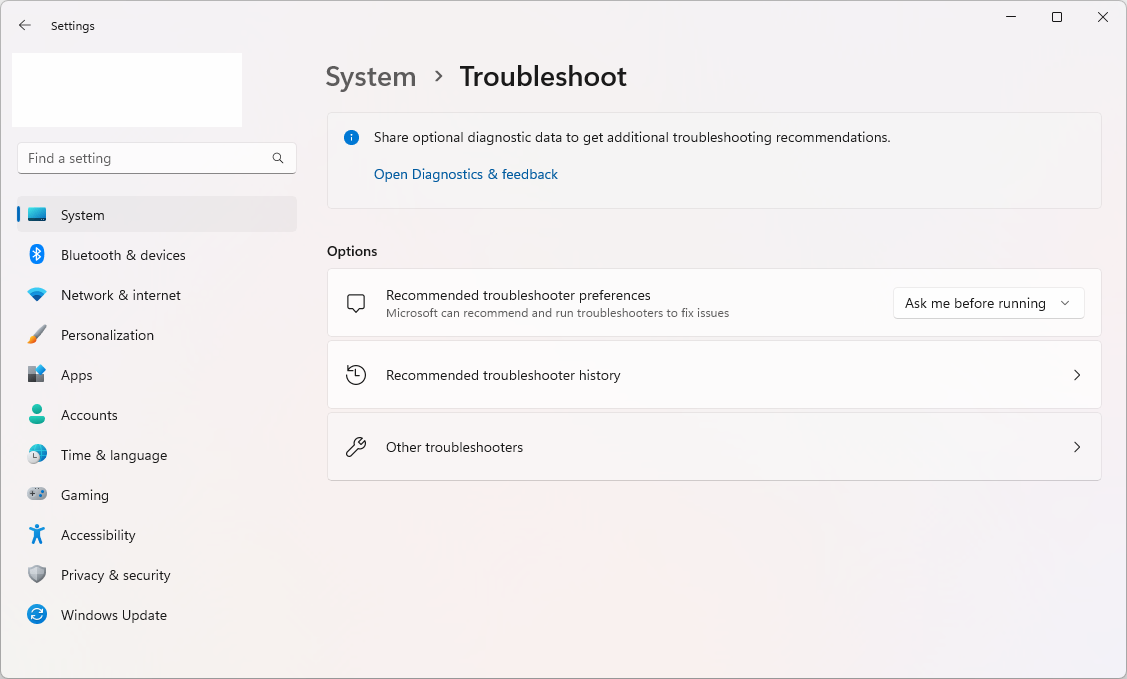
Click on "System. In the right-hand menu, select "Troubleshoot."
-
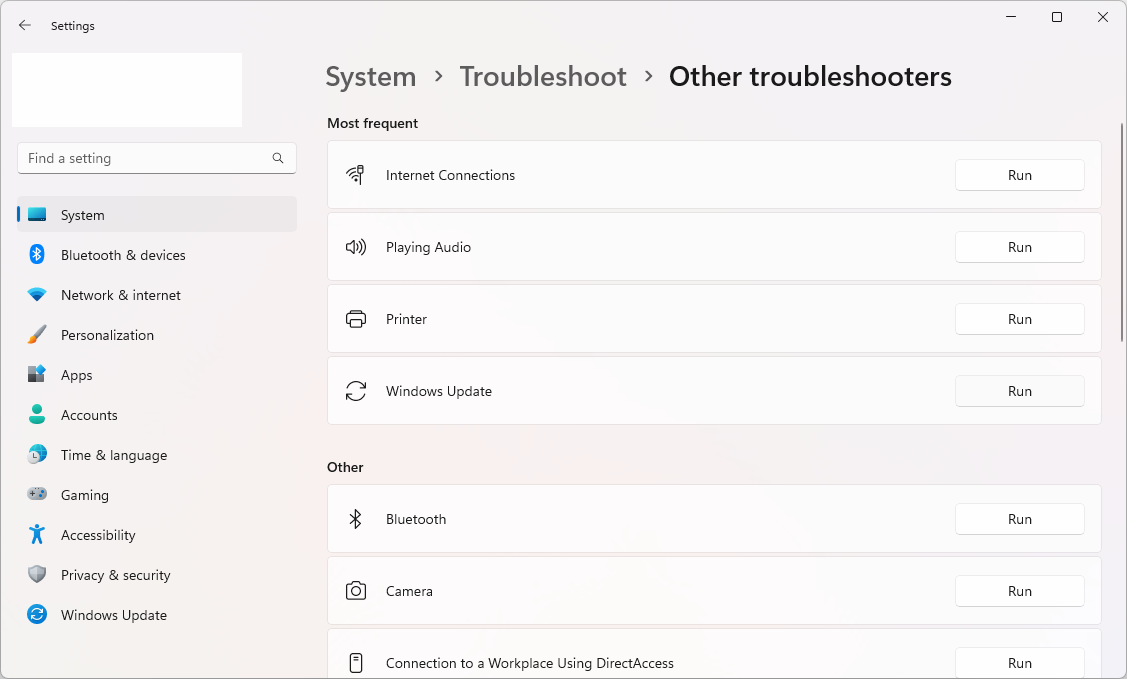
Click on "Other troubleshooters."
-
Under "Most frequent," select "Windows Update" and then click on the Run button.
- The troubleshooter will begin scanning your system for any issues with Windows Update. Follow any on-screen instructions to resolve any issues found.
- Once the troubleshooter is finished, restart your device to ensure that any changes made take effect.
Note: The above steps should work for Windows 11, but if you are using an older version of Windows, the steps may vary slightly.
3. Check Your Server Message Block (SMB) Settings
SMB is a protocol that allows devices on the same network to function like a client and server. If your SMB settings are incorrectly configured or they're having specific issues, perform the steps below to fix them.
Verify SMB Service Status
-
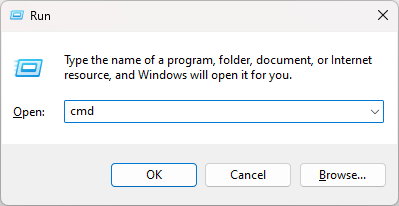
Press the Windows + R keys on your keyboard, and then type in "cmd" and press Ctrl + Shift + Enter to launch the elevated Command Prompt.
-
Execute the following command: "sc.exe qc lanmanworkstation." You'll likely see an output almost identical to the one below:
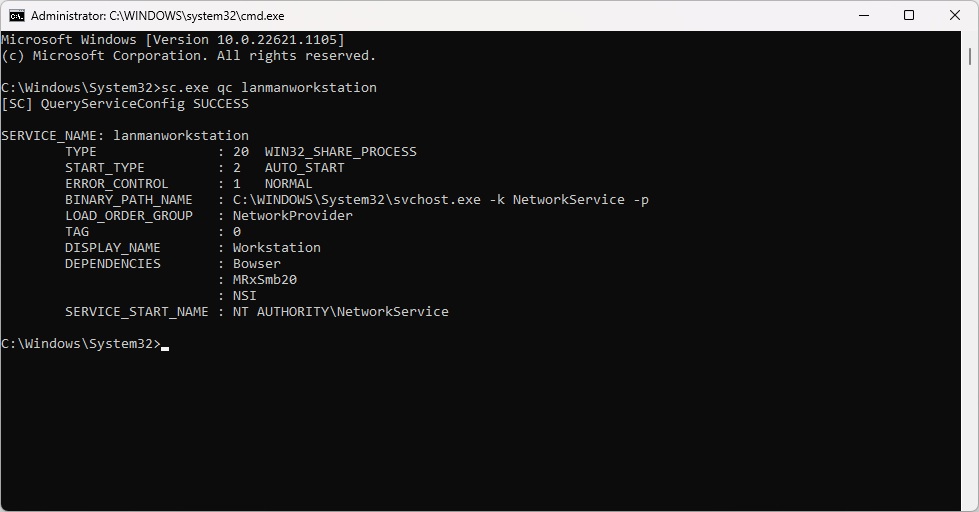
-
Verify if "START_TYPE" is set to "AUTO_START." Otherwise, execute the following two commands in the same window:
- sc.exe config lanmanworkstation depend= bowser/mrxsmb10/mrxsmb20/nsi
-
sc.exe config mrxsmb20 start= auto
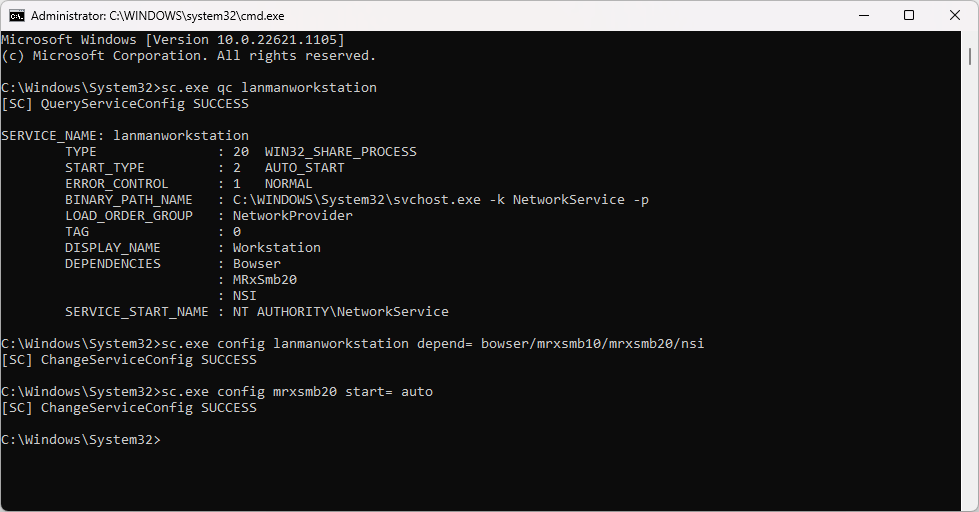
- If successful, you will see "[SC] ChangeServiceConfig SUCCESS."
Enable Insecure Guest Logins
If the above solution doesn't work out, enabling insecure guest logins is the next step to take.
-
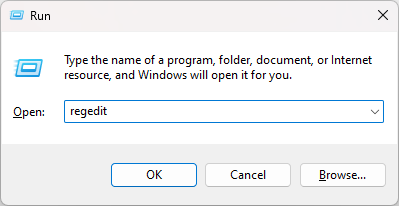
Press the Windows + R keyboard shortcut and type in the word "regedit." Press OK to launch the Registry Editor.
-
Access the "HKLM\SYSTEM\CurrentControlSet\Services\LanmanWorkstation\Parameters" key by either navigating to it on the left menu or copying and pasting the path into your address bar.
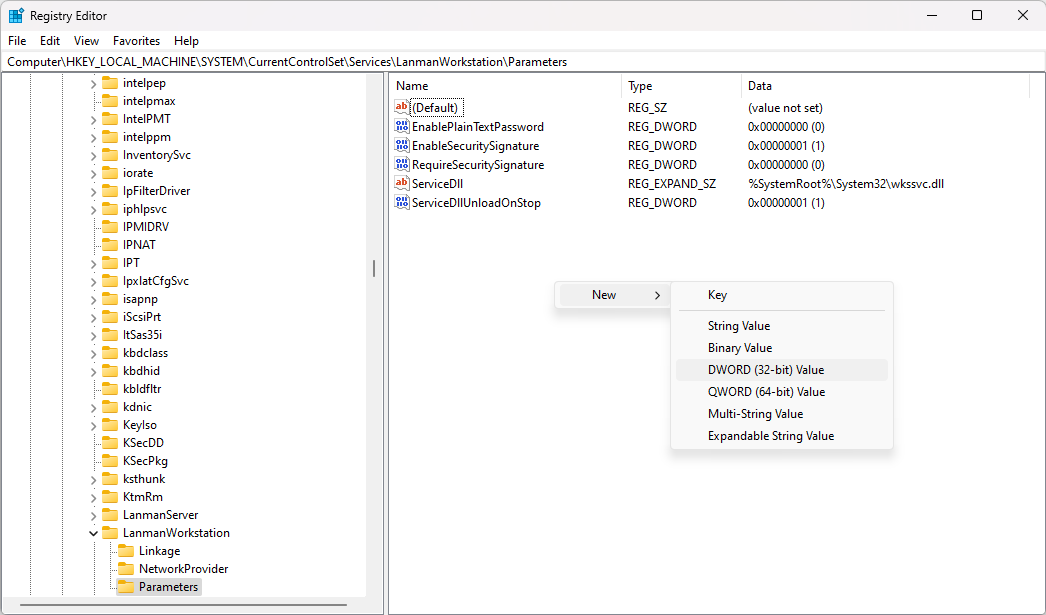
- Check if you have the AllowInsecureGuestAuth DWORD value. If you already have this value, continue with the next method.
-
If the value is not present, right-click on any empty space and choose New > DWORD (32-bit) Value, and name it "AllowInsecureGuestAuth."
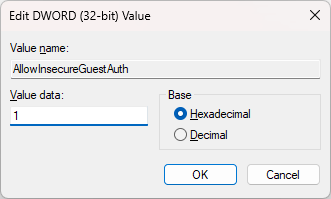
- Double-click on the newly created value, and set the value data to 1. Click OK to validate the change.
After performing this method, see if you're still dealing with the 0x80004005 error.
Switch To SMBv1
Even though SMBv1 - the oldest version of this standard - has been disabled on Windows 10 and 11, you can easily reactivate it if your network device requires its use.
-
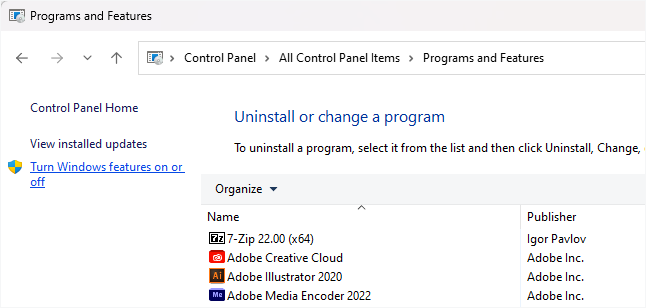
To access the Windows Feature settings, you have two options. You can either type “Windows Features” in your search box and click Open, or you can go to Control Panel > Programs and features > Turn Windows Features On or Off.
-
Search for SMB 1.0/CIFS File Sharing Support in the list and click on its plus button to open further options. Tick "SMB 1.0/CIFS Client" as well as "SMB 1.0/CIFS Server" from the options.
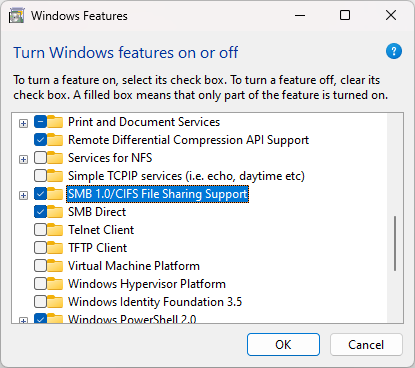
- Next, untick "SMB 1.0/CIFS Automatic Removal" and click OK to finalize the changes.
4. Configure Network Discovery and Sharing Settings
Troubleshooting networked devices can be frustrating, as issues with network discovery or sharing settings are often the culprit. To rule out these settings as the source of the problem, start by accessing the Network Settings.
This can be done by clicking the Start button and searching for "advanced sharing options", then clicking "Open." Once you've accessed the sharing settings, you can customize them based on the type of network you're connected to. Typically, it's best to set your home network as private.
To complete the process, select the check boxes corresponding to "Turn On Network Discovery," "Turn on Automatic Setup of Network Devices," and "Turn on File and Printer Sharing."
5. Turn On Essential Services
To guarantee the optimal function of your network sharing, make sure that these Windows services are properly enabled:
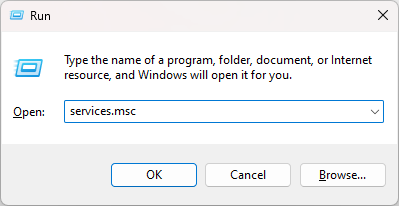
-
Press the Windows + R keys on your keyboard. This is going to bring up the Run utility. Type in "services.msc" and click on the OK button. This is going to launch the Services window.
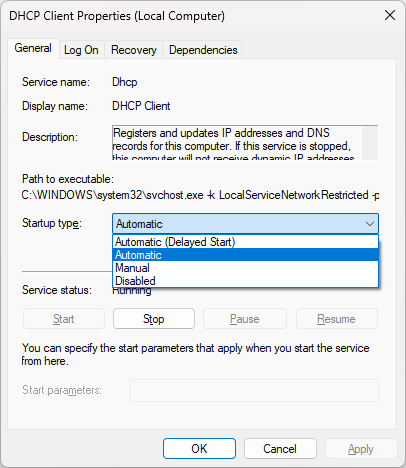
-
To enable a service, you need to right-click on its name and select Properties. In the new window, use the Startup type drop-down menu, and set it to Automatic.
-
Perform these steps for all of the following services:
- DNS Client
- DHCP Client
- Function Discovery Provider Host (fdPHost)
- Function Discovery Resource Publication (fdResPub)
- Simple Service Discovery Protocol (SSDP)
- UPnP Device Host
- After enabling these services, restart your computer and see if the 0x80004005 error code is still active.
6. Change NetBIOS Settings
If your NetBIOS isn't operating correctly, it can be the culprit behind error 0x80004005. It's an integral component when connecting devices over a Local Area Network, so making sure you have everything up to date and running properly is essential.
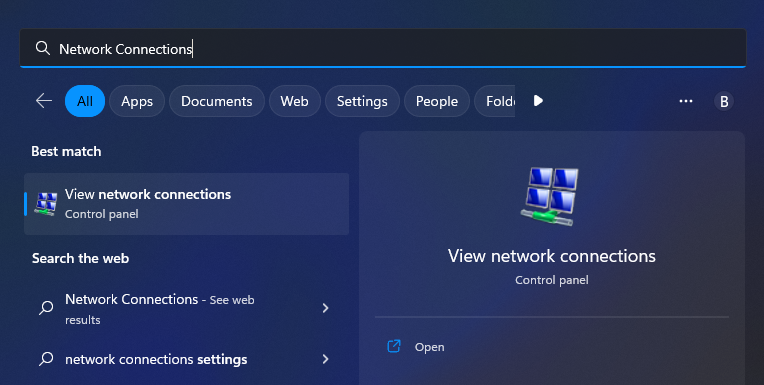
-
Bring up the search interface in your taskbar, and then type "Network Connections" into the search bar. Click Open on the matching search result.
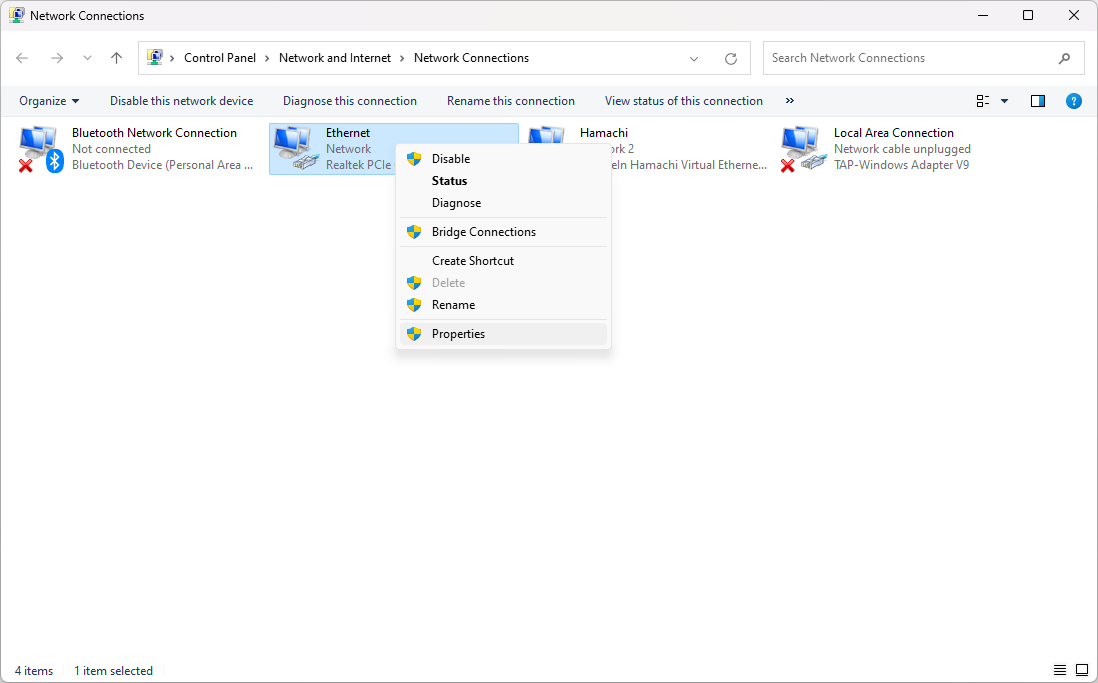
-
To view your network adapter's properties, simply right-click on it and select Properties from the context menu. A wired connection is typically called "Ethernet," while a wireless adapter is named "Wi-Fi."
-
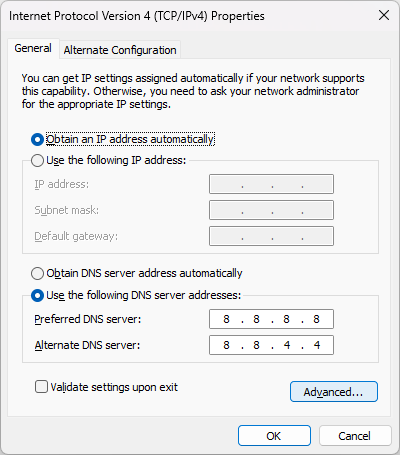
Find "Internet Protocol Version 4 (TCP/IPv4)." Click on it once to select it, then click on the Properties button. This will open its settings in a separate window.

-
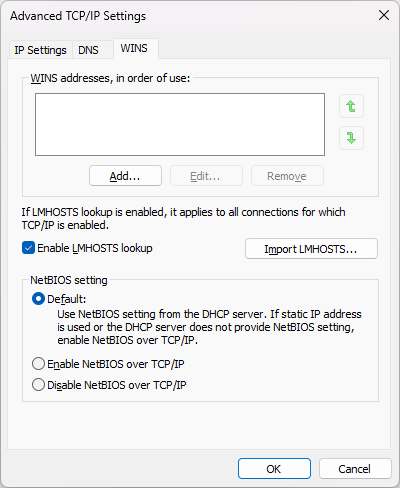
Click on the Advanced button.
-
Switch to the "WINS" tab. If NetBIOS is disabled, switch it to the Default setting. However, if "Default" is already selected and you’re getting the 0x80004005 error, try changing the setting to "Enable NetBIOS" instead.
-
Click OK and see if you still experience the 0x80004005 error.
7. Disable IPv6
IPv6, also known as Internet Protocol version 6, is the next-generation internet protocol. However, the transition to this new standard has not been without challenges. Older IPv4 devices occasionally face compatibility issues, which means disabling IPv6 may solve the 0x80004005 error.
- Open the Settings app on your Windows device. You can do this by clicking on the Start menu and selecting the gear icon, or using the Windows + I keyboard shortcut.
-
Click on "Network & internet," and then click on your network properties (either Ethernet or Wi-Fi). Here, click on the Edit button under the DNS settings section.
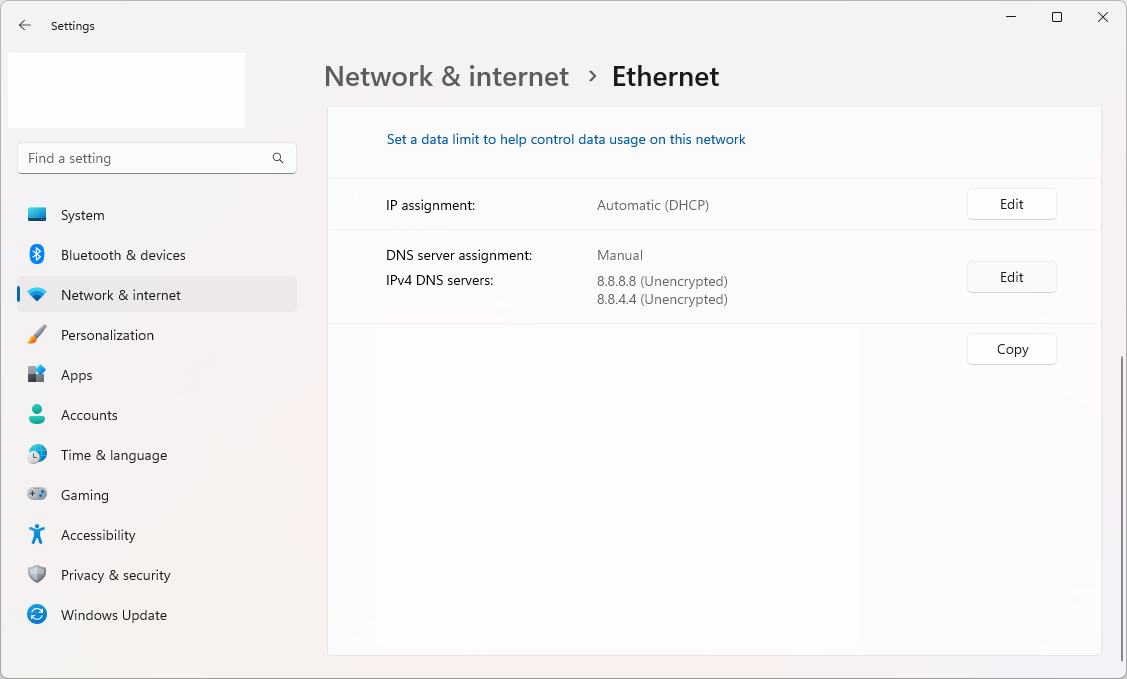
-
Make sure that the toggle next to IPv6 is turned Off. If it's currently enabled, just click on it once to disable it.
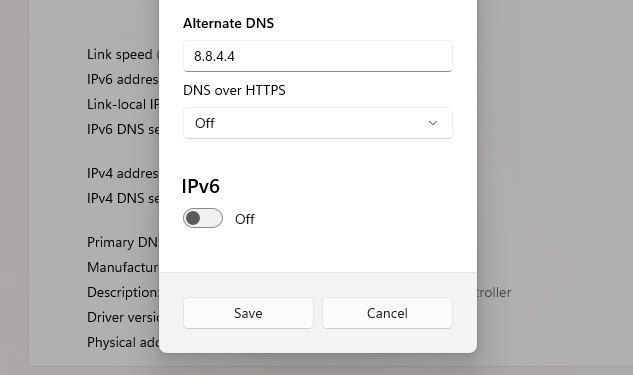
After making this change, restart your system and check if the 0x80004005 error is still active.
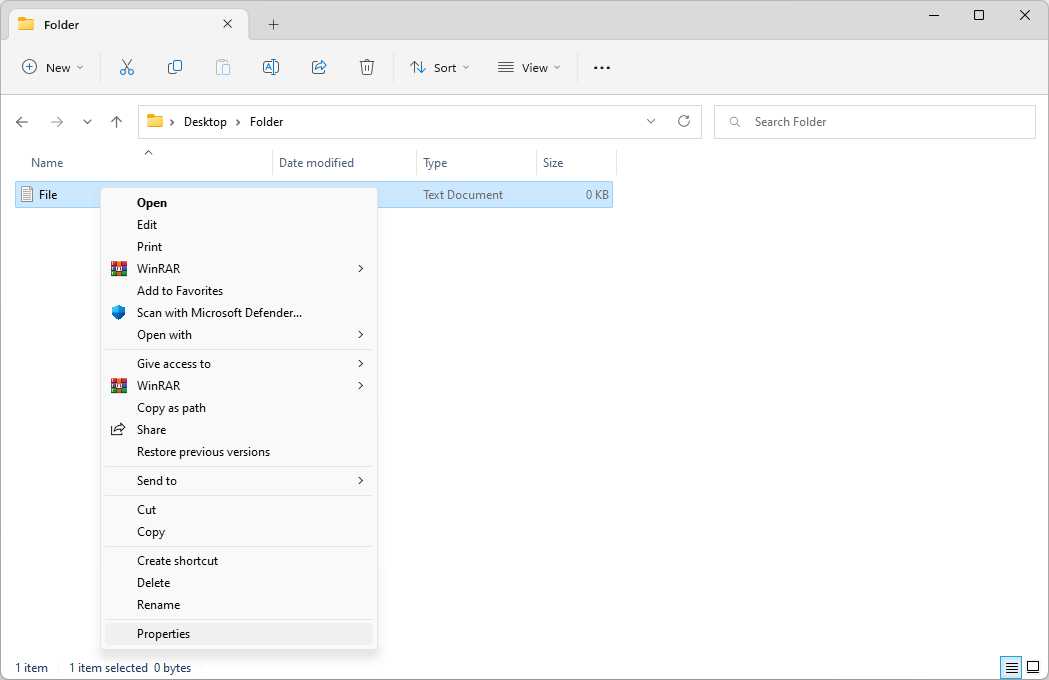
8. Fix User Permissions
If you're still struggling with the 0x80004005 error when managing local files, odds are that a permissions or ownership issue is causing it. Here's how you can resolve this.
-
Search for the file you are having issues with, then right-click to open a context menu and choose Properties from its list of options.
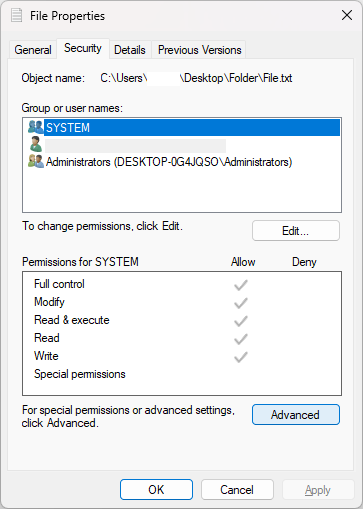
-
A new window will appear. Switch over to the Security tab and click on the Advanced button.
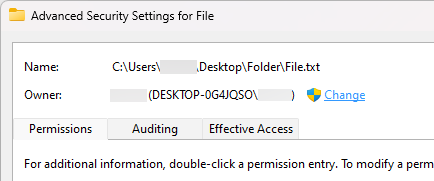
-
Click on the "Change" link next to the current owner of the file. You’ll need administrative permissions to do this.
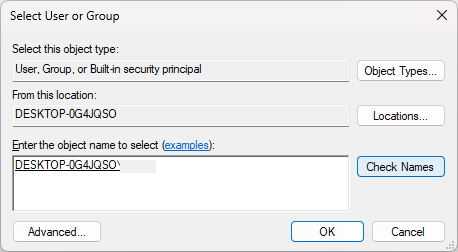
-
Type your account name in the "Enter the object name to select" field, and then click on the Check Names button. The system should automatically input the full name. When done, click the OK button.
-
Back in the file properties window, stay on the Security tab, and select the Users group. Click the Edit button, and then ensure that Full Control is granted.
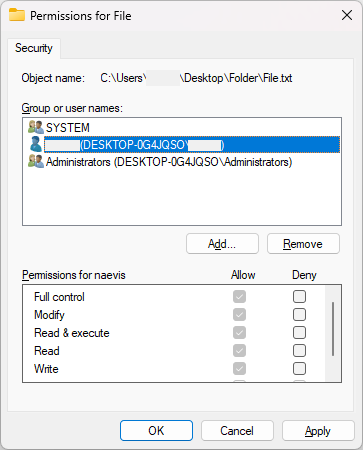
- Click Apply and see if the error still happens.
9. Run a Full System Scan
If the "0x80004005" error code is caused by malware or virus infections, running a full system scan can help resolve the issue. To do this, you can use a reputable antivirus program, such as ESET, McAfee, or Malwarebytes. These programs can scan your computer for malicious software and remove any detected threats.
10. Temporarily Disable Your Antivirus
While having an antivirus app on your device is crucial to protect yourself from threats, sometimes these kinds of software may detect false positives and block legitimate files from opening. This often leads to errors like 0x80004005.
If you believe your antivirus is responsible for the error, try disabling it temporarily and check if the issue is resolved. If this fixes the issue, you can look for a different antivirus solution or look up how to whitelist your file from being blocked.
Conclusion
Although the 0x80004005 error is a quite common problem in Windows, it can usually be fixed with simple methods. In this guide, we have discussed 10 ways to troubleshoot and fix the 0x80004005 error code. If you still can’t get rid of it, contact customer support or a system administrator for help.
We hope this guide has been helpful in resolving your issue. If you have any further questions or comments, please reach out to us. We’d love to hear from you!
One More Thing
We’re glad you’ve read this article :) Thank you for reading.
If you have a second, please share this article on your socials; someone else may benefit too.
Subscribe to our newsletter and be the first to read our future articles, reviews, and blog post right from your inbox. We also offer deals, promotions, and updates on our products and share them via email. You won’t miss one.
Related Articles
» How To Fix “Error Code: 0XC0000035” Kernel Event Tracing on Windows?
» How to Fix Windows Update Error Code: 0xc1420121?
» How to Fix Error '0x80242016 – Failed to Install' on Windows