
Windows is a popular operating system developed by Microsoft. Millions of people use it on their computers, laptops, and mobile devices. It offers a range of features and options that users may find helpful in their day-to-day lives.
However, like any piece of software, Windows can experience errors from time to time. If you are experiencing error code 0xc1420121 when trying to update Windows, don't worry - we can help!
This article will walk you through some of the most common solutions for this error code. We hope that one of these solutions will help you get your computer up and running again!
Keep reading for more information.
What Causes Error Code 0xc1420121 in Windows Update?
There could be plenty of reasons why 0xc1420121 error might occur. Most commonly, the issue lies within the Windows image or update components corruption. Likewise, a simple update bug could be the culprit. Running commands within elevated Command Prompt might fix it for you in this case.
Other common potential causes for this error code are:
- The Windows Update service is not running. In order to run Windows Update, you need to have the service running in the background. If it is not running, you will see the error code 0xc1420121.
- There is a problem with the Windows Update files on your computer. This can happen if the files become corrupted or if there is an issue with the way they are installed.
- There is a problem with your internet connection. This can prevent Windows from being able to connect to the update servers and download the necessary files.
- Your computer's security software is blocking Windows Update. This is not uncommon, as many security programs see Windows Update as a potential threat. However, it can prevent you from being able to install updates properly.
Keep in mind that you may be dealing with a unique issue that is not covered here. If none of the solutions below work for you, we recommend reaching out to Microsoft support for more help.
How to Fix Error Code 0xc1420121 in Windows Update?
Now that we know what can cause error code 0xc1420121, let's take a look at some of the most common solutions:
- Restart the Windows Update service. This is one of the most common solutions and it often works because it can fix problems with the service itself.
- Check your internet connection. As we mentioned above, a poor internet connection can cause this error code. Make sure that your computer is connected to the internet and that there are no problems with your connection.
- Temporarily disable your security software. As we also mentioned above, security programs can sometimes block Windows Update from running properly.
- Run the Windows Update Troubleshooter. This is a tool developed by Microsoft that can help fix a number of common problems with Windows Update.
- Enable Windows Update Service. If none of the above solutions work, you need to check if the Windows Update service is enabled. If it's been turned off, re-enable it and try again.
Solution to Windows Update Error 0xc1420121
Here are the working methods to fix this frustrating error when you try to update your Windows to a new version. By following these step-by-step instructions, you can easily restore Windows Update and get the new features, security improvements, and optimizations in the new Windows release!
Method 1. Restart the Windows Update Service Manually
The first thing you can try is to restart the Windows Update service manually. This might sound like a silly solution, but it has helped many people fix this problem.
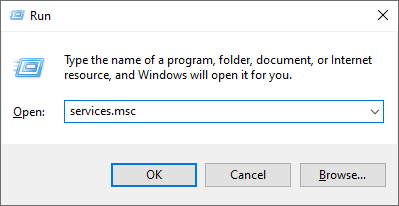
- On your keyboard, press the Windows + R keys. This will launch the Run application.
-
Type "services.msc" and hit the Enter key on your keyboard without quotation marks. The Services application will be launched as a result of this.
-
Scroll down until you see the Windows Update service in the alphabetical list. Right-click on it, and then choose Properties from the context menu.
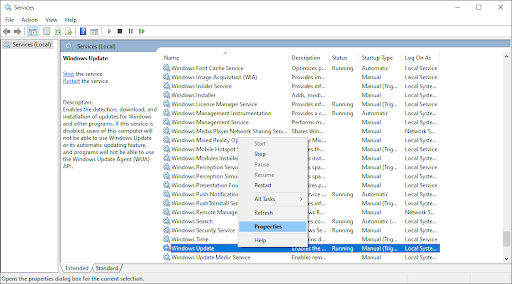
- Use the drop-down menu to change the Startup type to Enabled. When done, click Apply and then close the pop-up window and reboot your computer.
Method 2. Run the Windows Update Troubleshooter
If restarting the Windows Update service doesn't work, you can try running the Windows Update Troubleshooter. This is a tool developed by Microsoft that can help fix a number of common problems with Windows Update.
- Open the Search bar in your taskbar by clicking on the magnifying glass icon. You can also bring it up with the Windows + S keyboard shortcut.
-
Type Control Panel in the search box. When you see it in the results, click on it to launch the application.

-
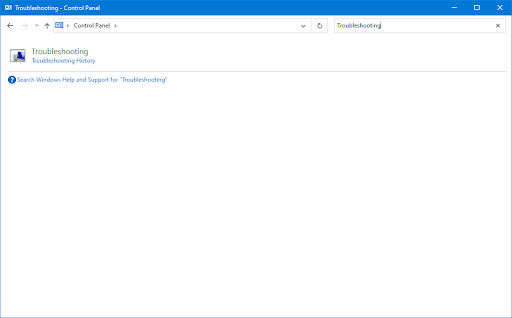
Search for Troubleshoot using the input field on the top right, and then click on the Troubleshooting header from the search results.
-
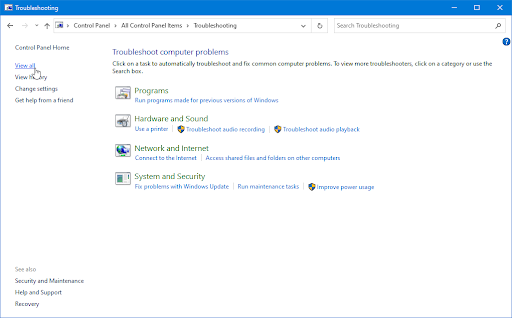
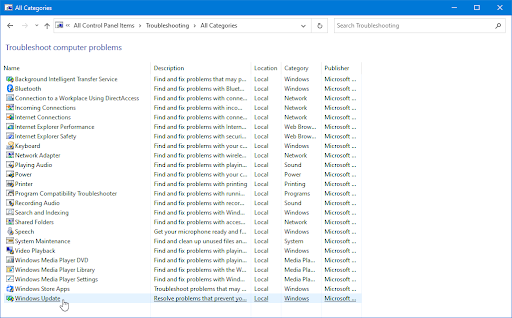
Click on the View all link in the left-side pane. This is going to take you to a new page with every available troubleshooter displayed.
-
Scroll down and locate the Windows Update troubleshooter. Click on it once, and then wait for the troubleshooter to launch in a different window.
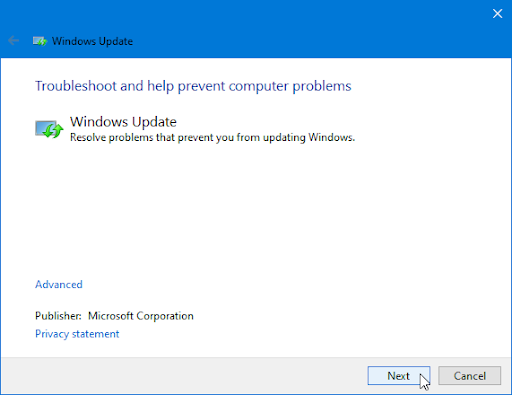
-
Click Next to begin the Windows Update problem analysis. If the troubleshooter is able to diagnose any problem, it will then attempt to fix the issue. You can see a full report at the end of the troubleshooting process.
Method 3. Remove Leftover Macrium Installation Files (if Applicable)
If you've previously installed Macrium Reflect, there might be some leftover files that are causing problems with Windows Update. You can try removing these files and see if that fixes the issue.
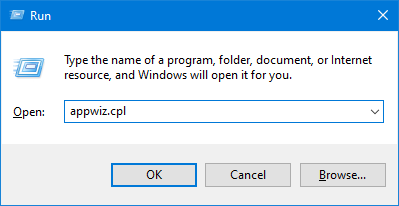
- Press the Windows + R keys on your keyboard. This is going to bring up the Run utility.
-
Type in “appwiz.cpl” without the quotation marks and press the Enter key on your keyboard. This will launch the Control Panel application and take you straight to the Programs and Features page.
-
Scroll down in your list of installed programs and locate the Macrium Reflect application. Right-click on it once, and select Uninstall from the context menu.
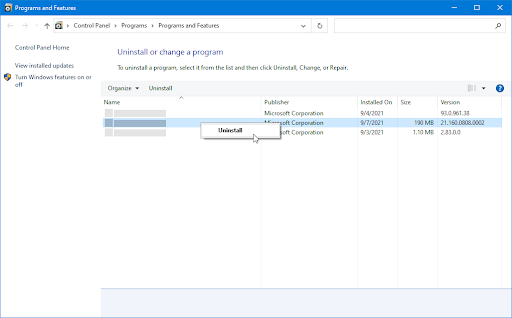
- To complete the uninstallation of Macrium Reflect, follow the on-screen prompts and restart your computer.
-
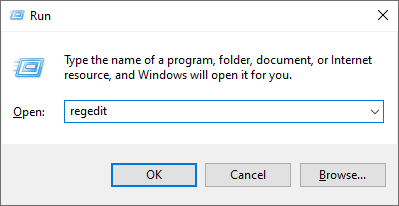
When your computer restarts, press Windows + R keys to bring up the Run dialog box. To open the Registry Editor with admin access, type 'regedit' and press Ctrl + Shift + Enter.
-
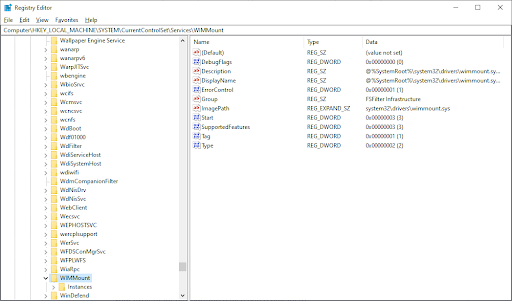
Use the navigation pane on the left side of the window to reach the following Registry key, or use the address bar and copy-paste the location:
HKEY_LOCAL_MACHINE\SYSTEM\CurrentControlSet\Services\WIMMount
-
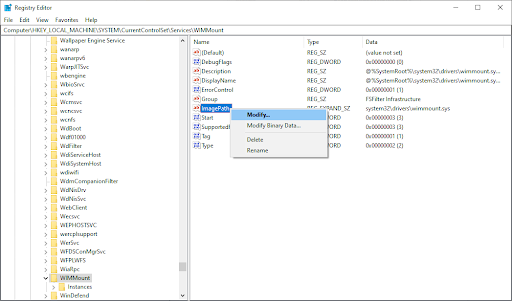
Right-click on the ImagePath registry entry in the right-side pane and choose Modify from the context menu.
-
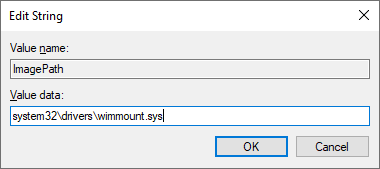
Change the value data to the following string, and then click the OK button: system32\drivers\wimmount.sys
- Reboot your computer after the modification is applied to see if the problem has been resolved.
If the problem persists after you've implemented the fix above (or if this method isn't applicable), move on to the next possible solution below.
Method 4. Use the System File Checker (SFC Scan)
Another way to fix corrupt system files is to use the SFC Scan tool. This will scan your system for any corrupted files and repair them.
- Open the search bar in your taskbar by clicking on the magnifying glass icon. Press Windows + S on your keyboard as a shortcut.
-
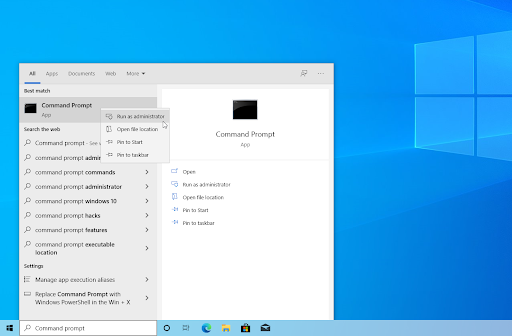
Type Command Prompt in the search box. When you see it in the results, right-click on it and choose Run as Administrator. If you're using a local account that doesn't have administrator permissions, click here to learn how to grant admin access.
- When prompted by the User Account Control (UAC), click Yes to allow the app to launch with administrative permissions.
-
Type in the following command and press Enter to execute it: sfc /scannow

- Wait for the System File Checker to finish scanning your computer. In the case of a discrepancy, the utility will restore system files and fix all errors related to them.
Method 5. Run the CHKDSK Command
If you're getting the 0xc1420121 error, it could be because there are some bad sectors on your hard drive. You can use the CHKDSK command to fix these errors.
- Open the search bar in your taskbar by clicking on the magnifying glass icon. You can also bring it up with the Windows + S keyboard shortcut.
- Type Command Prompt in the search box. When you see it in the results, right-click on it and choose Run as Administrator.
- When prompted by the User Account Control (UAC), click Yes to allow the app to launch with administrative permissions.
-
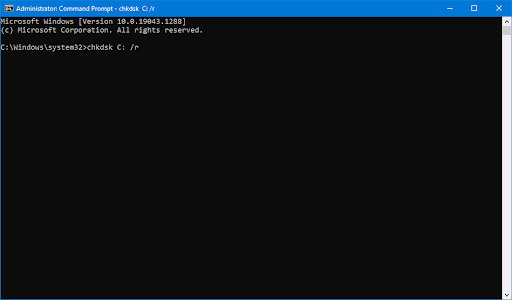
Type in the following command and press Enter to execute it: chkdsk C: /r
- Wait for the scan to complete.
Method 6. Deploy the DISM Scan
If the SFC scan doesn't work, you can try running the DISM tool. This will check for any problems with your Windows installation and repair them.
- Open the search bar in your taskbar by clicking on the magnifying glass icon. You can also bring it up with the Windows + S keyboard shortcut.
- Type Command Prompt in the search box. When you see it in the results, right-click on it and choose Run as Administrator.
- When prompted by the User Account Control (UAC), click Yes to allow the app to launch with administrative permissions.
-
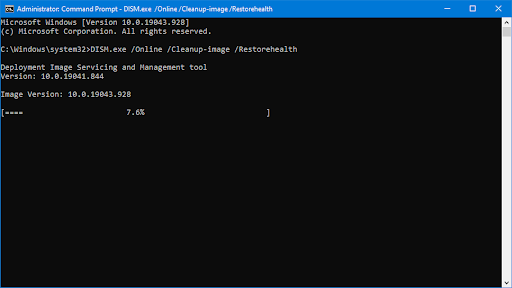
Type in the following command and press Enter to execute it: DISM.exe /Online /Cleanup-image /Restorehealth
After you execute the command, wait for the process to finish. Upon completion, close the Command Prompt window and restart your device to see if the 0xc1420121 error code has been fixed.
Method 7. Reset Windows Update Components
The last thing you can try is to reset the Windows Update components. This will delete any existing updates and then re-download them, which can fix a number of problems.
- Open the Search bar in your taskbar by clicking on the magnifying glass icon. You can also bring it up with the Windows + S keyboard shortcut.
- Type Command Prompt in the search box. When you see it in the results, right-click on it and choose Run as Administrator.
-
First, you need to stop 4 services that may be running on your device. To do this, input the commands below in the following order, pressing the Enter key on your keyboard after each line:
- net stop wuauserv
- net stop cryptSvc
- net stop bits
-
net stop msiserver
-
After this, you need to rename 2 system folders. Renaming them creates a backup in case something goes wrong during the new folder generation. Similarly to the previous step, press Enter after inputting these commands:
- ren C:\Windows\SoftwareDistribution SoftwareDistribution.old
-
ren C:\Windows\System32\catroot2 catroot2.old

-
The last step is restarting all the services you turned off previously. This can be done from the Command Prompt as well, just press Enter after each command:
- net start wuauserv
- net start cryptSvc
- net start bits
- net start msiserver
- Close the Command Prompt interface and try to run a Windows Update. You may need to restart your computer for the changes to apply.
Final Thoughts
We believe this article has helped you fix error code 0xc1420121 in Windows Update. Although this can be a frustrating problem, it is not that difficult to fix if you know what you are doing.
If one of these solutions does not help you get your computer working again, and you're still having trouble, you can try reaching out to Microsoft Support for more help. Good luck and happy updating!
One More Thing
Looking for more tips on Windows? We've got everything from fixing common errors to using advanced features. So if you're ready to take your system to the next level, check out our other guides in the Blog and Help Center.
Sign up for our newsletter and get early access to our blog posts, promotions, and discount codes. Plus, you'll be the first to know about our latest guides, deals, and other exciting updates!
Recommended Articles
» How to Fix the Windows Update Error 80244019
» What to Do When Windows Update Keeps Failing on Windows 10
» How to Cancel Windows 11 Update and Stay on Windows 10?
Feel free to reach out with questions or requests you’d like us to cover.