Renaming a single file is quite an easy process. However, things get more complex when you want to rename multiple files at once. This most commonly happens when changing the extension of a large batch of files in a folder. Instead of going through each file one by one, follow our methods to get the task done quickly.
In this article, we’ll be taking a look at how to rename files in a batch on Windows 10, using both built-in methods and a safe third-party tool. Let’s get started right away!
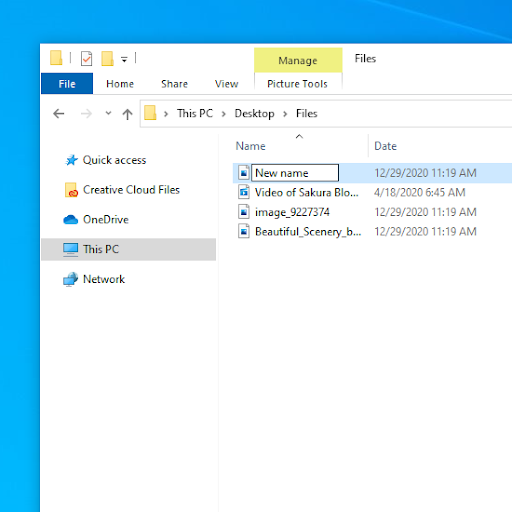
What is Batch Renaming?
Batch renaming refers to the process of renaming multiple computer files and folders in an automated fashion to save on time spend on renaming multiple files.
Method 1. Rename multiple files using File Explorer
Quickly rename files one at a time
Luckily, Windows 10 natively supports batch renaming files. It can be done in File Explorer, but it requires some knowledge of operating your system. Follow our step-by-step guide to rename up to hundreds of files at once.
-
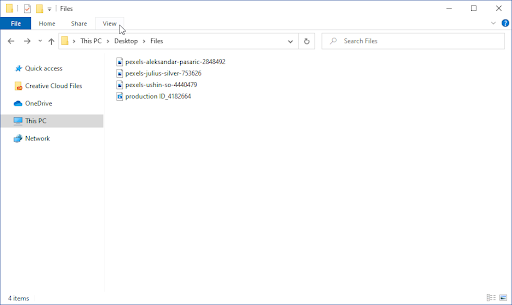
Open the File Explorer and browse to the folder containing the files you want to rename.
-
Using the header menu located in the top portion of the File Explorer, click on the View tab. This will expand your window with a new section.

-
Click on the Details button to change your view mode.

-
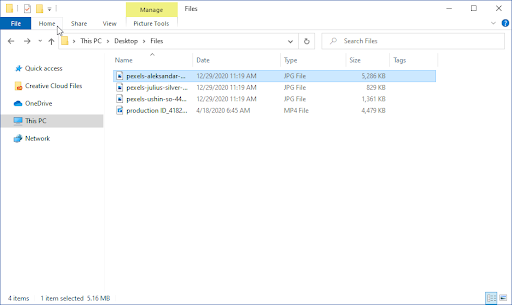
Select the first file on the list using your mouse cursor.
-
Using the same menu on top of the File Explorer window, switch to the Home tab.
-
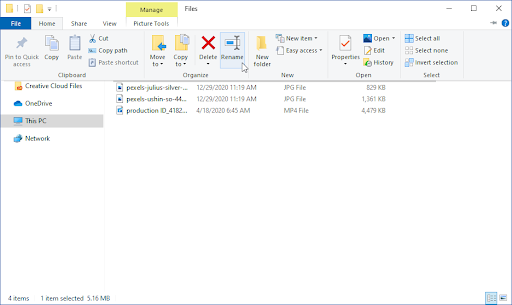
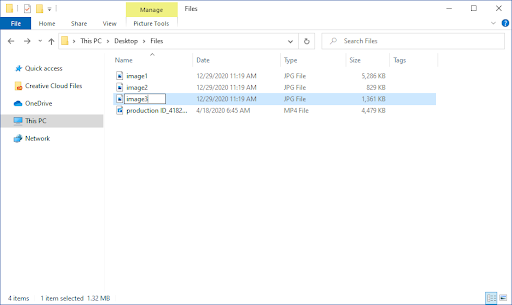
Click on the Rename button. (Tip: You can also select the first file in the folder and use the F2 key to enter the renaming mode.)
-
Check out our How To Use Function Keys Without Pressing Fn Key On Windows 10 article.
-
Check out our How To Use Function Keys Without Pressing Fn Key On Windows 10 article.
- You can type in the new desired name for the file now. When you’re done renaming the file, press the Tab button to move on to the next file.
- Using this method, you can quickly rename a large number of files without having to individually select and choose the rename option on each one.
Rename multiple files in a sequence
If you want all your files to share the same name except for a number, this method is the fastest possible way of getting that accomplished. Renaming files in a batch using the File Explorer allows you to let files share the same name, but get an automatically assigned number for differentiating and identifying them.
-
Open the File Explorer and browse to the folder containing the files you want to rename.
-
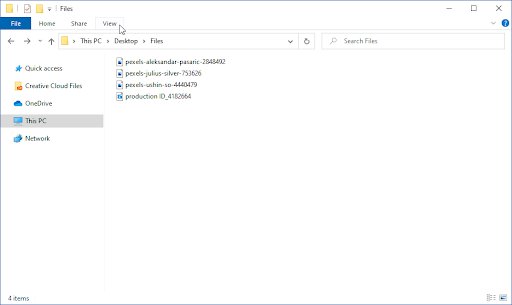
Using the header menu located in the top portion of the File Explorer, click on the View tab. This will expand your window with a new section.

-
Click on the Details button to change your view mode.
-
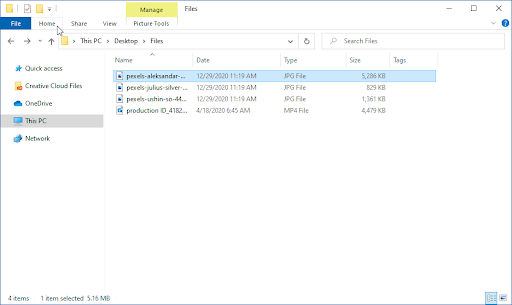
Using the same menu on top of the File Explorer window, switch to the Home tab.

-
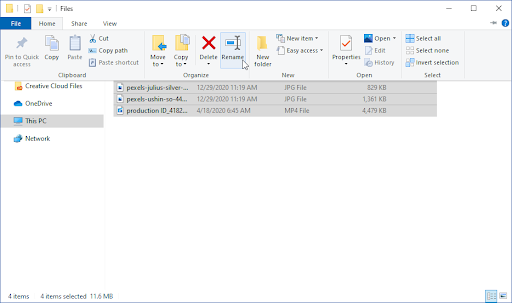
Click on the Select all button, found in the Select section of the pane.
-
Tip: Using the Ctrl + A keyboard shortcut allows you to select all files even quicker. You can also manually select files in a bulk by clicking and holding your mouse cursor, and then dragging it over the files you want to select.
-
Tip: Using the Ctrl + A keyboard shortcut allows you to select all files even quicker. You can also manually select files in a bulk by clicking and holding your mouse cursor, and then dragging it over the files you want to select.
-
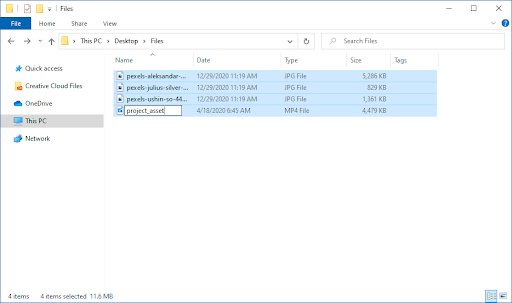
With all the files selected, open the Home menu again and click the Rename button.
-
Type in the shared name you want your files to have, and press the Enter button when you’re done.
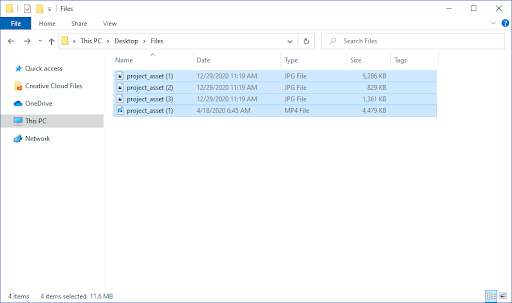
- After completing the steps above, you should notice that all your files changed to the same name with the only difference being a number to identify them with. For example, naming all files “project_asset” will yield files named “project_asset (1)” and “project_asset (2)” as a result.
Method 2. Rename multiple files with PowerToys
PowerToys is a downloadable app that may function as the solution to your renaming problems. It’s made by Microsoft and can be downloaded by navigating to this link in your browser.
-
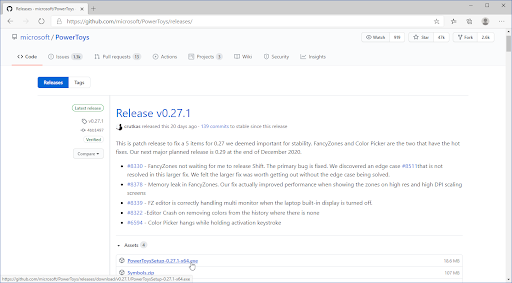
Open the PowerToys download page on GitHub, then click on the .exe file in the Assets of the latest release. Doing so will download PowerToys to your computer.
-
Launch the setup file, typically named something like “PowerToysSetup-0.27.1-x64.exe”. This is the file you just downloaded with the version number and your system architecture.

- Follow the on-screen instructions to install PowerToys and any components it needs, such as Microsoft Visual Studio. You know the installation process has finished once you see the “Completed the PowerToys Setup Wizard” text on the screen.
-
Launch PowerToys from either your desktop or the Start menu.
-
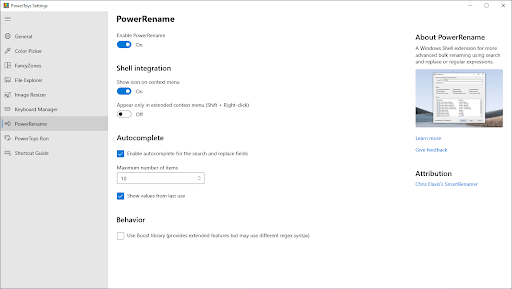
Using the pane on the left side, switch to the PowerRename tab. Here, make sure to toggle Enable PowerRename on.
- Tip: Also make sure that the “Show icon on context menu” option is toggled on under the Shell integration section. If this is turned off, you won't be able to see the PowerRename function in your context menus, even if the function itself is enabled.
-
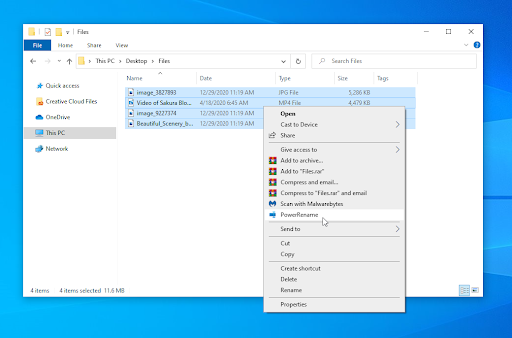
Now that the option is enabled, navigate to a folder containing the files you want to rename in a batch. Select all the files you want to rename (either by manually dragging your mouse cursor or by pressing the Ctrl + A shortcut).
-
Right-click on the selected files and choose PowerRename from the context menu.
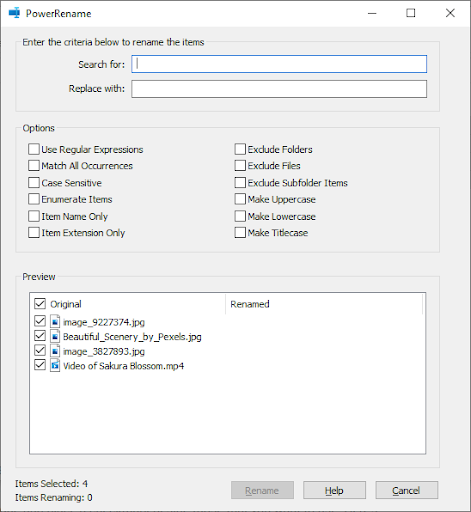
- Use the interface to rename files in bulk. You can search for and replace words, configure how you want to replace file names, and much more. We recommend experimenting with the options and finding out what’s the perfect configuration for your current file loadout.
- Once you’re happy with the edits, press the Rename button. The filenames will automatically change accordingly to your edits.
Final thoughts
If you need any further help with Windows 10, don’t hesitate to reach out to our customer service team, available 24/7 to assist you. Return to us for more informative articles all related to productivity and modern-day technology!
Would you like to receive promotions, deals, and discounts to get our products for the best price? Don’t forget to subscribe to our newsletter by entering your email address below! Receive the latest technology news in your inbox and be the first to read our tips to become more productive.
You may also read
> How To Use Function Keys Without Pressing Fn Key On Windows 10
> How to Fix the Windows Explorer Not Responding on Windows 10
> How to get help with file explorer in windows 10