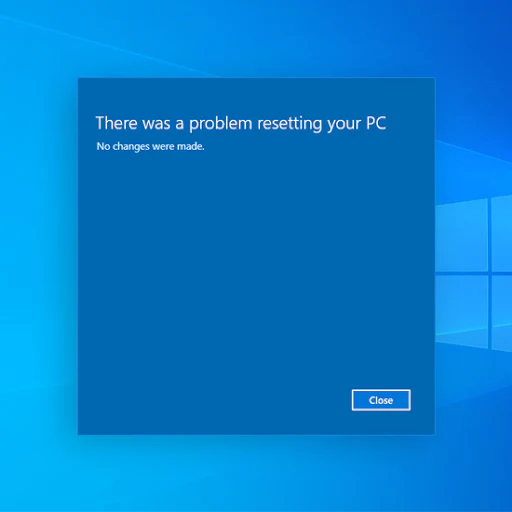
There are many reasons why you might want to reset your computer. Windows 10 acting up, some pesky malware is attacking your files, or you simply want a fresh start. However, if you run into the “There was a problem resetting your PC” error, even resetting requires some troubleshooting.
As the error itself suggests, your PC will remain in the same state and the reset won’t be carried out. In worse scenarios, your computer might get stuck in a reset loop, making it impossible to boot your system without errors. Luckily, you can fix these issues by following our guides below. Continue reading to learn more and see the steps for resolving the issue.
First, How do you Reset your PC
Recovery options in Windows are below
To reset your PC:
- Select Start > Settings > System > Recovery . Open Recovery settings.
- Next to Reset this PC, select Reset PC. Then choose from the options and/or settings in the table below.
If you've recently installed a Windows update, uninstall the update to try to resolve the issue.
-
Select the Start button, then select Settings > Update & Security > Windows Update > View your update history > Uninstall updates.
-
Right-click the update you want to remove, and then select Uninstall.
To reinstall Windows 10 while Windows is running:
-
Connect the installation media you created to your PC.
-
Open File Explorer and select the drive with the installation media.
-
From the root directory of the drive, double-click setup.exe, and then select Yes when asked if you’d like to allow the app to make changes to your device.
-
Select Change what to keep.
-
Select one of the following options, and then select Next:
-
Keep personal files and apps – To preserve your personal data, apps, and settings.
-
Keep personal files only – To preserve your personal data and settings, all your apps will be removed.
-
Keep nothing – To remove all personal data, settings, and apps.
Warning: You cannot undo a reinstallation of Windows 10. If you choose the Keep nothing option, be sure to back up your files first.
-
-
To finish, select Install to start reinstalling Windows 10 on your PC.
Your PC will restart several times during the reinstallation.
To reinstall Windows 10 by starting your PC using installation media:
-
Connect the installation media you created to your PC.
-
Start your PC using the installation media.
Note: Check with the PC manufacturer on how to start the PC using media.
-
When Windows Setup starts, select Next and then Install now.
-
If you have a Windows 10 product key, enter it when prompted. Otherwise, select I don’t have a product key.
-
If prompted, select a Windows edition (e.g., Home, Pro) to install and select Next.
-
When prompted to choose a type of installation, select Custom: Install Windows only (advanced).
-
Select the disk or partition to which Windows 10 should be installed.
Note: If you suspect your PC has been infected, consider deleting the existing partitions and reinstalling Windows 10 onto a clean disk. Your data on any deleted partitions will be lost.
-
Select Next to start reinstalling Windows 10 on your PC.
Your PC will restart several times during the reinstallation.
What causes " There was a problem resetting your PC" error?
This error on your screen makes resetting or booting your device impossible, depending on where you see the error. Here are some other variations of the error message on different builds of Windows 10:
- There was a problem refreshing your PC. No changes were made.
- Can’t reset your PC.
- There was a problem resetting your laptop or computer.

A variation of the same error can be seen in the screenshot above, where errors come up when trying to refresh the Windows 10 system instead of the reset.
If you see any of these messages at the end of your resetting process, you must troubleshoot in order to properly reset your operating system. Continue reading to find the steps necessary to restore your computer.
Fixed: "There was a problem resetting your PC"
Below are the different methods to restore your device and get rid of the frustrating error. Don't worry - even if you're stuck in a reset loop, our methods are suitable for fixing the issue.
Note: It’s worth mentioning that this error exists on both Windows 8 and Windows 8.1 as well. The majority of the methods below can also solve the issue of those operating systems. However, some steps might differ, as our article is primarily focusing on Windows 10.
Depending on the state of your device, you can either attempt to fix the issue or save your computer from getting stuck in an infinite reset loop. Our methods will discuss all sorts of solutions fit for different scenarios.
To carry out most of the steps in the guide below, you need to have a local user account with administrative permissions.
Quick Fix: Use the Startup Repair function
Startup Repair helps you fix common problems that prevent Windows from starting.
Note: If you’ve encrypted your device, you’ll need your BitLocker key to start in safe mode.
First, you need to enter the Windows Recovery Environment (winRE). To do this, you will repeatedly turn your device off, then on:
-
Hold down the power button for 10 seconds to turn off your device.
-
Press the power button again to turn on your device.
-
On the first sign that Windows has started (for example, some devices show the manufacturer’s logo when restarting) hold down the power button for 10 seconds to turn off your device.
-
Press the power button again to turn on your device.
-
When Windows starts again, hold down the power button for 10 seconds to turn off your device.
-
Press the power button again to turn on your device.
-
This time, allow your device to fully start up.
-
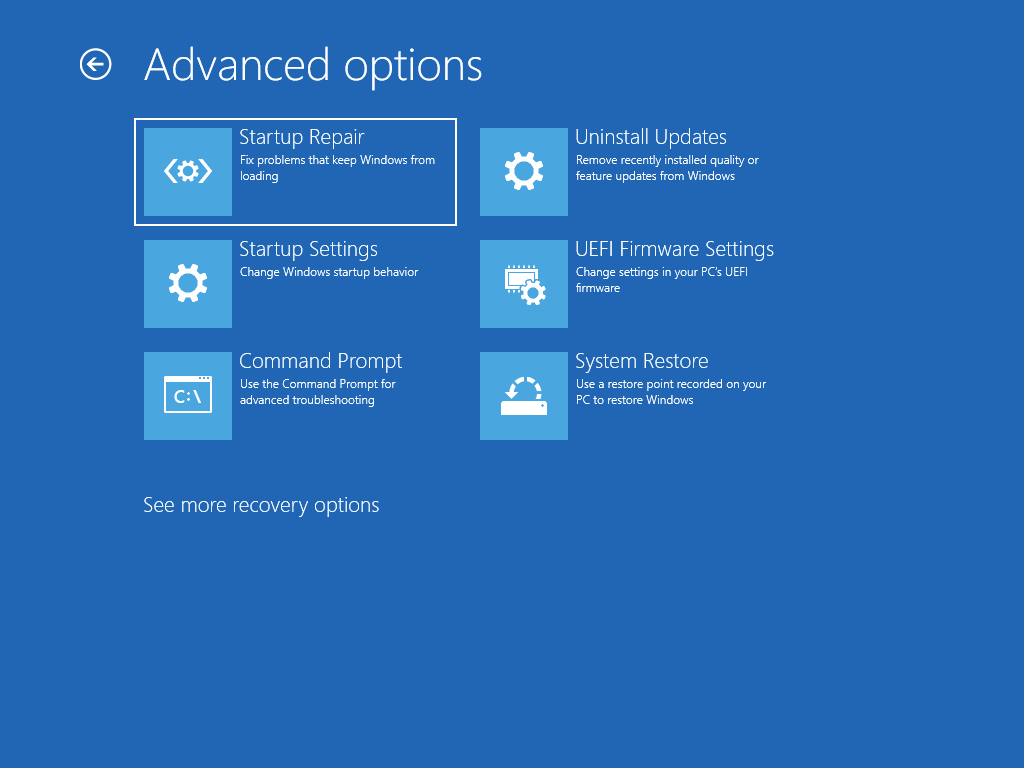
Select Advanced options.
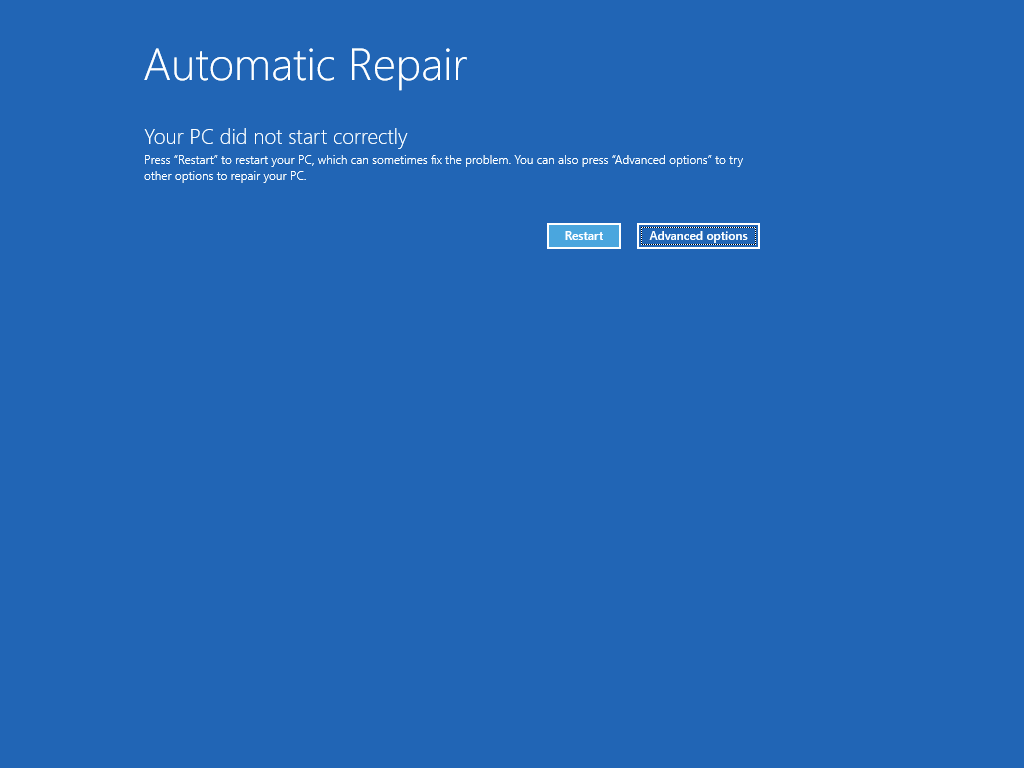
-
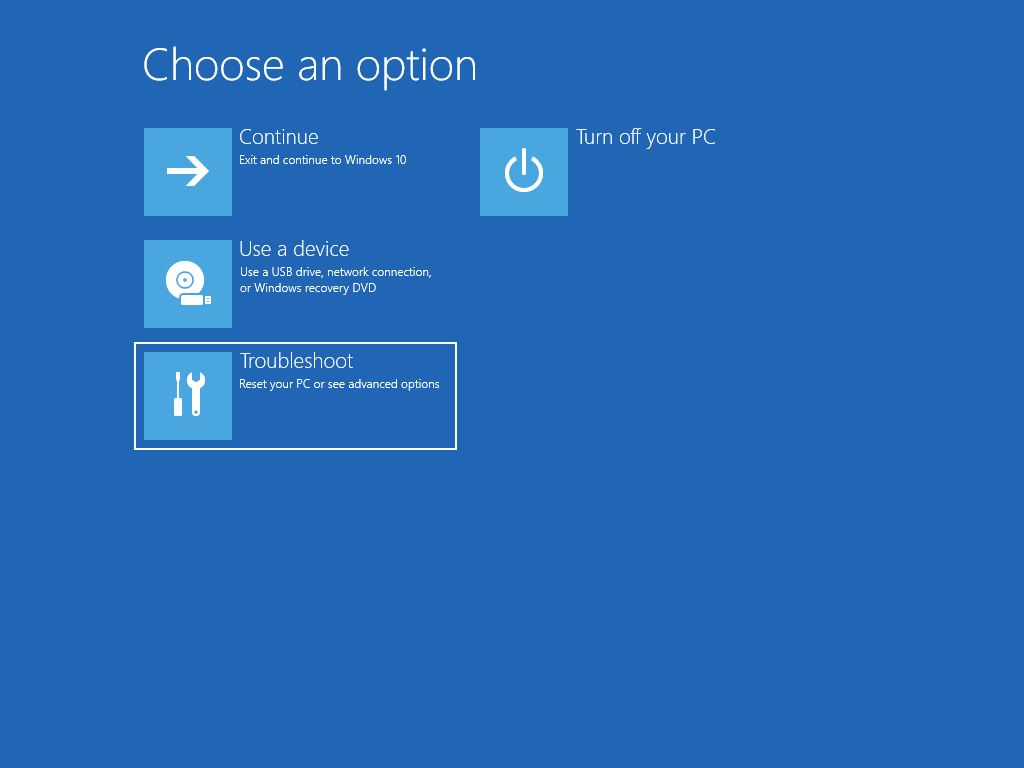
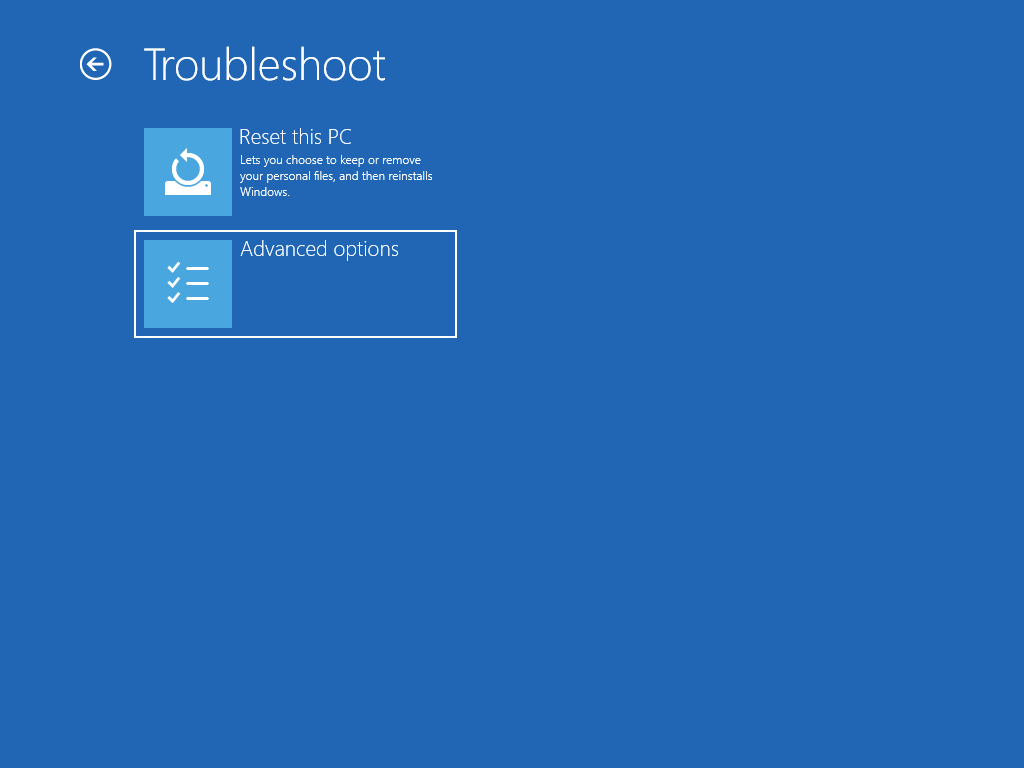
Now that you're in winRE, on the Choose an option screen, select Troubleshoot > Advanced options > Startup Repair > Restart.
Method 1: Run the System File Checker
One of the most common causes for the reset error is corrupted system files. If key files in your Windows 10 system are damaged or deleted, they can prevent the operation from resetting your PC. Running the System File Checker (SFC scan) will allow you to repair these files and attempt to reset them again. Follow the guide below to fix the error.
Here's how to run the SFC scan:
-
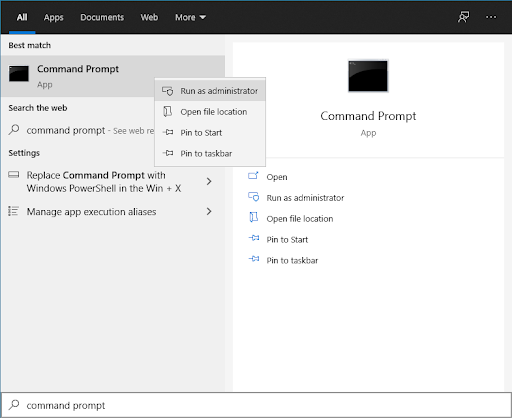
Search for Command Prompt, then right-click on the best match result and choose Run as administrator. If prompted, enter your local user password or get the administrator to help you.
-
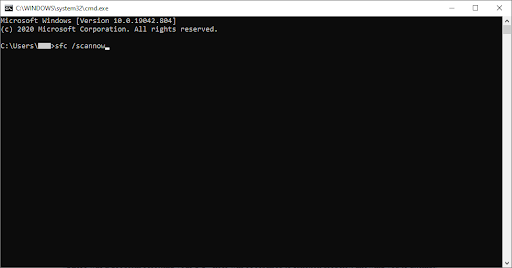
Once the Command prompt window opens, type sfc /scannow then press the enter key to start scanning your PC.
- Wait for the scan to reach 100% completion. Make sure you don't close the Command Prompt or shut down your computer during this process, as it may reset progression.
- Any system errors detected will automatically get repaired. This allows files associated with the "There was a problem resetting your PC" error to repair and function properly.
- Restart your computer and attempt to reset your PC again.
If this method didn't work for you, or your computer is currently stuck in a reset loop, proceed with Method 2 below.
Methods 2: Restore from a system restore point
If you have a System Restore point setup, you might be able to return to it and fix the errors automatically. By returning to one of these points, you basically send your computer back in time.
This option takes your PC back to an earlier point in time, called a system restore point. Restore points are generated when you install a new app or driver, and when you create a restore point manually. Restoring won’t affect your personal files, but it will remove apps, drivers, and updates installed after the restore point was made.
This method will only work if your point was set when the "There was a problem resetting your PC" error didn’t exist on your PC yet. However, it’s still worth a shot, as your files will never be harmed when doing a System Restore.
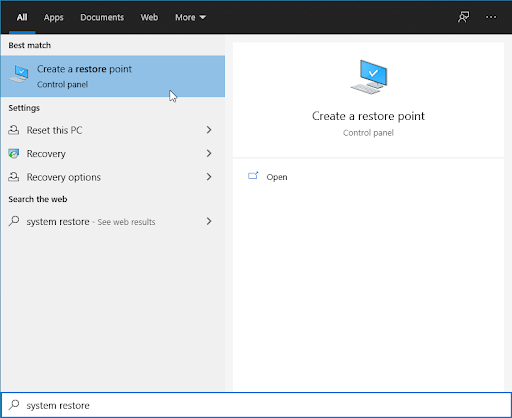
- From the search bar, type System Restore. Choose the Create a restore point option from the results.
-
System Properties windows will launch. Here, switch to the System Protection tab as shown.

- Click on the System Restore button.
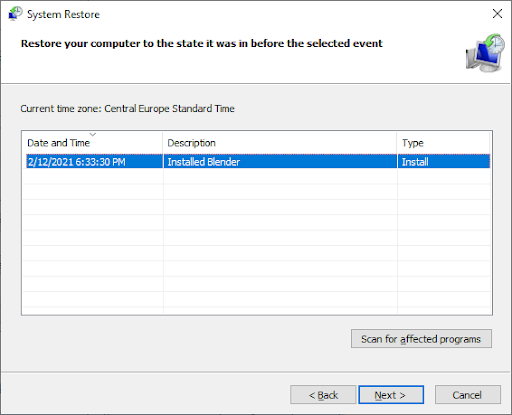
- When the System Restore window launches, click on Next.
-
Choose a point you want to return to. Your system may automatically create restore points after updates and software installations. Select a suitable return point, and then click Next.
- Simply follow the on-screen instructions in the restoration wizard to return your system to a past point. When you’re done, check if you can reset your PC.
Method 3: Rename System and Software Registry
For this method, we'll again use the Command Prompt to restore some crucial system files, including the software registry itself. This method works to fix various causes, including corruption and malware.
Note: Even if your PC is currently stuck in a reset loop, you can access the Command Prompt and possibly fix the issue from there. To do this, you simply have to use the Startup Repair tool.
Follow the next steps carefully! Using commands can easily lead to issues if the commands aren’t entered right.
-
Type Command Prompt in the search bar located within your taskbar. Right-click on it from the results and select the Run as administrator option.
- Using your keyboard, type in the following 3 commands. Make sure to press the Enter key on your keyboard after each line to execute the command:
cd %windir%\system32\config
ren system system.001
ren software software.001 - Once you’re done, close the Command Prompt by typing "exit" and pressing the Enter key, and then restart your PC. You can give resetting another try if you successfully booted up..
Method 4: Disable ReAgentc.exe
Some Windows 10 users have reported that the "There was a problem resetting your PC" error immediately disappeared after disabling ReAgentc.exe.
This process is related to the Windows Recovery Environment. You can disable it by using the Command Prompt. Make sure to follow our guide carefully! Using commands can easily lead to issues if the commands aren’t entered right.
- Type Command Prompt in the search bar located within your taskbar. Right-click on it from the results and select the Run as administrator option.
- Type in reagentc /disable and press enter.
- Re-enable the ReAgentc.exe process by typing in reagentc /enable. Press enter again.
- Close the Command Prompt and restart your computer. When you’re booted up, you can attempt to reset your PC once more.
Method 5: Refresh Windows from Windows Defender
Windows Defender is an integrated tool to help you with issues related to your computer. Its main purpose is to deal with malware, viruses, and other security issues, however, it’s often useful for other things as well.
Warning: When refreshing your PC, most of your files located on the system drive will be deleted. This is done to reset your system as if it was a new installation of Windows 10. Make sure you back up any personal files that are important as well - if something goes wrong during the reset process, data loss may occur even if the files weren't on your system drive.
After you’re done backing up your files, follow these steps to perform a refresh through Windows Defender:
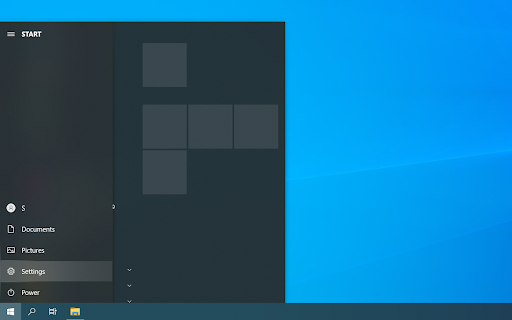
- Open the Settings app by pressing down the Windows + I keys on your keyboard. Alternatively, you can click on the gear icon in the Start menu.
-
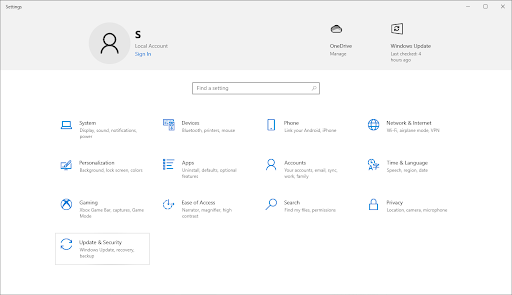
Click on Update & Security.

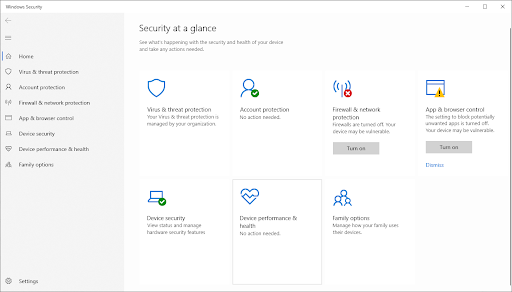
- Click on Windows Security from the left-side menu. In other versions of Windows 10, this is called Windows Defender.
-
Click on the Open Windows Security button. This button might show up as an Open Windows Defender Security Center for you.
-
Scroll down and choose Device performance & health.
-
Under the Fresh start section, click on the Additional Information link.
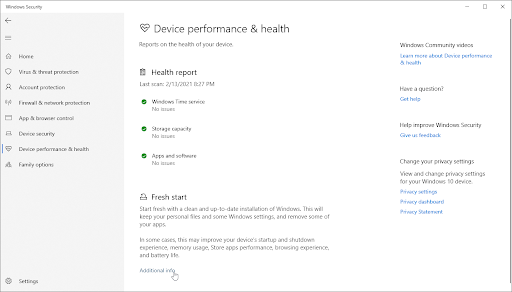
- Click on Get Started and follow the on-screen instructions for refreshing your PC. Afterward, you can attempt a reset once again.
Method 6: Fresh Install Windows 10
If Windows 10 is causing you much trouble you can do a fresh install. Sometimes, some Windows issues don't go away until you uninstall the Windows version and install it afresh.
If you're key is close to expiring or has expired, you can buy Windows 10 Product key here.
Always go for genuine Windows keys and avoid pirated software that can expose you to the risk of malware and other data breaches.
Final Thoughts
If you need any further help with Windows 10, don’t hesitate to reach out to our customer service team, available 24/7 to assist you. Return to us for more informative articles all related to productivity and modern-day technology!
Would you like to receive promotions, deals, and discounts to get our products for the best price? Don’t forget to subscribe to our newsletter by entering your email address below and get our Mystery Offer today! Receive the latest technology news in your inbox and be the first to read our tips to become more productive.