Are you looking to make your PowerPoint presentation run seamlessly on a loop? Looping your PowerPoint presentation ensures that your slides keep playing without interruption. This feature is perfect for kiosks, trade show booths, and any situation where you want your content to be displayed repeatedly without manual intervention.
This guide will explain the step-by-step process of looping your PowerPoint presentation, ensuring a professional display. Whether you're new to PowerPoint or just looking to refine your skills, this article will give you the knowledge and confidence to create a polished, automated slideshow.
By the end, you'll be able to set up a looping presentation effortlessly, enhancing your ability to deliver continuous content to your audience.
Why Loop a PowerPoint Presentation?
Looping your PowerPoint presentation can serve various purposes, from continuously showcasing your company's products and services at a trade show to providing background information at a conference or event. This feature ensures that your audience can catch your message at any point without needing to restart the presentation manually.
Looping presentations provide a seamless, uninterrupted experience for audiences. Your viewers can join the slideshow at any point without missing important information, making them ideal for trade shows, kiosks, or background displays.
Get Microsoft Office for cheap from SoftwareKeep to start creating looping presentations without breaking the bank.
Benefits of Looping a Presentation
Looping a PowerPoint presentation offers several advantages:
- Automatic Playback: No need to manually restart the presentation; it plays continuously.
- Consistency: Ensures that every viewer sees the same content, regardless of when they start watching.
- Engagement: Keeps your audience engaged with ongoing visual content.
How to Set Up a Looping PowerPoint Presentation
Making your PowerPoint presentation loop is a simple process. Follow the steps below:
1. Open Your PowerPoint Presentation
Start by opening the PowerPoint presentation you want to loop. Before setting up the loop, ensure that all your slides are in the correct order and that your content is finalized.
2. Set Up Slide Transitions
You need to set up slide transitions to make your presentation loop smoothly. Transitions control how your slides move from one to the next.
- Click on the slide you want to add a transition to.
-
In the PowerPoint ribbon at the top, click on the "Transitions" tab.

- Select a transition effect from the available options. This effect will be applied when moving to the next slide.
After selecting a transition effect, you can adjust the duration to control how long the transition lasts. This can be done by modifying the "Duration" field in the Transitions tab.
3. Set Up Slide Timings
For your presentation to loop effectively, specify how long each slide should be displayed before moving to the next one.
- Click on the slide you want to set a timing for.
-
Make sure the "On Mouse Click" option is unchecked.

- In the "After" box, specify the time (in seconds) the slide should be displayed before transitioning to the next slide.
4. Configure the Looping Option
Now that your transitions and timings are set up, you need to configure the looping option.
- Click on the "Slide Show" tab in the PowerPoint ribbon.
-
Click on "Set Up Slide Show." A new window will open.

-
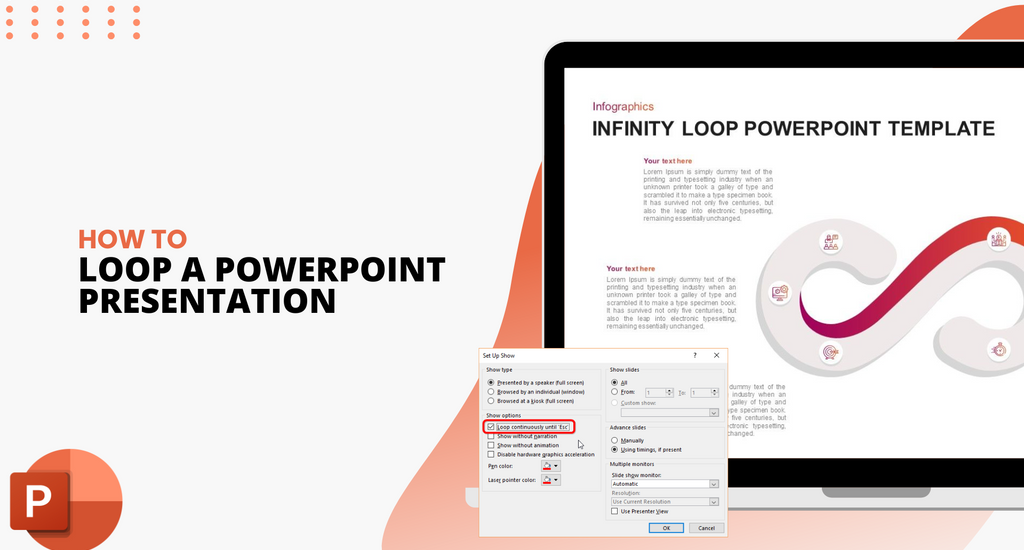
In the dialog box, check the option "Loop continuously until Esc." This setting ensures that your presentation will keep looping until you press the "Esc" key to stop it.

5. Start the Slide Show
Once you've configured the looping option, you're ready to start your slide show.
- Click on the "Slide Show" tab and select "From Beginning" to start your presentation.
- Your presentation will play in full-screen mode and will loop continuously based on the settings you've applied.
Tips for a Seamless Looping Presentation
Creating a smooth and professional looping presentation requires attention to detail. Here are some essential PowerPoint tips to ensure your slideshow transitions seamlessly and keeps your audience engaged throughout its continuous playback.
Using Kiosk Mode
Kiosk mode is particularly useful for looping presentations as it restricts navigation options, ensuring your audience cannot skip slides or interrupt the loop.
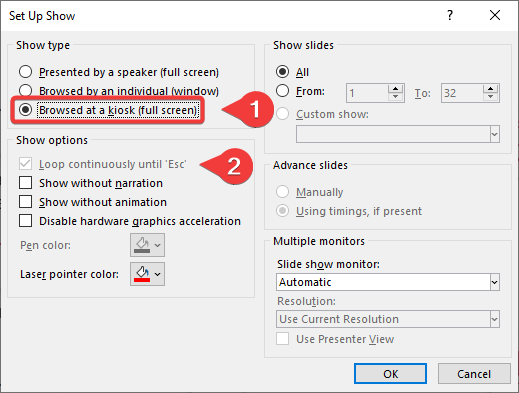
In the "Set Up Slide Show" dialog box, select the "Browsed at a kiosk (full screen)" option. This will turn off keyboard and mouse input that can alter the slide show, providing a controlled viewing experience.

You'll see that selecting this option automatically loops your presentation until hitting Esc.
Adding Background Music
To enhance your looping presentation, consider adding background music that plays throughout the entire slideshow.
-
Go to the "Insert" tab and click on "Audio," then select "Audio on My PC" to choose a file from your computer.

- In the "Audio Tools Playback" tab, set the audio to "Play across slides" and "Loop until Stopped."
Ensuring Smooth Transitions
Ensure your transitions are smooth and not too jarring, as abrupt transitions can disrupt the viewing experience. Consistency in transition style and timing can contribute to a more professional and engaging presentation.
Testing Your Presentation Loop
Before the actual event or display, test your looping presentation thoroughly. Check for any timing issues, ensure that transitions work correctly, and verify that the presentation loops seamlessly without manual intervention.
How to Fix PowerPoint Presentation Not Looping
If your PowerPoint presentation is not looping as expected, there may be a few common issues to address.
1. Enable Looping in PowerPoint Slide Show Settings
If your PowerPoint presentation is not looping, it might be because the loop setting is not enabled in the Slide Show settings. This can easily be fixed by adjusting the settings within the Slide Show tab.
- Open your PowerPoint presentation.
- Click on the "Slide Show" tab in the top menu.
- Click on "Set Up Slide Show."
- In the dialog box that appears, check the box labeled "Loop continuously until 'Esc.'"
- Click "OK" to save the changes.
- Start your slide show to check if the looping works.
By enabling the loop setting, your presentation should loop continuously as intended.
2. Set Slide Transition Timings
Each slide must have transition timings set for a PowerPoint presentation to loop effectively. The slides won't advance automatically without these, preventing the loop from functioning correctly.
- Open your PowerPoint presentation.
- Select the "Transitions" tab in the top menu.
- Click on the first slide to select it.
- In the "Timing" section, check the box next to "After" and set the desired duration for the slide to appear.
- Click "Apply to All" to ensure all slides have the same transition timing.
- Save your presentation.
- Start your slide show to verify that slides advance automatically and that the loop works.
Setting transition timings ensures your slides move automatically, allowing the presentation to loop seamlessly.
3. Include All Slides in PowerPoint Custom Slide Show
Sometimes, certain slides might be excluded from the slide show, causing the presentation not to loop correctly. Including all slides in the show will help resolve this issue.
- Open your PowerPoint presentation.
- Click on the "Slide Show" tab in the top menu.
- Select "Custom Slide Show" and then "Custom Shows."
- In the dialog box that appears, ensure all slides are listed in the "Slides in custom show" section.
- If any slides are missing, click "Edit" to add them.
- Click "OK" to save the changes.
- Start your slide show to ensure all slides and the presentation loops are included.
By ensuring all slides are part of the custom slide show, you can ensure the entire presentation loops without skipping any content.
Conclusion
This guide teaches you how to make a smooth and professional looping PowerPoint presentation for various purposes, including business events, education, and personal projects. This skill ensures a consistent message without interruption, improving the delivery of compelling content.
Make the most of technology and communicate more effectively by looping your PowerPoint presentations. With these skills, you can create dynamic, automated presentations that leave a lasting impression on your audience.
