
USB ports are an essential part of any computer system, allowing you to connect various devices such as external hard drives, keyboards, mice, and more. However, at times, you may find that your USB ports have stopped working, leaving you unable to connect any devices. This can be frustrating, especially when transferring files or using a particular peripheral.
Many Windows 10/11 users have reported similar problems where their USB ports fail to recognize any devices. The root cause of this issue can be anything from hardware problems to outdated drivers or incorrect power settings.
The good news is that in most cases, the problem can be fixed with a few simple steps, and you can get your USB ports working again in no time. In this guide, we will walk you through some troubleshooting steps to help you identify and fix the problem. So, if you're tired of dealing with USB port issues, read on to find out how to fix them.
What Causes USB Ports to Stop Working?
USB ports are an essential component of any Windows 10/11 computer, allowing you to connect a wide range of devices. Before we get into troubleshooting steps, it's important to understand the potential causes of USB port issues. Here are some common reasons why USB ports may not work in Windows 10/11:
- Debris in the ports - Dust and other debris can accumulate in your USB ports over time, obstructing the connection between the port and your USB device, and resulting in connectivity issues.
- USB device - If your USB device is not working, it could be a sign that there's something wrong with the device itself, such as a damaged cable or connector. Try using a different USB device or cable to isolate the problem.
- Windows updates - If you have not installed the latest updates to your Windows operating system, outdated drivers or bugs may cause USB port issues.
- USB drivers: Your USB drivers may be outdated, corrupt, or even missing, causing problems with the USB port functionality.
- Power settings - Some power settings cause specific devices and ports to turn off to preserve battery life. If you have enabled any power-saving settings, you should disable them to check if the USB ports start working again.
- System files - Corrupt or damaged system files can cause USB ports to stop working.
Now that you know the potential causes of USB port issues, let's look at some troubleshooting steps to help you fix them.
Fixed: USB Ports Not Working in Windows 10/11
Here are some solutions to help you fix any USB port issues in Windows 10/11:
- Check Your USB Ports
- Inspect Your USB Hardware
- Restart Your Computer
- Update Windows
- Reinstall Your USB Drivers
- Change Your Power Management Settings
- Disable the “USB Selective Suspend Power Setting”
- Run the SFC Scan
- Run the DISM Scan
1. Check and Clean Your USB Ports
Checking your USB ports for debris or other obstructions is a good starting point when your USB ports stop working. Dust and debris can accumulate in your USB ports, blocking the connection between the port and your USB device, and leading to connectivity issues.
Make sure that you thoroughly clean the ports with a soft cloth or compressed air to remove any dirt or dust. Once that's done, connect your USB device and see if it works correctly. You should also try plugging a different USB device into the same plug to eliminate the possibility of a hardware problem with your USB device.
2. Inspect Your USB Hardware
If your USB device is not working, it could be a sign that something is wrong with the device itself, such as a damaged cable or connector. Inspecting your USB hardware can help you determine if the issue is with your device or the port.
- Check your cables - Make sure your device's cables, if it has any, are securely connected. If the cables are loose, you will need to replace them with new ones.
- Check your connectors - If your device has a connector that plugs into the port, to make sure it is properly inserted and not damaged or broken.
- Make sure your USB device is compatible - Not all USB devices are compatible with every port. Check the specifications of your device to make sure it is compatible with the port you're using.
Once you have inspected your hardware, try using a different USB device or cable to isolate the problem.
3. Restart Your Computer
Restarting your computer can help to clear up any temporary issues that may be affecting your USB ports. It's a simple and quick solution that can be effective in resolving minor problems.
- Click on the Start menu in your taskbar. Alternatively, you can also simply press the Windows button on your keyboard.
-
Click on the Power button, and then select Restart from the available options.
- If you have any apps open preventing the restart process, click “Restart anyway” or cancel, and close all apps manually. Make sure you save any progress and files you haven’t saved yet.
After your system reboots, try using the USB port again and see if it works now. If you’re still dealing with any problems, continue to the next solution.
4. Update Windows
An outdated operating system may cause USB port issues. This is because new updates often address bugs and problems with previous ones, which may affect your USB port. Updating your Windows operating system can fix USB port problems caused by software bugs.
How to Update Windows 10
- Click on the Windows icon in the bottom left of your screen to bring up the Start menu. Choose Settings, or use the Windows + I shortcut.
-
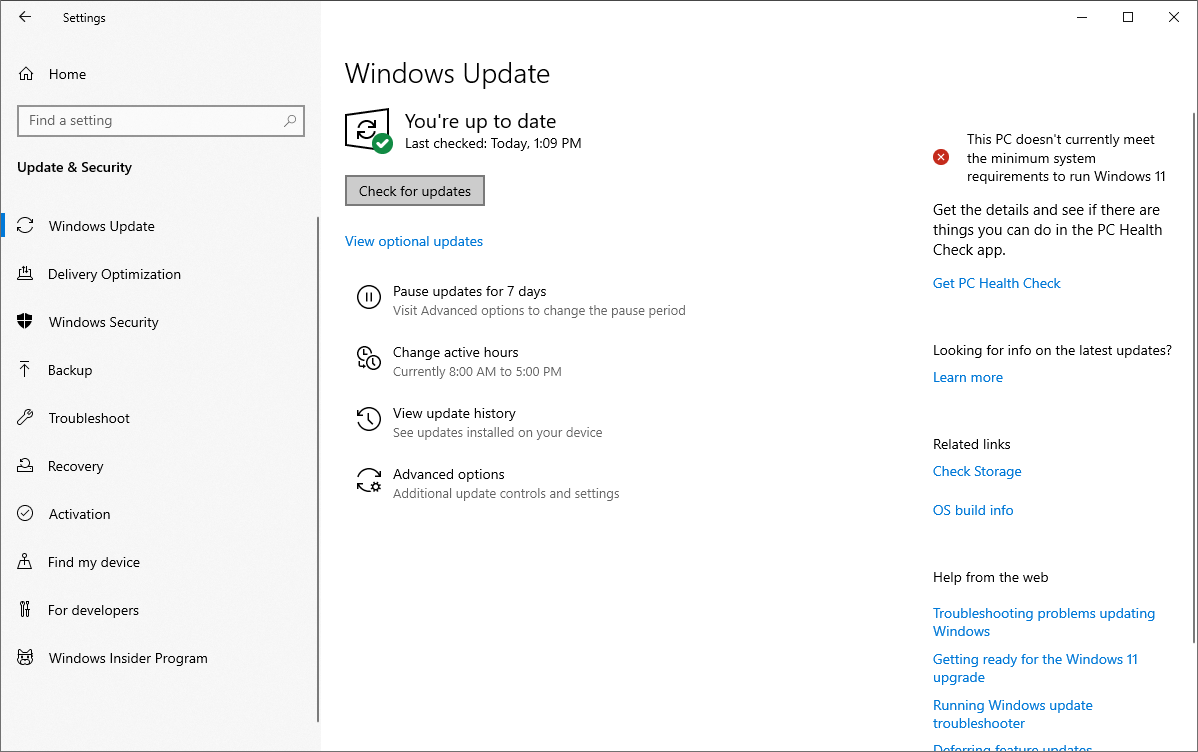
Navigate to Update & Security > Windows Update. Click on the Check for updates button and wait for Windows to find available updates. If you see any updates displayed, click on the View all optional updates link to see and install them.
- When Windows finds a new update, it’ll automatically start installing on your computer. Wait for Windows to download and apply the necessary updates.
How to Update Windows 11
- Click the Windows icon in the bottom-left corner of the screen to open the Start menu, then select Settings. You can also use the keyboard shortcut Windows + I.
-
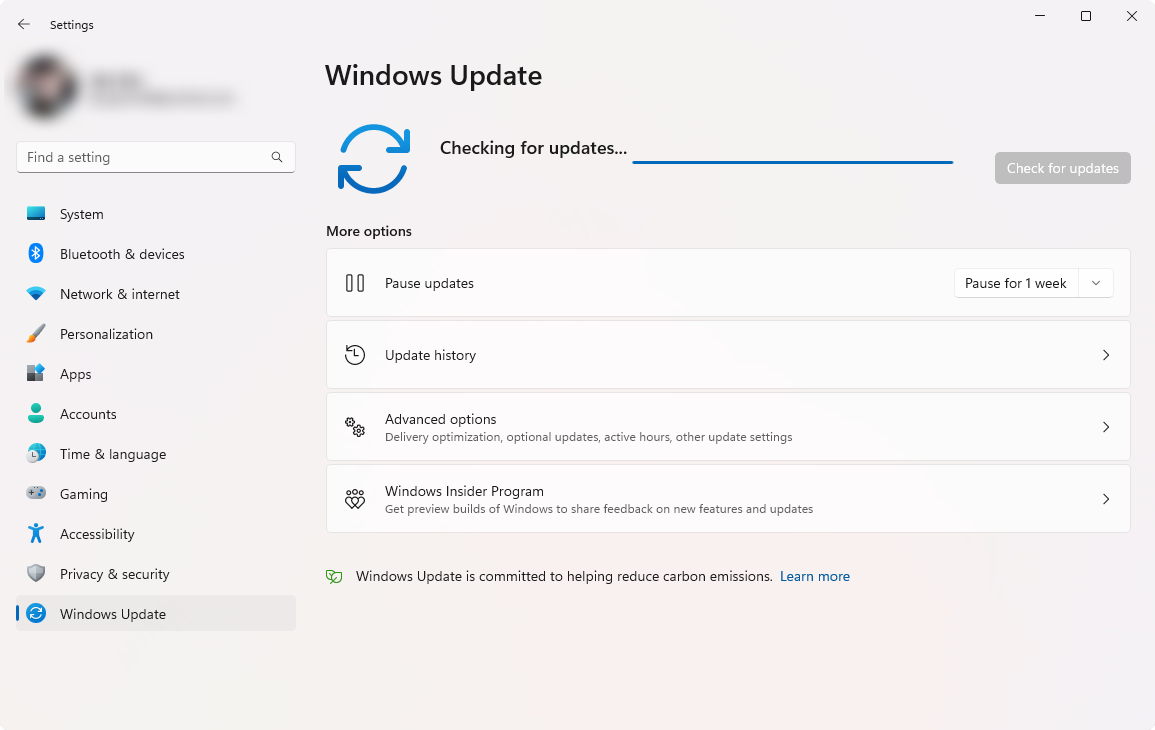
Switch to the Windows Update tab using the menu on the left, and then click on the Check for updates button. Windows will automatically detect if there’s a new update compatible with your device.
- If a new update is available, allow Windows to install it, and then follow the instructions to restart your computer.
5. Reinstall Your USB Drivers
Corrupt or outdated USB drivers can cause problems with the USB port functionality. Reinstalling the USB drivers may help to resolve this issue.
-
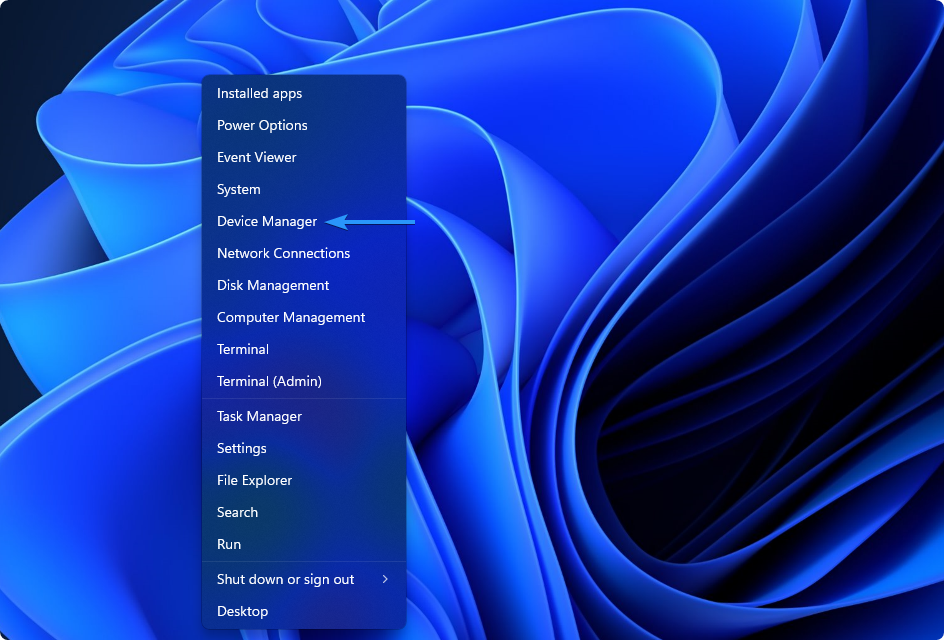
Press the Windows + X keys on your keyboard and choose Device Manager from the context menu.
-
Expand the Universal Serial Bus controllers category, and then right-click on the first device listed. From the context menu, choose the Uninstall device option.
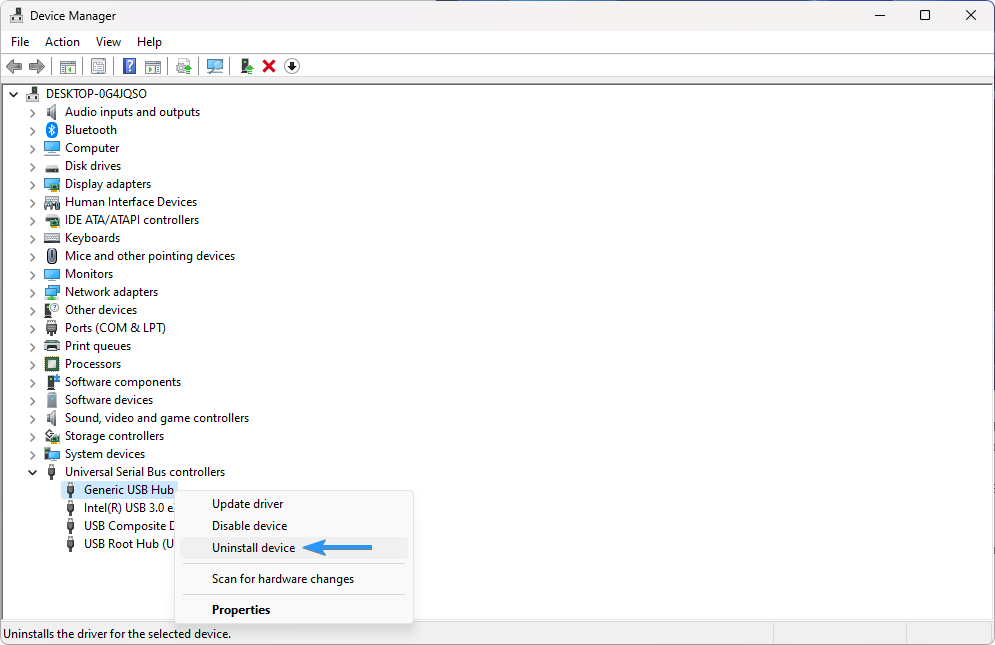
- Repeat this process for every device listed under the category. This will reset all of your USB drivers, allowing you to install them again without any problems.
- Reboot your system and allow Windows to install the necessary drivers. See if this was helpful in fixing the USB ports.
6. Change Your Power Management Settings
Power-saving settings that turn off specific ports or devices to save battery life can cause USB port issues. Changing your power management settings to disable power-saving for USB ports can help to resolve this issue.
- Press the Windows + X keys on your keyboard and choose Device Manager from the context menu.
-
Expand the Universal Serial Bus controllers category by clicking on the arrow next to it. Right-click on the USB Control Hub (or Generic USB Hub) device, and then choose Properties.

-
Switch to the Power Management tab, then uncheck the box next to the “Allow the computer to turn off this device to save power” option.
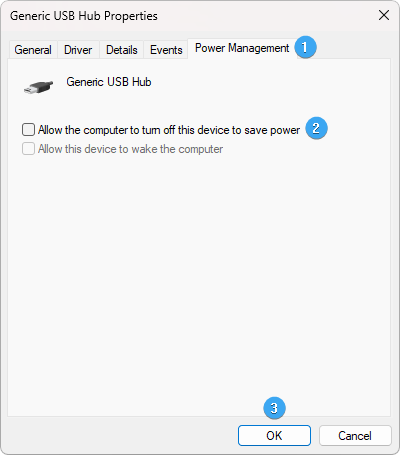
- Click the OK button to finalize the changes. See if this helps resolve the problem with your USB ports not working.
7. Disable the “USB Selective Suspend Power Setting”
Disabling the "USB Selective Suspend Power Setting" can help to fix USB port issues caused by power-saving settings.
- Type "Control Panel" into the search bar on your computer and open the first entry that appears.
-
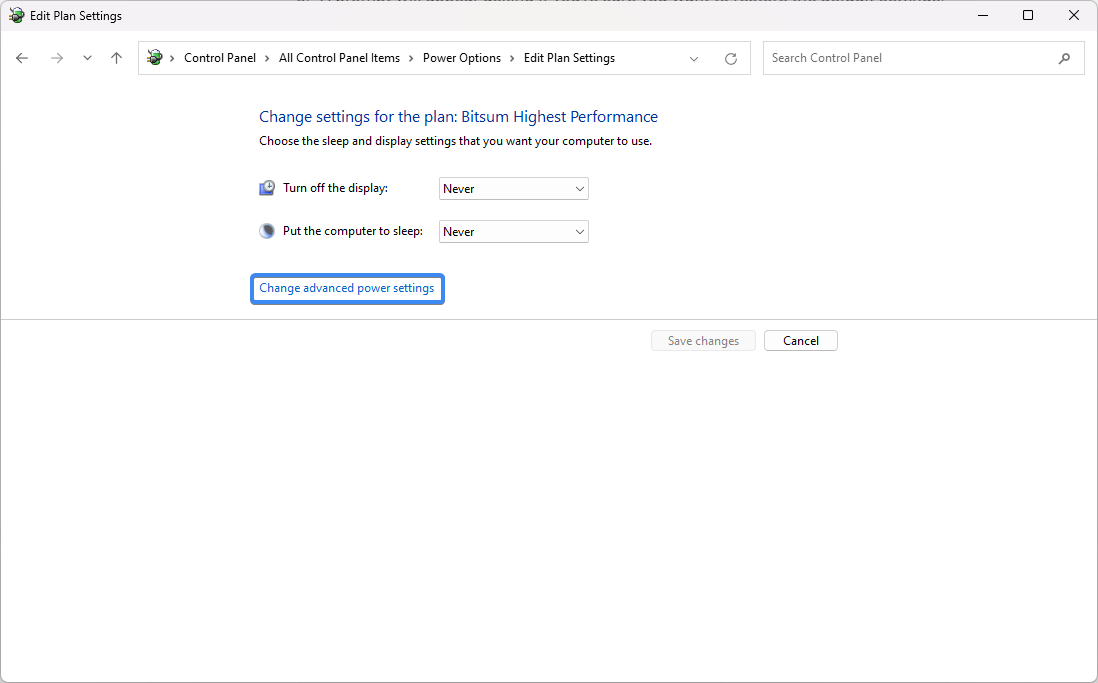
Navigate to Hardware and Sound > Power Options > Change plan settings next to your current plan, and then click on the Change advanced power settings link.
-
A small window will appear. Locate the "USB settings" option. Tap on the plus (+) icon next to it to expand the set of options. Expand the “USB selective suspend setting” with the same icon.
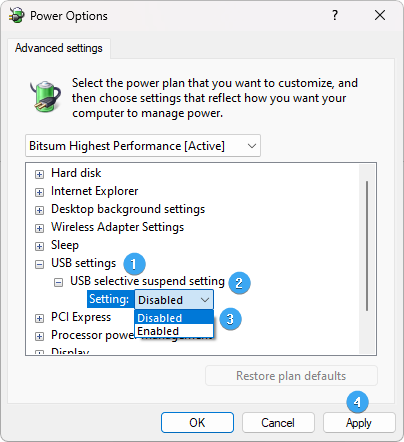
- Select “Disabled” from the drop-down menu. After making this change, click the Apply button, then close the window and see if it worked in restoring your USB ports.
8. Run the SFC Scan
The SFC (System File Checker) scan checks your system files for corruption and can help to repair any issues found. Running an SFC scan can help to restore USB port functionality.
- Open the search bar in your taskbar by clicking on the magnifying glass icon. Press Windows + S on your keyboard as a shortcut.
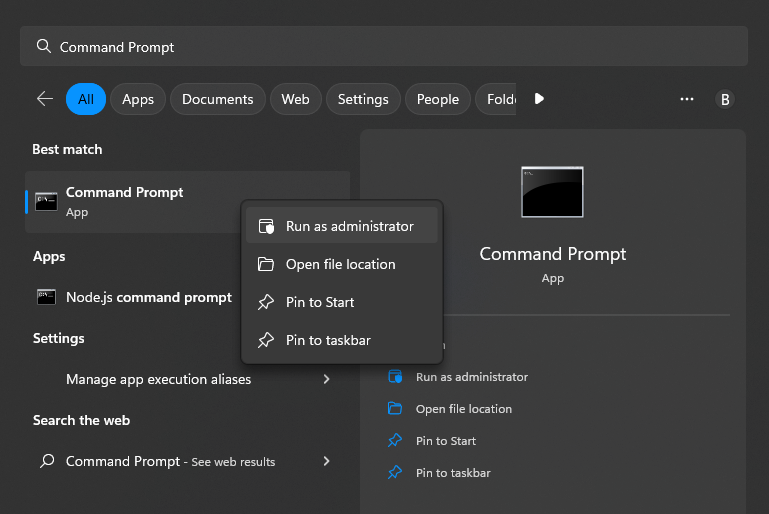
-
Type Command Prompt in the search box. When you see it in the results, right-click on it and choose Run as Administrator.
- When prompted by the User Account Control (UAC), click Yes to allow the app to launch with administrative permissions.
-
Type in the following command and press Enter to execute it: sfc /scannow
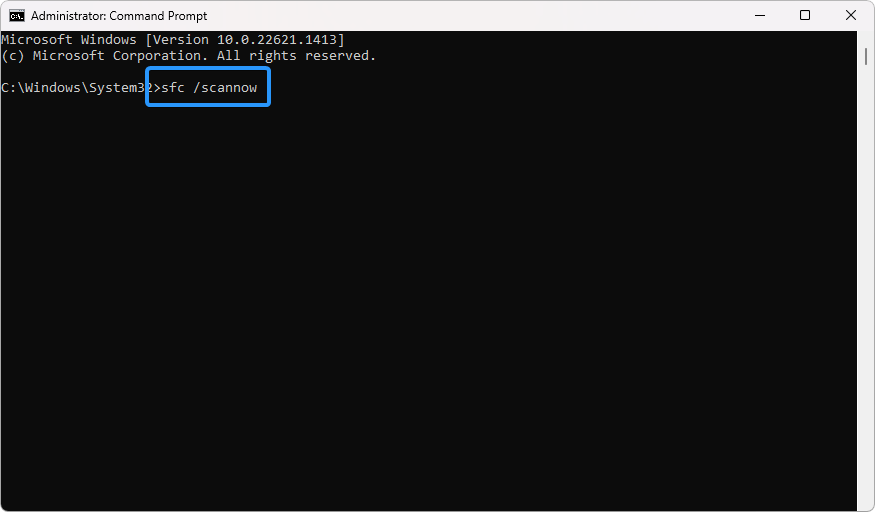
- Wait for the System File Checker to finish scanning your computer. In the case of a discrepancy, the utility will restore system files and fix all errors related to them.
9. Run the DISM Scan
The DISM (Deployment Image Servicing and Management) scan checks and repairs system files for any corruption. Running a DISM scan can help to fix issues with USB port functionality caused by corrupt system files.
- Open the search bar in your taskbar (or press Windows + S) and then type in Command Prompt. When you see it in the results, right-click on it and choose Run as Administrator.
- When the User Account Control (UAC) prompt appears, click Yes to grant the app administrative privileges.
-
Type in the following command and press Enter to execute it: DISM.exe /Online /Cleanup-image /Restorehealth
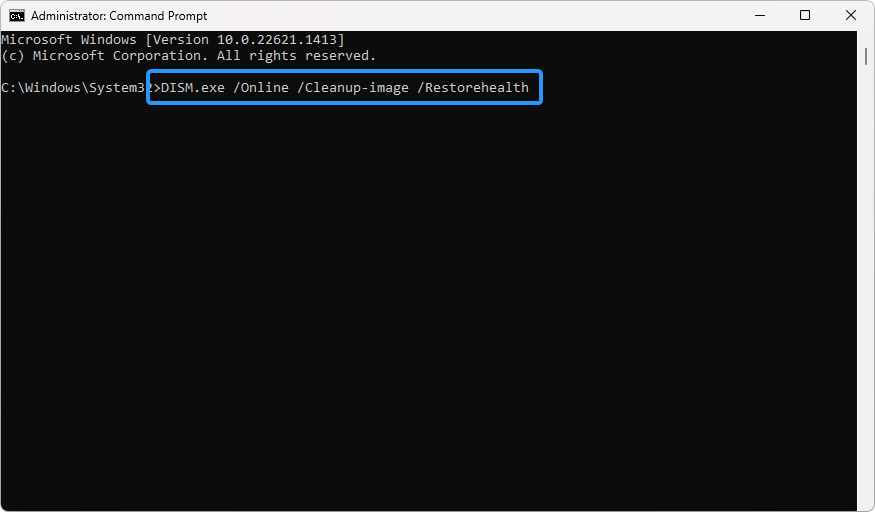
- Once you have run the command, allow the process to complete. After it has finished, close the Command Prompt and restart your device to check if your USB ports are working properly.
Conclusion
There are many potential causes of USB port issues in Windows 10/11. By following the solutions outlined above, you should be able to fix your USB ports and get them working properly again. If the issue persists, contact your computer manufacturer for further assistance.
We hope these steps have helped you resolve any issues with your USB ports in Windows 10/11. If you need further assistance or would like additional information, please contact us and one of our technicians will be happy to help you. Thank you for using our guide!
One More Thing
We’re glad you’ve read this article. :) Thank you for reading.
If you have a second, please share this article on your socials; someone else may benefit too.
Subscribe to our newsletter and be the first to read our future articles, reviews, and blog post right from your inbox. We also offer deals, promotions, and updates on our products and share them via email. You won’t miss one.