Many users, especially Windows 10 users, have reported issues with Chrome. When trying to load up a website they get the message “Waiting for cache” at the bottom left of the window. Whenever this happens the website freezes for a few seconds or a few minutes. This can even affect your computer performance overall as system resources will be used to try to connect.
In this guide, therefore, you'll learn some quick fixes to help you fix this bug.
What does “Waiting for cache” actually mean?
Let’s start by quickly going over what cache is. The cache is that place where your internet browser, in this case, Google Chrome, stores certain information about your browsing activity so it can access regularly used websites quicker. The waiting for cache error you see on your laptop or computer occurs when Chrome is unable to access this information. This issue is most common on Windows 10 PCs that have an SSD (Solid-state drive) rather than an HDD (Hard disk drive).
Let’s break down the fixes we have in store for you.
Fix #1. Prevent Google Chrome from writing on your SSD (Solid-state drive).
If you have an SSD, you can disable the disk writing caching feature on Windows 10. This particular feature can improve performance and speed, but it can cause memory loss. Disabling this feature can have a slight negative impact on your computer’s performance and speed but users have reported that this can fix the “waiting for cache” issue on Chrome. So how do you do it?. Simple, we break it down into neat steps for you.
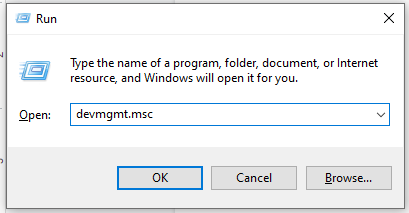
- Press Windows key + R to open the Run utility. Type devmgmt.msc and click OK to open the Device Manager.
-
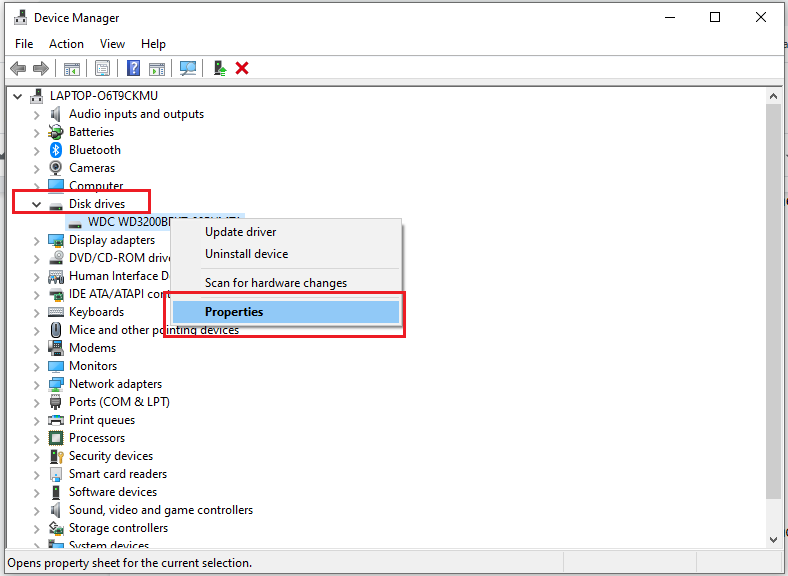
Look for Disk Drives on the list and click on the arrow next to it to expand it. Right-click the SSD where Google Chrome is installed and click on properties.
-
From the Policies tab, ensure "Enable write caching on the device" option is unchecked.
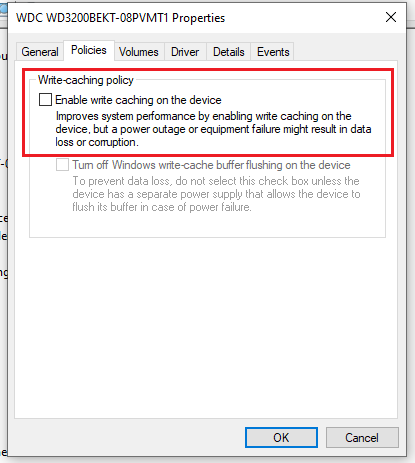
- Click on OK.
Once you are done, restart your computer and open up Chrome to see if the problem persists. If it does, we have a couple of tricks up our sleeves that can help.
Fix #2. Clear Google Chrome’s browser cache.
Usually, the issue breaks down to corrupted files stored in your cache directory. Removing them allows Google Chrome to create new ones and eliminate the problem.
So how do you clear the cache on Google Chrome if you are using Windows 10?. Follow these steps:
- Open Google Chrome.
-
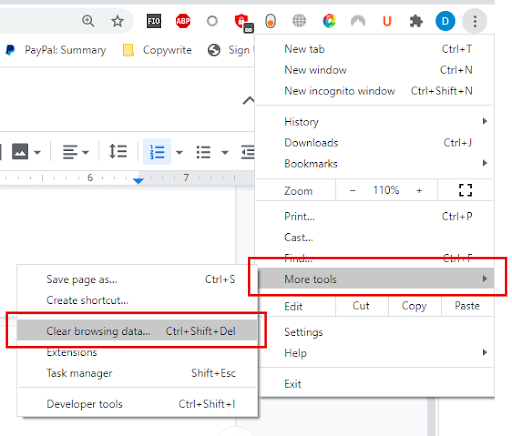
Click on the three vertical dots at the top right corner of your browser.

-
Scroll down the list and select More Tools and click on Clear browsing data. Alternatively, you can press Ctrl + Shift + Del.
-
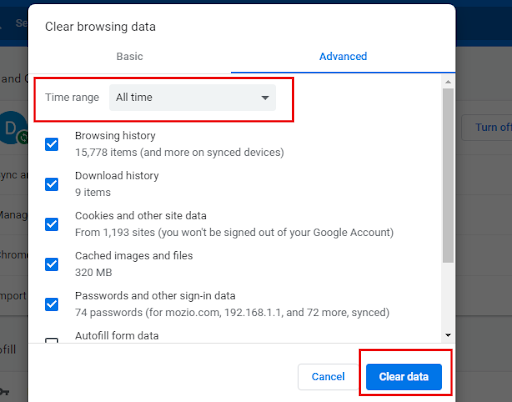
This will bring up another tab and a Clear Browsing Data window will pop-up. You want to select a Time Range of All Time to avoid issues. Then tick all the boxes of the data you wish to be removed. You have the option to see the basic and advanced options. Once you’re done click on clear data.
- Restart Google Chrome.
These simple steps should help you avoid encountering the “waiting for cache” issue. This will force Chrome to write a new cache for the websites, thus removing any corrupted or inaccessible files that were there before.
If that did not fix the issue, you can try the following fix.
Fix #3. Resetting Google Chrome to the default settings.
You can also try resetting Google Chrome to its default settings. Bear in mind that doing this will delete all the customizations and other settings you have made on your Chrome and revert it back to its original state. To restore to default settings follow these steps:
- Open Google Chrome.
-
Click on the 3 vertical dots at the top right corner of the browser.
-
Click on Settings. This will open up a new tab where you can see and edit your Chrome settings.
-
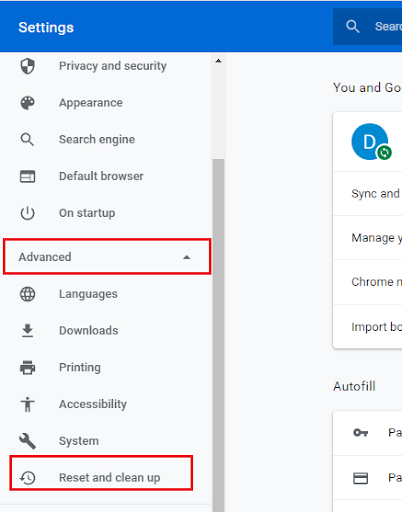
On the left-hand panel, look for Advanced and click on it to expand it. There you will find the Reset and clean up feature. Alternatively, you can go to chrome://settings/reset
-
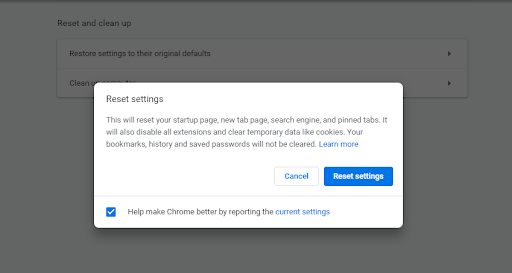
Click on Restore settings to their original defaults. A pop-up will appear asking for confirmation. Click on Reset Settings.
And that’s it!. This will restore your Google Chrome settings to its defaults.
If this still does not fix the “waiting for cache” issue there are 2 other fixes that you can try.
Fix #4. Create a new profile.
Another quick fix is to create a new profile in Google Chrome. Let’s break it down.
- Open Google Chrome.
-
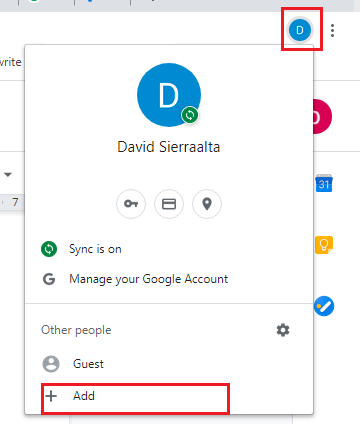
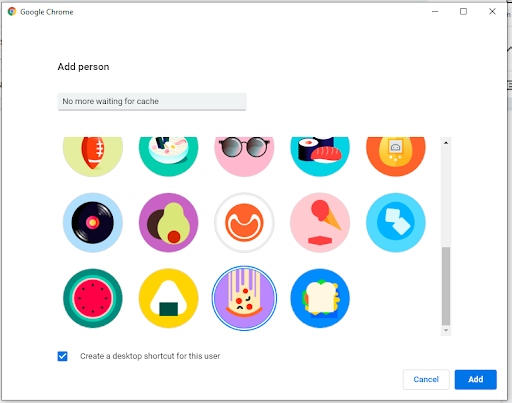
Click on the picture or letter that represents your profile (next to the 3 vertical dots) and click on Add.
-
This will open up a new window where you can create a new profile. Add a name and select an Icon.
After doing so Chrome will restart and open up with the new profile. You can check if the issue persists. If it has been fixed you can then sign in with your original Google account and import the data to this newly created profile.
If all else fails, there is the ol’ reliable reinstall option.
Fix #5. Reinstall Google Chrome.
“If it does not work, uninstall and reinstall” as my grandfather used to say. But before you do check if Chrome has any updates. After updating check if the problem persists. To reinstall Chrome simply follow these steps.
-
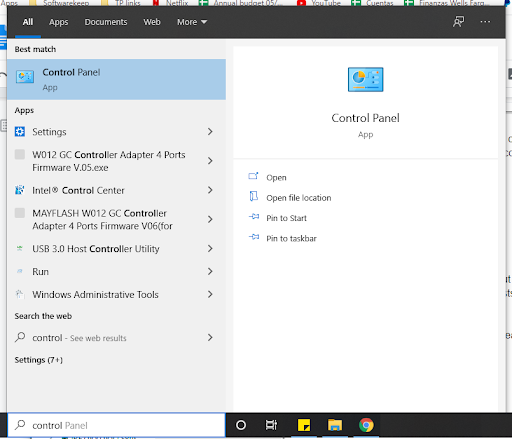
Click on the Start button at the bottom left corner of the screen and search for the Control Panel.
-
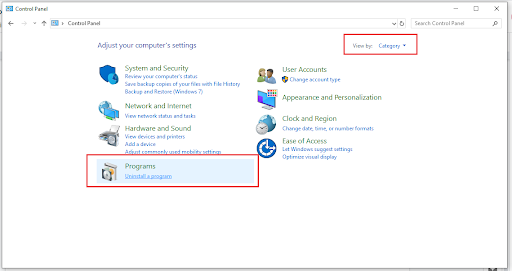
Sort the view by Category and click on uninstall a program under Programs and Features.
-
Find Google Chrome on the list, right-click on it, and click on Uninstall.
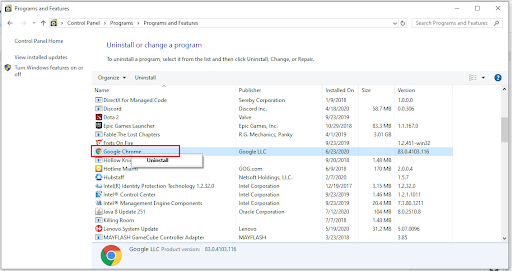
- You will be guided through the uninstallation of Chrome. Once you remove the browser completely, you can get the newest version online.
- Open up another browser like Firefox or Microsoft Edge.
- Go to Chrome’s website https://www.google.com/chrome/
-
Click on Download Chrome

- Wait for the download to finish and then run the application. Follow the steps and continue with the installation.
If you followed all the steps shown before, you should have a brand new, working Google Chrome on your Windows with no “Waiting for cache” error.
Most of the time this annoying error occurs due to corrupted cache data so hopefully, after these fixes, that is a thing of the past. Subscribe to our newsletter for more awesome tips and discounts on our store!.