A mouse is a key to navigating your device. While many things can be done with only keyboard shortcuts and inputs, you’ll most likely need your pointer to do everything better and faster. However, many Windows 10 users notice that their mouse is lagging, slow, stuttering, or freezing when using their device.
If you have this issue too, continue reading to learn how you can fix mouse lag on Windows 10 within minutes.
Jump to section:
- What is mouse lag and what causes it?
- How to fix mouse lag, freeze, and stutter
- Method 1: Make sure it's not your mouse itself
- Method 2: Update your mouse driver
- Method 3: Enable or disable Scroll Inactive Windows
- Method 4: Terminate the Realtek Audio process
- Method 5: Change the Palm Check threshold
- Method 6: Set your touchpad to No Delay
- Method 7: Turn off Cortana
- Method 8: Disable NVIDIA High Definition Audio
- Method 9: Connect your mouse receiver to a USB 2.0 port
- Method 10: Use a USB extender
- Conclusion
What is mouse lag and what causes it?
The terms "lag" and “lagging” are used to describe a situation when an unusually long time passes between the initiation and completion of a task.
For example, when talking about mouse lag, you might notice that the movement of your mouse pointer is not in sync with your hand movement at all. You might become frustrated because the left and right clicks happen slower, or even notice that your mouse pointer is frozen in place. Some other issues include:
- Mouse lag in games. Many users report that their mouse only seems to lag while playing games. This can be a huge issue for video game lovers, as many popular genres require you to use your mouse.
- Mouse stutter. The mouse stuttering may cause a significant drop in your productivity. It makes everyday tasks much harder to complete, as you need to deal with a slow, sluggish mouse.
- Mouse freezing, not moving. Perhaps the worst of all is when your mouse pointer freezes in place and doesn’t move at all. It doesn’t only give you a scare that your entire system is unresponsive, but makes it hard to figure out what the next step should be.
- Wireless mouse lag. Not even a wireless mouse is free from the lagging issue. However, our steps below should make it simple to fix this issue.
- Mouse input lag. Mouse input refers to pressing any of the buttons on your mouse. Some only have two, the left- and right-click, however many newer models come with extra buttons to help speed up your work. If these buttons aren’t working properly, you might lose efficiency.
Unfortunately, similarly to many other issues with Windows as a whole, there isn’t one definitive cause for your mouse lagging.
How to fix mouse lag, freeze, and stutter
So, the bottom line is that this issue can cause significant performance drop when working, make it impossible to play certain video games, and can set you back in many different ways. Luckily, we have many fixes to help you get rid of this annoyance.
Some of these methods involve hardware changes, while others focus on possible issues with your system itself. We recommend testing the system solutions first, as they can easily confirm where your issue is coming from.
Method 1: Make sure it's not your mouse itself
The very first thing you should do is check if it’s a problem with your mouse itself.
You can test this easily by disconnecting your mouse, then plugging in a different mouse. Doing this, you can confirm whether or not other models also lag on your computer, or if only one specific mouse has the issue.
Make sure to use the same USB port for each mouse. We’ll be testing different ports later on in Method 10.
Do this as many times as you want to — it’s even possible that only specific brands experience lag, while others don’t.
Method 2: Update your mouse driver
Drivers make it possible to use accessories and core computer parts on your device. If your drivers are outdated or corrupted, you’ll without a doubt run into issues sooner or later.
Here’s how you can quickly update your mouse driver to make sure you’re using the latest version.
- Press down the Windows + R keys on your keyboard to launch the Run utility.
-
Type in “devmgmt.msc” and click the OK button. This is going to launch the Device Manager window.

-
Expand the “Mice and other pointing devices” category by clicking on the arrow icon next to it. You should see your mouse listed there.

-
Right-click on your mouse and choose the Update driver option.

-
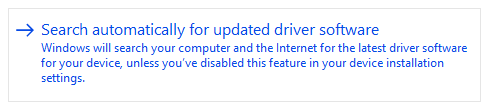
Choose the option to look for a driver. This will allow Windows 10 to find the latest driver update and correctly install it on your computer.
- Wait and follow the on-screen instructions to update your current driver.
After you’re done updating drivers, it’s recommended to give your computer a restart for good measure. After it boots up again, try and see if your mouse still lags.
Method 3: Enable or disable Scroll Inactive Windows
Windows 10 comes with a feature that allows you to scroll within inactive windows when hovering your mouse pointer over them. Many users report that this feature often causes issues with the mouse, however, they also report that turning it on fixed lag.
Depending on whether or not you have it enabled, follow the appropriate steps to either enable or disable your Scroll Inactive Windows feature.
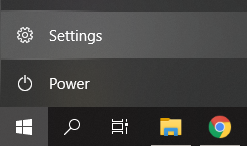
Step1: Click on the Windows icon in the bottom left of your screen, then choose Settings (indicated by a gear icon). You can also use the Windows + I shortcut to launch the app.
Step 2: Click on the Devices tile.

Step 3: From the menu on the left side, choose Mouse or Mouse & Touchpad, depending on if you’re using a PC or a laptop.

Step 4: You should see an option called Scroll Inactive Windows. Click on the switch under it and either enable or disable the feature.

Step 5: Check if your mouse still lags. If it does, restart your computer and check again.
If Scroll Inactive Windows is a feature you can live without or one that you don’t mind turning on, this fix can solve your mouse lag quickly. However, many people prefer to keep their systems configured the way they are used to it. That is why we still have many options to troubleshoot mouse lag on Windows 10.
Method 4: Terminate the Realtek Audio process
Something that might work when fixing mouse lag issues is disabling the Realtek Audio process. If you use an NVIDIA part, you might also try Method 8 to disable the NVIDIA High Definition Audio component.
-
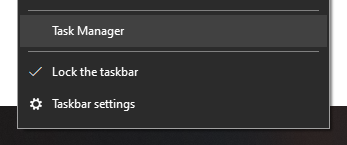
Right-click on any empty space in your taskbar and choose Task Manager.
-
If the Task Manager launches in compact mode, click on the More details button in the bottom left of the window.

-
Make sure you’re on the Processes (default) tab.

-
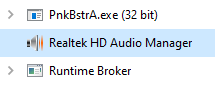
Under Background Processes, locate and select Realtek HD Audio Manager.
-
Click the End task button that becomes available in the bottom right of the window once the process is selected.

- Test if your mouse still experiences lag issues.
Method 5: Change the Palm Check threshold
This method is intended for those who use a trackpad or touchpad, for example on a laptop or an external one for your PC.
Note that not every computer is equipped with the same drivers. We can’t give you a detailed guide on this method that will 100% fit your device settings. However, the steps below follow the streamlined process of changing the Palm Check threshold on most laptops.
-
Click on the Windows icon in the bottom left of your screen, then choose Settings (indicated by a gear icon). You can also use the Windows + I shortcut to launch the app.

-
Click on the Devices tile.
-
From the menu on the left side, choose Mouse & Touchpad.
-
Click on the Additional mouse options link at the bottom of the page.

- Choose the TouchPad or ClickPad tab at the bottom of the Mouse Properties window.
- Click on Settings. This will open up a control panel. When it’s open, find a tab for Advanced settings.
-
Locate the Palm Check Threshold control, and move it all the way to the minimum value. The example below is from the Synaptics Control Panel.

- Click OK.
Now, test if your mouse works as intended! You can always reset these settings by going back into the same tab and changing the value to what’s comfortable for you.
Method 6: Set your touchpad to No Delay
Another solution for trackpad users is setting the delay before your cursor moves to none. This feature is implemented into Windows 10 to ensure your cursor doesn’t accidentally move while you type, however, for many users it’s more harm than good.
Here’s how you can turn it off.
-
Click on the Windows icon in the bottom left of your screen, then choose Settings (indicated by a gear icon). You can also use the Windows + I shortcut to launch the app.
-
Click on the Devices tile.
-
From the menu on the left side, choose Mouse & Touchpad.
-
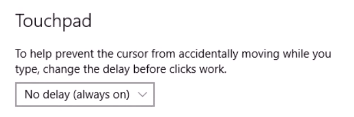
Under Touchpad, make sure you set the delay to No delay (always on).
- Test if your mouse works correctly.
Method 7: Turn off Cortana
It may seem like a totally unrelated feature, but many Windows 10 users have reported that Cortana, Microsoft’s virtual assistant, seems to cause mouse lag. If you currently have Cortana enabled, we recommend giving this solution a try. After all, if it didn’t help, you can always turn Cortana at any time.
Here’s how to turn off Cortana on Windows 10.
-
Click on the Cortana icon in the taskbar, then choose Settings (indicated by a gear icon).
-
Make sure that you’re on the Talk to Cortana tab.

-
Turn every Cortana option Off. This will ensure that its services are completely turned off.

-
If you want to, you can hide the Cortana button from your taskbar by right-clicking on it and choosing the Hide Cortana button option.
- Test if your mouse is working correctly now that Cortana is turned off.
Method 8: Disable NVIDIA High Definition Audio
Similarly to an earlier method involving a different audio manager application, you might have mouse lag issues because of NVIDIA’s High Definition Audio process. It’s extremely easy to disable, so it might be a quick and easy solution to many.
-
Right-click on an empty space in your taskbar and choose Task Manager.
-
If the Task Manager launches in compact mode, click on the More details button in the bottom left of the window.

-
Make sure you’re on the Processes (default) tab.
- Under Background Processes, locate and select Realtek HD Audio Manager.
- Click the End task button that becomes available in the bottom right of the window once the process is selected.
- Test if your mouse still experiences lag issues.
Method 9: Connect your mouse receiver to a USB 2.0 port
Even if the issue isn’t caused by your mouse itself, it’s possible that something is wrong with the USB port it’s connected to.
Especially with the newer USB 3.0 ports rolling out, it’s possible that you’ve plugged your mouse into the wrong hole. Not every computer accessory is capable of functioning properly with the USB 3.0 port, which means you need to make sure you try plugging it into a USB 2.0 one.
It could also be that the USB port you’re using is damaged. Make sure to test it with other accessories such as a keyboard or a pen drive.
Method 10: Use a USB extender
Some users report that they have mouse lag issues on Windows 10 due to poorly configured power settings. This can be fixed easily by following the next few steps.
- Press down the Windows + R keys on your keyboard to launch the Run utility.
-
Type in “devmgmt.msc” and click the OK button. This is going to launch the Device Manager window.
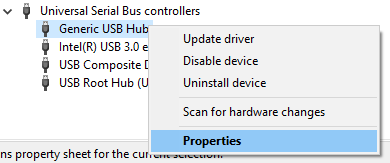
- Expand Universal Serial Bus controllers by clicking on the arrow icon.
-
Right-click on a USB Hub and select Properties from the context menu.
-
Switch to the Power Management tab.
-
Make sure to uncheck the “Allow the computer to turn off this device to save power” option.

- Click OK and test if your mouse works properly.
Conclusion
We hope that this guide was able to resolve your issues with the mouse lag on Windows 10.
If you’re in need of information about other Microsoft Windows issues, need help with troubleshooting, or want to learn more about your operating system, check out our other articles here.
However, if you’re looking for a software company you can trust for its integrity and honest business practices, look no further than SoftwareKeep. We are a Microsoft Certified Partner and a BBB Accredited Business that cares about bringing our customers a reliable, satisfying experience on the software products they need. We will be with you before, during, and after all the sales.
One more thing
We’re glad you’ve read this article upto here :) Thank you for reading.
If you have a second, please share this article on your socials; someone else may benefit too.
Subscribe to our newsletter and be the first to read our future articles, reviews, and blog post right in your email inbox. We also offer deals, promotions, and updates on our products and share them via email. You won’t miss one.
Read also
> Two Finger Scroll Not Working Windows 10 (Fixed)
> How to fix Windows 10 scrolling by itself
> How to Change Your DPI Mouse in Windows 10