Many users swear that Windows 10 is one of the fastest operating systems to this day. Being a modern system, it has certainly overcome many of the limitations of older versions of Windows, however, it still has a lot to improve.

An issue that’s been happening to many users is Windows 10 starting up slow when the computer is restarted or turned on. This is incredibly frustrating, as most of us expect our devices to be readily available whenever we need them.
Tip: If you know anyone experiencing similar Windows 10 issues, make sure to recommend our website to them! We aim to make troubleshooting accessible to everyone, even without prior expertise. Spread the word and make Windows 10 a better system by helping others.
Luckily, we know how to fix this error. In our article, you can find several methods that can be applied to fix slow startup on Windows 10.
Guide to fixing slow startup
Just like most of Windows 10’s errors and issues, there are multiple reasons why your computer may be starting up slower than it should. This also means that the problem can be fixed in several different ways.
Below are the methods people have found to be useful to improve the boot time of their devices. We’d like to recommend that you use these methods in conjunction with each other — this is going to ensure that you make your computer boot time as fast as possible.
Why is my computer slow?
Your operating system has to manage your computer's resources (memory, drive space, processing power) between all the programs running on it. Many things may reduce your computer’s performance, but they usually boil down to your PC’s resources being used inefficiently.
Here are some of the things that slow down your computer:
- Running out of RAM (Random Access Memory)
- Running out of disk drive space (HDD or SSD)
- Old or fragmented hard drive
- Too many background programs
- Too many startup programs
- Falling behind on Windows or driver updates
- Malware or viruses
- Special effects and visual features
If your computer is running slow, read on for ways to fix each of these issues.
How to make my computer faster
Without wasting any time, let’s get right into troubleshooting!
Method 1: Disable Fast Startup
While Fast Startup was implemented to make your boot times better, some users have reported that it only slows down the boot process. Luckily, you can disable this option quite easily.
Here are the steps you need to take to disable fast startup on Windows 10.
- Press the Windows + R keys on your keyboard. This is going to bring up the Run utility.
- Type in “control” and click on the OK button. This is going to launch the classic Control Panel application.
- Make sure that your view mode is set to either “Small icons” or “Large icons.” This will list all of the Control Panel items on one page.
- Click on “Power Options.”
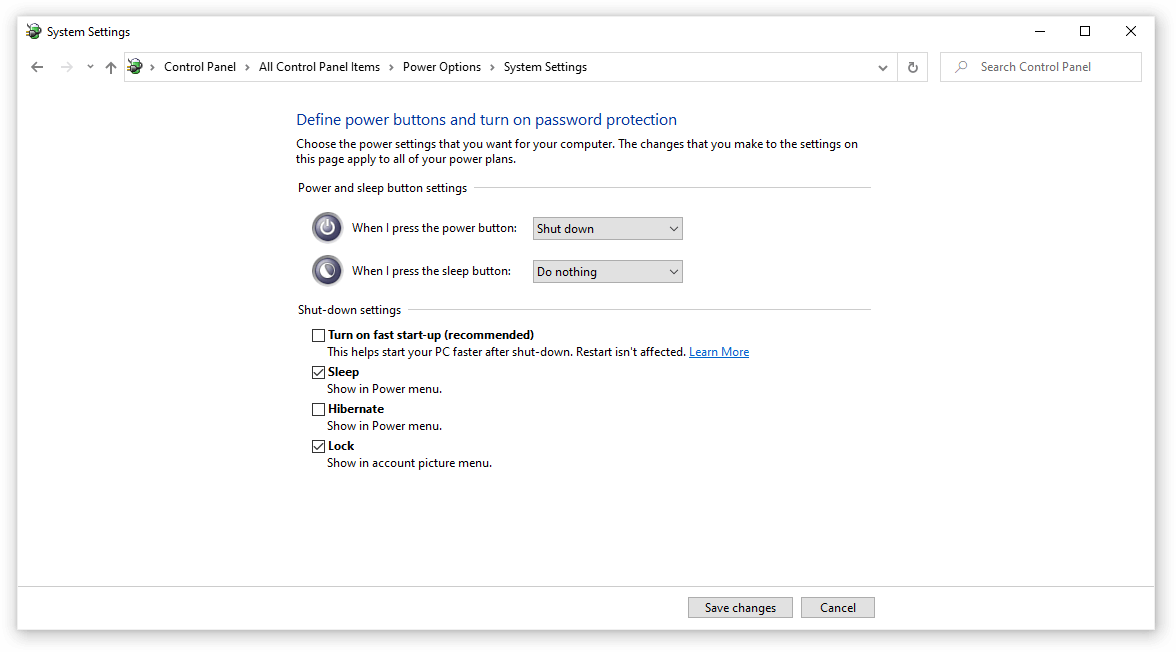
- Click on the “Choose what the power buttons do” link from the left-side panel.
- Click on the “Change settings that are currently unavailable” link. You may be prompted to enter administrator credentials.
- Uncheck the “Turn on fast startup (recommended)” option and click Save changes. You can try and restart your computer to see whether or not the boot time has improved.
Method 2: Disable processes with high startup impact

A third-party application installed on your computer may be causing issues that impact your boot time. In this case, we recommend turning off all non-Microsoft startup processes, then testing them one by one to see which one is slowing down the boot time so much.
Here’s how you can disable startup applications in Windows 10.
- Open the Task Manager using one of the following ways:
- Right-click on your taskbar and choose “Task Manager” from the context menu.
- Otherwise, press the Ctrl + Alt + Esc keys on your keyboard.
- If your Task Manager launched in the compact view, click on the “More details” option seen in the bottom left of the window.
- Switch to the “Startup” tab at the top of the Task Manager window. Here, you can see all of the applications that start along with your computer at launch.
- Click on an application that doesn’t have “Microsoft Corporation” stated in the “Publisher” column. You can also check the “Start-up impact” column and pick applications that have a high impact measurement.
- Now, click on the “Disable” button in the bottom right of the window. The status of the application should change to “Disabled.”
- Repeat this for every single non-Microsoft app, then restart your computer.
Now, your computer should launch up without any impact-heavy apps automatically launching as well. This gives you the ability to test if your boot times have gotten better.
If you’ve noticed that your computer boots up faster after disabling start-up applications, it’s most likely that one of those applications caused the error. Try and re-enable some apps, and test if your booting time remains stable until you find the culprit.
Method 3: Make adjustments to your virtual memory
If your virtual memory is poorly configured, it may be causing issues with your system’s resources. This can directly impact your boot time, which makes it slow to turn your computer on or restart it.
Here’s what you need to do to potentially fix this issue.
- Press the Windows + R keys on your keyboard at the same time to bring up the Run application.
- Type in “sysdm.cpl” and press the OK button. This will open up the System Properties window.
- Switch to the “Advanced” tab.
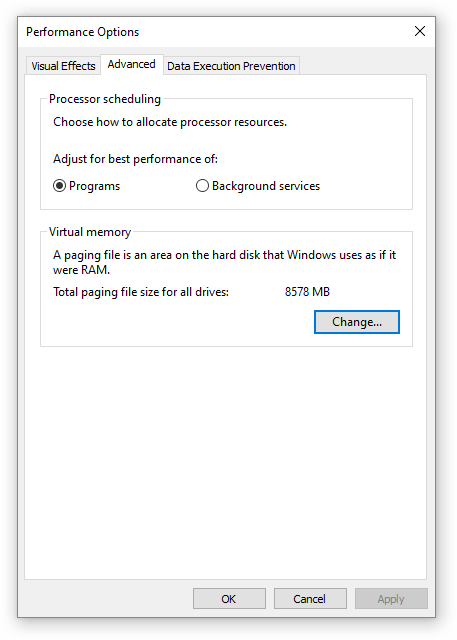
- Click on the “Settings” button in the “Performance” section. A new window should open up titled “Performance Options.”
- Switch to the “Advanced” tab.
- Click on the “Change” button.
- Uncheck the “Automatically manage paging file size for all drives” option.
- Select “Custom size,” then set the “Initial size” to “1000” and “Maximum size” to “8192.” Click the OK button to finalize your changes.
- Restart your computer using the automated prompt and check if your boot time has gotten faster.
Method 4: Defragment your computer's hard drive
If none of the methods above seemed to work, you can still try optimizing your hard drives with the defragment tool.
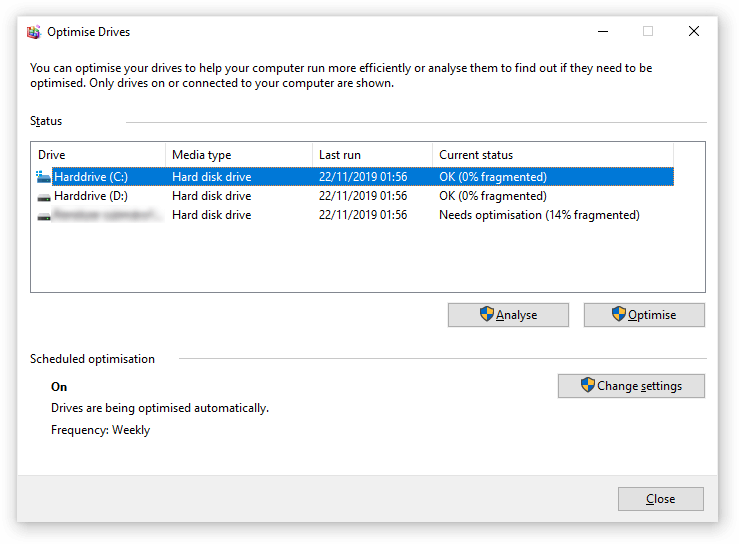
- Press the Windows + R keys on your keyboard to launch the Run utility. Here, type in “dfrgui” and press the OK button.
- Select the hard drive you’d like to defragment, then click on the “Optimize” button. We recommend starting with the drive you have Windows 10 installed on, which is typically the “C:” drive.
- Wait for the defragmentation process to finish. Afterward, you can optimize other drives and possibly further improve your boot times.
Method 5: Update your graphics card drivers
Keeping your drivers updated is important. An outdated graphics driver may be able to cause frustrating errors on your device, and can ultimately lead to a slow startup. Thankfully, updating these drivers is quite easy and doesn’t take any expertise — simply follow our steps to ensure you have the latest version of your driver.
Update graphics card drivers automatically
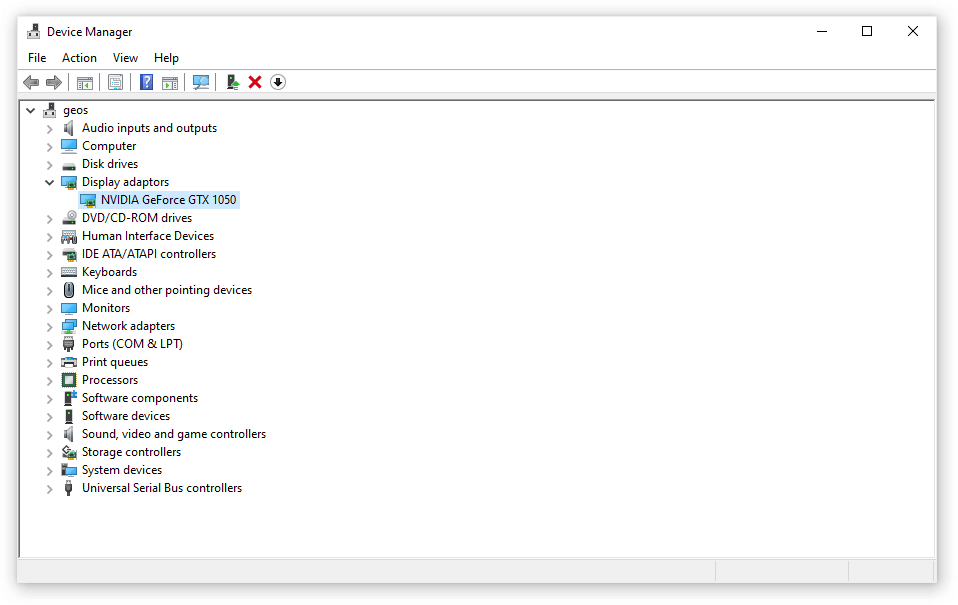
- Press the Windows + X keys on your keyboard, then choose “Device Manager” from the context menu.
- Expand the “Display Adaptors” section. You should see your graphics card listed here as a device.
- Right-click on your graphics card and select “Update driver.”
- Choose “Search automatically for updated driver software” and let Windows 10 automatically find the updated driver.
Update graphics card drivers manually
- First, you need to check what graphics card you’re using. If you don’t already know the exact model, follow these steps:
- Press the Windows + R keys on your keyboard to bring up the Run utility. Here, simply type in “dxdiag” and press the OK button.
- The DirectX Diagnostic Tool should open up on your screen. Use the header menu to switch to the “Display” tab.
- In the “Device” section, check “Name.” You should be able to see the manufacturer and graphic card model. Keep this in mind for the next steps.
- After you’ve identified your graphics card, head over to the manufacturer’s website and locate a download page dedicated to drivers. We’ve compiled a list of some popular graphics card brands with links to their download page:
- Intel Drivers & Software page
- NVIDIA Driver download page
- AMD Drivers and support page
- Find your graphics card using the built-in search function, then download its latest driver compatible with your system.
- Install the latest driver by double-clicking on the downloaded file, then following the on-screen instructions.
Method 6: Make sure Windows 10 is updated to the latest release
Something you can try to decrease the time it takes for your device to boot is simply upgrading to the newest Windows 10 release. This can fix known bugs, bring you new and exciting features, patch up security holes, and much more.
Here’s how you can update Windows 10.
- Click on the Start menu and choose “Settings.” You can alternatively use the Windows + I keyboard shortcut as well.
- Click on the “Update & security” tile.
- Make sure to stay on the default “Windows Update” tab.
- Click on the “Check for updates” button. When an update is found, click on the “Install” button and wait for Windows 10 to download and apply the update.
- Restart your computer after the update has been completed and see how long it takes to boot up. We recommend doing at least two tests, as after an update your system may still need to re-configure itself which makes booting slower.
Method 7: Perform a clean install of Windows 10
While this is the least desirable option, it can certainly help when dealing with serious system issues. Many users turn to reset Windows 10 in an attempt to get a clean start and fix messy problems that otherwise would require hours and hours of troubleshooting.
Here are the steps to reset Windows 10 while keeping all of your data.
- Click on the Start menu and choose “Settings.” You can alternatively use the Windows + I keyboard shortcut as well.
- Click on the “Update & security” tile.
- Switch to the “Recovery” tab.
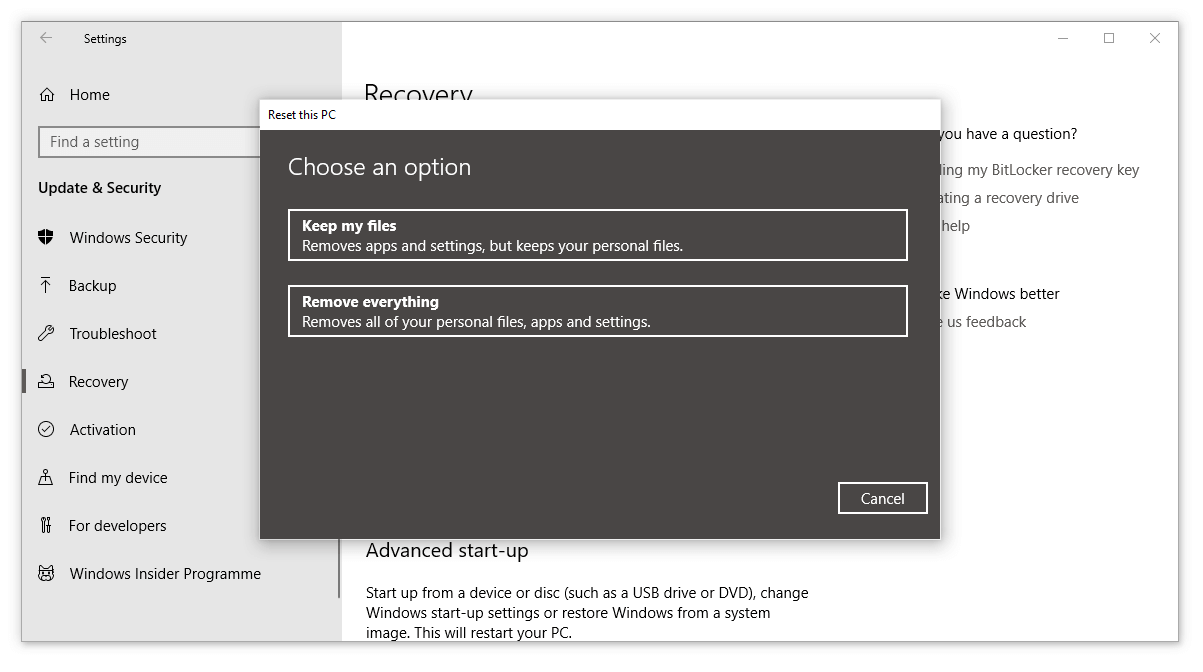
- You should see a header that says “Reset this PC.” Simply click on the “Get started” button under it.
- Choose whether or not you want to keep personal files. Both options mean that your applications will be removed, but you can easily keep personal documents safe.
- Proceed with the on-screen prompts and reset your PC. You should be able to see some improvement in the time it takes for your device to start up.
We hope that this guide was able to help you improve the startup time of your device. Again, we recommend using multiple methods in conjunction with each other to ensure the best results.
If you notice that your computer is starting up slow in the future, feel free to return to our article and apply some other fixes. If nothing works, we recommend turning to either Microsoft’s customer support team or looking into upgrading your PC.
Final Thoughts
Are you interested in learning more about Windows 10? You can browse our dedicated Help Center section and read about how to fix Windows login problems.
If you’re looking for a software company you can trust for its integrity and honest business practices, look no further than SoftwareKeep. We are a Microsoft Certified Partner and a BBB Accredited Business that cares about bringing our customers a reliable, satisfying experience on the software products they need. We will be with you before, during, and after all the sales. That’s our 360 Degree SoftwareKeep Guarantee.