Notifications are a great way to keep updated with what’s happening in the world. However, there’s a time and place for everything — sometimes, you want things to be quiet and undisruptive. To do this, you can turn off notifications on Windows 10 and enjoy some peace.

TL; DR: Turn off notifications in Windows during certain times
- Select Start > Settings > System > Notifications .
- To turn on Do not disturb, select On.
- You can also turn on do not disturb automatically.
- When do not disturb is on, the notification center icon will change and hide any incoming notifications
Table of Contents
Disable/Turn Off/Mute Notifications on Windows 10
There are multiple ways to turn off notifications on Windows 10 entirely, or on a per-app basis. In this article, we’ll be showing you all the required steps with detailed instructions.
Tip: If you found our article helpful, make sure to come back to us and explore what our Help Center has to offer!
Method 1. How to disable all notifications on Windows 10
This method completely disables all forms of Windows 10 notifications until you turn them back on. It’s used by people who wish to entirely stop receiving notifications from applications and other senders.
- Click on the Start menu in your taskbar. This icon has the Windows 10 logo on it. If you’re not familiar with the Windows 10 interface, we recommend reading the How to Get Started with Windows 10 article on our website.
- Select the Settings icon, indicated by a gear. Alternatively, you can use the Windows + I keyboard shortcut to reach this application quicker.
- Click on the System tile.
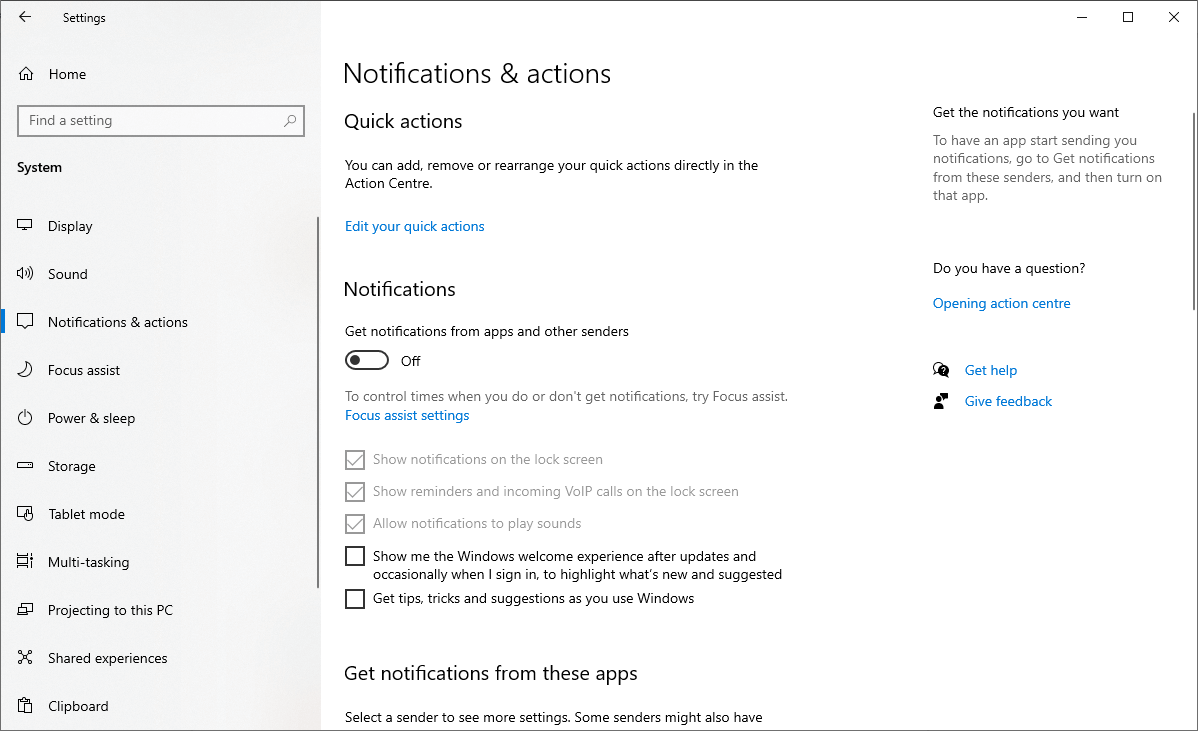
- Switch to the Notifications & actions tab on the left side of the panel.
- To disable your Windows 10 notifications, set the “Get notifications from apps and other senders” toggle off. After this, you shouldn’t see any more notifications from applications and other senders.
- If you wish to turn your notifications back on, simply click on the toggle again and ensure it’s set to on. You’ll start receiving notifications again.
Method 2. How to disable individual app notifications on Windows 10
If you want to stop receiving notifications from a specific application, you can use the method below to disable its ability to notify you. Following this method won’t stop all notifications entirely, and instead allows you to pick and choose what sources you want to get them from.
Please note that this method only works for apps and senders that use the traditional Windows 10 notification function. Apps with custom notifications will not be affected — for these, you need to open the software and find the individual notification settings.
- Click on the Start menu in your taskbar.
- Select the Settings icon, indicated by a gear. Alternatively, you can use the Windows + I keyboard shortcut to reach this application quicker.
- Click on the System tile.
- Switch to the Notifications & actions tab on the left side of the panel.
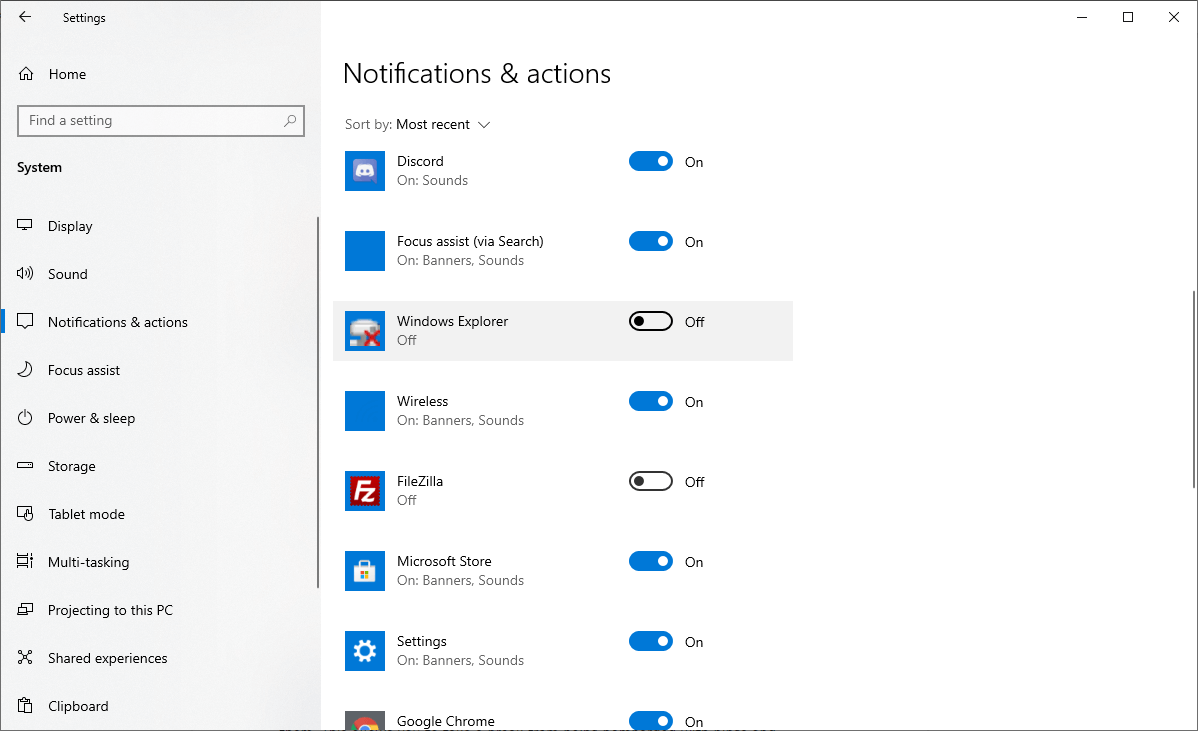
- Scroll down until you reach the “Get notifications from these senders” section. Here, you should see a list of applications and other sources that send you notifications.
- Toggle an application’s switch to Off in order to stop receiving its notifications. You can set as many apps on silent as you wish, there’s currently no limit to this.
Method 3. Temporarily mute notifications on Windows 10
Need a temporary break? The steps below guide you to mute notifications for a set amount of time using the Quiet Hours feature, after which you continue receiving them. This allows you to take a break from being bombarded with pings and distractions but doesn’t require you to manually go back and restore notifications.
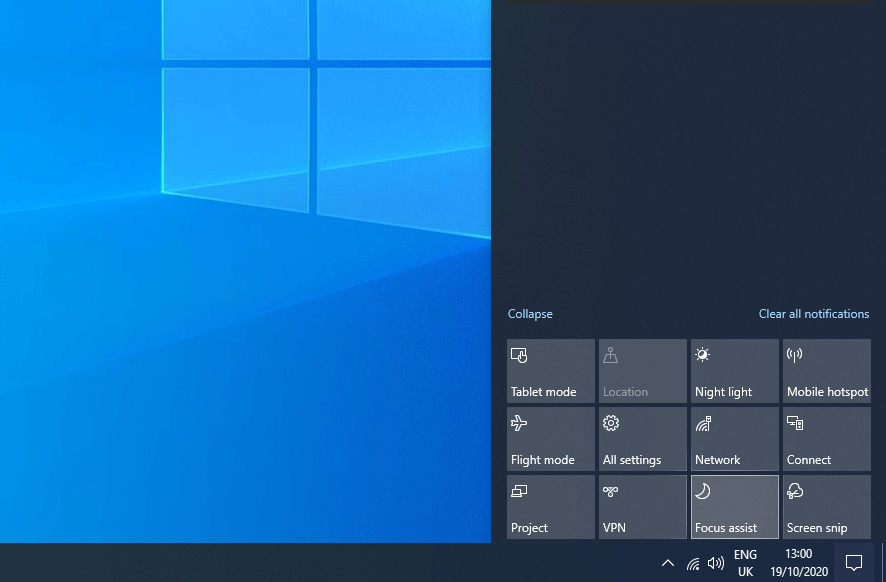
- To activate Quiet Hours (also known as Focus Assist or Do Not Disturb), click on the Action Center icon near the bottom right corner of your taskbar. Alternatively, press the Windows + A shortcut.
- Click on the Quiet Hours (or Focus Assist) tile to toggle it on or off.
- Don’t see this tile? Click on the “Expand” link at the bottom of the Action Center to reveal additional options.
- By default, Quiet Hours is set to activate at midnight and lasts until 6 AM. To customize the time frame, follow the next steps:
- Click on the Start menu in your taskbar.
- Select the Settings icon, indicated by a gear. Alternatively, you can use the Windows + I keyboard shortcut to reach this application quicker.
- Click on the System tile.
- Switch to the Focus Assist tab and customize your experience. You can always come back here and adjust the time frame to work for your relevant activities.
Final thoughts
If you need any further help, don’t be afraid to reach out to our customer service team, available 24/7 to assist you. Return to us for more informative articles all related to productivity and modern-day technology!
Would you like to receive promotions, deals, and discounts to get our products for the best price? Don’t forget to subscribe to our newsletter by entering your email address below! Receive the latest technology news in your inbox and be the first to read our tips to become more productive.
Read Also
> What are the Windows 10 N and KN Editions?
> How to Set Up Security in Windows 10
> New: Microsoft Releases a Windows File Recovery Tool