A frozen Apple iMac or MacBook can be a significant nuisance. When the “Spinning Ball of Death” appears, you’re stuck, and that sucks. There are several reasons for Mac freeze-ups, and they can vary from device to device.

We know how frustrating it can be to have to get to work but have the spinning ball of death come on the screen, KILLING YOUR TIME AND PROGRESS.
So to help you out and to keep you from smashing your laptop, we have created this article to help you learn how to unfreeze your mac if this ever happens. Here’s How to Unfreeze Word on Mac Without Losing Work.
“Spinning Ball of Death”
When your Mac is busy, it can be normal to see the “spinning ball” cursor from time to time arise. This means that the computer is processing a particularly tricky task. Usually, this lasts for just a few seconds at most, and then the ball gradually goes away, and then the standard cursor pointer reappears when the task is finished.
However, when the Mac hits a severe snag (if you are doing TOO MUCH), the spinning ball will appear and stay there. The Mac will be partially frozen. Although the current app or document you may have been working on will be temporarily disabled, you may still be able to switch to another and work on that.
However, under more severe circumstances, all your Mac’s programs are stuck, and you can't seem to get the Mac to respond, and the trackpad or mouse won’t answer, and nothing seems to work then this is a situation where you may need to let your Mac rest.
This leads us to our first option.
What to do when Your Mac Freezes
Take a Break

Sometimes, the Mac has too many demanding tasks that are all piled upon it, and it will need some time to work through them. If the keyboard or the mouse is unresponsive, walk away from the computer/laptop for a few minutes and then take care of other business.
When you come back, the problem should have sorted itself out, and you can get back to using your Mac. If this is the case, your Mac may be very low on free hard drive space or RAM.
Mac Force Quit
Go to the Apple menu:
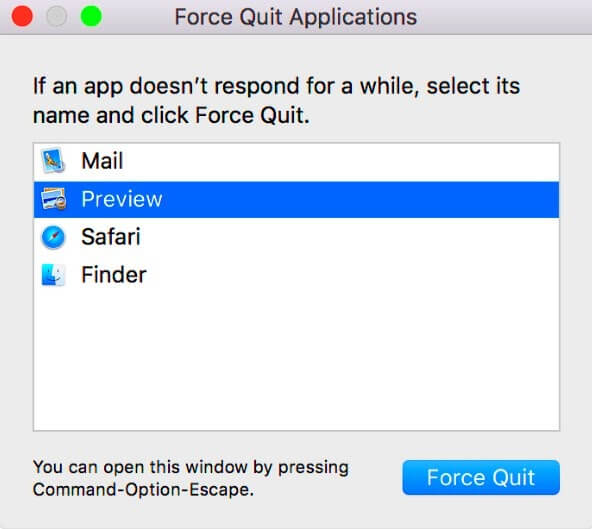
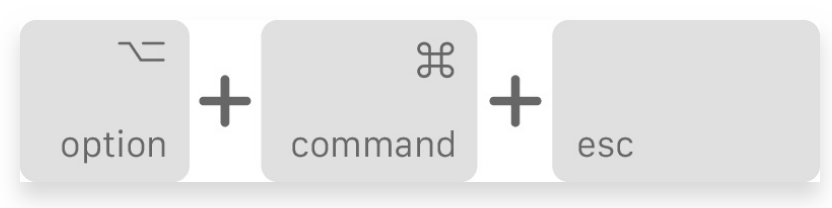
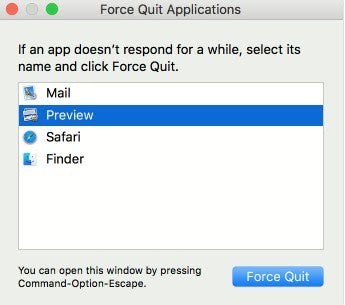
Step 1. Press the combination Cmd+Option+Esc, and a window will pop up.
Step 2. After pressing the above keyboard combination, the Force Quit Applications should appear, select Microsoft Word and then click on the "Force Quit" button.
The Mac will also display a list of programs. When it presents these programs, click the frozen one, and the Mac will close it down for you and do so without affecting any of the others. Depending on your app and work, performing a Force Quit on your MacBook may, unfortunately, result in the loss of some of your work.
So you may want to be careful with this option. It would be a good idea to set up the Time Travel app (which backs up your data a piece of information every hour)
Power Down, Power Up

In certain rare situations, your Mac might completely freeze on you. The mouse cursor will not move, and the keyboard will be completely unresponsive. So by pressing the "Force Quit" isn’t going to be an option. If your Mac has been in a frozen state for several minutes, then your best bet is to turn off the power of your Mac only.
Before turning it back on, you will need to unplug any external devices, such as your cameras or your scanners. Your Mac will automatically restore the apps along with any other documents that were open at the time it was shut down.
5 Ways to Force Quit Apps on Mac
The Dock
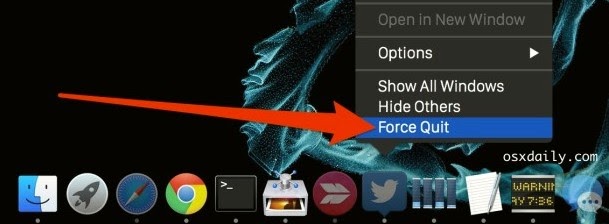
Typically, when you right-click on a running application in the OS X Dock, you will see an option to the “Quit” box. However, this may not work with a frozen app. To force quit your app, hold the Option key on your keyboard while you also right-click on the app’s Dock icon, and then you will see that “Quit” is now “Force Quit.”
Click this to force quit the app.
You will want to be sure to note that there is no warning when you force quit an app and that the usual “save” prompts won't appear before the app is closed.
The Force Quit Window
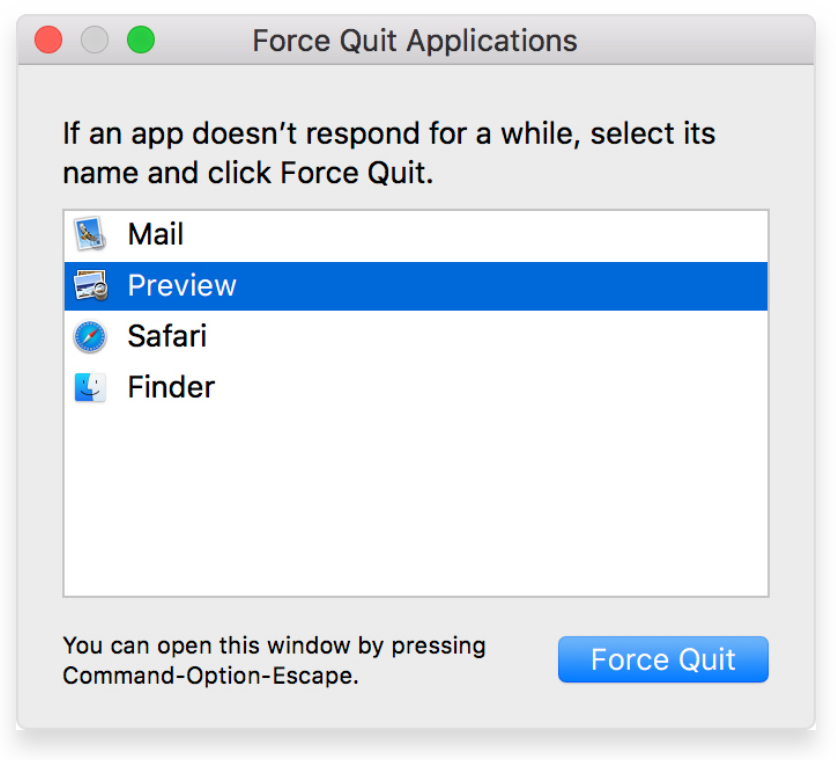
OS X has a unique window that is dedicated to handling apps that need to be forcibly quit. You can access this window in two different ways. The first way is by clicking the Apple logo in the Menu Bar along with selecting the Force Quit. The second way is for you to bring up these same windows by using the keyboard shortcut option: Command-Option-Escape.
The window will then display all the running applications, and then you can identify with the red text about any of the apps that are “not responding.” Merely highlight the app and then click the Force Quit button to quit it.
Activity Monitor
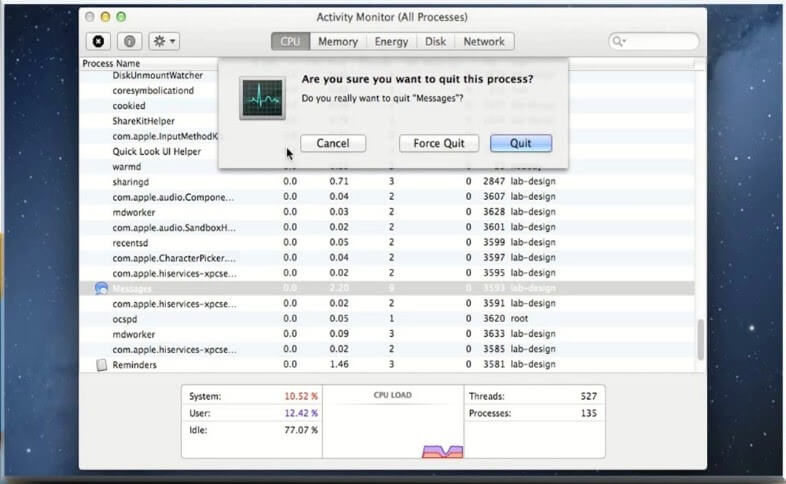
The Activity Monitor app will offer you a wealth of information about the current status of your Mac. The Activity Monitor resources, along with your applications, will allow you to force quit any frozen apps.
All you need to do is locate the app in the processes list.
You’ll be able to present them with two options. Which are: Quit or Force Quit. If possible, try Quit first, as this will attempt to quit the application and preserve user data gracefully.
The ‘Kill’ Command in Terminal
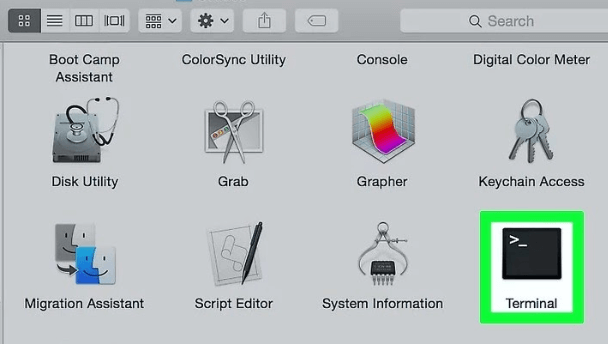
If you are more preferential to a command-line method to deal with unresponsive apps, you can also use the ‘kill’ command in Terminal. To use this specific method, you will need to determine the app’s Process ID (PID), which is a numeric value that OS X uses to keep track of all your unique applications.
The easiest way to find your app’s PID is via Activity Monitor. It is here where it will be listed in the PID column. If you’re using the Activity Monitor to find the PID, you might as well use it to force quit the app as well just as described previously.
Keyboard Shortcut

Last, you can directly force quit any app via a keyboard shortcut, and do so without any of the intervening steps that we have mentioned above. This may seem to be the best or the most apparent method -- but there’s a reason this is listed here at last.
Using your keyboard shortcut below will immediately force quit the active app. The problem that arises is that it’s elementary to lose track of which app is active, especially when dealing with one or more frozen or unresponsive apps.
With this said, this method is the riskiest method and one that is the LAST result (see what we did).
However, if you understand the risks involved and are careful, this force-quit shortcut method is the fastest method. To use this method, you must make sure the frozen app is active as well as press and hold the Command-Option-Shift-Escape. As with other force quit methods we have mentioned, the active application will immediately be force quit.
Why Microsoft Word?
Microsoft Word (MS) documents are renowned and widely used software that has become very beneficial to students, writers, journalists, and overall to anyone who must write in general. MS documents store vital information for users, and many times these files will carry sensitive information -- as such, they will require that they are protected.
For these specific situations, MS Word (including the latest version: microsoft word 2019) itself provides a brilliant opportunity for users to lock as well as unlock the word files so that the data cannot be altered or misused by any unauthorized users. Due to the high level of security MS Word is also a software that is very popular amongst Apple users as well.
Benefits of Microsoft Word
- Put your best words forward: With Word, you will be able to write with confidence -- having great informed that your work will be the best due to the smart technology designed in Words to help with your spelling, grammar, and even stylistic writing suggestions. With tools at your fingertips, you can quickly go from pen to paper and to digital effortlessly.
- Stay in the flow: You can get all the information you will need as you write and do so -- without ever having to leave Word, whether it’s a teammate’s PowerPoint slide, cited research, or reports from your LinkedIn to help you craft a compelling and eye-catching resume or article.
- Work better together: It will not matter wherever you are -- you will be able to collaborate in real-time. You will also be able to share all your work and documents with just the click of a button. Inviting others (friends, teammates, etc.) to edit in realtime or to add comments to a task is also feasible. Lastly, no matter your preferred full language (if you are working in a multi-verbal group) or accessibility options -- everyone on your team will still be able to work together to do more.
- Collaborate on shared projects: Easily one of the hallmarks. The Office Online combines the more commonly used Office features as well as the real-time co-authoring capabilities.
- Jumpstart your documents: You will be able to show your professionalism with Word templates in over 40 categories, as well as save so much more time.
- Connect with experts: If you are having any difficulties, you can see what’s new by getting tips along with tricks to help you create, edit, and finally polish documents just like a pro.
6 Features of Microsoft Word you Should be Using
1) How About Checking Your Spelling?
With Microsoft Word, you can quickly correct your spelling errors -- and do so all in one go. Spelling corrections can be done by just running a full Word spell check from the Review tab (which can save you a great deal of time) through the Proofing group or via the Spelling and Grammar button.
Microsoft Word will be listed in the "Not in Dictionary" box when using the primary Spelling or the Grammar dialog box. When this happens, you will get suggestions that will be presented below the screen -- with the first suggestion selected. The options you have will all be similar to the right-click options that are available for corrections as you type.
2) Utilizing The Benefits Of Mail Merge
This feature (mail merge) allows you to send bulk emails to the people on your email list -- but with unique elements (elements such as coding). For example, you could produce a series of labels or envelopes for your great mailing-sending scenario.
In this email or letter, it can include your name as well as your address and other informative details. It can also have a ‘directory.’ You can create one document that contains all this information -- and then from there; it will all be the same in each version (emails that are being sent).
3) Find & Replace
You can save precious amounts of time with this useful Word feature. The Word Replace can also search for all occurrences of a particular word, a phrase, or a set of characters -- after it has found what you were looking for, it will then replace them with an alternative.
You will also be given the option to replace all the occurrences or move through them individually, accepting or rejecting each change you deem necessary.
4) Inserting Watermarks
If you have just sent an important document or maybe create a draft sample, you will want to be able to protect your content without editing too much of it.
With this feature, you can insert a watermark specific to your document via the page layout button. You will also be able to customize your watermark, as well as also add your picture. This feature is great because you can add your brand logo -- and to sidestep for a second, creating a brand is powerful. Your brand logo will be on your reports for the business that you may produce.
5) Inserting Your Header & Footer
It is essential to use the space function in your header and footer to save space in other areas of your document. This feature also gives your files have a much more professional and appealing look to them.
You can include page numbers that run across the whole document, for example. However, what many people don’t seem to take too much advantage of is the idea that they can also insert their unique images into the documents. More specifically, we mean they can place their company's logo or maybe a compelling image that has context with the document's overall theme.
6) Using Hyperlinks Strategically
Perhaps one of the best ways to give your Word document that extra bit of cutting edge -- is to insert hyperlinks in the images and into specific text to make your document more interactive.
By simply right-clicking on the text/image and clicking the hyperlink, you will then be able to select where you wish to direct the users. A great way to further utilize this fantastic feature and tool is to lead users to another article or maybe even a web page with your digital footprint. This creates more traffic and more buzz about your business.