There are billions of people utilizing the convenience of Wi-Fi technology worldwide. However, some people run into issues such as the “Wi-Fi doesn’t have a valid IP configuration” error on Windows 10. If you’re currently dealing with this, keep reading — we've got the fix.
When this issue is present on the computer, you’re likely to not be able to access the internet through a Wi-Fi connection. This may limit your ability to operate your device, and entirely cut you off from the internet if you don’t have Ethernet nearby.
In this guide, you can learn what causes the Wi-Fi doesn’t have a valid IP configuration error on Windows 10 and how to fix it.
How to Fix a “Wi-Fi Doesn’t Have a Valid IP Configuration” Error
- Restart Your Router
- Change the Router’s SSID and Password
- Check if the Network service is running
- Restart your computer with a clean Boot
- Run the Network Adapter Troubleshooter
- Reset IP Configuration on Network Adapter and Reset TCP/IP Stack/Settings (Reset Wireless Network Adapter)
- Temporarily Disable your Antivirus
- Obtain the IP Address Automatically (Set the channel’s width to Auto)
- Update the Wireless Network Adapter and Reinstall the Wireless Network Adapter
- Reset the firewall
- Set your IP manually
- Reset Your PC’s Network Settings (Perform Network Reset)
What causes the Wi-Fi doesn’t have a valid IP configuration error on Windows 10?
What Causes the “Wifi Doesn't Have a Valid IP Configuration” Error? This error is reported when the IP Address Configuration on the Router does not match the IP reported by your Wifi Network Adapter. It can occur after updating Windows or when network changes have occurred that haven't been pushed to the Network Adapter.
Just like most Windows 10’s errors, this one has a variety of possible causes. You should try to identify the root of the issue to narrow down the list of fixes. This will save you precious time and ensure you get back online as fast as possible.
-
Unidentified network — You may get this issue when fixing your Wi-Fi connection using the built-in troubleshooter. It’s possible that something went wrong with network identification, causing your system to no longer be able to connect.
-
No internet connection — If you don’t have an active connection to the internet, it may result in a Wi-Fi configuration error.
-
Issues with drivers — Drivers are the backbone of your computer. If your drivers are outdated, missing, corrupt, or damaged, several issues can arise.
-
Third-party antivirus — Many users have reported that having a third-party antivirus installed on their computers causes the Wi-Fi configuration error. You can either disable or entirely uninstall this software.
-
Other Windows 10 issues — Your case may be unique, and the error isn’t listed here. In this case, we recommend performing the troubleshooting methods below and seeing if you have any luck restoring your system.
Now that we’ve looked at possible causes of the error, it’s time to start troubleshooting. Let’s get started.
How to fix Windows 10’s Wi-Fi doesn’t have a valid IP configuration error
We’ll be using both standard Windows 10 troubleshooting methods as well as some specific procedures that aim to fix this error message. Our guides are step-by-step, allowing you to restore your internet connection efficiently.
Tip: If you’re unfamiliar with the Windows 10 interface, we recommend reading our How to Get Started with Windows 10 article before troubleshooting.
Quick fix #1: Restart your router
You can restart your router in 3 easy steps:
- Locate the power button on your router and turn the device off.
- Wait for a few minutes. We recommend waiting 5 minutes to allow your router and network to shut down properly.
- Turn your router back on.
Test if you still experience Wi-Fi issues after giving your router a restart. If necessary, continue reading and try our other methods to solve the error.
Quick fix #2:Change the Router’s SSID and Password
If restarting the router doesn't yield, try Changing the Router’s SSID and Password.
Note: You'll need the router’s gateway IP, password, and username to gain access to its settings. You can find the details on a label somewhere on the router itself.
- Enter the gateway IP into a new browser tab (Chrome, Firefox, or Edge) > then press Enter.
- Log in to the router using the username and password.
- Sift through the router settings and change the SSID and password. Then, save your changes.
Once done, update your PC’s connection to the router with the new SSID and password. Don’t forget to update the network on other devices that also connect to it.
Method 1. Check if Network Service Is Running
Windows uses a Service to manage network changes on your PC automatically. The Service should be running to ensure the software identifies and addresses any changes. To check if your Network Service is running, hit the Windows Key and type “services” in the search box.
The Services Application will be displayed in the Application list. Click on the icon to open the application. Depending on your PC, it may take some time to load.
In the list of services, scroll down to WLAN AutoConfig Service, right-click and select properties.
Ensure the Status of the service is “Running” and that the Startup Type is set “Automatic”. If this is not the case, make the changes and restart your PC. Check if networking has been restored. If still not working, proceed to the next step.

Method 2. Restart your computer with a clean boot
Starting your computer in a clean boot will ensure that no applications clash with each other and no third-party conflicts cause errors on your system. With non-Microsoft apps and services disabled, you can attempt to connect to the Wi-Fi network.
This is how you can perform a clean boot on your Windows 10 system:
- Press the Windows + R keys on your keyboard. This is going to bring up the Run utility.
-
Type in “msconfig” without the quotation marks and press the Enter key on your keyboard. This will launch the System Configuration window.

-
Switch over to the Services tab. Make sure that you check the “Hide all Microsoft services” box. This is going to ensure that you only see third-party services.

-
After hiding all system services, click the Disable all button to temporarily disable every third-party service on your device.

- Click the Apply button and restart your computer. Now you'll be in a clean boot state with only official Microsoft services running.
- See if you’re able to connect to the Wi-Fi network without issues. If so, one of your third-party services is interfering with the network — find out which, and disable it.
Method 3. Run the Network troubleshooter
Windows 10 comes with built-in troubleshooters that aim to identify and fix operating system issues. If you experience connectivity errors, the Network troubleshooter could be a handy app to solve them for you.
-
Click on the Windows icon in the bottom left of your screen to bring up the Start menu. Choose Settings, or alternatively use the Windows + I shortcut.

-
Click on the Network & Internet tile. This is where you can find most of your network settings.

-
Make sure to stay on the Status tab. Scroll down and click on the Network troubleshooter.

-
Wait for the troubleshooter to diagnose your computer and identify issues. Follow the on-screen instructions to fix any errors and issues found by the troubleshooter.

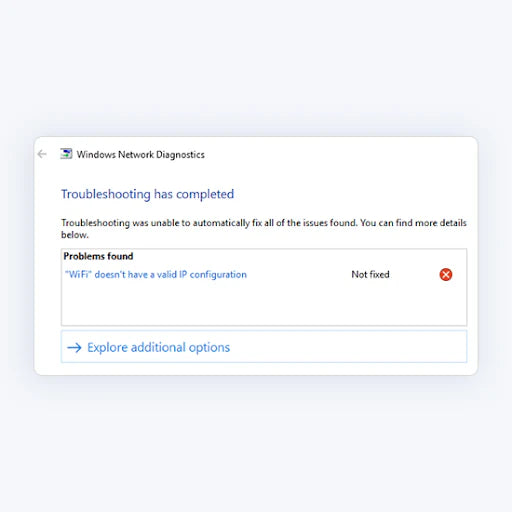
The troubleshooter may be unable to identify any errors. This is a common behavior, as typically, troubleshooters check for a limited set of errors and can’t help when your particular one is outside that.
If your Wi-Fi connection issues persist, continue reading.
Method 4. Reset IP Configuration on Network Adapter and completely reset your TCP/IP Settings
The Network Adapter has an IP Configuration which is usually set to automatically detect the network settings. Part of the network settings delivered to the Adapter will be the device-specific IP address assigned by the Router.
If flushing your DNS wasn’t enough on its own, you may try to reset your TCP/IP. This requires the Command Prompt and potentially administrative permissions.
- Press the Windows + R keys on your keyboard. This is going to bring up the Run utility.
-
Type in “cmd” without the quotation marks and press the Enter key on your keyboard. This will launch the classic Command Prompt application.

-
Type in the following commands and press the Enter key after each line to execute them:
ipconfig /release
ipconfig /all
ipconfig /renew -
Stay in the Command Prompt you previously opened. Type in and execute the following commands in order:
netsh int ip set dns
netsh winsock reset

- After successfully executing the commands, exit the Command Prompt and reset your PC. Check if the “Wi-Fi doesn’t have a valid IP configuration” error remains.
Method 5. Temporarily disable your antivirus
Antivirus applications are known to cause computer issues by interfering with your internet connection or blocking apps and services from running properly. You can test if the antivirus you’re using at the moment is causing the “Wi-Fi doesn’t have a valid IP configuration” error by temporarily disabling it.
Note: This method is not recommended as it is unsafe to use your computer without protection. Only proceed if you’re aware of the possible risks and have a backup of your system to revert any damage that may happen.
- Right-click on an empty space in your taskbar and choose Task Manager.
-
If the Task Manager launched in compact mode, make sure to expand details by clicking on the “Mode details” button.

- Switch to the Start-up tab using the header menu located at the top of the window.
-
Find your antivirus application from the list and select it by clicking on it once.

- Click on the Disable button now visible in the bottom-right of the window. This will disable the application from launching when you start your device.
- Restart your computer and try to connect to your Wi-Fi again.
Method 6. Set the channel’s width to Auto (Obtain the IP Address Automatically)
-
Press the Windows + X keyboard shortcut, then select Network Connections from the menu.

-
Click on the Change adapter options button, found under the Advanced network settings header. A pop-up window should appear on the screen.

- Right-click on your Wi-Fi adapter, and select Properties. If prompted by the User Account Control (UAC), click Yes to allow the window to launch with administrative permissions.
-
Click on the Configure button as shown below.

- Switch to the Advanced tab. Click on 802.11n Channel Width for band 2.4 and ensure it’s set to Auto.
- Click OK to finalize your changes.
Method 7.Update the Wireless Network Adapter Drivers
Regularly updating your driver software is something you should do all the time. Outdated network drivers can cause more trouble than you’d think.
In this solution, we will be using the integrated Device Manager to update the drivers for your network adapters.
-
Press the Windows + X keys on your keyboard and choose Device Manager from the context menu.

-
Expand the Network adapters section. Here, simply double-click on the adapter you’re currently using.

-
Switch to the Driver tab, and then click on the Update Driver button.

-
Select the method of updating your driver. You can either let Windows 10 search for a driver automatically or manually locate a new driver file already on your computer.

- Wait for the driver installation to complete. Once the driver is installed, restart your computer and check if you’re able to connect to the Wi-Fi without errors.
Method 8. Reset the firewall
There’s a chance that a configuration issue with your firewall is causing your IP address to not be validated. Luckily, you can restore the Windows Firewall to default settings with a few easy steps.
- Open the search bar in your taskbar by clicking on the magnifying glass icon. You can also bring it up with the Windows + S keyboard shortcut.
-
Type in firewall and click on Check firewall status from the search results.

-
Click on the Restore defaults link.

-
Read the warnings before you proceed. Click on the Restore defaults button to reset your firewall settings to default.

- Click Yes. After the settings have been reset, try to connect to your Wi-Fi network again and see if it works as intended.
Method 9. Set your IP manually
-
Press the Windows + X keyboard shortcut, then select Network Connections from the menu.

-
Click on the Change adapter options button, found under the Advanced network settings header. A pop-up window should appear on the screen.
- Right-click on your Wi-Fi adapter, and select Properties. If prompted by the User Account Control (UAC), click Yes to allow the window to launch with administrative permissions.
-
Double-click on Internet Protocol Version 4 (TCP/IPv4).

-
Switch to the "Use the following IP addresses" option, and then type in these numbers:
- IP Address: 192.168.1.# (Replace # with any number.)
- Subnet Mask: 255.255.0
-
Default Gateway: 192.168.1.1

-
Switch to the “Use the following DNS server addresses” option, and then type in the following numbers:
- Preferred DNS server: 8.8.8.8
-
Alternate DNS server: 8.8.4.4
-
Make sure that the Validate settings upon exit option is checked, and then click the OK button.

- Check if your Wi-Fi issues have been solved by performing this method.
Method 10. Perform a Network Reset
An alternative way of recreating the profiles of your networks is by performing a network reset. This is going to automatically remove every existing profile for the networks you connected to with your computer, giving you a fresh start.
Take note that you’ll need to reconnect to all the networks you previously used with correct authorization.
-
Click on the Windows icon in the bottom left of your screen to bring up the Start menu. Choose Settings, or alternatively use the Windows + I shortcut.

-
Click on the Network & Internet tile.

-
Make sure to stay on the Status tab. Here, scroll down to the bottom of the page and click on the Network reset link.

-
Read the precautions before proceeding with the network reset procedure. After acknowledging what this feature does, click on the Reset now button.

- Click Yes. After all your network profiles have been reset, try connecting to your Wi-Fi and check if you can go online.
Final thoughts
You can resolve the “Wi-Fi doesn’t have a valid IP configuration” error by restarting the router, changing its password, resetting the wireless network adapter, or renewing the IP lease. But if the issue recurs after some time, we recommend you work through some of the advanced fixes above until it goes away permanently.
Our Help Center offers hundreds of guides to assist you if you’re in need of further help. Return to us for more informative articles, or get in touch with our experts for immediate assistance.
Would you like to receive promotions, deals, and discounts to get our products for the best price? Don’t forget to subscribe to our newsletter by entering your email address below! Be the first to receive the latest news in your inbox.