
If you are a Windows 11/10 user experiencing issues moving a folder, then you are not alone. This problem can be caused by several factors, such as a corrupted file system, a malware infection, or a malfunctioning application.
In this article, we will show you how to fix this issue so you can move folders on your Windows 11/10 system without any problems. We'll provide simple solutions that'll let you go about your task without any issues.
Jump To
- Close the App Your Folder Is Open In
- Restore the Default Path
- Change Your OneDrive Settings
- Run the DISM Scan
- Make an Edit in the Windows Registry
- Relink Your OneDrive Account
- Run the System File Checker
Can't Move Folder on Windows: Possible Causes
Before we dive into the solution, let’s first take a closer look at the problem.
- The folder is open in an app - When you try to move a folder, you may receive an error message that says, “The action can’t be completed because the folder is open in another program.” This message indicates that there is a program or process that is currently using the folder, and Windows is unable to move it until that program or process is closed.
- Syncing issues with OneDrive - An issue with syncing between your computer and OneDrive can cause an error message when trying to move a folder. This can happen due to a variety of reasons such as a poor internet connection, OneDrive server issues, or problems with your computer's network settings.
- Corrupt system files - Windows relies on a variety of system files to function properly. If any of these files become corrupted or damaged, it can cause problems with various functions including moving folders. This can happen due to malware infections, power outages, or hardware issues.
- File mapping - If file mapping is not configured correctly, it can cause problems when moving folders. This can happen due to accidental changes in file mapping settings or conflicts with other software installed on the computer.
- Access permissions - If you don't have the appropriate permissions to move a folder, it can cause an error message. This can happen due to changes in user account settings or the folder's permissions being set to read-only.
- Large file sizes - Moving large files or folders can take time and require significant system resources. If the file or folder is too large, it can cause an error message when trying to move it.
- Software conflicts - Sometimes, the problem can arise due to conflicts with other software installed on the computer. This can happen due to issues with third-party applications, antivirus software, or even the operating system itself.
It's important to note that these are just potential causes for the issue and there may be other reasons why you can't move a folder on Windows 11/10.
How to Fix Can't Move Folder on Windows 11/10
Now that you understand the potential causes of the issue, let's take a look at how to fix it. Here are some simple solutions that can help you get back to work without any problems:
1. Close the App Your Folder Is Open In
Sometimes, an app or program may have a folder open and this can cause issues when trying to move it. Closing the app can free up the folder and allow you to move it. If this is the case, you'll get an error message that says "The action can’t be completed because the folder is open in another program."
If you can't find which application is using the folder, you can try restarting your computer. This will close all running programs and free up the folder for moving. When your system boots back up, see if you can move the folder.
2. Restore the Default Path
If folder mapping is causing the issue, restoring the default path can help fix the problem. This involves changing the location of the folder to its default location.
-
Right-click on the folder that you're unable to move, and select "Properties." This will open a new window with options for the folder.
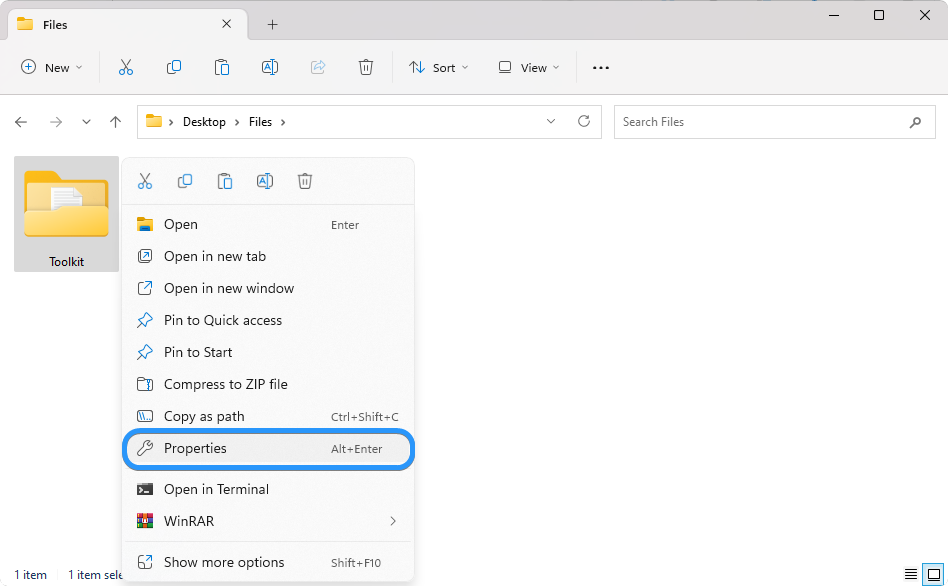
-
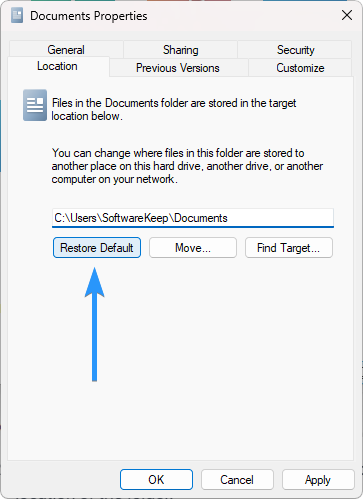
In the Properties window, click on the "Location" tab. Here, you will see the current location of the folder.
-
Click on the "Restore Default" button to reset the location of the folder to its default location. This will ensure that the folder is in the correct location and that any future issues with the folder can be easily resolved.
- Click “Apply” and then "OK" to save the changes you made. This will close the Properties window and apply the changes you made to the folder.
Make sure that all the files from the old location are copied to the new location. This will ensure that you do not lose any important data. You can do this by selecting all the files in the old location, copying them, and then pasting them into the new location.
By following these steps, you should be able to successfully move the folder to its default location without encountering any issues.
3. Change Your OneDrive Settings
If syncing issues with OneDrive are causing the issue, changing the settings of the service can help resolve the problem. This may involve disabling certain settings or adjusting the sync frequency.
- Find the OneDrive icon in the system tray, which is located in the bottom right corner of the screen. The system tray is the area where small icons for running programs are displayed.
- Once you've found the OneDrive icon, click on it to open the OneDrive app. This will bring up a small window with options for OneDrive.
- Look for a gear icon in the upper right-hand corner of the OneDrive window. Click on it to access the OneDrive settings.
-
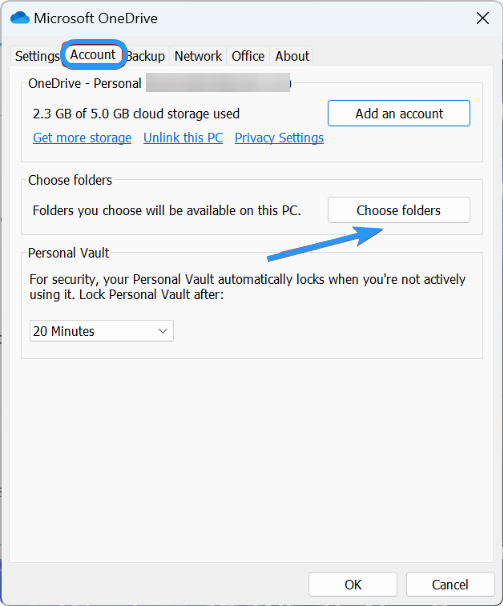
In the settings menu, click on the "Account" tab. This will bring up options related to your OneDrive account. Look for the "Choose folders" option and click on it. This will allow you to select which folders you want to sync to your computer.
-
Look for the option that says "Files not in a folder" and untick it.
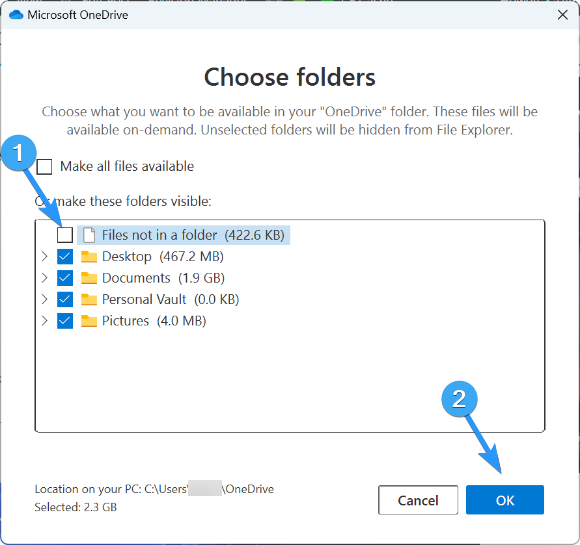
- Click on the "OK" button to save the changes you've made.
4. Run the DISM Scan
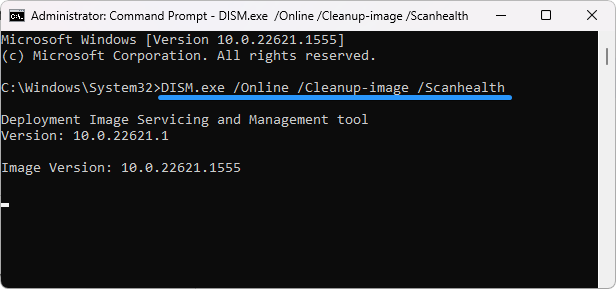
DISM stands for Deployment Image Servicing and Management. It's a built-in tool in Windows that can help fix corrupted system files. Running a DISM scan can help repair any issues with your system files and can fix the problem of not being able to move a folder.
- Open the search bar in your taskbar by clicking on the magnifying glass icon. Press Windows + S on your keyboard as a shortcut. Type “cmd” in the search box. When you see it in the results, right-click it and choose “Run as Administrator.”
-
Run the DISM command by typing "DISM.exe /Online /Cleanup-image /Scanhealth". This will scan your system for corruption and repair any errors found.
- Wait for the scan to finish running. After it finishes, see if you’re able to move the folder.
5. Make an Edit in the Windows Registry
Modifying the Windows Registry can sometimes help resolve the issue of not being able to move a folder. However, this solution should only be attempted by experienced users as making incorrect changes to the Registry can cause serious problems.
-
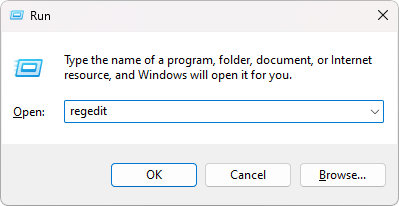
Press the Windows + R keys on your keyboard at the same time to open the Run utility. Here, type in "regedit" and press OK. This is going to open the Registry Editor.
-
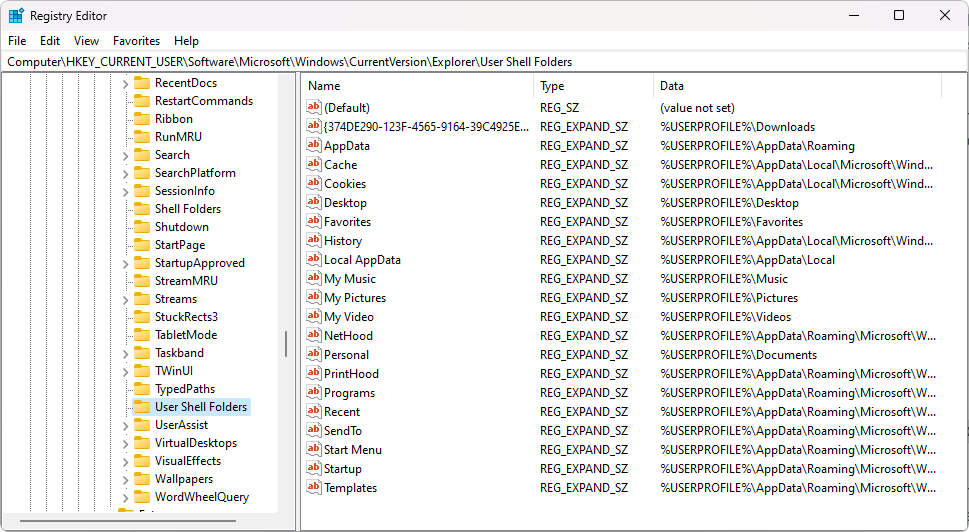
Navigate to the following key in the Registry: HKEY_CURRENT_USER\Software\Microsoft\Windows\CurrentVersion\Explorer\User Shell Folders
-
First, locate the specific registry key for the folder that's causing the problem. Once you've found the registry key, change its "Value data" to the path that's listed next to it. You can use this list below:
- Desktop – %USERPROFILE%\Desktop
- Favorites – %USERPROFILE%\Favorites
- Music – %USERPROFILE%\Music
- Pictures – %USERPROFILE%\Pictures
- Videos – %USERPROFILE%\Videos
- Documents – %USERPROFILE%\Documents
- Downloads – %USERPROFILE%\Downloads
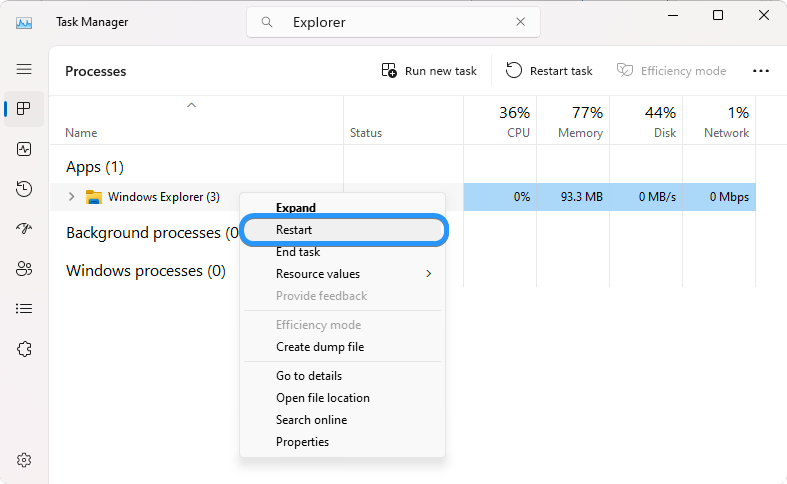
- After making this change, close the Registry Editor and open the Task Manager by pressing Ctrl + Shift + Esc on your keyboard.
-
Right-click on “Windows Explorer” and select “Restart” from the context menu. Wait for the explorer to restart and see if you’re able to move the folder.
6. Relink Your OneDrive Account
If there are issues with syncing between your computer and OneDrive, relinking your account can help fix the problem. This involves signing out of OneDrive and then signing back in.
- Locate the OneDrive icon on your Taskbar, usually located in the bottom right-hand corner of your screen.
- Click on the gear icon, which should be located at the top of the window that appears when you click on the OneDrive icon. Select the “Settings” option from the dropdown menu.
- After clicking on Settings, a new window will appear. Look for the “Account” tab and click on it. Once in the Account tab, click the link labeled "Unlink this PC".
- Follow the instructions on the screen to complete the process.
After the process is complete, close OneDrive and restart your device. Once your device has restarted, open OneDrive again and sign in with your account information.
7. Run the System File Checker
Running the System File Checker (SFC scan) can help scan for and repair any issues with system files, which can resolve the issue of not being able to move a folder. This is a built-in Windows tool that can help repair issues with the operating system.
- Open the search bar in your taskbar by clicking on the magnifying glass icon. Press Windows + S on your keyboard as a shortcut. Type “cmd” in the search box. When you see it in the results, right-click it and choose “Run as Administrator.”
-
After the Command Prompt loads, input the following command, and then press the Enter key on your keyboard to execute it: sfc /scannow
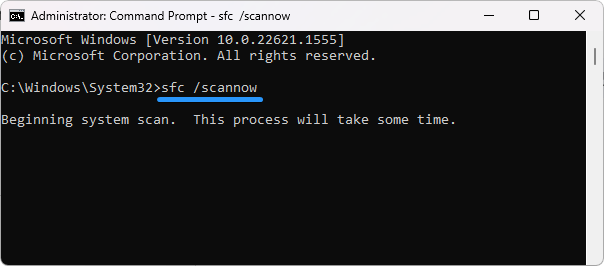
- Wait for the System File Checker to check your system files. This may take up to several minutes, depending on the speed of your computer. If the scan detects any issues with your system files, it will automatically fix them.
Conclusion
It's incredibly frustrating when you're trying to move a folder on Windows, but can't seem to do it. Hopefully, this article has provided you with some helpful solutions to the problem. If none of these solutions work, you may need to contact customer support for further assistance. Remember to always back up your data before attempting any changes on your computer.
We hope this article has been helpful in resolving your issue.
One More Thing
We’re glad you’ve read this article. :) Thank you for reading.
If you have a second, please share this article on your socials; someone else may benefit too.
Subscribe to our newsletter and be the first to read our future articles, reviews, and blog post right from your inbox. We also offer deals, promotions, and updates on our products and share them via email. You won’t miss one.
Related Articles
» Where Is the Startup Folder in Windows 11/10?
» How to access and use Steam screenshot folder on Windows 10
» What is the AppData Folder in Windows 10/11?