Cortana is Microsoft’s iteration of a virtual assistant — a piece of artificial intelligence to help you perform mundane actions while using your operating system. However, not everyone wants to use this feature for various reasons, starting with the privacy risks and not optimized operating.

We’ve received reports of users finding an issue where Cortana won’t close on a Windows 10 operating system. This can get annoying, as the interface takes up a lot of space on the screen and makes it hard to do just about anything. Additionally, the Cortana app overrides most other screen elements, even blocking out the Start menu.
Table of Contents
- How to fix: Cortana Won't Close In Windows 10
- Method 1. Start menu troubleshooter
- Method 2. Install the speech package for your language
- Method 3. Restart Cortana using the Task Manager
- Method 4. Restart Cortana using the Command Prompt
- Final thoughts
How to fix: Cortana Won't Close In Windows 10
We've compiled this guide with various approaches to fix and resolve issues with Cortana not closing in Windows 10. If you find our article useful, return to SoftwareKeep for more troubleshooting guides and helpful tech tips.
Note: You might be required to have access to an administrator account to perform all of the methods described below. If the account you’re currently using doesn’t have administrative permissions, make sure to change this in your settings.
Method 1. Start menu troubleshooter
Windows 10 has plenty of built-in troubleshooters and more troubleshooters available to download from Microsoft. One of these is the Start menu troubleshooter, which may fix issues with your Cortana function not closing.
- Download the Start menu troubleshooter from Microsoft.
- Run the startmenu.diagcab file you just downloaded. In some cases, you might have to run the program as an administrator to fix your Cortana issue.
- You might be required to unzip the file first using an application such as WinRAR.
-
Once the troubleshooter wizard opens, click on the Advanced link near the bottom left of the window and check the Apply repairs automatically option. Click Next to proceed.

-
Wait for the troubleshooter to scan for issues. This may take several minutes depending on your computer and the severity of the error(s).

-
If a problem is found, the troubleshooter will proceed to fix it. On the last “Troubleshooting has completed” screen, you’ll be able to find details about the issue.
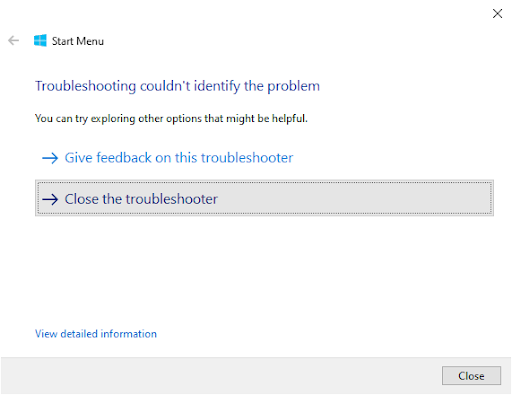
- Click on Close the troubleshooter and restart your device. Once it boots up again, check if Cortana functions properly.
Method 2. Install the speech package for your language
Some users have shared their tips on the Cortana not closing issue. They found that the error could be a side effect of your language’s speech package not being installed on Windows 10. To fix this, follow the steps detailed below.
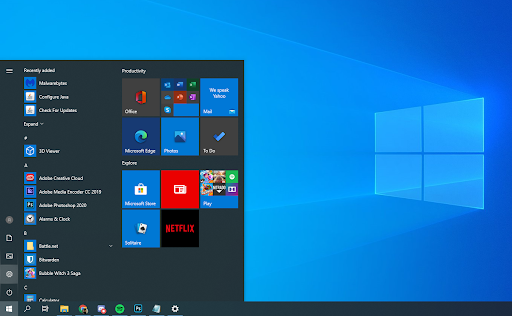
- Click on the Start menu in your taskbar. This icon has the Windows 10 logo on it. If you’re not familiar with the Windows 10 interface, we recommend reading the How to Get Started with Windows 10 article on our website.
-
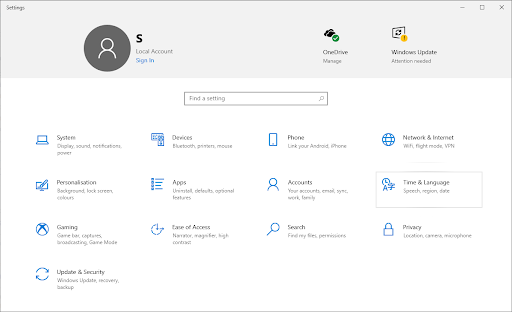
Select the Settings icon, indicated by a gear. Alternatively, you can use the Windows + I keyboard shortcut to reach this application quicker.
-
Click on the Time & Language tile.
- Select the Speech tab on the left side of the panel, then scroll down until you see Installed voice packages. Here, double-check that your language is added. If you find that it’s not, click on the Add voices button.
-
Check the box next to your language, then click the Add button.

-
Wait for the download to complete. This may take several minutes, depending on the size of the installation as well as your internet speed.

- Restart your computer and check if Cortana functions properly after the correct language speech files are in place.
Method 3. Restart Cortana using the Task Manager
In some cases, simply restarting the Cortana process could help you fix it not closing properly. First, we’ll try using the Task Manager and terminate the Cortana process, then restart it by launching it again.
-
Right-click on any empty space in your taskbar, then select the Task Manager from the context menu.

- Locate Cortana listed in your Processes list. Select it by clicking on it once, then click the End task button now visible in the bottom-right of the Task Manager window.
- Restart your computer and Cortana. Check if it works properly now.
Method 4. Restart Cortana using the Command Prompt
If the regular Task Manager method wasn’t enough, you can try restarting Cortana with the help of the Command Prompt.
-
Press the Windows + R keys on your keyboard. This is going to bring up the Run utility.
- Type in “cmd” without the quotation marks and press the Enter key on your keyboard. This will launch the classic Command Prompt application.
-
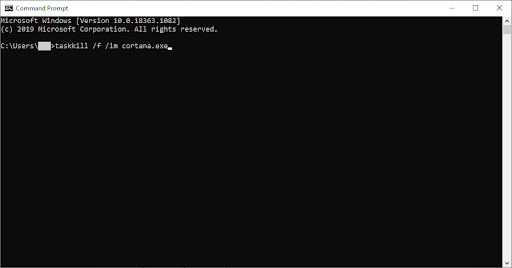
Paste in the following command and press the Enter key to execute it:
taskkill /f /im cortana.exe - Restart your computer and Cortana. Check if it works properly now.
Final thoughts
If you need further help, don’t hesitate to contact our customer service team, which is available 24/7. Return to us for more informative articles all related to productivity and modern-day technology!
Would you like to receive promotions, deals, and discounts to get our products for the best price? Don’t forget to subscribe to our newsletter by entering your email address below! Receive the latest technology news in your inbox and be the first to read our tips to become more productive.
Suggested Read
> Fix “Windows Update components must be repaired” Error on Windows 10
> Fix “We can't sign into your account” Error on Windows 10
> What is Modern Setup Host, and how to fix problems with it?