Are you getting the "Windows can't connect to this network" error on your Windows 10 computer? This can be a really frustrating problem, especially if you need to get online for work or school. In this article, we will discuss 10 working solutions to this problem.
It can be incredibly frustrating when Windows suddenly can’t connect to a network. You might see the “Windows can’t connect to this network” error message, even though your Wi-Fi connection is stable. Fortunately, there are a number of solutions you can try. This article will explore 10 different ways to fix when your Windows system can’t connect to a network.
Windows users have been seeing the "Windows can't connect to this network" error message for a long time. Find several viable solutions to this problem in this article! Some of these solutions are straightforward and simple, while others may necessitate a little more technical knowledge. But don't worry, we've got you covered!
Keep reading to learn everything you need to know to get your computer back on your home or workplace network in no time.

Table of Content
- What causes the “Windows can’t connect to this network” error?
- Solved: Windows can’t connect to this network
- Method 1. Forget and reconnect to the Wi-Fi network
- Method 2. Toggle Airplane mode on and off
- Method 3. Update your drivers
- Method 4. Reinstall network adapter driver
- Method 5. Run the Network troubleshooter
- Method 6. Perform a Winsock reset
- Method 7. Flush your DNS
- Method 8. Reset your network settings
- Method 9. Disable IPv6
- Method 10. Enable 802.11d for your network adapter
- Final thoughts
What causes the “Windows can’t connect to this network” error?
A single factor doesn't usually cause Windows errors. They may come from various circumstances that differ from computer to computer. Some of the causes, however, are more prevalent than others and may apply to you.
There might be a variety of reasons why Windows 10 is unable to connect to a network:
- Wrong Wi-Fi information such as password, SSID, etc.
- Your wired connection isn't plugged in properly
- Your device is out of Wi-Fi range
- Wi-Fi interference, problems with your internet provider
- Outdated or missing network adapter drivers
- Damaged router, Ethernet cable, or other hardware
- Other hardware issues
Wrong settings for Windows apps and overcrowded internet access points can also cause Wi-Fi network connectivity issues. Because there are so many possible reasons, you'll have to go through a number of steps to figure out what's wrong and how to remedy it.
Solved: Windows can’t connect to this network
Use these solutions to fix your operating system's “Windows can’t connect to this network” error. The steps were written using Windows 10, but you can apply them on both Windows 11 and Windows 8 operating systems as well.
Method 1. Forget and reconnect to the Wi-Fi network
Simply disconnecting and removing the network from your device, and then reconnecting to it can help you solve this issue.
-
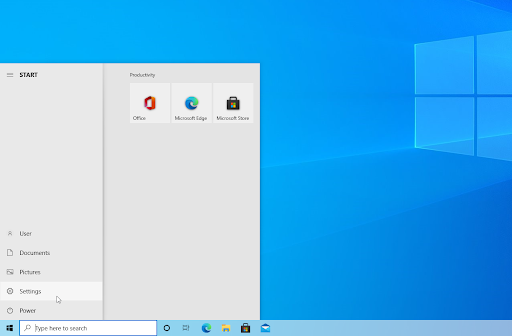
Click on the Windows icon in the bottom left of your screen to bring up the Start menu. Choose Settings, or alternatively use the Windows + I shortcut.
-
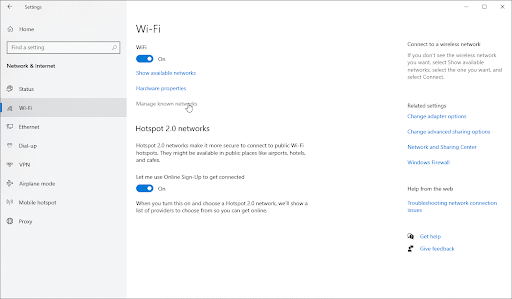
Click on the Network & Internet tile.

-
Switch to the Wi-Fi tab. Here, click on the Manage known networks link.
-
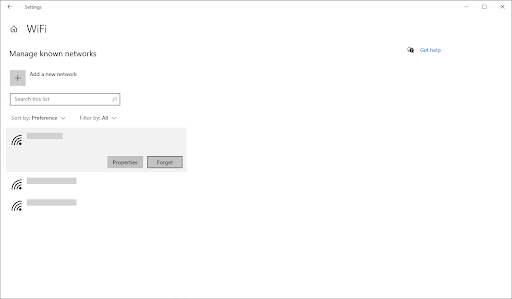
Select the Wi-Fi network to which you're having trouble connecting, then hit the Forget button. The profile will be fully erased as a result of this action.
-
Click the Networks icon in your system tray and pick the wireless network for which you just erased the profile. Check whether you can connect successfully by clicking the Connect button.
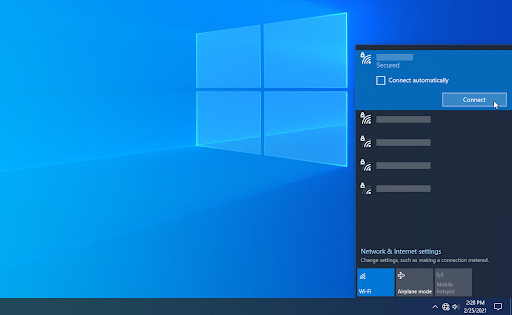
- It's possible that you'll be asked to provide login information, such as your Wi-Fi password. Input the required information and wait to see if you still get the “Windows can’t connect to the network” error.
Method 2. Toggle Airplane mode on and off
Some users have observed that turning on and off airplane mode in Windows resolves the network problem. If your device (such as a laptop) has airplane mode, you can utilize it to try to repair your internet connection.
-
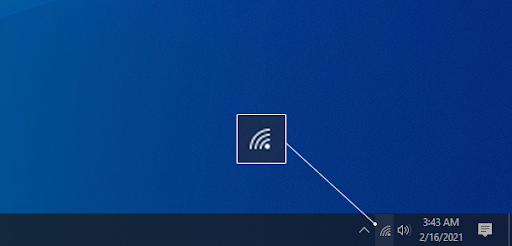
Click on the Network icon in your taskbar. If Airplane mode is turned on, it’s possible that the icon shows up as an airplane symbol. (If the icon isn’t visible at all, click on the arrow to see hidden tray items.)
-
You’ll see your networks, and a variety of tiles with options such as Mobile hotspot, etc. Check to see if the Airplane mode tile is enabled. If this is the case, click on its symbol to turn it off.
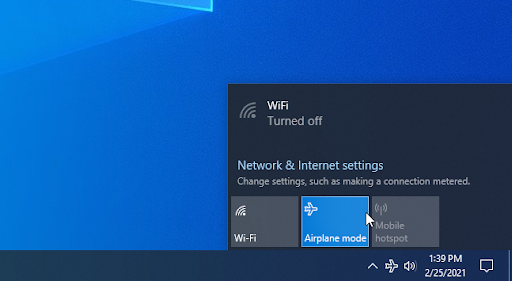
- Your networks should be visible once again. Try reconnecting to your network to see if you can go online again.
Method 3. Update your drivers
Drivers make or break a device. If your network drivers are missing or outdated, this error has a high possibility of happening. Luckily, you can easily update your drivers automatically or manually. Just pick the approach you prefer and follow the steps below.
How to automatically update drivers on Windows
Windows Update has a feature that allows you to automatically update outdated drivers. This can help you quickly find and get some of your drivers up-to-date without having to individually check for new versions.
-
To access the Start menu, click the Windows symbol in the lower-left corner of your screen, and then choose Settings. Alternatively, press Windows + I to bring up the menu.

-
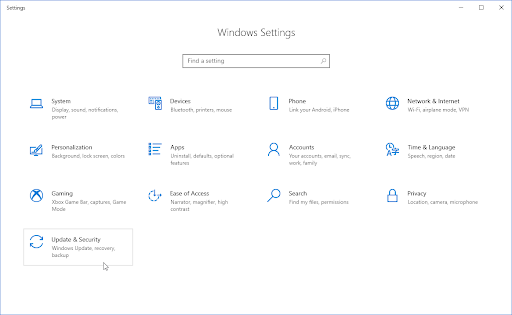
Select the Update & Security tile from the drop-down menu. The majority of your Windows Update settings can be found here.
-
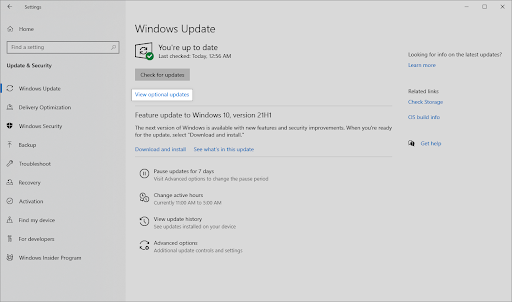
Go to the Windows Update section, and then click on the View optional updates link if it’s available.
-
Expand the Driver Updates section to see which drivers need to be updated right now. Simply check the boxes next to the drivers you want to update, then click the Download and Install button.
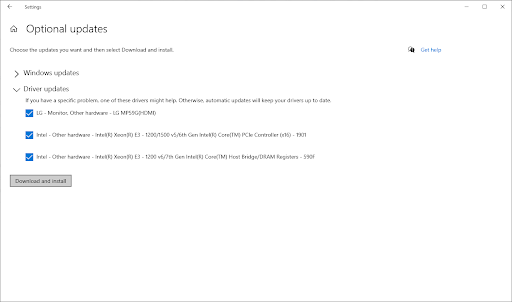
- Allow Windows to download and update your outdated drivers before restarting your machine.
How to manually update drivers on Windows
Use the steps below to manually update a driver that may be out of date. Keep in mind that only legitimate sites should be used to download drivers! Some fraudulent websites may try to trick you into downloading malware-infected driver files.
-
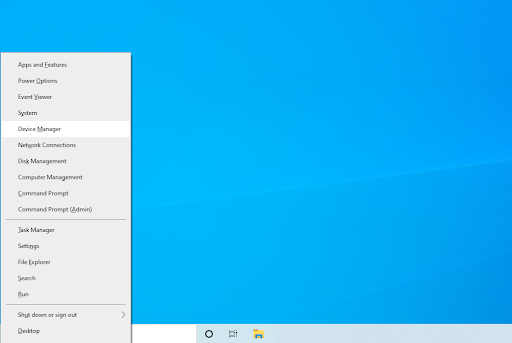
To access the needed utility, press the Windows + X keys on your keyboard and choose Device Manager from the context menu.
-
Expand the Network adapters category, and then right-click on your current network adapter. Select Update driver from the context menu.
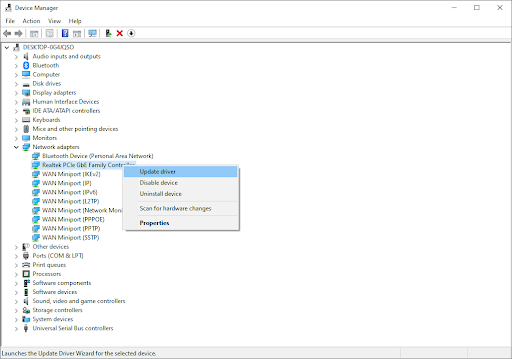
- Choose how you want to update your driver. You may either let Windows find a driver for you automatically or manually seek a fresh driver file on your machine.
Method 4. Reinstall network adapter driver
If updating your network adapter driver didn’t work, try reinstalling it. This can be done by first uninstalling the driver, and then letting Windows install the default, working driver for you.
- Press the Windows + X keys on your keyboard and choose Device Manager from the context menu.
-
Expand the Network adapters category, and then right-click on the adapter you’re currently using. From the context menu, choose the Uninstall device option.
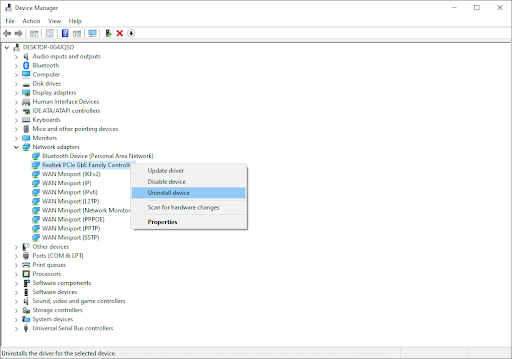
- Restart your computer. Windows will automatically reinstall the correct driver needed for it to work. You can attempt to connect to the network again after completing these steps.
Method 5. Run the Network troubleshooter
Windows comes with many built-in troubleshooters to make fixing problems easier. You can use the Network troubleshooter to address issues with your internet connection and potentially fix the “Windows can’t connect to this network” error.
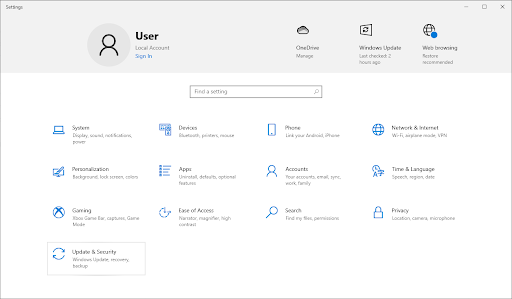
- Click on the Windows icon in the bottom left of your screen to bring up the Start menu. Choose Settings, or alternatively use the Windows + I shortcut.
-
Click on the Update & Security tile. This is where you can find most of your built-in troubleshooters.
-
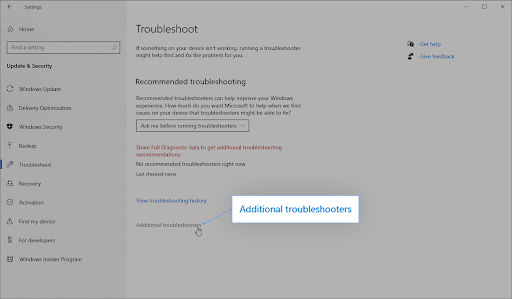
Switch to the Troubleshoot tab using the left-side pane. Here, you should be able to see a troubleshooter named Network Adapter.

-
If you don’t share full diagnostic data to Microsoft, click on the Additional troubleshooters link and locate the Network Adapter troubleshooter there.
- Click on the Run the troubleshooter button. Wait for the troubleshooter to scan your device and identify any issues.
Check to see whether running the troubleshooter helps you solve the problem. If the troubleshooter doesn't find any problems, keep reading and try one of the other options we've provided!
Method 6. Perform a Winsock reset
Resetting your Winsock library can help you resolve any issues and restore the default Windows Sockets API settings, allowing everything to work smoothly once again!
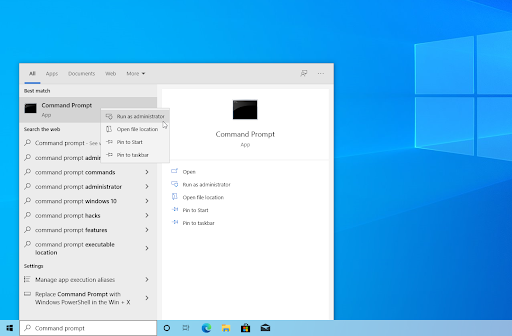
- By clicking the magnifying glass icon in your taskbar, you may access the search bar. You may also use the Windows + S keyboard shortcut to bring it up.
-
Type Command Prompt in the search box. When you see it in the results, right-click on it and choose Run as Administrator. If you're using a local account that doesn't have administrator permissions, click here first.
-
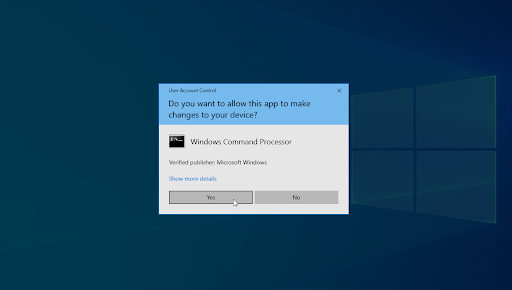
When prompted by the User Account Control (UAC), click Yes to allow the app to launch with administrative permissions.
-
Input the commands below in the following order, pressing the Enter key on your keyboard after each line:
- netsh winsock reset
-
netsh int ip reset
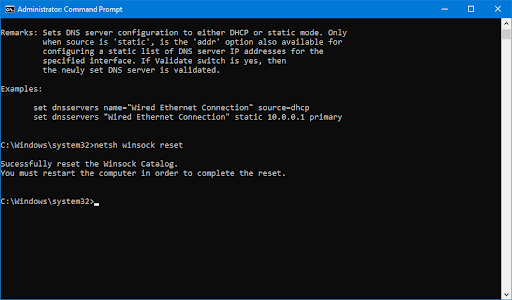
- Close the Command Prompt and check if you’re able to connect to the network after performing these steps.
Method 7. Flush your DNS
You might try manually clearing your device's DNS cache to see if the problems it creates go away. The process takes only a few minutes to complete and only involves the use of the Command Prompt.
- Open the search bar in your taskbar by clicking on the magnifying glass icon. You can also bring it up with the Windows + S keyboard shortcut.
- Type Command Prompt in the search box. When you see it in the results, right-click on it and choose Run as Administrator. If you're using a local account that doesn't have administrator permissions, click here first.
- When prompted by the User Account Control (UAC), click Yes to allow the app to launch with administrative permissions.
-
Input the commands below in the following order, pressing the Enter key on your keyboard after each line:
ipconfig /flushdns
ipconfig /registerdns
ipconfig /renew
ipconfig /release
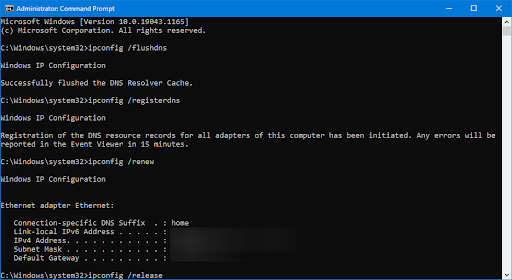
- Close the Command Prompt and check if you can connect to the network after carrying out the steps above.
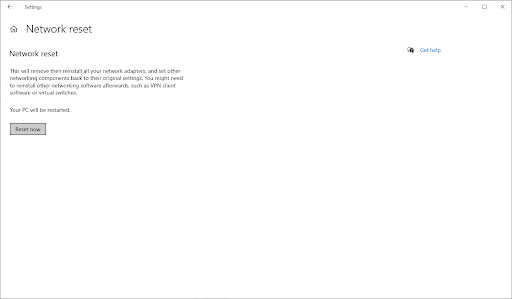
Method 8. Reset your network settings
The Network reset feature might be able to assist you in re-establish an internet connection. It deletes all existing profiles for the networks to which your machine is connected. This will restart your computer using the factory default settings.
Please keep in mind that you'll need to re-authorize all of the networks you previously utilized once you've completed the procedures below.
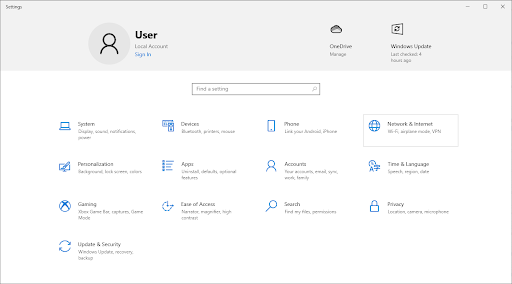
- Click on the Windows icon in the bottom left of your screen to bring up the Start menu. Choose Settings, or alternatively use the Windows + I shortcut.
-
Click on the Network & Internet tile.
-
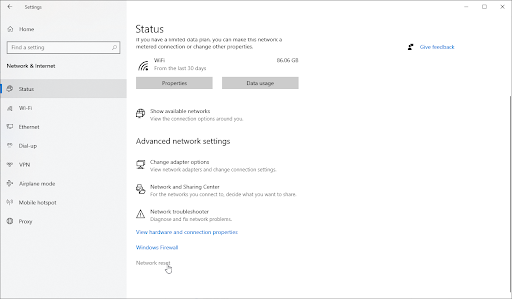
Make sure to stay on the Status tab. Here, scroll down to the bottom of the page and click on the Network reset link.
-
Before beginning the network reset procedure, read the precautions. Click the Reset now button once you've acknowledged what this feature does.
- Click Yes. After all your network profiles have been reset, check if you’re able to go online.
Method 9. Disable IPv6
If you're having trouble connecting to a network, it's possible that Windows has activated IPv6 on your device. If turning off this feature won't affect your device's functioning, follow the steps below to disable the protocol.
-
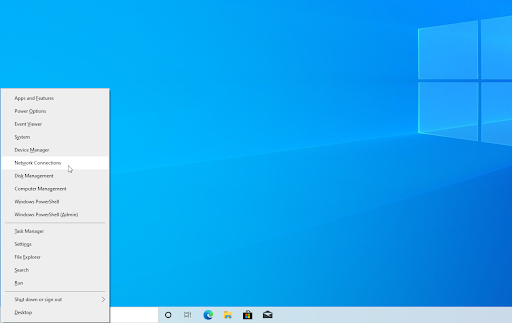
Press the Windows + X keys on your keyboard to bring up the WinX menu and click on Network Connections from the context menu.
-
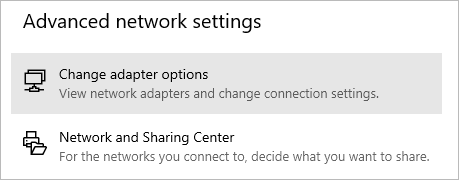
Select your current connection type (for example Ethernet or Wi-Fi) in the left pane, and then click on the Change adapter options button.
-
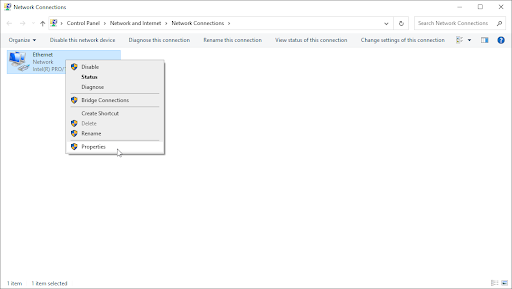
Right-click on the network adapter you’re currently having issues with, and select Properties from the context menu.
-
Scroll down until you see the Internet Protocol Version 6 (TCP/IPv6) option. If there’s a checkmark next to it, click on the box once to disable it. If the box is already empty, then IPv6 is not enabled on your device and you can try a different solution to the error.
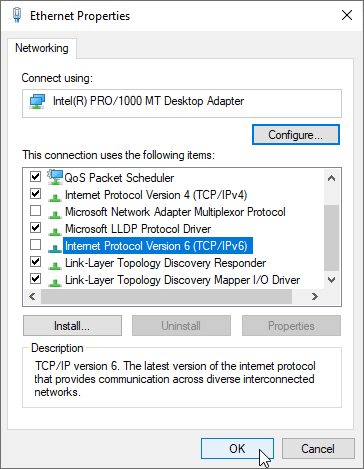
- Click OK. This solution would be most useful if IPv6 was the specific reason why you could not use your network.
Method 10. Enable 802.11d for your network adapter
Windows allows you to customize the properties of your network adapter, which means you can try enabling the 802.11d feature in order to fix the network error.
- Press the Windows + X keys on your keyboard to bring up the WinX menu and click on Network Connections from the context menu.
- Select your current connection type (for example Ethernet or Wi-Fi) in the left pane, and then click on the Change adapter options link listed in the right pane.
- Right-click on the network adapter you’re currently having issues with, and select Properties from the context menu.
-
Click on the Configure button.

-
Switch to the Advanced tab using the menu bar on top of the window. Here, in the Property section, select 802.11d if available, and make sure that the value is set to Enabled.
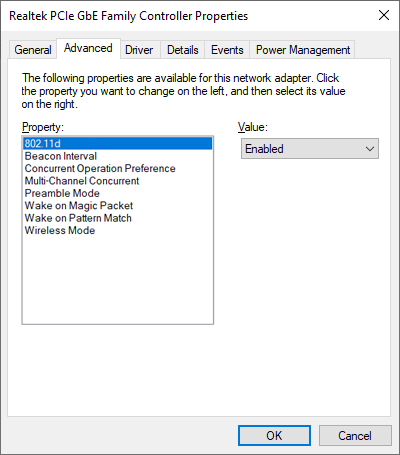
- Click OK to save your settings and check if this modification has helped you connect to the network.
Final thoughts
We hope you were able to resolve the "Windows can't connect to this network" issue on your Windows PC by using the solutions in this article. If not, please contact us and let us know what you want assistance with. Our team of experts is always available to assist you.
If there are any questions left unanswered or problems not addressed, please feel free to reach out — our team of experts would love to help! In the meantime be sure to keep up with all things tech by checking back for more articles about troubleshooting, and following us on social media.
Follow our Blog for more great articles like this one! In addition, you can check our Help Center for a wealth of information on how to troubleshoot various issues.
One more thing
Sign up for our newsletter and get early access to our blog posts, promotions, and discount codes. Thank you for reading! We hope to see you again soon.
Recommended articles
» Solved: No Internet Connection Windows 10
» Fixed: Windows Could Not Automatically Detect This Network’s Proxy Settings
» How to Fix "Unidentified Network" on Windows 10
Feel free to reach out with questions or requests you’d like us to cover.