It’s not unheard of for a Windows 10 update to bring new bugs onto your system. One of these bugs is known as the No Internet Connection error, making it impossible to connect to the internet on your computer. Luckily, this vexatious problem can be fixed easily by following our methods.
The exact cause of this has remained unknown for the span of its lifetime. We were able to speculate that it could have something to do with a Windows 10 update recently installed on your PC, an error on your network, or an issue with your router.
In most cases, the bug completely cuts off your ability to use the internet and view any online content. However, some users report being able to surf the web despite losing access to online apps such as Spotify, Discord, Skype, and video games.
With our guides, you’ll be able to efficiently solve the No Internet Connection error on Windows 10. We’ve compiled reliable solutions, common network troubleshooting methods, and other workarounds to get over this irksome bug. Let’s get started!
Jump to Solutions
- Method 1. Restart your computer and router
- Method 2. Use the Network troubleshooter
- Method 3. Enable your network adapter
- Method 4. Disable Airplane mode
- Method 5. Recreate the WiFi profile
- Method 6. Perform a Network reset
- Method 7. Reset network stack with Command Prompt
- Method 8. Update your Network Adapter drivers
- Method 9. Use the Registry Editor (Windows 10 version 2004)
- Fixed! You Are Not Connected to Any Networks Windows 11
- Final thoughts
How to fix “No Internet Connection” on Windows 10
Method 1. Restart your computer and router
In many cases, simply restarting your computer and router can fix issues with online connectivity. We recommend performing this before continuing on with the methods below.
Here are the steps detailing how to restart your Windows 10 computer:
- Make sure to save your work first to ensure no data gets lost.
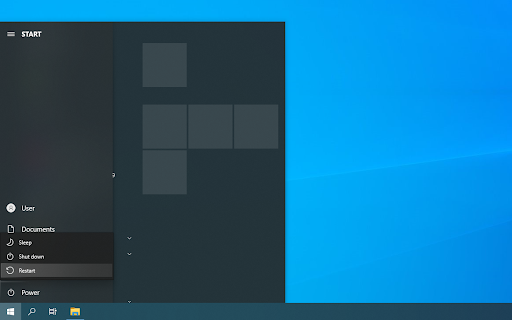
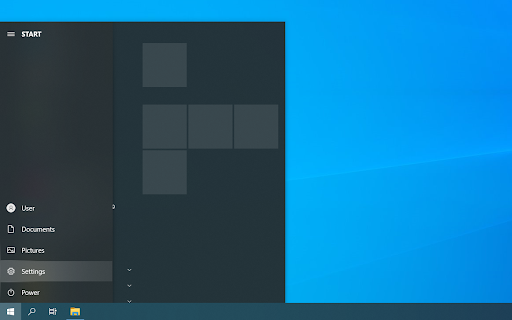
- Click on the Windows icon in the bottom-left of your screen to bring up the Start menu.
-
Click on the Power option, and then choose Restart. This is going to close all of your open applications and completely restart your computer.
- After your computer has restarted, check if the issue is still happening. If yes, move on to restart your router.
Something you should always try when facing these issues is restarting your router. This will allow the device to sort itself out and possibly fix any ongoing issues within its system.
You can restart your router in 3 easy steps:
- Locate the power button on your router and turn the device off.
- Wait for a few minutes. We recommend waiting 5 minutes to allow your router and network to properly shut down.
- Turn your router back on.
Test if you still experience internet issues after giving your computer and router a restart. If necessary, continue reading and try our other methods to solve the error.
Method 2. Use the Network troubleshooter
Windows 10 comes with built-in troubleshooters that aim to identify and fix operating system issues. If you experience connectivity errors, the Network troubleshooter could be a handy app to solve them for you.
-
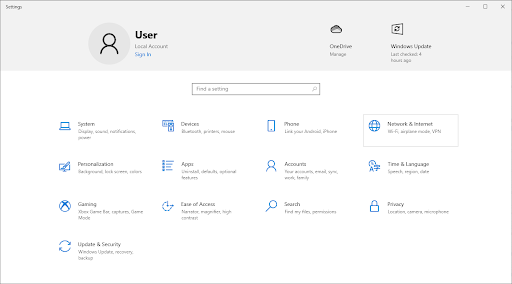
Click on the Windows icon in the bottom left of your screen to bring up the Start menu. Choose Settings, or alternatively use the Windows + I shortcut.

-
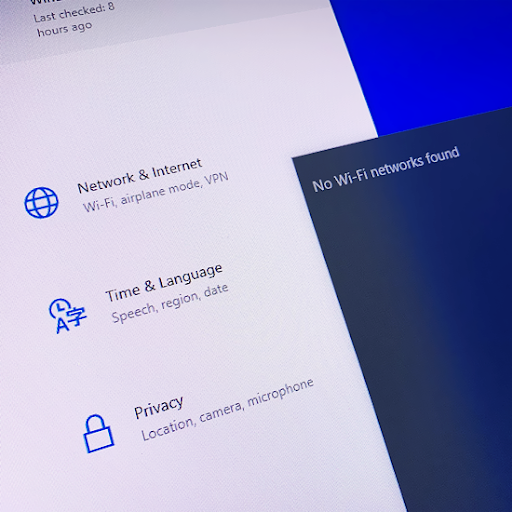
Click on the Network & Internet tile. This is where you can find most of your network settings.

-
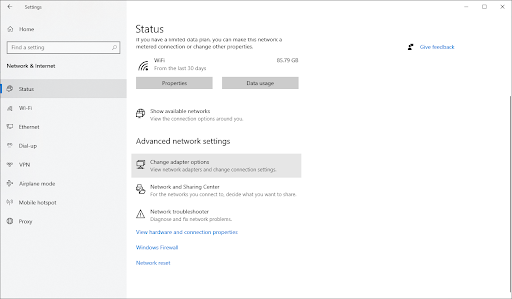
Make sure to stay on the Status tab. Scroll down and click on the Network troubleshooter.

-
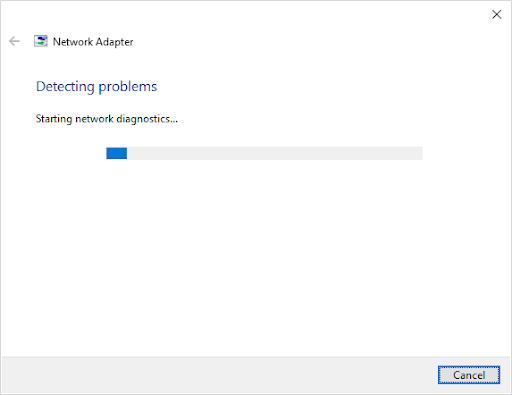
Wait for the troubleshooter to diagnose your computer and identify issues. Follow the on-screen instructions to fix any errors and issues found by the troubleshooter.
It’s possible that the troubleshooter is unable to identify any errors. This is a common behavior, as typically troubleshooters check for a limited set of errors and can’t help when your particular one is outside that.
If your network connection issues persist, continue reading.
Method 3. Enable your network adapter
All networks use adapters in order to function with your device. the network adapter you’re using could be disabled due to unauthorized changes. This change was most likely caused by a Windows 10 update, malicious software, or another user.
Here’s how to re-enable your network adapter on Windows 10:
-
Click on the Windows icon in the bottom left of your screen to bring up the Start menu. Choose Settings, or alternatively use the Windows + I shortcut.

-
Click on the Network & Internet tile.
-
Make sure to stay on the Status tab. Scroll down and click on the Change adapter options button.
-
A new window will appear listing your network adapters. Right-click on the adapter you’re trying to use, and choose Enable from the context menu.

Method 4. Disable Airplane mode
We’ve all made a mistake with leaving a feature on and not realizing it later. Windows 10 comes with a built-in Airplane mode that disables connection to the internet.
There’s a possibility that you accidentally left this feature turned on, or didn’t even realize you had it on. Here’s how to disable Airplane mode on Windows 10:
-
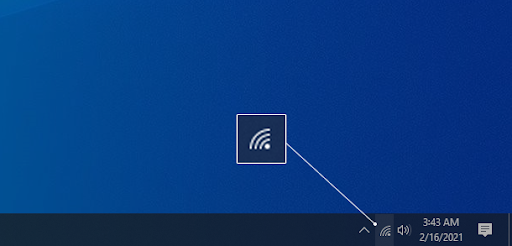
Click on the Netwotk icon in your taskbar. If Airplane mode is turned on, it’s possible that the icon shows up as an airplane symbol. (If the icon isn’t visible at all, click on the arrow to see hidden tray items.)
-
Check if Airplane mode is turned on. If so, click on its icon to disable it.

- Your networks should become visible again. Try reconnecting to your network and see if you’re able to get back online.
Method 5. Recreate the WiFi profile
Windows 10 saves wireless connection settings such as authentication and security in a profile. If this profile is corrupted or poorly configured, you’ll inevitably run into issues. Recreating the WiFi profile can help you solve this:
-
Click on the Windows icon in the bottom left of your screen to bring up the Start menu. Choose Settings, or alternatively use the Windows + I shortcut.
-
Click on the Network & Internet tile.

-
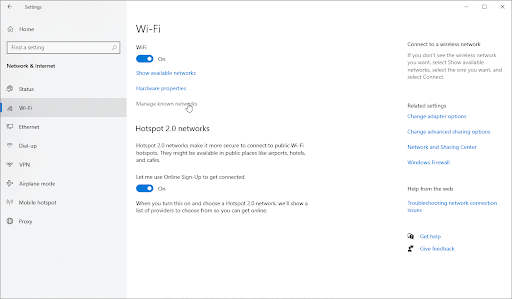
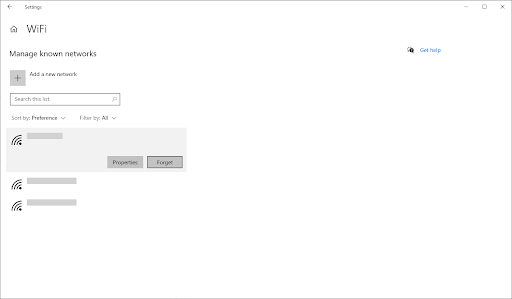
Switch to the WiFi tab. Here, click on the Manage known networks link.
-
Select the current WiFi network you’re connected to, then click on the Forget button. This is going to completely erase the profile.
-
Click on the Networks icon in your system tray, and select the wireless network you just deleted the profile for. Click on the Connect button.
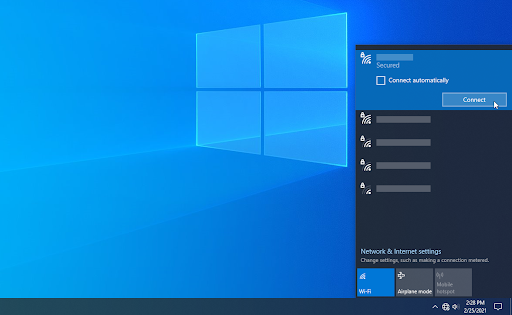
- Windows 10 will automatically create a new profile for the network without any corruption or misconfiguration.
Method 6. Perform a Network reset
An alternative way of recreating the profiles of your networks is by performing a network reset. This is going to automatically remove every existing profile for the networks you connected to with your computer, giving you a fresh start.
Take note that you’ll need to reconnect to all the networks you previously used with correct authorization.
-
Click on the Windows icon in the bottom left of your screen to bring up the Start menu. Choose Settings, or alternatively use the Windows + I shortcut.

-
Click on the Network & Internet tile.

-
Make sure to stay on the Status tab. Here, scroll down to the bottom of the page and click on the Network reset link.

-
Read the precautions before proceeding with the network reset procedure. After acknowledging what this feature does, click on the Reset now button.

- Click Yes. After all your network profiles have been reset, try connecting to your WiFi and check if you’re able to go online.
Method 7. Reset network stack with Command Prompt
If your DNS is outdated, you can manually clear its cache to potentially fix the issues this causes. The method is simple and involves using the Command Prompt.
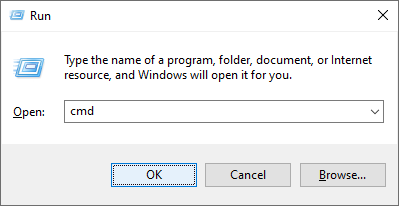
- Press the Windows + R keys on your keyboard. This is going to bring up the Run utility.
-
Type in “cmd” without the quotation marks and press the Enter key on your keyboard. This will launch the classic Command Prompt application.
-
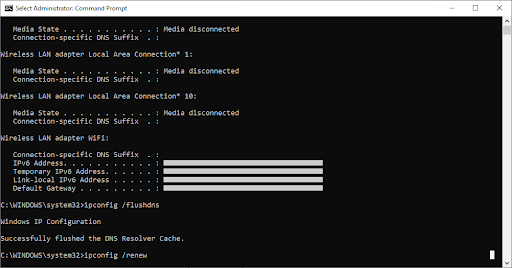
Type in the following command and press the Enter key to execute it: ipconfig /flushdns

-
Check if you’re able to connect to the internet or use an online app. If not, keep the Command Prompt open and proceed with the steps below.
- If flushing your DNS wasn’t enough on its own, you may try to reset your TCP/IP. This requires the Command Prompt and potentially administrative permissions. Need help? Check out our How to make a local user an administrator in Windows 10 guide.
-
Stay in the Command Prompt you previously opened. Type in and execute the following commands in order. Press enter after every command:
ipconfig /release
ipconfig /all
ipconfig /renew
netsh int ip set dns
netsh winsock reset
- After successfully executing the commands, exit the Command Prompt and reset your PC. Check if the No Internet Connection error is still present.
Method 8. Update your Network Adapter drivers
Regularly updating your driver software is something you should do all the time. Outdated network drivers can cause more trouble than you’d think.
In this solution, we will be using the integrated Device Manager to update the drivers for your network adapters.
-
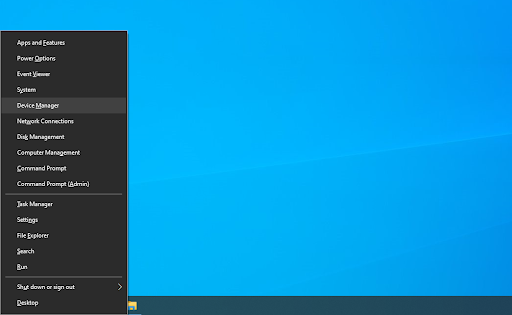
Press the Windows + X keys on your keyboard, and then choose Device Manager from the context menu.
-
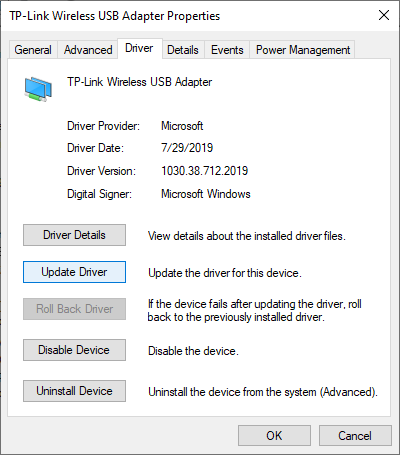
Expand the Network adapters section. Here, simply double-click on the adapter you’re currently using.

-
Switch to the Driver tab, and then click on the Update Driver button.
-
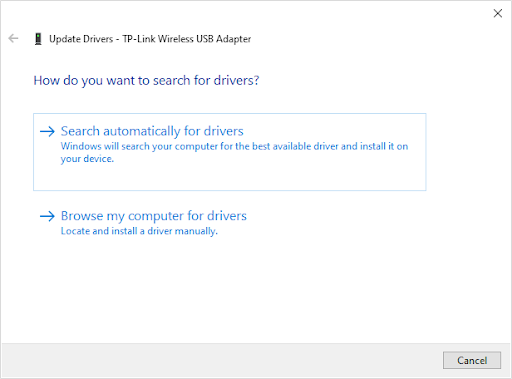
Select the method of updating your driver. You can either let Windows 10 search for a driver automatically or manually locate a new driver file already on your computer.
- Wait for the driver installation to complete. Repeat this for any other network adapter drivers you use, and see if the bug has been fixed.
Method 9. Use the Registry Editor (Windows 10 version 2004)
Users on the Windows 10 version 2004 update may have a bug related to network connectivity. In this special case, use the Registry Editor to fix the error and return online with ease.
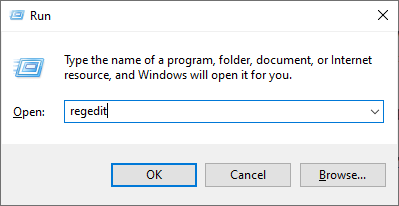
- Press the Windows + R keys on your keyboard. This is going to bring up the Run utility.
-
Type in “regedit” without the quotation marks and press the Enter key on your keyboard. This will launch the Registry Editor application.
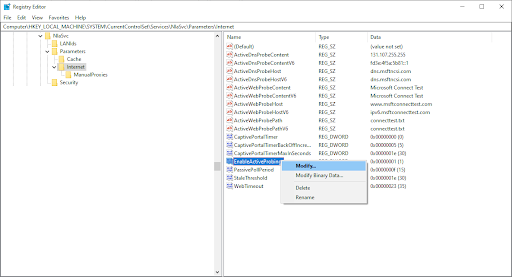
- Navigate to the following key: HKEY_LOCAL_MACHINE\SYSTEM\CurrentControlSet\Services\NlaSvc\Parameters\Internet
-
You can use the address bar in the Registry Editor to type or paste the key as well, making navigation faster.
-
Right-click on the EnableActiveProbing key, and then select Modify from the context menu.
-
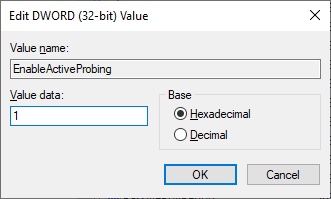
Modify the Value data and type in 1. Click the OK button to finalize the changes.
- Restart your computer and check if the error still persists.
Fixed! You Are Not Connected to Any Networks Windows 11
If you're using Windows 11, watch this YouTube Video to Fix "Not Connected to Any Networks Windows 11:
Final thoughts
If you need any further help with Windows 10, don’t hesitate to reach out to our customer service team, available 24/7 to assist you. Return to us for more informative articles all related to productivity and modern-day technology!
Would you like to receive promotions, deals, and discounts to get our products for the best price? Don’t forget to subscribe to our newsletter by entering your email address below! Receive the latest technology news in your inbox and be the first to read our tips to become more productive.
You may also like
» WiFi Keeps Disconnecting on Windows 10? Here’s the Fix
» Which Web Browser Should You Be Using in 2021? (Updated)
» How to Enable Dark Mode in the Windows 10 File Explorer