If you have been experiencing high CPU usage on your Windows 10 device, it may be due to the HD audio background process using too much of your system's resources. There are a few ways to fix the problem and stop it from happening again in the future.
HD Audio Background is an audio driver and software package produced by Realtek Semiconductor for HD audio controllers. HD stands for high-definition, which means high quality! HD Audio Background has been found to cause the RAVBg64.exe process to consume resources in a way that users don’t notice or expect to do so.
The HD Audio Background process can cause problems. It causes system slowdown, frozen programs, or errors with software not responding. This happens when the process is consuming CPU resources unnecessarily. Continue reading to learn how you can fix it with a few simple methods.
Table of Contents
- How To Fix HD Audio Background Process High CPU Usage
- Method 1. Update Your Realtek Audio Driver
- Method 2. Disable Realtek From the Task Manager
- Method 3. Disable HD Audio Device Using Device Manager
- Method 4. Make an Edit in the Registry
- Method 5. Reinstall Realtek Audio Driver
- Final Thoughts
How To Fix HD Audio Background Process High CPU Usage
The methods below were written for Windows 10 users struggling with the HD Audio Background process using too much CPU. But, they may work for Windows 8 and Windows 7 users as well.
To stop the HD Audio Background process from having high CPU usage, you have to perform some of the methods below. Sounds too easy? It is! Let's get started.
Method 1. Update Your Realtek Audio Driver
You may be dealing with a CPU-hogging bug if your RAVBg64.exe process has gone rogue, but you can fix it by obtaining the latest available drivers for your Realtek Audio device that will get rid of this issue and leave you free to enjoy a speedy computer!
-
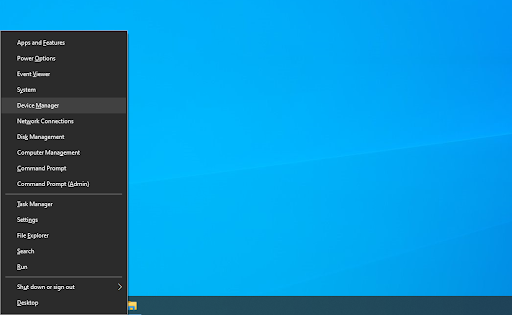
Press the Windows + X keys on your keyboard at the same time, then click on Device Manager.
-
Expand the Sound, video, and game controllers section by clicking on the arrow icon in front of it. Right-click on the Realtek Audio sound device and choose Update Driver.

-
Select the “Search automatically for updated driver software” to let Windows 10 look for the latest drivers compatible with your device. Note that you’ll require a connection to the internet to perform this step.
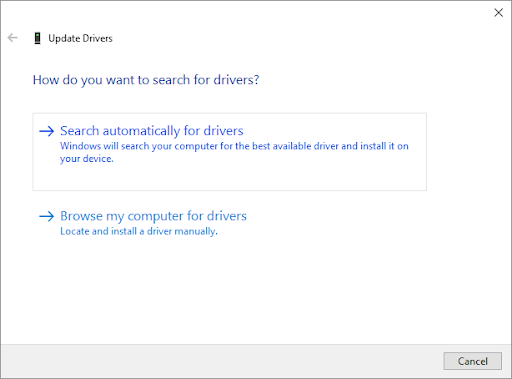
- Once the new driver has been downloaded and installed, restart your device. Check if you’re still seeing high resource usage from the HD Audio Background process.
Method 2. Disable Realtek From the Task Manager
While this might not work for everyone, you can try to disable the Realtek Audio Manager from starting on your computer. This will remove the Audio Background process, along with its CPU-hogging properties.
-
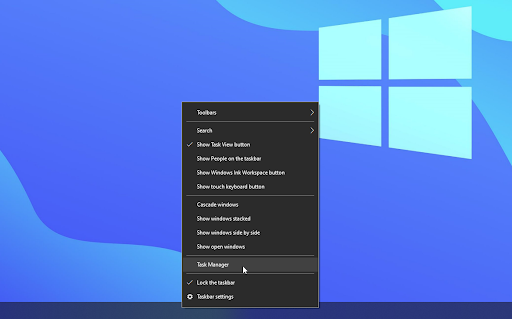
Right-click on an empty space in your taskbar and choose Task Manager. If the Task Manager launches in compact mode, make sure to expand details by clicking on the “Mode details” button.
-
Switch to the Start-up tab using the header menu located at the top of the window. Find the Realtek Audio Manager from the list and select it by clicking on it once.
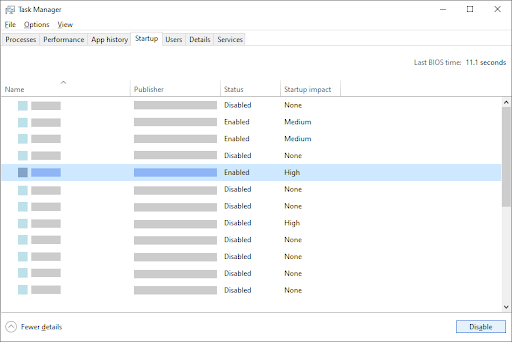
- Click on the Disable button now visible in the bottom-right of the window. This will disable the service from launching when you start your device.
- Restart your computer.
Method 3. Disable HD Audio Device Using Device Manager
A different way to go about turning off the problematic background service is simply disabling the audio device causing it to start. You can do this in your Device Manager.
- Press the Windows + X keys on your keyboard at the same time, then click on Device Manager.
-
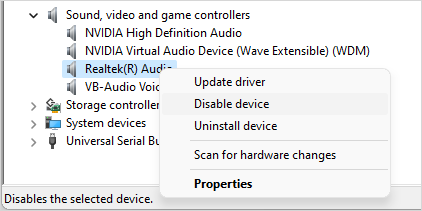
Expand the Sound, video, and game controllers section by clicking on the arrow icon in front of it. Right-click on the Realtek Audio sound device and choose Disable.
- Restart your computer. See if the resource usage has been solved after disabling your Realtek device.
Note: If you can’t hear any audio after performing this method, the device may be necessary for your computer. Simply navigate back to it, right-click again, and choose Enable device from the context menu to revert your changes.
Method 4. Make an Edit in the Registry
The Registry Editor is a powerful tool, and there’s a trick you can use to help patch up your CPU-heavy Realtek process. We recommend proceeding with caution: the Registry is a vital part of your system and making the wrong edits can cause fatal errors.
If you’re unsure of your ability to work the Registry Editor, we recommend creating a backup of your system, or a System Restore point.
- Press the Windows + R keys on your keyboard. This is going to bring up the Run utility.
- Type in “regedit” without the quotation marks and press the Enter key on your keyboard. This will launch the Registry Editor application.
-
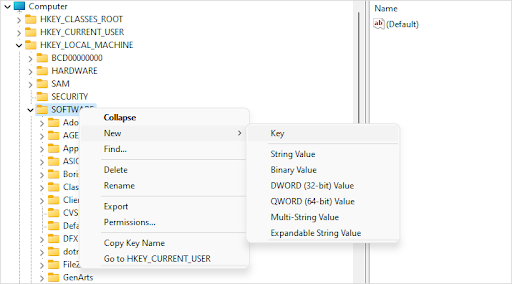
Use the Navigation pane to reach the following Registry key, or use the address bar and copy-paste the file’s location: HKEY_LOCAL_MACHINE\SOFTWARE. Right-click on the SOFTWARE folder, and choose New → Key from the context menu.
-
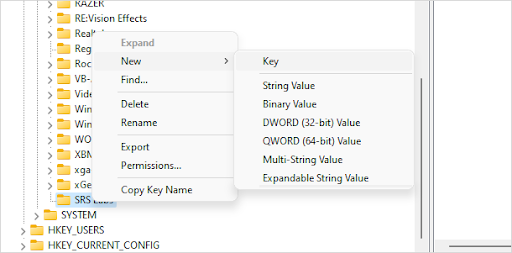
Name the key “SRS Labs” and then right-click on it. Once again, choose
- Exit the Registry Editor and restart your computer. This will make the changes take place and you can test if the CPU usage has returned to normal.
Method 5. Reinstall Realtek Audio Driver
- Press the Windows + X keys on your keyboard at the same time, then click on Device Manager.
- Expand the Sound, video, and game controllers section by clicking on the arrow icon in front of it. Right-click on the Realtek Audio sound device and choose Update Driver.
-
In the dialog window, choose to Browse my computer for driver software, and then click on the Let me pick from a list of available drivers on my computer button.

-
Find and select High Definition Audio Device. If you can’t see it in the list, uncheck the Show compatible hardware option. Click Next to continue.
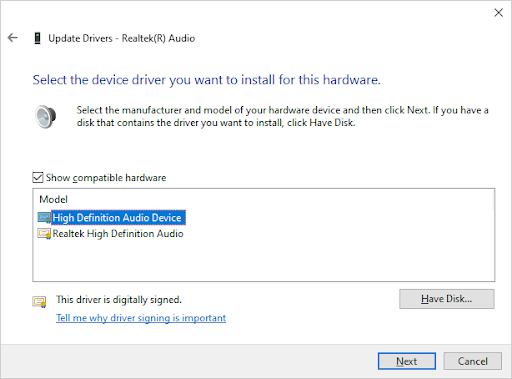
- Follow the on-screen instructions until the installation is complete, and then restart your computer. If the issue doesn’t appear to be fixed, repeat the steps and select Realtek High Definition Audio instead.
Final Thoughts
We hope we helped you fix high CPU usage on your Windows 10 device caused by the HD audio background process using too much of your system’s resources. If you are still experiencing this issue, please contact us at our help desk so that we can resolve it for you!
Visit our Help Center to get access to hundreds of articles covering hundreds of topics, and with tips on how to get the most out of your system.
Sign up for our newsletter to get promotions, deals, and discounts from us right in your inbox. Subscribe with your email address below.
You May Also Like
» How to Fix the “No Audio Output Device Is Installed” Error on Windows 10
» How To Fix the Audio Services Not Responding Error in Windows 10
» How to fix Windows Audio Device Graph Isolation high CPU usage