Having a slow computer can be immensely frustrating and even dangerous at times. You should always be careful of your CPU usage: running at high %s can eventually lead to damage to your processor.
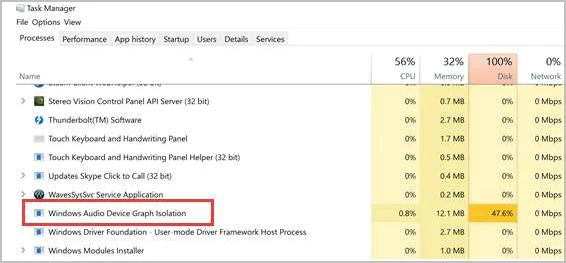
Many applications and processes can eat up your CPU usage, Windows Audio Device Graph Isolation is one of them. You can find out if this process is causing you issues by checking the Task Manager and identifying the process.
Are you sure that the usage of your CPU is unusually high because of this Windows process? Continue reading our article to find out what the process is, whether or not it’s dangerous and how you can stop the high usage issue.

What is Windows Audio Device Graph Isolation?
The Windows Audio Device Graph Isolation (also shown as AudioDG.exe) is a part of Windows’ audio engine. It serves as the audio engine in your operating system allowing third-party apps to run sound on your computer. This is also called digital signal processing.
Windows users have the ability to apply special effects to audio. Adding reverb, boosting the bass, or simulating echo all fall into this category.
It’s also useful for third parties, allowing them to add their own special effects for audio without having to alter Windows Audio itself. Because of this feature, sound-card vendors are able to offer more and better effects for customers.
Is this process a virus?
By default, Windows Audio Device Graph Isolation is not a virus or malware. This process is a part of your Windows operating system.
However, people with malicious intent often try to disguise their harmful tools as processes like this one. When you feel like a process on your PC is causing harm, you should always double-check that it’s genuine.
How to ensure that Windows Audio Device Graph Isolation is Safe
You can determine if you’re dealing with a virus by checking the process’s location. This can be done straight from your Task Manager whenever Windows Audio Device Graph Isolation is running.
-
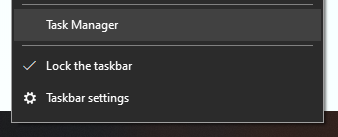
Open your Task Manager. You can do this by right-clicking on an empty space in your taskbar and choosing Task Manager.
-
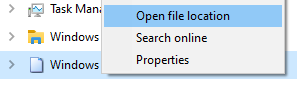
Locate and right-click on Windows Audio Device Graph Isolation, then select Open File Location.
-
Check the location of the file. By default, this file is always located in the C:\Windows\System32 folder. If your file isn’t there, you most likely have a virus.

Confirming that you’re dealing with malware is important to troubleshoot the issue properly. Do you need help removing malicious tools from your computer? Continue reading our article for a guide on how you can ensure that your PC is safe.
Can I disable or Quit the process?
The short answer is yes, but it’s not recommended. This process is necessary to be able to produce any audio on your system. When you force quit or disable the process, you won’t hear any audio until the Windows Audio Device Graph Isolation is running again.
If you want to keep the audio on your system but don’t want to deal with the dangerously high CPU consumption, you need to fix the issue. Let's get troubleshooting!
Fixed: Windows Audio Device Graph Isolation's high CPU usage on Windows 10
By now, you should be able to tell whether or not you’re dealing with a virus or if your process is simply not running as intended. Follow our methods to repair your PC.
Disable all Sound Effects
Since Windows Audio Device Graph Isolation is heavily involved in handling special sound effects, you might be able to fix its high CPU usage by disabling these effects.
Note: The following instructions were written for Windows 10 operating systems. However, the process is similar in many other Windows releases, including Windows 7 and Vista.
Of course, this method only works for people who have little to no desire to utilize these in the first place. If these sound effects are something you want to keep, we recommend trying a different method first.
-
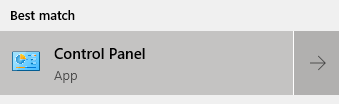
Instead of going straight into the new Settings app, we want to use the classic Control Panel. Search for Control Panel in your search bar and launch it from the results.
-
Change your view mode to Large icons.

- Click on Sound. This will bring up a new window containing all of your playback devices.
-
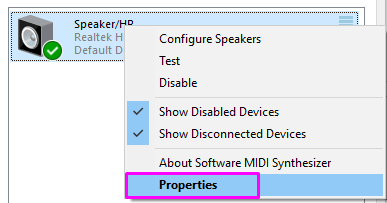
Right-click on your speakers, then select Properties from the menu.
-
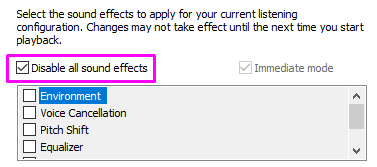
Another window will open. Here, switch to the Enhancements tab.

-
Click the box next to Disable all sound effects to place a checkmark. When you’re done, press the Apply button.
- Repeat steps 4 to 6 on every other playback device you have. When you’re done, restart your computer.
Fix your Audio Drivers
Regularly updating your drivers is something you should do all the time. Outdated audio drivers can cause more trouble than you’d think.
There are multiple ways in which you can update your drivers. Follow one of the guides which suit your approach.
Update your driver from Windows itself
In this method, we will be using the integrated Device Manager to find a new, updated driver.
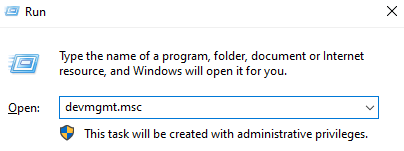
- Press and hold the Windows key, then press R. This will launch the Run application.
-
Type in devmgmt.msc and hit OK to open the Device Manager.
- Expand the Sound, video and game controllers section by clicking on the arrow icon.
- Right-click on your audio driver and select Update Driver.
-
Click on Search automatically for updated driver software.

- If Windows can find an updated driver, it will automatically download and install the update to your computer.
- Restart your PC and test if the issue is solved.
Update your drivers with a third-party app
You can also find and download third-party updater tools such as Driver Booster, DriverHub, or DriverPack Solution. These three tools are all free and easy to use, but you can always look around the web for more advanced apps.
Note: Always make sure that the app you’re using is trustworthy. Many applications that promise to fix or update your drivers contain malware, adware or spyware. We recommend searching the name of the product and reading reviews made by real people.
Reinstall Skype
Some Windows 10 users reported that their issue with Windows Audio Device Graph Isolation is related to Skype. Uninstalling and reinstalling the application often seems to fix this.
Note: When performing a clean install of Skype, you might lose your app preferences and Skype data. Make sure to back up any important chats or files beforehand to ensure you don’t lose anything.
How to uninstall Skype
- Open the Settings app by pressing down the Windows and I keys on your keyboard. Alternatively, you can click on the gear icon in the Start menu.
-
Click on Apps.

- Search for Skype by using the Search bar. You can also manually find the app from the list.
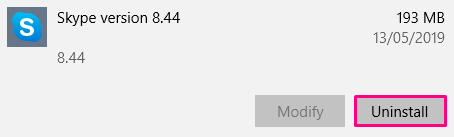
- Click on Skype to enter the expanded view.
-
Click on the Uninstall button and follow the instructions on the screen to remove Skype.
How to Download and Reinstall Skype
- Go on the Skype download page.
-
Choose the version you want to download. You can either get Skype for Windows 10 or download the classic Skype for Windows app.

-
Go to your Downloads folder and double-click on the Skype installer.
- Click on the Install button.
Skype should automatically install and launch itself. You might be prompted to log in again and could possibly lose all your Skype chats and app preferences.
Scan your computer for a virus
Even after performing the methods above, it’s recommended to run a full system scan on your computer, especially if the file location of Windows Audio Device Graph Isolation doesn’t seem to match our records.
To do this, you can find a variety of antivirus software online, however, not all of them are of good quality. This is especially true if you’re looking for something that’s free.
An application that received good reviews from users is Malwarebytes. Even its free version is able to detect malicious files on your computer and provide a relatively high level of security.
Some other solutions are Emsisoft, Norton AntiVirus, Avast, Bitdefender, or AVG. A few of these applications offer paid services, which is excellent for users who require advanced features.
You can follow these steps to download and run any of the antivirus applications mentioned above:
- Open the official website of the application. In this guide, we will be downloading Malwarebytes from malwarebytes.com.
-
Find the download link for the edition you wish to have and download the installer.
- Open the file you downloaded and follow the on-screen instructions to install Malwarebytes.
- Launch Malwarebytes.
-
Switch to the Scan tab on the left.

-
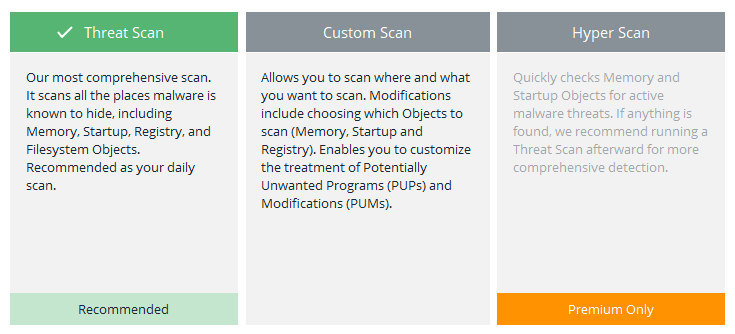
Select Threat Scan. Optionally if you purchase Premium or gained a free trial period of it, you can do a Hyper Scan.
- Click on Start Scan.
- Wait for Malwarebytes to finish scanning your computer. This might take a long time, but after it’s done, your computer should be free of any harmful apps and viruses.
We hope that by following our guide, you were able to reduce the CPU usage of Windows Audio Device Graph Isolation.