DPI mouse (dpi stands for dots-per-second) indicator is used to test your mouse's sensitivity, enabling you to adjust your mouse's cursor speed by adjusting how many pixels per second it moves. Understanding your DPI is particularly useful when playing video games or using software where you want to be precise when placing your cursor. It also makes it much easier to use widescreen monitors and multiple displays.
Generally, DPI mouse is the standard used to measure the mouse sensitivity, expressed as the number of DPIs (dots per linear inch) that a device can detect. By changing the DPI, you can instantly adjust pointer speed for precision tasks, such as in-game targeting or photo editing.
DPI is the standard used to measure the mouse sensitivity, expressed as the number of DPIs (dots per linear inch) that a device can detect. By changing the DPI, you can instantly adjust pointer speed for precision tasks, such as in-game targeting or photo editing. The greater the number of DPIs, the higher the mouse sensitivity, and the faster the pointer speed. Some mouse models include dedicated buttons (DPI On-the-fly buttons) you can use to instantly adjust your mouse sensitivity (DPI).
This article will present how you can check your mouse DPI and change it on Windows 10.
Jump to:
- What is the DPI Mouse?
- How to change your Mouse DPI in Windows 10
- How to check your Mouse DPI
- Conclusion
What is the DPI Mouse?/Mouse sensitivity
Mouse DPI = Mouse sensitivity - dots per linear inch.
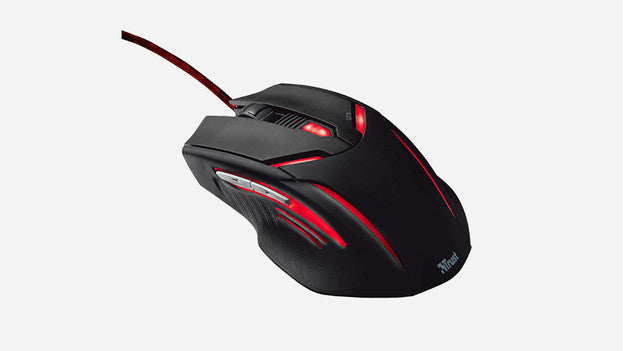
Mouse DPI is also a measurement used to show how many pixels your mouse can move when you move your mouse cursor one inch. For example, if your mouse has 1600 DPI (low dpi mice), moving it exactly one inch (2.54 cm) will move the cursor to 1600 pixels on your screen.
The higher your DPI (dots per inch), the more sensitive your mouse is. For example, any modern gaming mouse has high dpi standards of up to 20,000 on high dpi mice. This may seem unpleasant. However, many people using large or multiple displays love being able to move the cursor faster or improve cursor speed.
While most people aren’t concerned about DPI count, it’s important for those playing video games. Especially in First Person Shooter (FPS) titles, many theorize about the perfect DPI setting to aim precisely.
Below are several ways to change your DPI settings, then check your current DPI to remember which setting works best.
How to change your Mouse DPI in Windows 10
So, How do I change mouse sensitivity (DPI)?
Many people want to modify their current DPI setting to achieve higher or lower sensitivity. You can gain more comfort and operate your device better. Having perfect sensitivity allows you to get things done better and enjoy your gaming experience even more.
The process of changing your mouse's DPI (dots per inch) varies based on your type of mouse. Office mice usually have no more than two buttons — the left and right mouse buttons, — whereas a dedicated gaming mouse has somewhere between 4 and 8 buttons.
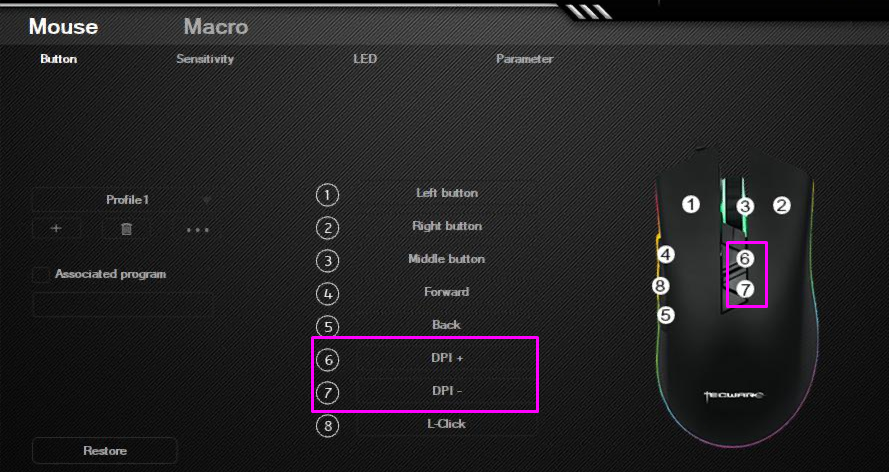
If your mouse has DPI on-the-fly buttons, press one of the DPI On-the-fly buttons to create new settings for each DPI button. The mouse LCD will briefly display the new DPI setting. On the other hand, if your mouse doesn’t have DPI on-the-fly buttons, start Microsoft Mouse and Keyboard Center, select the mouse you are using, click basic settings, locate Sensitivity, make your changes.
Let's look at this in detail below:
Method #1: Change sensitivity of mouse in the Settings app
This method mostly applies to mice with no dedicated DPI button. Luckily, the Windows 10 developers didn’t forget people who use simpler computer mice and gave everyone the option to switch mouse dpi, hence their sensitivity easily.
Note: While you won’t know the exact number right away, you can use the methods described in the next section to determine your new DPI (dots per inch). You can switch dpi to a higher dpi or lower it.
Using the Windows Settings app, you can easily adjust your DPI settings and levels.
- Click on the Windows icon in the bottom-left of your screen to bring up the Start menu, then choose “Settings app.” You can also use the Windows + I keyboard shortcut to go to the settings app.
- Click on the “Devices” tile.
- Switch to the “Mouse” tab using the left-side panel.
- Click on the “Additional mouse options” link at the bottom of the page or in the right-side panel.
- Switch to the “Pointer Options” tab using the header menu of the Mouse Properties window.
- Adjust the speed of your mouse with the slider under ‘Motion' on high-resolution screen. Moving the slider head to the left will make your mouse slower while moving it to the right will increase its speed.
- We recommend turning off the “Enhance pointer precision” setting, as it’s capable of messing up your DPI.
- Click the OK button. You should immediately see the change in mouse speed when you try to scroll the mouse cursor and see the cursor speed.
Method #2: Adjust sensitivity in the video game itself
Many video games allow you to adjust your sensitivity in-game and adjust it to a higher dpi or lower it. This allows you to use one general DPI for operating your system normally, then set up different sensitivity settings for different games.
While the setting is located in different menus for each game, you can generally follow these steps to find where you can change your in-game mouse scrolling sensitivity.
- Launch the game you want to change your sensitivity in and wait for it to load entirely.
- Locate the menu that says either “Options” or “Settings,” usually available from the title screen.
-
You should be able to locate a menu that says “Controls.” If this menu is missing, chances are that you can’t directly adjust the sensitivity of the mouse from the game you opened.

-
Look for the sensitivity slider and adjust it until you feel comfortable with the speed.

Method #3: Use the DPI changer button on your gaming mice
Any gaming mouse has a button dedicated to changing your DPI on-the-fly, which you can adjust to higher dpi or lower. You can adjust your DPI between various presets, which may or may not be customizable depending on your mouse, no matter your application.
The DPI button is usually located below the scrolling wheel. It’s relatively small compared to the other buttons and sometimes even has the word “DPI” written on it as well.

You can cycle through the preset DPI settings that gradually get higher and higher by pressing the button once. Some mice may offer two buttons to increase it to higher dpi or decrease the DPI instead of cycling. And some high dpi mice might need lowering when you change from gaming to normal work. Or use gaming mice (gaming mice are mice designed for gaming) strictly for gaming.
Unsure of which button is responsible for your DPI? We recommend searching for the box your mouse came in, which usually has visual labels for each button on your mouse. You can also hop online and start looking for your model on the manufacturer’s website.
How to check your Mouse DPI
At the moment of writing, there’s no dedicated Windows 10 application for checking your DPI that comes with the system itself. This is an issue, as many people would love to get a clear and simple understanding of their mouse gadget's DPI.
Don’t feel discouraged, though — there are many other ways to check what DPI you’re rolling with. Simply follow our instructions below to identify and make changes to your mouse gadget's DPI.
Two key ways to Change mouse sensitivity (DPI) settings
-
If your mouse has DPI on-the-fly buttons, press one of the DPI On-the-fly buttons to create new settings for each DPI button. The mouse LCD will briefly display the new DPI setting.
-
If your mouse doesn’t have DPI on-the-fly buttons, start Microsoft Mouse and Keyboard Center, select the mouse you are using, click basic settings, locate Sensitivity, make your changes.
Other ways include:
Method #1: Check the manufacturer’s specifications
This method mostly applies to branded mice. Most major brands list their products on a website, complete with a set of specifications and images. This is mostly used to get customers interested, however, it can help those who’ve already purchased the product as well.
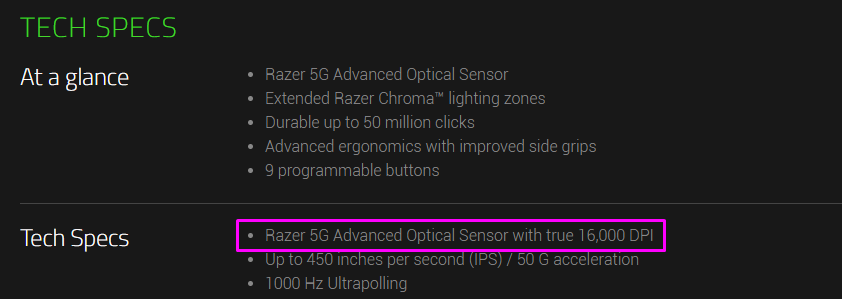
In this example, we’ll look at the Razer Mamba Elite mouse and determine its DPI. This process is similar for every mouse. However, some manufacturers don’t have a website or technical information about their products.
- Head over to the manufacturer’s website. In our case, we navigated to the official Razer website.
-
Use the built-in search engine to find your mouse model.

-
Locate the technical specifications and check the DPI count written on the website.
If you can’t find your mouse on the manufacturer's website, we suggest getting in touch with customer support. Many brands offer support through e-mail or the phone.
Method #2: Use Microsoft Paint
This might seem like a silly way to determine your DPI. However, it works near perfectly. Since MS Paint comes with the ability to see the pixel your cursor is at, you’re able to do a little experiment to find a somewhat accurate measurement of your DPI.
- Open MS Paint by searching for it in your taskbar or your list of applications.
- Set your zoom level to 100%.
- Select any brush tool and place your cursor to the far left of the screen. In the bottom-left, the first number should show 0.
-
Hold the left mouse button and move your mouse around 2-3 inches. Look at the first number in the bottom-left without moving your mouse and note it down.
- Repeat this process multiple times, then find the average of each measurement. This is your DPI.
Method #3: Install the correct mouse drivers
Most branded computer mice and any high dpi mouse come with the manufacturer’s own driver software. This allows you to completely customize how the hardware behaves, even if it has extra buttons and features.
Installing the right mouse driver may give you the option to check your DPI. Again, we’ll be using a branded Trust GXT 177 Rivan RGB Gaming Mouse for this example.
- Head over to the manufacturer’s website. In our case, we navigated to the official Trust website.
-
Use the search engine to find your product.

-
Look for a section to download the driver software, then choose your operating system.
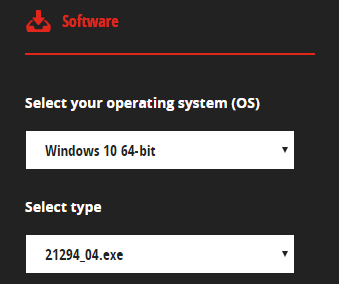
- Install the driver and launch the software. You should be able to locate a section dedicated to DPI settings, allowing you to see the DPI of your mouse.
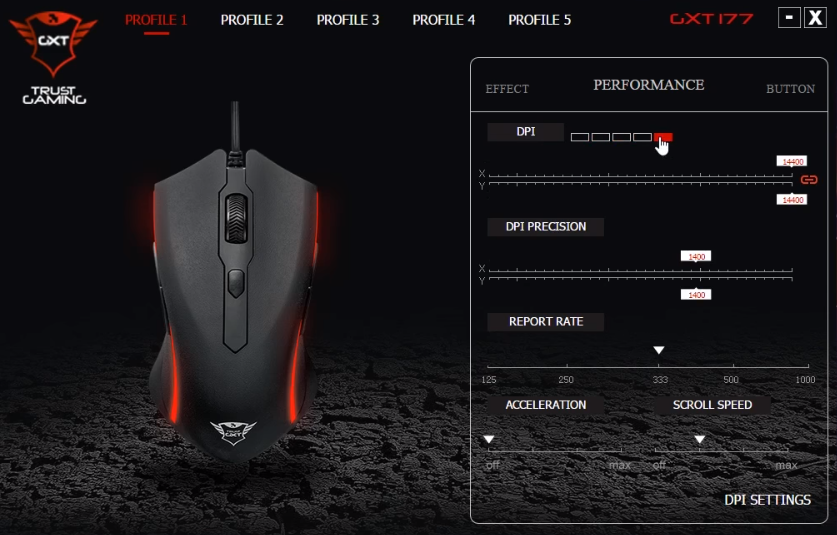
Note: Not every manufacturer and mouse has dedicated driver software except on a gaming mouse. However, it’s worth checking in case you want to make personalized changes.
Conclusion
We hope this article helped you with the DPI issues on both high dpi and low dpi mice. You now know what dpi stands for (dpi stands for dots per inch) and that a mouse's DPI is flexible — you don’t have to stick to one setting. Make sure to dedicate different mouse dpi settings or options for different activities to control cursor speed.
For more tech support and tips, visit our help center, subscribe to our email list, and receive tech updates, offers, and discounts at your comfort.
You May Also Like:
» How to Fix Mouse Lag on Windows 10
» How to Turn Off Mouse Acceleration Completely in Windows 10
» How to Fix Keyboard Typing Wrong Characters in Windows 10
» How to Fix Your Keyboard Not Working in Windows 10
»How To Change Your Mouse Cursor on Windows 10/11