It’s easy to see how one of the worst things that can happen to a computer user is a keyboard issue. Keyboards are needed to do just about everything on PC or laptop, as they allow you to input information, communicate, and run commands. They even offer faster access to some features via keyboard commands.
When your keyboard stops working, you’re essentially left to use your pc with a handicap. However, we’re here to help you restore your keyboard into working order with this guide.

Jump to:
- Why is my keyboard not working in Windows 10?
- Fixing your keyboard in Windows 10
- Prerequisite: Turn on the on-screen keyboard
- Method 1: Use the Windows + Space bar keyboard shortcut
- Method 2: Turn off the Filter Keys feature
- Method 3: Uncheck the “Allow the computer to turn off this device to save power” option
- Method 4: Use the Windows 10 Keyboard troubleshooter
- Method 5: Disable Fast Startup
- Method 6: Update your drivers
- MSI Creator 17 Professional Laptop B11UG 494 Review
- Final Thoughts
Why is my keyboard not working in Windows 10?
There are multiple possible things that can cause trouble when it comes to your peripherals. You might be dealing with hardware issues, or something could simply be wrong on your system itself.
We were able to collect the most common causes reported by Windows 10 users and made a list that might have a cause that applies to you as well.
- Your keyboard is damaged. Physical damage can cause issues when you're trying to use your keyboard. Especially in the case of a USB keyboard, make sure to inspect both the body and the connecting cable for any signs of damage.
- Your battery is low. If you use a wireless keyboard, ensure that the battery is charged. If needed, change the battery.
- Your drivers are missing or outdated. Driver updates are needed to ensure your computer parts function as intended, even if Microsoft doesn’t natively support them. If the correct keyboard drivers are missing or outdated, your device may not work.
- You’re using the wrong USB port. You may have plugged your keyboard into a USB port incompatible with it. You may also have a damaged USB port that needs to be replaced.
- Your power settings are poorly configured. Windows 10 has many power-saving options. One of these functions allows your computer to turn off inactive devices, possibly turning your keyboard off.
- Windows 10’s Filter Key bug. A known bug in Windows 10’s Filter Key feature causes issues with typing on the login screen. At the time of writing, Windows 10 updates released by Microsoft seem to fix this.
- A new major Windows 10 update. Sometimes major Windows 10 updates can break things on your computer.
Recomended Read: Key keyboard features for Computer Keyboards and Gaming Keyboards
Fixing your keyboard in Windows 10
Now that we’ve looked at possible causes, it’s time to troubleshoot your keyboard. You can do many things to get rid of this issue — make sure to give all of our methods a try to see what works for you!
Prerequisite: Turn on the on-screen keyboard
Before troubleshooting, we recommend turning on the on-screen keyboard in Windows 10. This will allow you to follow instructions even if you need to type something in or press keys on the keyboard.
Here’s how to turn on the on-screen keyboard in Windows 10:
-
Click on the Windows icon in your taskbar and choose Settings.

-
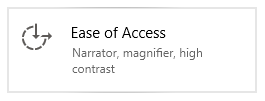
Choose the Ease of Access tile.
-
Scroll down in the left-side panel, then click on Keyboard listed under the Interaction section.

-
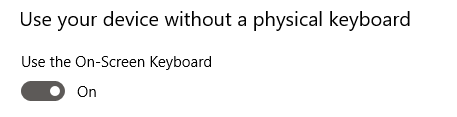
Click on the toggle under “Use the On-Screen Keyboard” to turn on the virtual keyboard in Windows 10.
Method 1: Use the Windows + Space bar keyboard shortcut
Before jumping into any complicated methods, we’d like to address a quick and easy fix that’s able to fix issues with the keyboard.
All you have to do is simply press the Windows + Space bar keys on your keyboard simultaneously. A considerable amount of users have reported that by doing this, their keyboard has started working again.

No luck? Don’t panic just yet! We have many more specialized methods to help you restore your keyboard.
Method 2: Turn off the Filter Keys feature
As mentioned above, the Filter Keys feature has a known bug that causes issues with your keyboard. You can simply turn Filter Keys off by following the steps below, and potentially restore your keyboard within minutes.
-
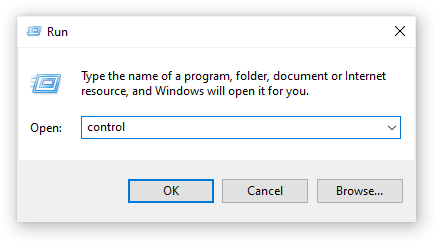
Press the Windows + R keys using the on-screen keyboard to bring up the Run utility, then type in “control” and click the OK button. This is going to open the Control Panel.
-
Make sure that your view mode is set to Category.

-
Next, click on the Ease of Access heading.

-
Click on the “Change how your keyboard works” link found in the Ease of Access Center.

-
Make sure that the checkbox next to “Turn on Filter Keys” is empty. If you see a checkmark, simply click on it to remove it.

- Click the Apply button, then click OK. You should be able to test if your keyboard functions as intended now.
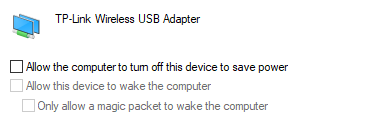
Method 3: Uncheck the “Allow the computer to turn off this device to save power” option
It’s possible that your Power Management settings disable your wireless adapter from time to time, causing it to temporarily disconnect. You can easily fix this by making one small adjustment.
-
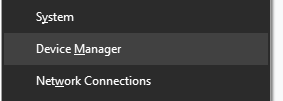
Press the Windows + X keys on your keyboard and click on the Device Manager option from the menu.
- Expand the Universal Serial Bus controllers menu by clicking on the arrow next to it.
-
Double-click on the USB your keyboard is connected to (usually either USB Root Hub or Generic USB Hub,) then switch over to the Power Management tab in the new window.

-
Uncheck the box next to “Allow the computer to turn off this device to save power” then click OK.
- Restart your device and see if you still experience the same issues with the keyboard.
Method 4: Use the Windows 10 Keyboard troubleshooter
Windows 10 comes pre-equipped with many troubleshooters that allow you to diagnose and get rid of specific issues. Luckily, there’s a troubleshooter designed specifically for detecting keyboard related errors, which can be fixed automatically by your system.
Here’s how you can run the keyboard troubleshooter on Windows 10.
-
Click on the Windows icon in your taskbar and choose Settings.
-
Search for “Fix keyboard” using the integrated search in the Settings application, then click on “Find and fix keyboard problems.”

-
Click the “Next” button to start the troubleshooter. You should see that Windows is detecting issues.

- If any issues were successfully identified, you can follow the on-screen instructions to attempt an automatic fix.
Method 5: Disable Fast Startup
Some users suggest that the Fast Startup setting may cause issues with the functionality of your device, especially connected peripherals or driver software. You can test this by disabling Fast Startup using our guide below.
-
Press the Windows + R keys using the on-screen keyboard to bring up the Run utility, then type in “control” and click the OK button. This is going to open the Control Panel.
-
Make sure that your view mode is set to Category.
-
Next, click on the Hardware and Sound heading.

-
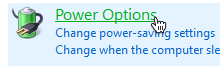
Open the Power Options menu.
-
Click on the “Choose what the power buttons do” link from the left pane.

-
Here, you should see options to change the way your computer boots up. To be able to modify these settings, you need to click on the “Change settings that are currently unavailable” link.

-
Simply make sure that “Turn on fast startup” is unchecked, then click the “Save changes” button.

- Restart your device and see if your keyboard works properly.
Method 6: Update your drivers
Outdated drivers can cause a whole bunch of issues on your system. Make sure to update them in order to possibly fix any issues with your keyboard on Windows 10.
-
Press the Windows + X keys on your keyboard and click on the Device Manager option from the menu.
- Expand the Keyboards menu by clicking on the arrow next to it.
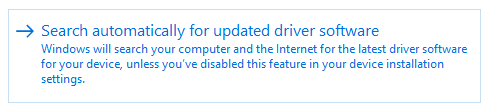
- Right-click on your keyboard listed in the menu and choose Update Driver.
-
Allow Windows 10 to look for the newest driver on your local computer or online, then follow any on-screen instructions.
MSI Creator 17 Professional Laptop B11UG 494 Review
Final Thoughts
We hope that this guide was able to help you restore your keyboard. If your keyboard acts up anytime in the future, feel free to return to our article and apply a different fix!
We're glad you've read up to here :) Thank you :)
If you need any further help, don’t hesitate to reach out to our customer service team, which is available 24/7 to assist you. Return to us for more informative articles all related to productivity and modern-day technology!
On more thing...
Would you like to receive promotions, deals, and discounts to get our products for the best price?
Subscribe to our newsletter by entering your email address below! Receive the latest technology news in your inbox and be the first to read our tips to become more productive.
Further Reading
» Key keyboard features for Computer Keyboards and Gaming Keyboards
» How to Fix Keyboard Typing Wrong Characters in Windows 10
» How to Fix Mouse Lag on Windows 10
» How to Fix the Headphone Jack Not Working in Windows 10