The Windows 10 operating system has been pretty popular with gamers and Windows enthusiasts alike. However, like all software, Windows 10 does have its fair share of issues and bugs that need to be ironed out. One such issue is the "Discord installation failed" error message when trying to install Discord on Windows 10 machines.
This article will tell you what causes this problem and how you can fix it!
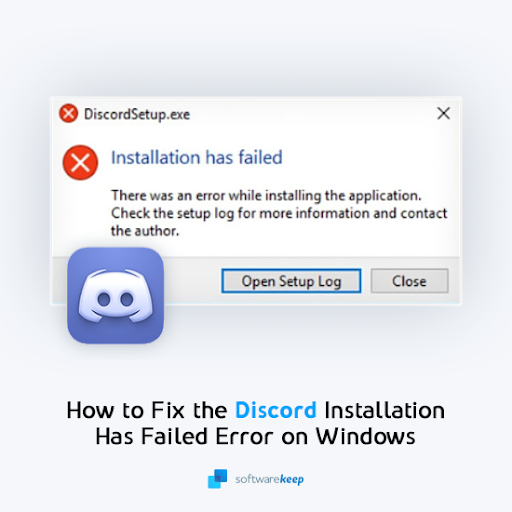
Table of Contents
- Why does the Discord installation fail on Windows 10?
- Solved: Can’t install Discord on Windows 10
- Method 1. Run the installer as an administrator
- Method 2. Run the installer in compatibility mode
- Method 3. Restart the installer through the Task Manager
- Method 4. Completely remove Discord files
- Method 5. Try installing a different version of Discord
- Method 6. Temporarily disable your antivirus
- Method 7. Turn off the Windows Firewall
- Summary: How do I fix Discord install issues in Windows 10?
- Final thoughts
Why does the Discord installation fail on Windows 10?
There are different Discord Installer Errors [Windows] based on the different problems with installation.
So, if Discord installation fails, the cause can come down to a few different things. The problem is usually caused because of corrupted files, or Windows interfering with Discord's services.
The symptoms include:
- Discord installer not opening
- Discord won’t install on Windows 10
- Can’t install Discord
- Discord installer error
- Discord install failed
The solutions outlined below will assist you in resolving any difficulties that may arise during the Discord installation process. As a result, your preferred online chatting app should work at the end of day!
Solved: Can’t install Discord on Windows 10
In this section, you’ll learn:
- How do I fix Discord installation failed?
- How do I install Discord on Windows 10?
The methods of fixing this problem include downloading and running a fresh installer, removing residual files, and fixing Windows settings. Here’s how to fix the Discord installation failed error on Windows 10:
Method 1. Run the installer as an administrator
The first thing you should try is running the installer in administrator mode. This will allow the installer to bypass potential restrictions and install all the necessary files to run Discord on your computer.
-
Make sure to download the latest version of the installer from the Discord website.

- Find the Discord installer file (commonly named DiscordSetup.exe) in the File Explorer. If you downloaded it recently, it should be located in your Downloads folder.
-
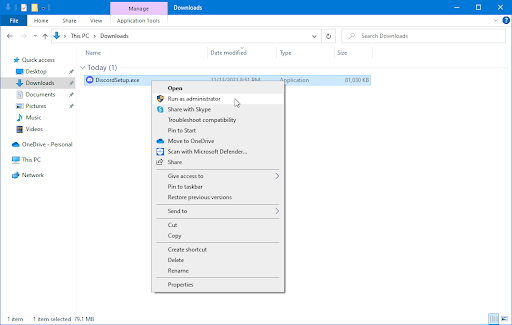
Right-click on the installer, and choose Run as administrator from the context menu. If you're using a local account that doesn't have administrator permissions, click here first.
-
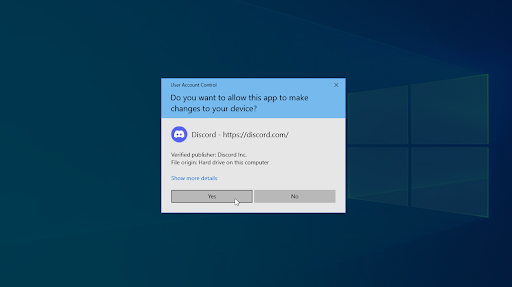
Click Yes if you’re prompted by the User Account Control (UAC) screen. This will allow the Discord installer to run with elevated permissions which may be required on your device.
- Go through the on-screen instructions to install Discord.
Method 2. Run the installer in compatibility mode
Some systems struggle to run modern apps, which means you need to place the Discord installer in compatibility mode. This will minimize the potential conflicts that may cause the installer to not work.
- Make sure to download the latest version of the installer from the Discord website.
- Find the Discord installer file (commonly named DiscordSetup.exe) in File Explorer. If you downloaded it recently, it should be located in your Downloads folder.
-
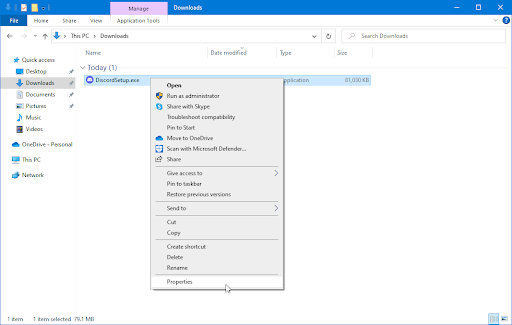
Right-click on the installer, and choose Properties from the context menu. A pop-up window should appear on the screen.
-
Switch to the Compatibility tab. Make sure to place a checkmark next to the Run this program in compatibility mode for checkbox.
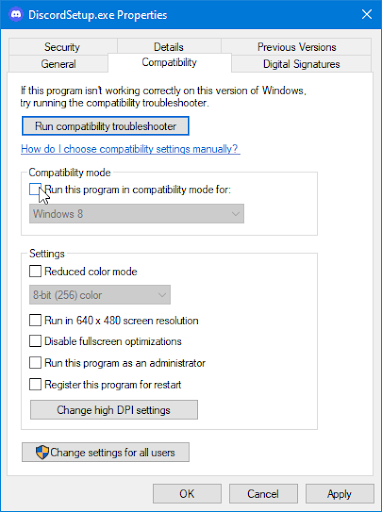
-
From the dropdown menu, select either Windows 8 or Windows 7. Discord’s support website recommends trying both modes if the installer doesn’t start the first time.
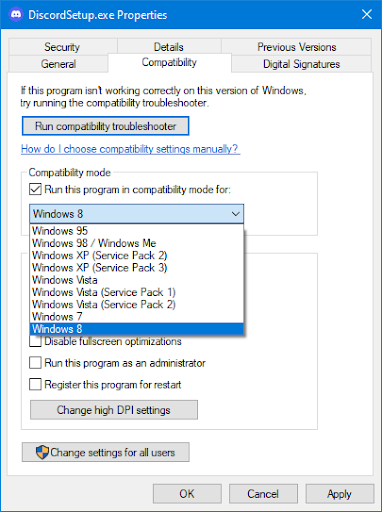
- Click on the Apply button and try to run the Discord installer again. If it still doesn’t work, move on to another method below!
Method 3. Restart the installer through the Task Manager
It’s possible that the installer is unable to complete it because you already have a different instance of Discord (or its installer) open. You can completely exit the installer and restart it completely to fix this problem.
-
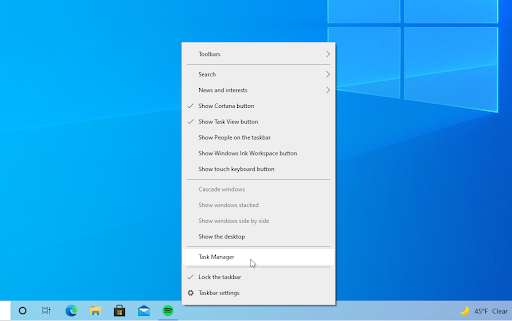
Right-click on an empty space in your taskbar and choose Task Manager from the context menu.
-
Switch to the Details tab. Locate any instances of Discord and select them, and then click on the End task button.

- After closing all of the running Discord processes, try to launch the installer once again.
Method 4. Completely remove Discord files
It’s possible that an earlier instance of Discord installed on your computer has some residual files that conflict with your current installer. You can fix this by removing any leftover files and then restarting the installer.
-
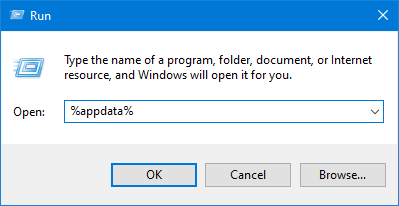
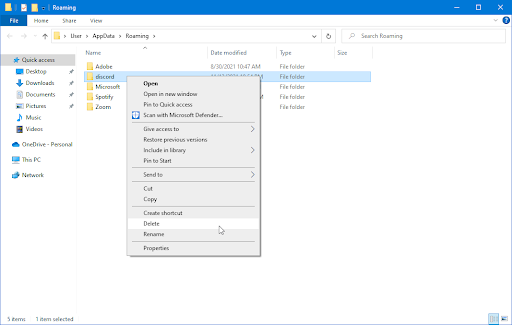
Press the Windows + R keys on your keyboard at the same time to bring up the Run utility. Type in “%appdata%” without the quotation marks, then hit the OK button. This is going to launch File Explorer in a separate window.
-
Locate the folder named “discord” and select it by clicking on it once. Next, right-click on the folder and choose Delete from the context menu, or simply press the Del key on your keyboard.
-
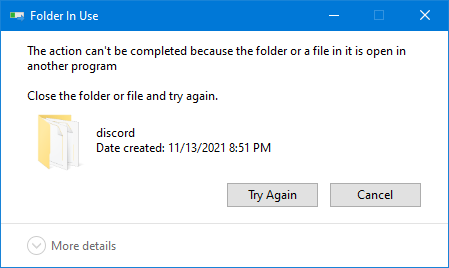
If you get the error message “This action can't be completed because the folder or a file in it is open in another program” simply follow the steps in Method 3. to completely close the installer beforehand.
-
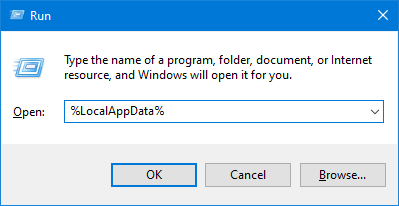
After successfully deleting the discord folder, press the Windows + R keys on your keyboard again to bring the Run utility back. Type in “%LocalAppData%” without the quotation marks and click OK.
-
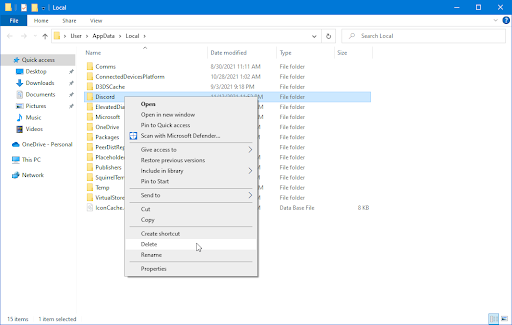
Locate the folder named “Discord” and select it by clicking on it once. Next, right-click on the folder and choose Delete from the context menu, or simply press the Del key on your keyboard.
-
If you’re unable to delete the folder, open the Run utility again (Windows + R) and type in “%temp%” without quotation marks. Click OK and delete any files and folders that have Discord in the file name. Try Step 5. again when you’re done.
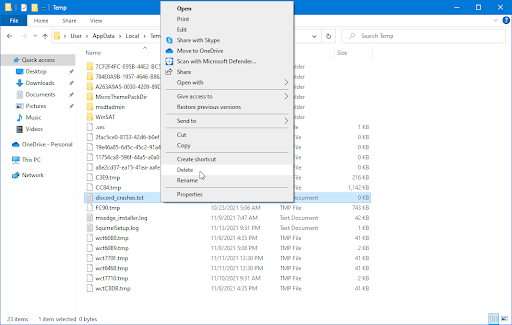
- After deleting the folders and files, try to install Discord again.
Method 5. Try installing a different version of Discord
Discord is available in three different versions, two of which are meant for people looking to test early or experimental features. While these versions aren’t as stable as the release version, they can be used as a replacement if you can’t install Discord the traditional way.
Here’s how to get one of the beta versions of Discord:
-
-
Choose which version of Discord you want to download, and install the latest release to get the most enjoyable experience:
- Discord
- Discord Public Test Build (Discord PTB)
- Discord Canary
- After downloading the installer for Windows, try to launch the installer to see if it works. If you don’t have any luck, try the other versions.
-
Choose which version of Discord you want to download, and install the latest release to get the most enjoyable experience:
Method 6. Temporarily disable your antivirus
Sometimes, your antivirus app can detect other apps as “false positives”, which means that it falsely detects a harmless program as malware. In this case, you need to temporarily turn off your antivirus app, and then install Discord.
- Right-click on an empty space in your taskbar and choose Task Manager from the context menu.
- Switch to the Start-up tab using the header menu located at the top of the window. Here, find your antivirus application from the list and select it by clicking on it once.
-
Click on the Disable button now visible in the bottom-right of the window. This will disable the application from launching when you start your device.
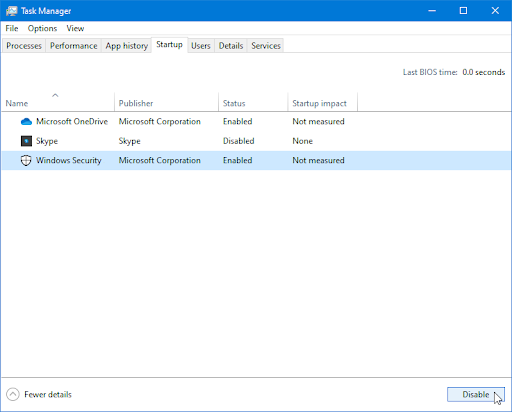
- Restart your computer and see if you’re able to install Discord after making this change. Don’t forget to turn your antivirus app back on after the installation finishes!
Method 7. Turn off the Windows Firewall
One of the common problems users face with the Windows Firewall is that it causes issues such as not being able to install Discord on your computer. Turning off your Windows Firewall might be enough for this problem!
-
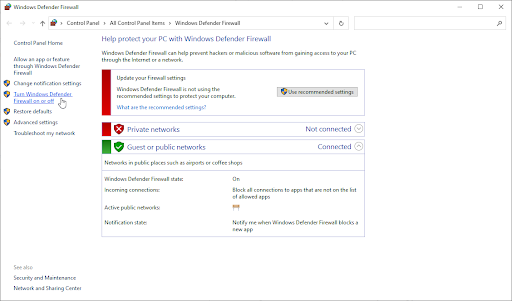
Press the Windows + R keys on your keyboard to launch the Run utility. Type in “firewall.cpl” (without the quotation marks) and click on the OK button.
-
Click on the Turn Windows Defender Firewall on or off link, located on the left side of the window.
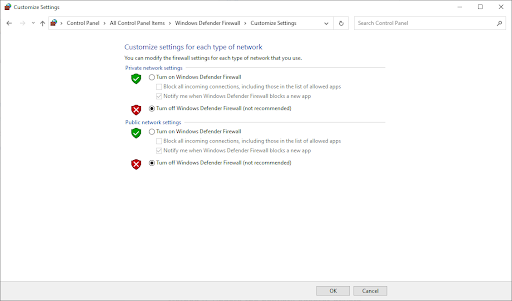
- Make sure that you select the “Turn off...” option for both Private network settings and Public network settings.
- Click OK and restart your computer. Check if you’re able to install the Discord app after disabling the firewall.
Summary: How do I fix Discord install issues in Windows 10?
- Stop the Discord process. Press Ctrl+Alt+Del and choose Task Manager.
- Uninstall the previous Discord app. Type Control Panel on the Windows search bar.
- Remove the file still left on your device.
- Run the install as Administrator.
- Uninstall the Windows update.
Final thoughts
That covers everything you need to know about how to fix when Discord won’t install on Windows 10.
If you have any questions or need help with these tips, please don't hesitate to reach out! We're happy to answer any tech-related question that comes our way. Contact us by email, live chat, and phone every day of the week!
Get early access to our blog posts, promotions, and discount codes when you subscribe to our newsletter! You’ll get the best price on all products we offer at SoftwareKeep. Want more articles from us? Check out our blog page for more tech articles updated regularly!
Recommended articles
» Discord Stuck and Won’t Open on Windows? Here’s How to Fix It
» How To Fix Discord Screen Share Audio Not Working
» How to Fix Discord Update Failed Error
For more articles, check out our Blog and Help Center!