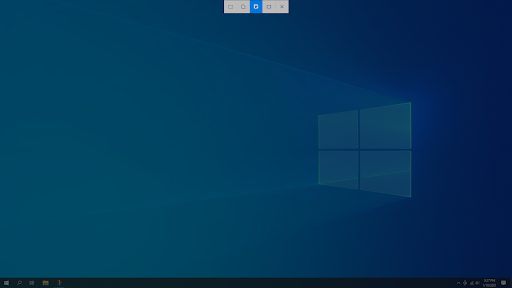
To begin a capture in Snip & Sketch, use the Windows 10 built-in shortcut: Windows key + Shift + S. This will dim the screen and add a small toolbar at the top of the display, where you can choose to snip a rectangle, a free-form area, or the entire screen. After selecting your option, use the mouse pointer/cursor to draw the area you want to capture. It's that simple.
Let's learn how to use the new Snip & Sketch app for smart screenshots in detail here below.

Although screengrabs have been possible natively from Windows Vista, it’s gotten more advanced and easier to use in Windows 10. Previously, you’d require third-party apps such as Lightshot to help you capture screenshots easier with instant editing. Now, it’s better than ever before in the latest release of the operating system.
In this article, you can learn how to use and operate Windows 10’s Snip & Sketch tool for taking screenshots and instantly editing them.
Read: How to Take Screenshots on Windows
Table of Contents
- How to get Snip & Sketch on Windows 10
- How to take a screenshot with Snip & Sketch
- How to edit a screenshot with Snip & Sketch
- Final thoughts
How to get Snip & Sketch on Windows 10
The Snip & Sketch tool was made available in the Windows 10 October 2018 build. If your system is older than this build, you should have access to the tool without having to download any new updates. Users who don't have access to the tool can download it from the Microsoft Store.
-
Click on the Start menu.

-
From the application list, scroll down and select the Microsoft Store. Alternatively, use the Search bar to find the application.
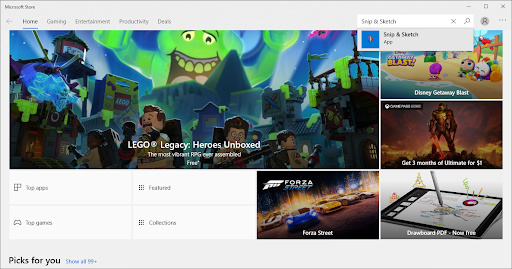
-
Use the search bar in the top-right of the window to look for the Snip & Sketch tool. Once visible, click on it from the search results to navigate to the store page.
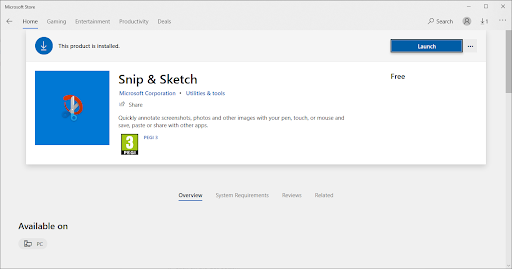
- Click on the Get button. After the application downloads, click on Launch to start it.
Read: How to Take a Screenshot on Mac
How to take a screenshot with Snip & Sketch
There are different types of screenshots you can take with the Snip & Sketch tool, however, they all come from the same menu. This makes the process extremely accessible and quick, allowing you to make decisions on the fly while screen grabbing.
Take a snapshot/screenshot to copy words or images from all or part of your PC screen using the Snipping Tool to make changes or notes, then save, and share.
With the Snipping tool in Windows 10, you can capture any of the following types of snips:
|
Free-form snip |
Draw a free-form shape around an object. |
|
Rectangular snip |
Drag the cursor around an object to form a rectangle. |
|
Window snip |
Select a window, such as a dialog box, that you want to capture. |
|
Full-screen snip |
Capture the entire screen. |
When you capture a snip, it's automatically copied to the Snipping Tool window where you make changes, save, and share.

To begin a capture, you can use the Windows 10 built-in shortcut. Press Windows key + Shift + S. Tha will dim the screen and add a small toolbar at the top of the Windows screen display. On the toolbar, choose to snip a rectangle, a free-form area, or the entire screen. After selecting your preferred option, use the mouse pointer to draw the area you want to capture.
Alternatively, you can begin a capture from the Snip & Sketch app. Use the following procedure:
Open Snipping Tool
-
Open Snip & Sketch:
- Open the Start menu and look for the tool in your list of installed applications.
- Use the search bar to find the application.
-
Use the Windows key + Shift + S keyboard shortcut to instantly enter Snip & Sketch’s screenshot mode.
-
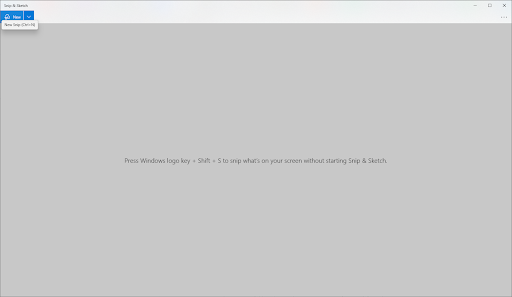
Capture a screenshot: Click on the New button in the top-left corner, or use the aforementioned keyboard shortcut (Windows + Shift + S) to enter the screenshot mode.
-
Use the menu on top of your screen to select which mode you want to take a screenshot in. Currently, Snip & Sketch offers four different screenshot methods:
- Rectangular Snip - Make your selection in the shape of a rectangle. Only the area you selected will be screenshotted.
- Freeform Snip - Make any selection on the screen.
- Window Snip - Choose any open window on the screen to grab it without having to make your selection.
-
Fullscreen Snip - Take a screenshot of your entire screen.
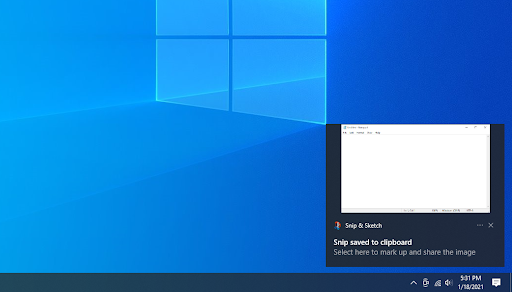
- After making your selection, you’ll see a pop-up notification in the bottom right corner of your screen, displaying a preview of your screenshot. Click on it to enter editing mode.
How to edit a screenshot with Snip & Sketch
There are several ways to edit your screenshots after taking them with Snip & Sketch.
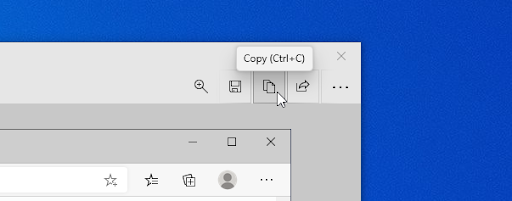
- Before you begin editing, we recommend clicking on the Copy button or pressing the Ctrl + C keyboard shortcut. This will keep a copy of your original screenshot before any edits are made to it, allowing you to keep the original.
-
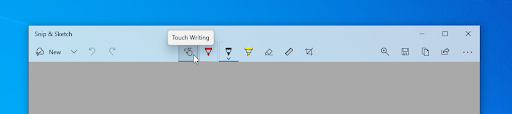
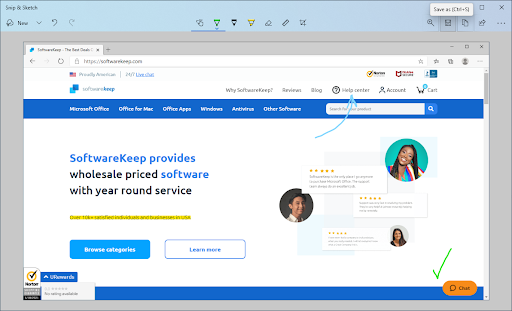
Use the tools found in the toolbar to edit your screenshot. You’re able to crop, draw, highlight, and even use tools such as a ruler and protractor for making perfect lines.
-
Once you’re done editing your screenshot, click on the Save button or use the Ctrl + S keyboard shortcut to save your edits.

- Choose a location for your file, then rename it and choose a file format if you want to make any changes to the defaults. By default, Snip & Sketch will name your screenshot with the date and time to make identifying easier.
-
Click Save. In the future, Snip & Sketch will remember this location and automatically open it to save your screenshots there.

- If you don’t want to save your screenshot, simply click the Copy (Ctrl + C) button to put the screenshot on your keyboard. Now, you’re able to Paste (Ctrl + V) it without having to store the file on your computer.
Final thoughts
If you need further help with Windows 10, don’t hesitate to contact our customer service team, available 24/7 to assist you. Return to us for more informative articles all related to productivity and modern-day technology!
Would you like to receive promotions, deals, and discounts to get our products for the best price? Don’t forget to subscribe to our newsletter by entering your email address below! Receive the latest technology news in your inbox and be the first to read our tips to become more productive.
Recommended articles
> How to Capture Scrolling Screenshot in Windows
> How to access and use Steam screenshot folder on Windows 10
> How to Take Screenshots on Windows