
All Windows users should be aware of the risks associated with running unknown applications on their computers. It is a known fact that malicious software can be injected into an application, and it can cause serious damage to your system if not detected and removed in time. This is why Microsoft implemented the Windows Sandbox feature.
Windows Sandbox is a lightweight virtual environment where you can safely run untrusted applications without having to worry about compromising the integrity of your system. Windows Sandbox takes advantage of the hardware-assisted virtualization and OS isolation features available in modern PCs, creating a secure environment for running untrusted applications.
In this article, we'll take a deep dive into what Windows Sandbox is, how it works, and how you can use it to your advantage.
What Is Windows Sandbox?

Windows Sandbox is a built-in lightweight virtual machine that enables you to run applications and programs in an isolated environment. It acts as a temporary desktop environment, allowing you to test potentially harmful or untrusted software without putting your actual operating system at risk. Once you close the sandbox, all changes and modifications made within it are discarded, ensuring a clean and secure experience every time.
Windows Sandbox was first introduced with the release of Windows 10 May 2019 Update (version 1903) and has since become a valuable tool for users seeking a safe and convenient way to experiment with software without jeopardizing the stability of their primary operating system.
Each time Windows Sandbox is launched, it starts with a fresh and clean installation of Windows, ensuring a pristine environment for testing and experimentation. Any changes made or files created within Windows Sandbox are not persistent and are automatically discarded when the sandbox is closed.
Isn't that a virtual machine?
It could be a virtual machine, and certainly Windows Sandbox is, but remember that not all virtual machines are sandboxes.
The important thing is, Architecture, hosts and guests!
You can read more about this in Microsoft's documentation. But put simply Windows Sandbox is a Hyper-V virtual machine running on your computer... simple!
Your computer can be called the host and Sandbox is a guest. When I mention host in this post I'm referring to your normal Windows environment.
Benefits of Using Windows Sandbox
Using Windows Sandbox offers several advantages for both regular users and IT professionals. Let's take a closer look at the benefits it brings to the table:
- Enhanced Security: Windows Sandbox provides a secure testing environment, preventing any potential threats from infiltrating your main operating system. It acts as a protective shield against malware, viruses, and other malicious software.
- Isolation: By running applications within Windows Sandbox, you can ensure that any changes made or files created during testing are contained within the sandbox. This isolation prevents any interference with your primary system and guarantees a clean slate with each sandbox session.
- Convenience: Windows Sandbox is easy to use and requires no additional setup. It comes pre-installed with Windows 10 Pro and Enterprise editions, making it readily available for business and professional users. Simply launch the sandbox and start testing right away!
- Time and Cost Efficiency: Windows Sandbox saves time and resources by eliminating the need for dedicated virtual machines or separate physical machines for testing purposes. It offers a lightweight solution that can be quickly set up and discarded after use.
If you often download and test unknown applications, Windows Sandbox offers an effective way to maintain the security of your system while still being able to explore new software.
Warning!
It's important to note a few things before proceeding:
- If you use a third party virtualization tool, like Oracle VirtualBox, that tool will break after installing Sandbox. This is because Sandbox uses Hyper-V, and Windows will lock the virtualization extensions to Hyper-V only
- By default, the sandbox will have network access. This means that programs running will be able to access your network and the Internet. The default configuration doesn't give true isolation
How Does Windows Sandbox Work?
Windows Sandbox leverages the virtualization technology built into Windows 10 to create an isolated environment that closely emulates your actual system. When you launch Windows Sandbox, a pristine copy of Windows 10 is created, which is entirely separate from your host operating system. This ensures that any changes or malware within the sandbox cannot affect your primary system.
The sandbox environment is designed to be disposable and lightweight, allowing it to be quickly created and torn down as needed. It shares the same kernel with the host operating system, eliminating the need for additional resources while still providing a secure separation.
Windows Sandbox System Requirements
Before enabling Windows Sandbox, it's important to ensure that your PC supports the virtualization technology required by Sandbox.
Here's a step-by-step guide on how to check if your PC supports virtualization:
Prerequisites
a. Virtualisation support
A lot of modern processors have virtualisation extensions built into the processor (e.g. Intel VT-x) but these aren't always enabled. To use Sandbox you'll need to go into your BIOS and enable the extensions. As BIOS interfaces (and now UEFI) differ massively you'll need to consult your computer's manual to determine how to get into the interface, and what option to toggle.
b. Check if PC Supports Windows Sandbox app
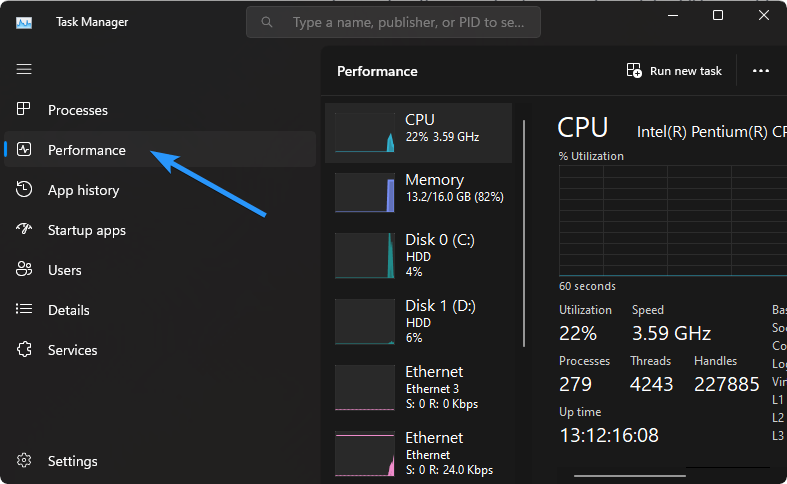
- In Windows 10, right-click the Taskbar and select Task Manager. In Windows 11, you can either press Ctrl + Shift + Esc or click the Search icon, start typing "Task Manager," and then select "Task Manager" from the results.
- If the Task Manager window appears compact, click on "More details" at the bottom to expand it and reveal all the tabs.
-
Select the "Performance" tab to view the performance details of your PC.
-
Look for the entry labeled "Virtualization" under the "Performance" tab. Make sure it says that virtualization is enabled.
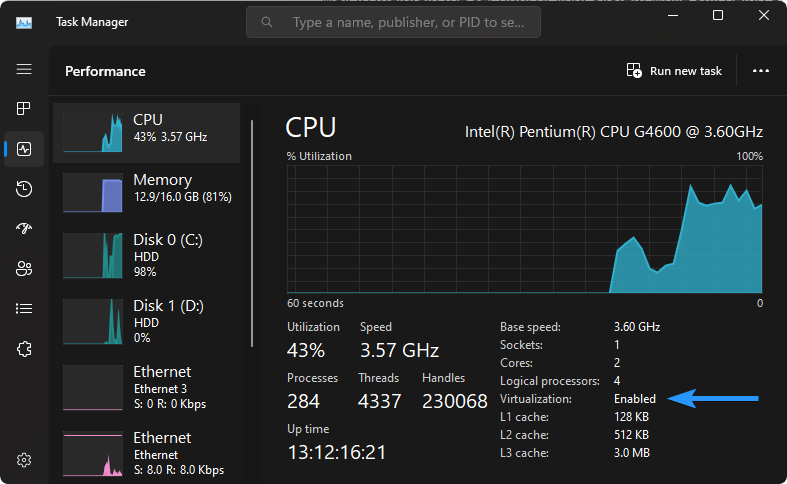
If "Virtualization" is enabled, your PC supports the necessary virtualization technology for Windows Sandbox. If it's disabled, you may need to enable virtualization in your PC's BIOS settings. The process for enabling virtualization in the BIOS varies depending on your computer's manufacturer, so refer to your device's documentation or manufacturer's website for specific instructions.
c. Install the Windows SandBox
If Windows Sandbox isn't installed, you may need to install it. Use the process steps below. There are two ways:
- you can enable it from Windows settings, or
- enable Windows Sandbox via PowerShell
Note: The steps outline below are done using Windows 11, but they work pretty well for Windows 10 too.
How to Enable Windows Sandbox
Before you can use Windows Sandbox, you'll need to enable it. There are two different ways to do this:
Enable Windows Sandbox from Settings
Windows Sandbox provides a user-friendly interface that mimics the Windows desktop experience. Here's a step-by-step guide on how to set up and make the most out of this powerful tool:
- Once you have confirmed that virtualization is enabled on your PC, you can proceed with enabling Windows Sandbox. Follow these steps:
-
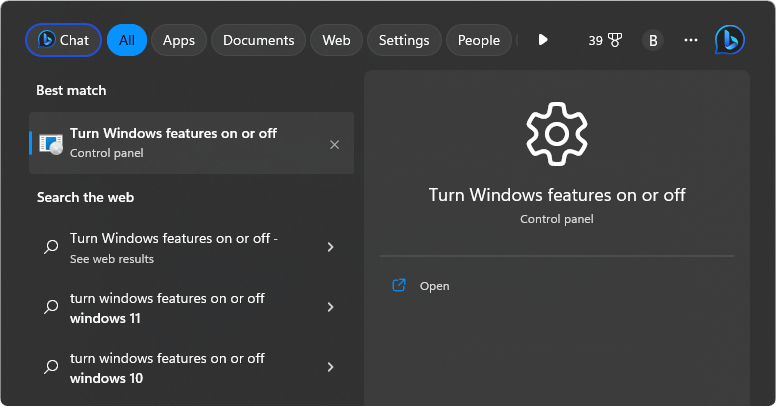
Open the Start menu and search for "Turn Windows features on or off." Click on the "Turn Windows features on or off" option from the search results.
- In the Windows Features dialog box that appears, scroll down and locate "Windows Sandbox" in the list of features.
-
Check the box next to "Windows Sandbox" to enable it. If there are any additional features that need to be installed for Sandbox, Windows will automatically install them.

- Click "OK" to apply the changes. Windows will now enable Windows Sandbox on your PC.
Depending on your system configuration, you may be prompted to restart your computer to complete the installation of Windows Sandbox. If prompted, save any unsaved work and click "Restart now" to restart your PC.
After the restart, Windows Sandbox will be enabled on your PC, and you can start using it to run and test applications in a secure and isolated environment. Simply search for "Windows Sandbox" in the Start menu to launch the application and begin your testing sessions.
Enable Windows Sandbox via PowerShell
Enabling Windows Sandbox can also be done using PowerShell commands. Here's a step-by-step guide on how to enable Windows Sandbox through PowerShell:
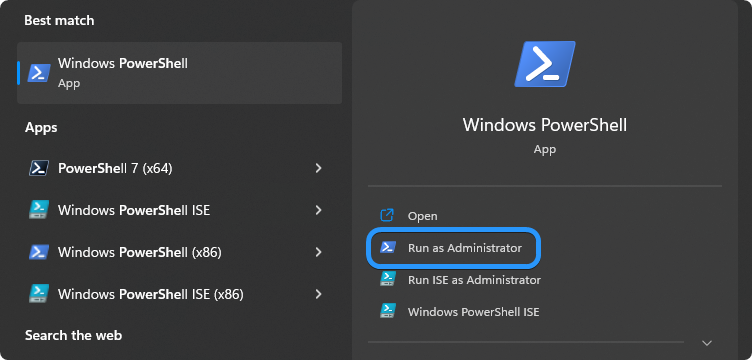
- Click on the Start menu and scroll down to find the folder for Windows PowerShell.
-
Right-click on the shortcut for Windows PowerShell and select "Run as administrator" from the context menu. This will open PowerShell with administrative privileges.
-
In the PowerShell window, type the following command and press Enter: Enable-WindowsOptionalFeature -Online -FeatureName "Containers-DisposableClientVM" -All

- If prompted, restart your computer to complete the installation of Windows Sandbox. Once your PC has restarted, sign back in, and Windows Sandbox will be enabled and ready to use.
Using PowerShell commands is an alternative method to enable Windows Sandbox, especially if you prefer working with command-line tools. By following these steps, you can enable Windows Sandbox and start using it to safely test applications and programs on your Windows computer.
Windows Sandbox Use cases
The Windows Sandbox like many other virtual machines have several use cases:
1. Testing new software
My most common use case is to test a piece of software that someone wants added to an approved software list. If you don't want to burden your host system with lots of extra files and registry keys, and you're reviewing a piece of software you potentially don't trust it yet, a sandbox is a perfect tool here.
After loading the sandbox you'll install the software under test, interact with it for a bit, write my tests up, and then dispose of the sandbox. Each test gets done with a fresh sandbox instance so there's no conflict.
2. Browsing anonymous
When you want to browse the web without cluttering up your browser's history or saving extra cookies the Sandbox comes in handy. While you could use an incognito/private window for that, sometimes sites detect the use of that mode and display differently.
So, instead I you just use the browser in the sandbox.
3. Log in to browser as a different user
The good thing is that you can also use the sandbox's browser to get you another session for when you need to be logged in to a system as another user (first user in host browser, second user in host "in private" browser, third user in sandbox browser).
4. un a different version of an app
Another use case is for when you want to run a different version of an application, but your host system already has the application installed. Why?
In most cases you cannot install multiple versions of the same application. So, to do that, the sandbox gives you an environment to run that application as a second.
5. Distraction free environment
Potentially you can also use the Windows sandbox to give yourself a distraction free environment. Close Outlook, Teams, Slack on the host, open Sandbox and then use a clean browser (no extra tabs) from there.
Something worth trying because the idea appeals.
How to Open Windows Sandbox
To open Windows Sandbox and start using it, follow these step-by-step instructions:
- Open the Start menu by clicking on the Windows icon in the bottom-left corner of your screen.
- Scroll through the All Apps list and locate the shortcut for "Windows Sandbox."
- Click on the Windows Sandbox shortcut to open it.
If you plan to use Windows Sandbox frequently, you can pin its shortcut to the Start menu or the Taskbar for easy access. Just right-click on the Windows Sandbox shortcut, and select either "Pin to Start" or "Pin to Taskbar" based on your preference.
Once Windows Sandbox is open, you can start testing and running applications in a secure and isolated environment. You can also create customized configuration files that define the settings for Windows Sandbox environments to use when launching them.
How to Use Windows Sandbox
To test a software program, you need to make it available in the Sandbox. There are a few ways to do this. To install programs in Windows Sandbox, follow these step-by-step instructions:
1. Downloading a Program
- Open Windows Sandbox by clicking on the Start button and selecting the Windows Sandbox shortcut.
- Inside the Sandbox, open Microsoft Edge (the built-in web browser). Navigate to the website from where you can download the desired program.
-
Download the program just as you would on a regular Windows system.
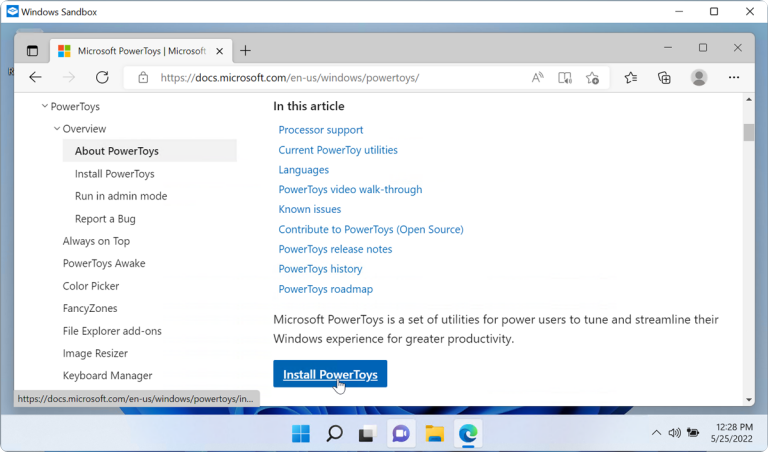
- Once the download is complete, you can install and use the program within the Sandbox environment.
2. Installing a Previously Downloaded Program
- If you have already downloaded the program on your host Windows system, locate the setup file or installer.
- Right-click on the setup file and select "Copy" from the context menu.
- Inside the Sandbox, open File Manager (Windows Explorer). Navigate to a folder within the Sandbox where you want to install the program.
-
Right-click within the folder and select "Paste" to copy the setup file from your host system into the Sandbox.
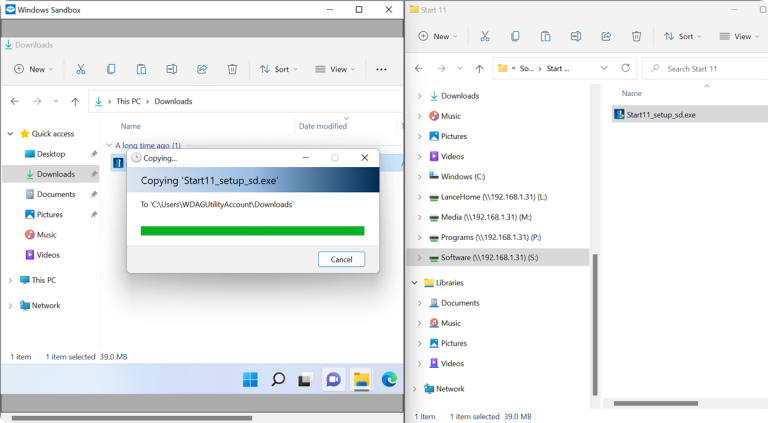
- Double-click on the setup file within the Sandbox to begin the installation process. Follow the regular installation steps for the program.
- Once installed, launch the program within the Sandbox and use it as you normally would.
How to Uninstall Windows Sandbox
To remove Windows Sandbox from your Windows 11 system, you have a couple of options. Here's a step-by-step guide on how to do it:
Using Windows Features
- Open the Start menu and search for "Turn Windows features on or off."
- Click on the "Turn Windows features on or off" option from the search results.
- In the Windows Features dialog box that appears, scroll down and locate the entry for "Windows Sandbox."
-
Uncheck the box next to "Windows Sandbox" to disable it. Click "OK" to save the changes.
- If prompted, restart your computer to complete the removal of Windows Sandbox.
Using Windows PowerShell
- Open Windows Terminal or PowerShell as an administrator. You can do this by searching for "PowerShell" in the Start menu, right-clicking on the app, and selecting "Run as administrator."
-
In the Terminal or PowerShell window, enter the following command: Disable-WindowsOptionalFeature -FeatureName "Containers-DisposableClientVM" -Online

- Press Enter to execute the command.
- If prompted, restart your computer to finalize the removal of Windows Sandbox.
By following either of these methods, you can successfully remove Windows Sandbox from your Windows system. It's important to note that removing Windows Sandbox will permanently disable the feature, and you won't be able to use it again unless you re-enable it using the same methods explained earlier.
Can I reboot the sandbox?
Some software asks for a reboot after installation. So long as you choose to reboot from the start menu, you can reboot the sandbox and keep your changes. It takes longer for the reboot to complete than starting the sandbox normally.
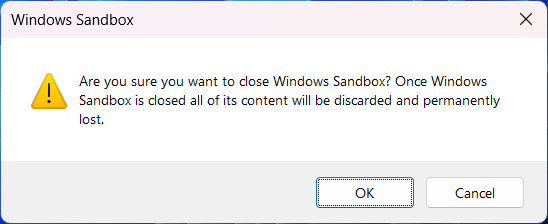
If you close the sandbox you'll be warned that all your changes will be lost:
Conclusion
Windows Sandbox is a great way to securely test applications and programs on your Windows system. It's easy to set up and use, and it provides a safe environment in which you can run potentially dangerous software without the risk of damaging your main system. Now that you know how to install, use, and uninstall Windows Sandbox, you can make the most of this useful feature.
We hope this guide has been helpful and that you now have a better understanding of Windows Sandbox. Good luck!
What Next?
We’re glad you’ve read this article. :) Thank you for reading.
If you have a second, please share this article on your socials; someone else may benefit too.
Subscribe to our newsletter and be the first to read our future articles, reviews, and blog post right from your inbox. We also offer deals, promotions, and updates on our products and share them via email. You won’t miss one.
Keep Learning
» What is the Microsoft Device Association Root Enumerator?
» What Is the taskeng.exe Popup? Is It Safe?
» What's Damaging Your Laptop’s Battery Windows 11