Windows 7 is an incredibly popular and loved operating system. Having been around for several years, it’s gotten incredible support from the user base and continues to prosper as a system that many of us still use every day.
Despite this, users still report issues with the strange behavior of Microsoft’s groundbreaking operating system. If you’re trying to shut your computer down, you might notice that the process gets stuck, or simply fails to take place.
If your Windows 7 system won’t shut down, you’re looking in the right place for help. Our article will go through all the steps necessary to restore your computer back to its pristine state, making it easy to operate again.
Windows 7 Won't Shut Down Quick Fixes
We know how frustrating this error is and how hard it can be to deal with it. No matter why you want to shut your computer down, it’s important that you have immediate access to the function. We’re here to help you restore just that.
Below are several methods that can be used to troubleshoot any issues with Windows 7 being unable to shut down. You can use multiple methods in conjunction with each other to ensure better results — however, you’re not required to perform everything to successfully solve the issue.
Let’s start right away!
Method 1: Start your computer with Clean Boot
Starting your computer in a clean boot will ensure that no applications clash with each other and no third-party conflicts cause errors on your system. With non-Microsoft apps and services disabled, you can easily attempt to reset your PC.
This is how you can perform a clean boot on your Windows 7 system.
- Click on the Start menu icon in your taskbar and use the search function to look up “Command Prompt.”
- Type in “msconfig.”
- Click on “msconfig.exe” from the search results.
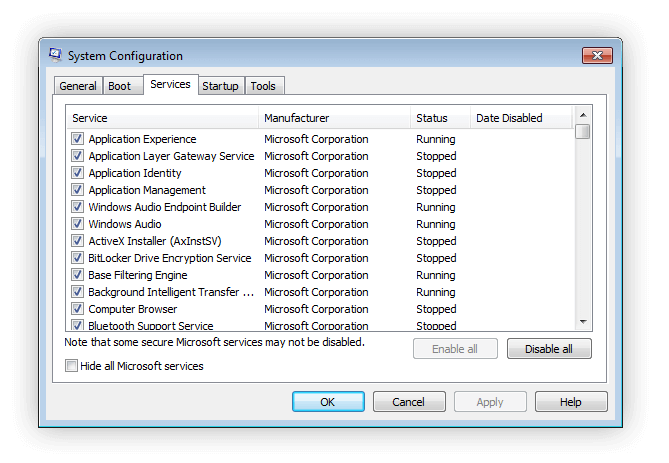
- Switch over to the “Services” tab using the header menu of the new window.
- First, make sure that you check the “Hide all Microsoft services” box. This is going to ensure that you only see third-party services.
- Click the “Disable all” button to temporarily disable every third-party service on your device.
- Click the Apply button and attempt to restart your computer. Now you'll be in a clean boot state with only official Microsoft services running.
- See if you can properly shut your computer down. If yes, try enabling each service one by one until you’re unable to shut the computer down, finding the problem source.
Method 2: Close all open applications

There are some cases where the WIndows 7 shutdown seems to be stuck or simply not working because some applications are still running in the background. Luckily, this can be fixed easily, even if you don’t have direct access to close these programs.
- Right-click on any empty space in your taskbar and choose the “Start Task Manager” option from the context menu.
- Switch to the “Applications” tab.
- Click on a running application, then close it by clicking on the now available “End Task” button.
- Repeat this for all of the applications listed in your window, then close the Task Manager.
- Attempt to shut your computer down without any applications running.
Method 3: Disable the "Clear Pagefile at Shutdown" feature
In most cases, Windows 7 doesn’t experience issues with shutting down native Windows processes alongside the computer. However, when you’re experiencing slow or stuck shutdowns, it’s recommended to turn off the clearing of Pagefile on shutdown.
To do this, you’ll need to use the Registry Editor. You can find all the steps necessary to do this method below.
Warning: Before beginning this guide, we recommend creating a backup of your Registry. If you’re not sure how to create and import Registry backups, watch “Registry Backup, Restore, Import And Export” from Windows Ninja.
- Press the Windows + R keys on your on-screen keyboard to open Run, then type “Regedit” into the input field. Press the OK button to launch the Registry Editor.
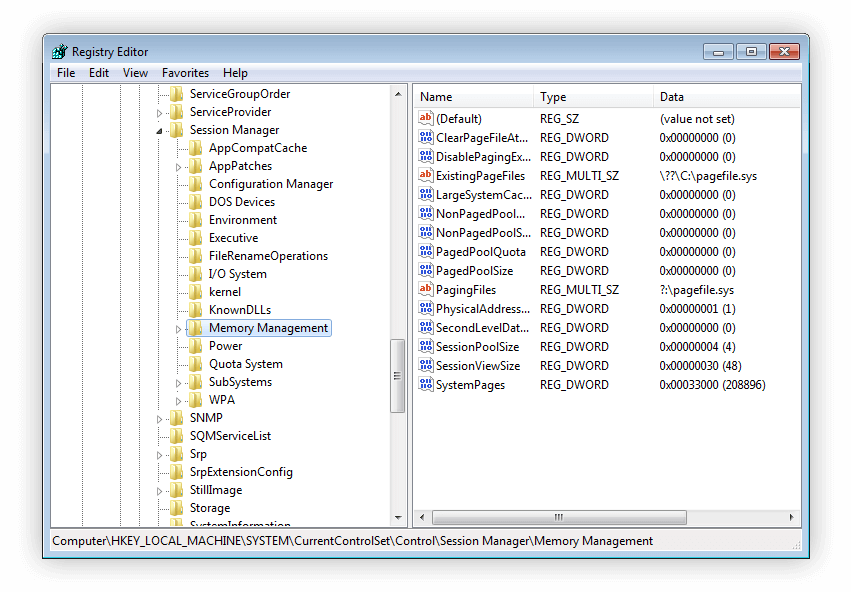
- You can navigate the Registry Editor by expanding folders using the arrow icon next to their names. Using this, locate the following Registry key: HKEY_LOCAL_MACHINE\SYSTEM\CurrentControlSet\Control\Session Manager\Memory Management
- Right-click on the “ClearPageFileAtShutdown” entry in the right panel, then choose Modify.
- Change the data value from “1” to “0” to turn off the feature.
- Click on the OK button to finalize your changes. Close the Registry Editor and attempt to shut your computer down again.
Method 4: Perform a System File Checker scan
The System File Checker is a tool available in Windows 7 by default. It’s also called an “SFC scan,” and it’s your quickest way to automatically fix corrupted system files and other issues.
Running this scan has proven to get rid of issues with Windows 7 being unable to shut down. Here’s what you need to do to run it.
- Click on the Start menu icon in your taskbar and use the search function to look up “Command Prompt.”
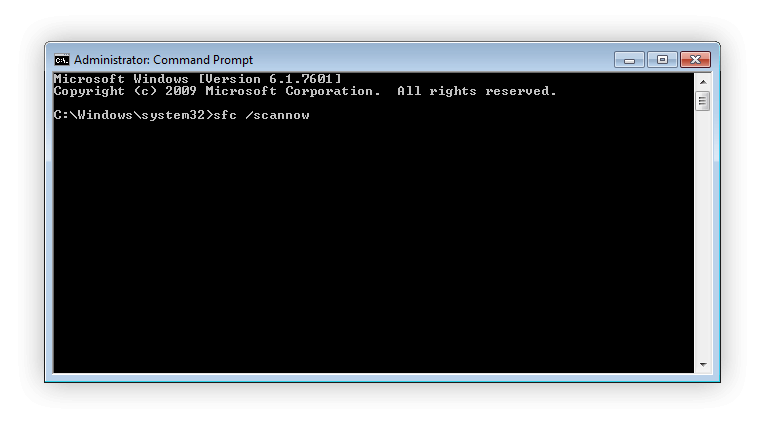
- Right-click on the “Command Prompt” application and choose “Run as administrator” from the context menu.
- If prompted, click Yes to allow the Command Prompt to make changes on your device.
- Once in the Command Prompt, type in the following command and press Enter to execute it: sfc /scannow
- Wait for the SFC scan to finish scanning your computer and repairing corrupt files. This may take a long time; ensure that you don’t close the Command Prompt or attempt to shut your computer down.
- Try restarting your device to see if fixing the corrupted system files helped.
Method 5: Repair corrupt hard drive
Windows 7 comes with a handy tool that allows you to quickly identify and fix system issues with your disk. This tool is easily available to use, and you can access it by following the next steps below.
- Open your File Explorer from the taskbar.
- Click on “Computer” from the left-side panel.
- Right-click on your system drive (this is usually the C: drive) and select “Properties” from the context menu.
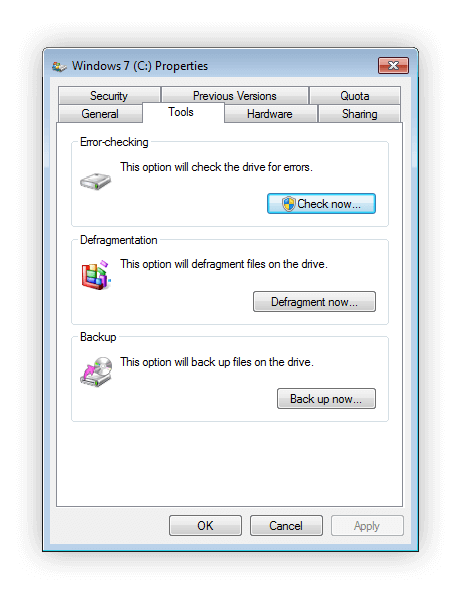
- Switch over to the “Tools” tab using the header menu of the Windows 7 (C:) Properties window.
- Under the “Error-checking” section, click on the “Check now...” button.
- Give permission to the hard drive checker to identify issues on your device. Repair any found problems automatically and attempt to shut down your computer afterward.
Method 6: Use System Restore to return Windows 7 into a working state
If none of the methods above seemed to work when restoring the shutdown function in Windows 7, you can always try rolling back to an older version of your system. This can undo any changes made to your system files, making it a great way to troubleshoot the error.
Here’s how to return to an already existing System Restore point in Windows 7.
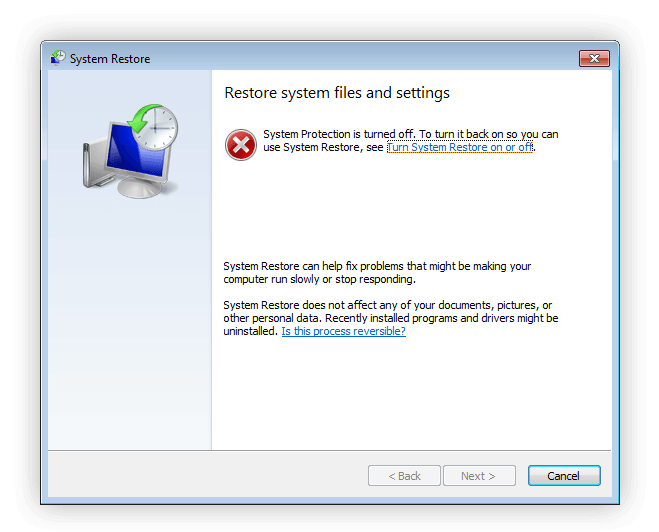
- Open your Start menu from your taskbar, then type “System Restore” into the search field.
- Launch “System Restore” from the matching search results.
- Select a point you want to return to. Make sure to select one created at a time when the shutdown issue wasn’t present yet.
- Click the “Finish” button to start the process. Make sure to read all the on-screen information before agreeing to return to a restore point.
- Wait for the restoration process to finish, then attempt shutting down your PC like normal.
We hope that this article was able to help you fix issues with Windows 7 being unable to power off.
If you notice in the future that your system is experiencing similar issues, feel free to return to our article and apply some other fixes. If nothing works, we recommend turning to either Microsoft’s customer support team or looking for an IT specialist in regards to your PC’s health.
If you’re looking for a software company you can trust for its integrity and honest business practices, look no further than SoftwareKeep. We are a Microsoft Certified Partner and a BBB Accredited Business that cares about bringing our customers a reliable, satisfying experience on the software products they need. We will be with you before, during, and after all the sales.
That’s our 360 Degree SoftwareKeep Guarantee. So, what are you waiting for? Call us Today on +1 877 315 1713 or email sales@softwarekeep.com. As well, you can reach us via Live Chat.