Do you desire a clean and accurate spreadsheet? Learn how to remove gridlines in Excel using this tutorial. Gridlines are the faint grey vertical and horizontal lines visible in the Excel spreadsheet that differentiate cells. Because of these gridlines, you can tell where information begins or ends.
The central idea of Excel is to arrange data in rows and columns. Therefore, grid lines are a common sight in spreadsheets. What’s more, you need not draw cell borders to highlight your table.
However, you can remove gridlines in Excel 2016 to clean your spreadsheet and make it more presentable. This guide teaches you how to remove gridlines in Excel effortlessly.
Uses of Grid Lines
- Gridlines help you to differentiate cell borders in your spreadsheet
- They give you a visual clue when aligning objects and images within the workbook.
- Finally, they enhance the readability of your tables or charts that lack borders.
Let's get started on how to remove gridlines in Excel.
TL: DR: Watch How to Remove Gridlines from Excel
Option1: View and Page Layout Option
The good news is that there is a default option to hide the gridlines in Excel.
-
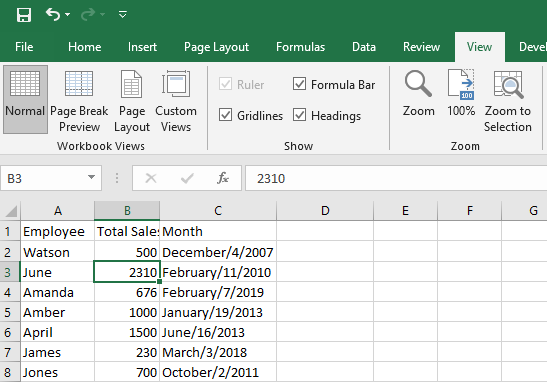
Navigate to the “View” ribbon on the Excel Spreadsheet.
-
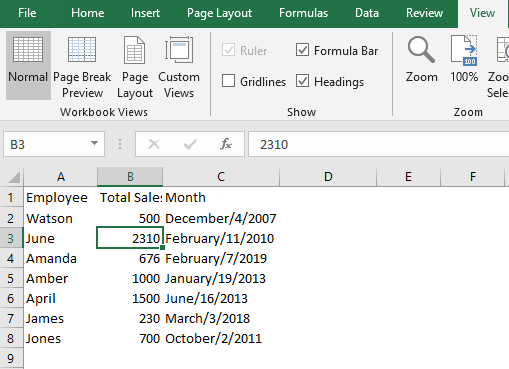
Locate the “Gridlines” checkbox and uncheck. Unchecking the gridlines hides them automatically.
- Alternatively, Navigate to the “Page Layout” Tab.
- Uncheck “View” ribbon to remove or hide the gridlines.
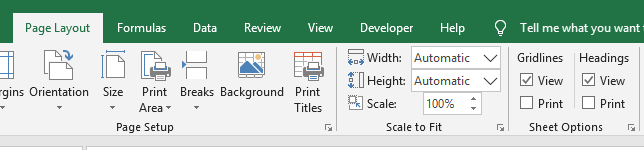
- However, to print the gridlines, Check the “Print” option under the Gridlines on the “Page Layout.”
To apply these changes in all the sheets in the workbook:
- Right-click any sheet tab at the bottom of the workbook.
- Choose “Select All” from the drop-down menu.
- Now, uncheck the gridlines box to hide all the lines in the entire workbook.
Option 2: Change Background Color
You can remove gridlines by changing the background color to match the worksheet area. Here’s how.
- First, highlight the rows and columns of your spreadsheet. Alternatively, you can use “CTRL+C.”
- Navigate to the Home Tab and click “Fill Color.”
- Next, select White Color and apply.
After that, all the gridlines will be hidden from view.
Option 3: Visual Basic for Applications (VBA)
Excel has an in-built programming code that allows you to disable gridlines automatically.
Add the Developer tab
You need to create and manage macros through the developer tab. However, if you don’t have this tab, you need to activate it through these steps:
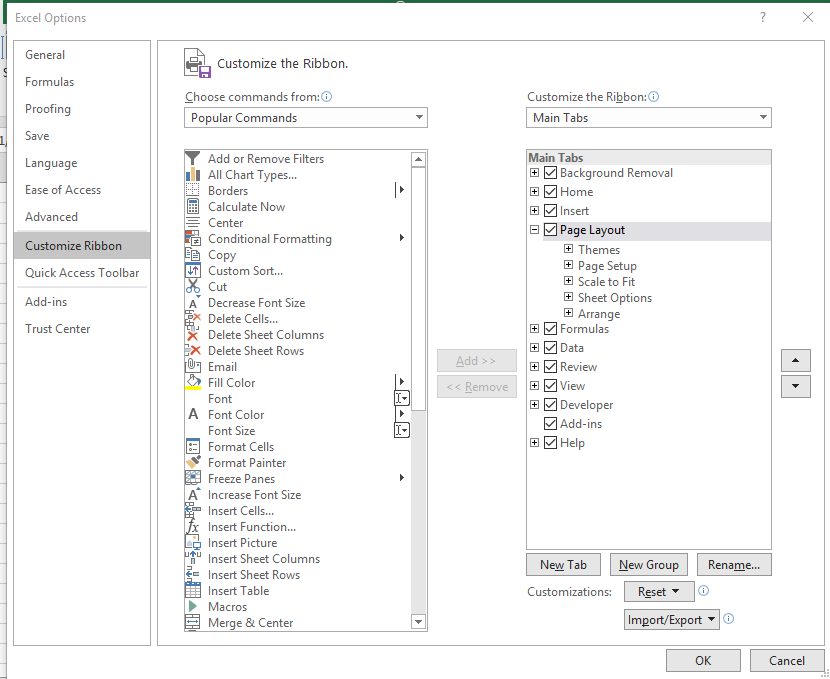
- Navigate to the Excel Options on the File Menu.
- Click on Customize Ribbons.
- Tick the “Developer” ribbon.
-
Click Ok to add “Developer Tab” on your spreadsheet.
Insert your VBA module
Fortunately, Excel allows you to copy-paste your code directly from the internet.
- Click on the “Developer Tab”.
- On the left-most side of the tab, select the “Visual Basic” ribbon.
- Now, right-click on the “VBAProject that contains your workbook name.
- From the drop-down menu, select “Insert” and click on “Module.”
You have now created a new Excel code. Start typing the code or copy and paste it from another source.
How to remove gridlines on the entire workbook using VBA
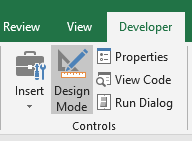
- Click on the “Developer” tab on the Excel spreadsheet.
-
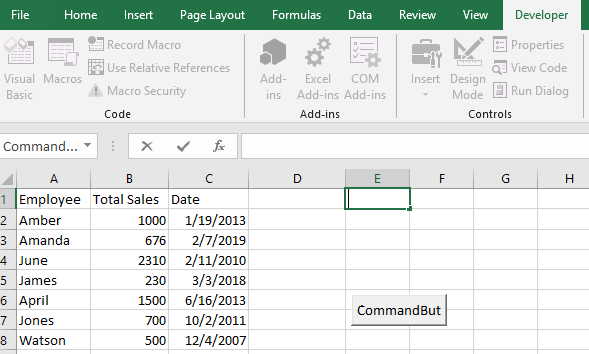
Next, click on insert and select the “Command” button on the “Active X Controls.”
-
Double-click the “Command Button” on the work area.
-
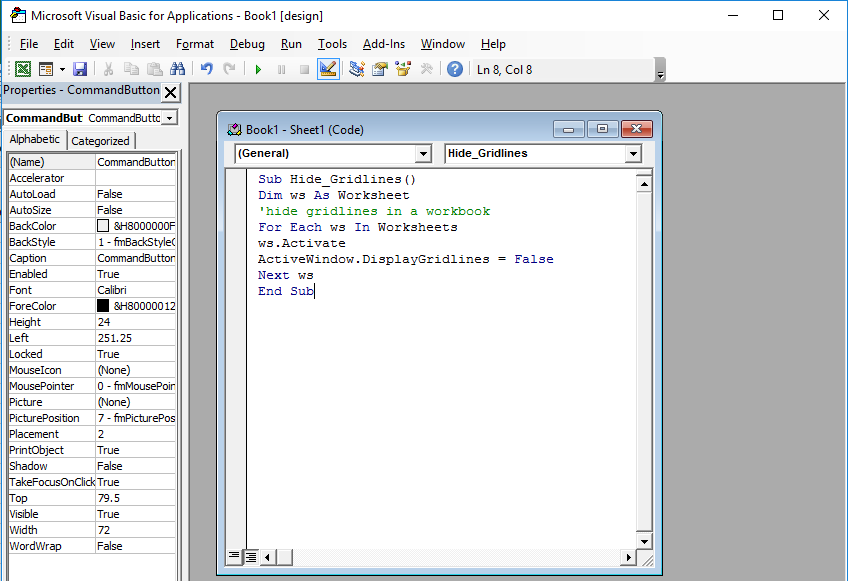
Type or copy-paste your code on the dialog box and close the dialog box:
Sub Hide_Gridlines()
Dim ws As Worksheet
'hide gridlines in a workbook
For Each ws In Worksheets
ws.Activate
ActiveWindow.DisplayGridlines = False
Next ws
End Sub
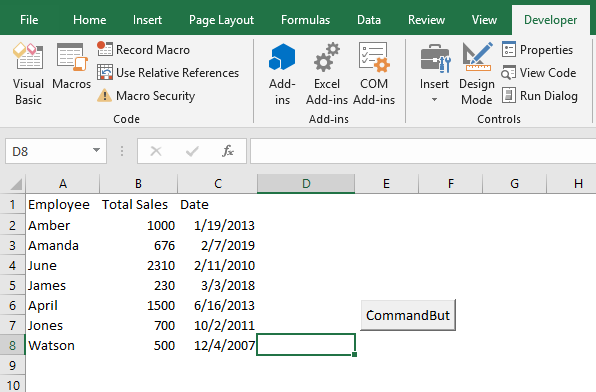
- Next, click on the “Macros” ribbon and run the code. The code hides the gridlines in the entire workbook.
How to Remove Gridlines in Microsoft Excel for specific Cells
If you want to remove gridlines in Excel for particular cells, the best option is to apply white borders. Alternatively, you can change the background to white. You now know how to change the spreadsheet’s background color.
Here’s how to color your borders and disable the gridlines.
- First, select the range you wish to remove the gridlines. Hold the SHIFT key and press the last cell in the desired range.
- Alternatively, Click CTRL+A to select the entire sheet.
- Next, right-click the selected cell range. From the drop-down menu, select “Format Cells.”
- Alternatively, click “CTRL+1 to display the Format Cells Dialog box.
- Now, in the Format Cells Window, select the “Border” Tab.
- Choose white from the Color ribbon.
-
Under presets, click both the outline and inside buttons.
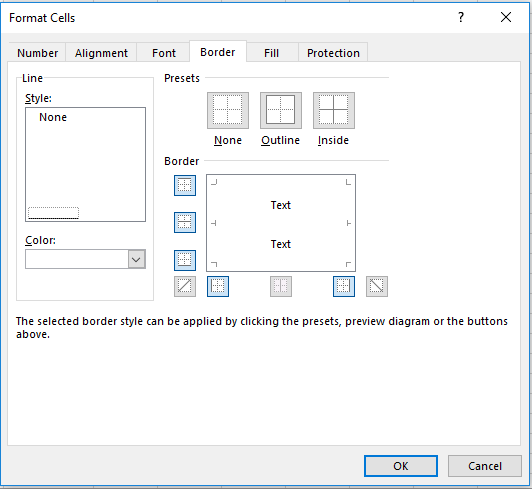
-
Click OK to confirm the changes.
Well, you’ll notice that the particular specific cells lack gridlines just like you wanted. To undo the gridlines, choose none under the presets tab.
Tips on How to Remove Gridlines in Microsoft Excel 2010
These steps of removing gridlines apply to Excel 2010 as well. If you find these gridlines are distracting or unattractive, switch them off. However, you cannot delete these gridlines permanently. Instead, Excel lets you disable grid lines in the current spreadsheet.
Here’s how to remove gridlines from the current spreadsheet in Excel 2010:
- Open the desired Excel Worksheet.
- Navigate to the “File” menu and select “Options”.
- Click “Advanced” from the “Excel Options” Dialog Box.
- Scroll down to “Display Options for this Worksheet”.
- Uncheck the “Gridlines” checkbox.
- Click OK to disable lines in the current sheet.
- Alternatively, you can choose to change the gridline colors from the “Gridline Color”.
How to Remove Gridlines in Excel 2013
Removing grid lines gives makes your presentation attractive. To get rid of gridlines in Excel 2013, follow these quick but straightforward steps. However, you can check for other options suitable to this Excel version in this guide.
- Open the Excel 2013 worksheet.
- Click on the “Page Layout” Tab.
- Locate the “Gridlines” and uncheck the “View” or “Print” button as you desire.
Alternatively;
- Open your spreadsheet in Excel 2013.
- Click the “View” tab.
- Then uncheck the “Gridlines” ribbon to hide the lines.
Limitations of Gridlines
- Gridlines cannot be printed if an Excel printout is required.
- These lines are light in color. Thus, colorblind people are unable to identify their color.
- You cannot customize gridlines.
Tips to Remember when Removing Gridlines in Excel
- Use borders when printing an Excel workbook. Otherwise, the gridlines will not be printed.
- Applying white color to the selected cell range removes gridlines.
- Remove the gridlines once you complete your work to avoid confusion and make your work presentable.
If you want a professional document, learn how to remove gridlines in Excel. Hiding or removing these lines gives your report a clean and attractive look.
Conclusion
You see, there are different ways to show and hide gridlines in Excel. Just choose the one that will work best for you. If you know any other methods of showing and removing cell lines, you are welcome to share them with other users :)