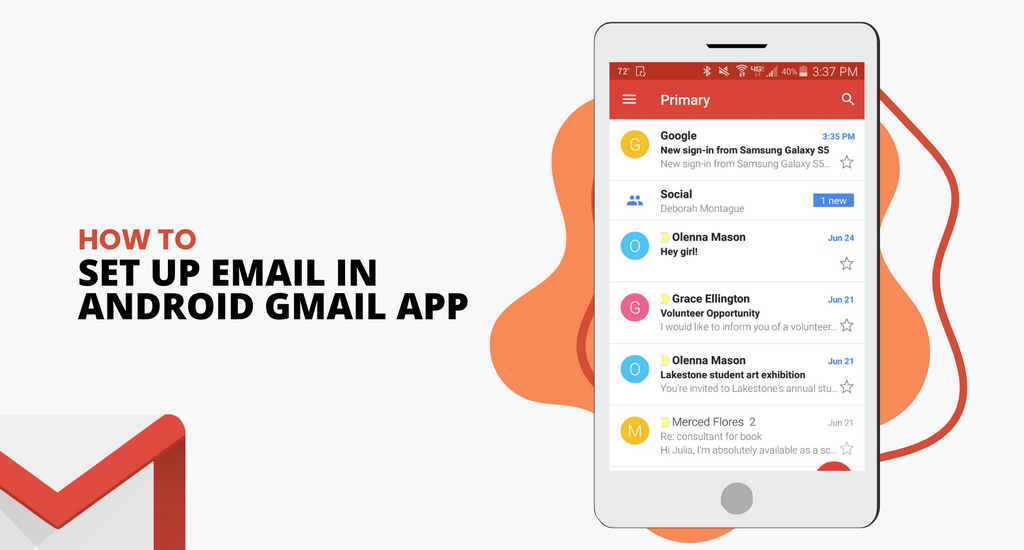
Android comes in various forms and because of this, the Gmail app may appear different across various devices. Use the directions in this guide to help you set up your email in your Android Gmail app.
- Select your specific built-in Android email application
- Before you get started, make sure you update your Gmail application to the latest version
- Next, navigate to the Google Play application on your phone or your tablet
- Next, enter “Gmail” into your search bar and choose “Update”
- Keep in mind that if you are unable to find the update button, or you do not see it, then your device is already in the latest version
- After the Gmail application is finished updating, you can now open your Gmail app.
- Next, navigate to the menu button in the upper left-hand corner, then go to Settings, tap Add Account, and the Exchange and Office 365
- Note that you should only select “Outlook, Live, and Hotmail” if you would like sync only your email and not include calendar and contacts.

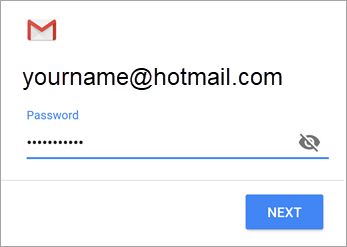
- In the space provided, enter in your email address and then select Next

- Next, you will need to enter your password
- These are the steps that should be followed for each account type:
- If you are an Outlook user, you can skip these steps
- For those who use Exchange or other accounts, it may be necessary for you to ask your admin or your email provider for the server settings to allow you to set up your account manually.
- For those who are using Office 365 work or school, a Redirect request screen may appear. In this case, select “Ok”
- When the incoming server settings screen appears, you will then need to choose your server to outlook.office365.com
- Next, you may get prompts for security reasons, device permissions, and sync settings. You should follow all of these prompts.
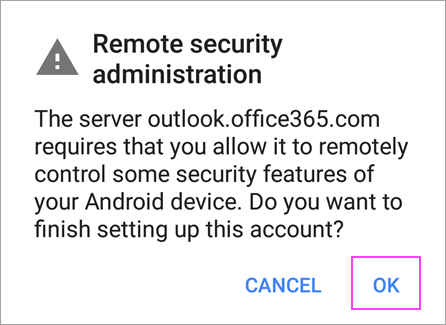
- For those who have an Office 365 account for work or school, you may additionally be asked to give confirmation for “Remote and Security administration” and to also give approval for additional security measures. When this happens, select “Ok” or “Activate”
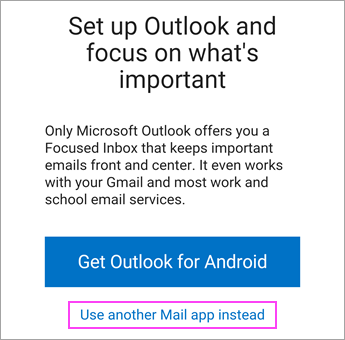
- Next, navigate to the inbox that you have just set up. If you see an email that says “Actions is required to Sync email” then you need to open that email and select “Use another Mail application instead”
- However, if you do not see this email and your emails are successfully syncing then you can skip this step.
- Next, locate your Android notification bar by pulling down from the top of the screen.
- If you see a notification that says, “Unable to sync calendar and contacts” select that. Next, select Allow in order to give access.

- After you do this, you are finished.
Setting up your email in Gmail on an Android Device
This is similar to the first method. However, it is slightly different.
- First, open the Gmail application on your Android device
- Navigate to Settings, and then select the arrow that is just right of the email
- Select Add account, and then the Other. Also, note that if you would like to set up your account with Mobile Sync, then you should select Exchange instead
- Type your email address in the space provided
- Next, choose IMAP
- In the space provided, type in your password
- You will then be prompted to enter imap.one.com for an incoming server
- For an outgoing server, enter send.one.com
- From the options that are given, select account options. When you get to this step, you can decide how often Gmail should be looking for new emails, when and how often you get notifications, and more. You can also deselect any options you do not want.
- After that step, you are finished.
Adding a Gmail Account to your Android using IMAP
- In order to enable IMAP in Gmail
- Login to your Gmail account
- Next, select the gear icon that is located in the upper right-hand corner of your screen and choose Gmail Settings that is at the top of any Gmail page
- Select POP/IMAP and Forwarding
- Next, choose Enable IMAP
- Finally, you will need to configure your IMAP client and then select Save Changes
- Next, navigate to the Android home screen and select the Email icon
- In the space provided, enter both your email address and password. Then, select Manual setup
- Choose the IMAP account option
- You will be taken to another screen where you need to enter your username, password and IMAP server: imap.gmail.com/ Port: Either 993 or 143 or very rarely 585
- Then select Next
- For outgoing server settings, on the next page you will need to enter: SMTP server: smtp.gmail.com/ Port: either 25 or 465 or very rarely 2525/ Security type: SSL
- Then select Next
- Choose the Email check frequency option
- Then select Next
- Lastly, you will need to name the account and enter the display name of your choice
- Once you select done, you are now able to check your Emails from your Android
Manual Setup for if you are unable to add your email account to Gmail Application
- First, open the Gmail account and then navigate to Settings
- Select Add Account and then Other
- In the space provided, type in your full email address and then select Manual Setup and then Exchange
- Next, type in your password
- If server settings are available, make sure yours is set on: Outgoing SMTP Server Settings and Incoming Server Settings
- For your domain or username, make sure the entire email address appears.
- For your password, enter the same password that you use to access your email account
- For any email account ending in @hotmail.com, @outlook.com, @live.com, or @msn.com or any other account that is hosted by Outlook.com, enter in eas.outlook.com
- Keep in mind that if you are setting up an Exchange-based account but do not know the name of your Exchange server, then you should contact your admin
- For accessing the Port: use 443 or 993
- For the security type, Choose either SSL or TLS and make sure the Use secure connection option is selected. Then, choose Next.
- For Outgoing SMTP servers, make sure that you are using smtp-mail.outlook.com. This is only necessary if you are using an Outlook account
- If you have an Office 365 for a business account, then be sure to use smtp.office365.com
- If you have Exchange email accounts, then you may be required to contact your email administrator or system provider.
- For the security type, select TLS
- For the port number, type in 587 and then select Next
What are POP and IMAP?
You choose to set up your email using IMAP or POP by setting up your account manually instead of using Exchange ActiveSync.
What this means is that only your email will sync to your phone, and your calendar and contacts will not
If you are unsure of what IMAP and POP are, here are their definitions.
IMAP
IMAP allows you to have access to your email no matter where you are, and from any device of your choice. For example, when you read a message using IMAP, your computer does not actually download or store it.
Instead, you are actually reading it directly from the email service.
Because of this, you can check your email from any device in the world. IMAP will only download a message when you select and click on it.
Furthermore, attachments are not automatically downloaded, which allows you to check your email a lot faster than you would be able to with POP.
POP
In comparison, POP contacts your email service directly and downloads all of your new messages from it. After they have finished downloading to your computer or Mac, they are then deleted from the email service.
This means that after the email is downloaded onto your device, it can only be accessed from the same computer. If you attempt to access your email from a different device, the emails that were downloaded before will not be available to you.
Furthermore, sent mail is stored locally on your computer or Mac, and not the email server. Keep in mind that many Internet Service providers provide email accounts to you that use POP.