
Most Mac computers have limited storage space available. Many users run into the “Your startup disk is almost full” error message as a result of this. The ominous text aims to warn users that their storage is filling up and they should free up some space.
A Mac computer with no available space is a nightmare to operate. Due to the lack of storage, you'll start to notice hiccups in performance. You also won't be able to install new applications or even save files. This is why you must get rid of the "Your startup disk is almost full" message by creating some available space.
This may seem like a difficult task. We store files we want to keep and install applications we use on a daily basis. Getting rid of these is out of the question, so what else can you do?
There's more on your computer than what meets the eye. The macOS system, like other solutions such as Windows, has "hidden" folders full of content. This means temporary files, leftover strings from applications you've uninstalled, and so on. But it's important you know which one of these folders is safe to clear.
In this article, you can find 10 quick tips on how to create space on your Mac.
Jump to:
- Get an overview of your Mac's storage
- How to clear space on your Mac
- 1. Clear the Downloads folder
- 2. Clear your Mac’s cache
- 3. Remove log files
- 4. Delete unwanted language resources
- 5. Clear your Mail Downloads folder
- 6. Completely uninstall unused apps
- 7. Find your large files
- 8. Store files in the cloud
- 9. Remove old iTunes backups
- 10. Empty your Trash
- Conclusion
Get an overview of your Mac's storage
Before you start clearing your files, it's good practice to check what's taking up space on your device. For this, use the About this Mac... window in the Apple menu. Get a detailed view of the contents on your device and see what's taking up the most space.
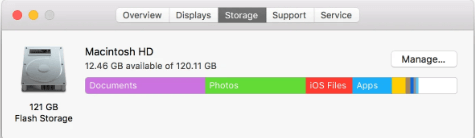
Doing this, you might start to see ways you can immediately take action. For example, if a huge chunk of your storage is Backups, focus on clearing those first.
It's common that files you want to keep are the ones taking up precious gigabytes on the startup disk. Don't worry, you don't have to get rid of your precious memories of crucial work assets. If you see that Photos & Videos take up a lot of space on your drive, look into cloud storage and external drives.
The Other category might come across confusing to most Mac users. It doesn't give you an answer to what's taking up gigabytes worth of storage, which is strange at first glance. This category often refers to temporary files and cache. These are a bit harder to clear without instructions.
How to clear space on your Mac
1. Clear the Downloads folder
If your Mac is the primary device you use for browsing, you might have a ton of things in your Downloads folder. By default, this is the location your Mac stores files you get from the internet.
Many users find large, unneeded files stored in their Downloads folder. It's advised that you look through these files before deleting them. Files you often use or want to keep should stay untouched, but old .zip archives and app installers are safe to get rid of.
- Open the Finder from your Dock, then click on the Downloads folder in the left-side panel.
-
Click on the Change item grouping icon (shown on the screenshot below) and choose Size. This will sort the files in your Downloads folder to show which files are taking up the most space.
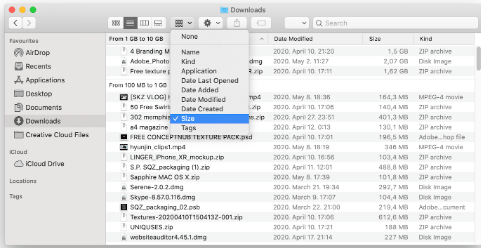
- To delete files, right-click on them and choose Move to Trash/Bin. Don’t forget to empty the trash to permanently delete the unwanted files!
2. Clear your Mac’s cache
If your applications are good at managing their cache, you probably don't have a huge cache folder to worry about. However, many users notice large files in their cache. If you let this get out of control, you'll be faced with the "Startup disk is almost full" message sooner or later.
So, what can you do to clear your cache on a Mac? The steps are simple, just follow our guide.
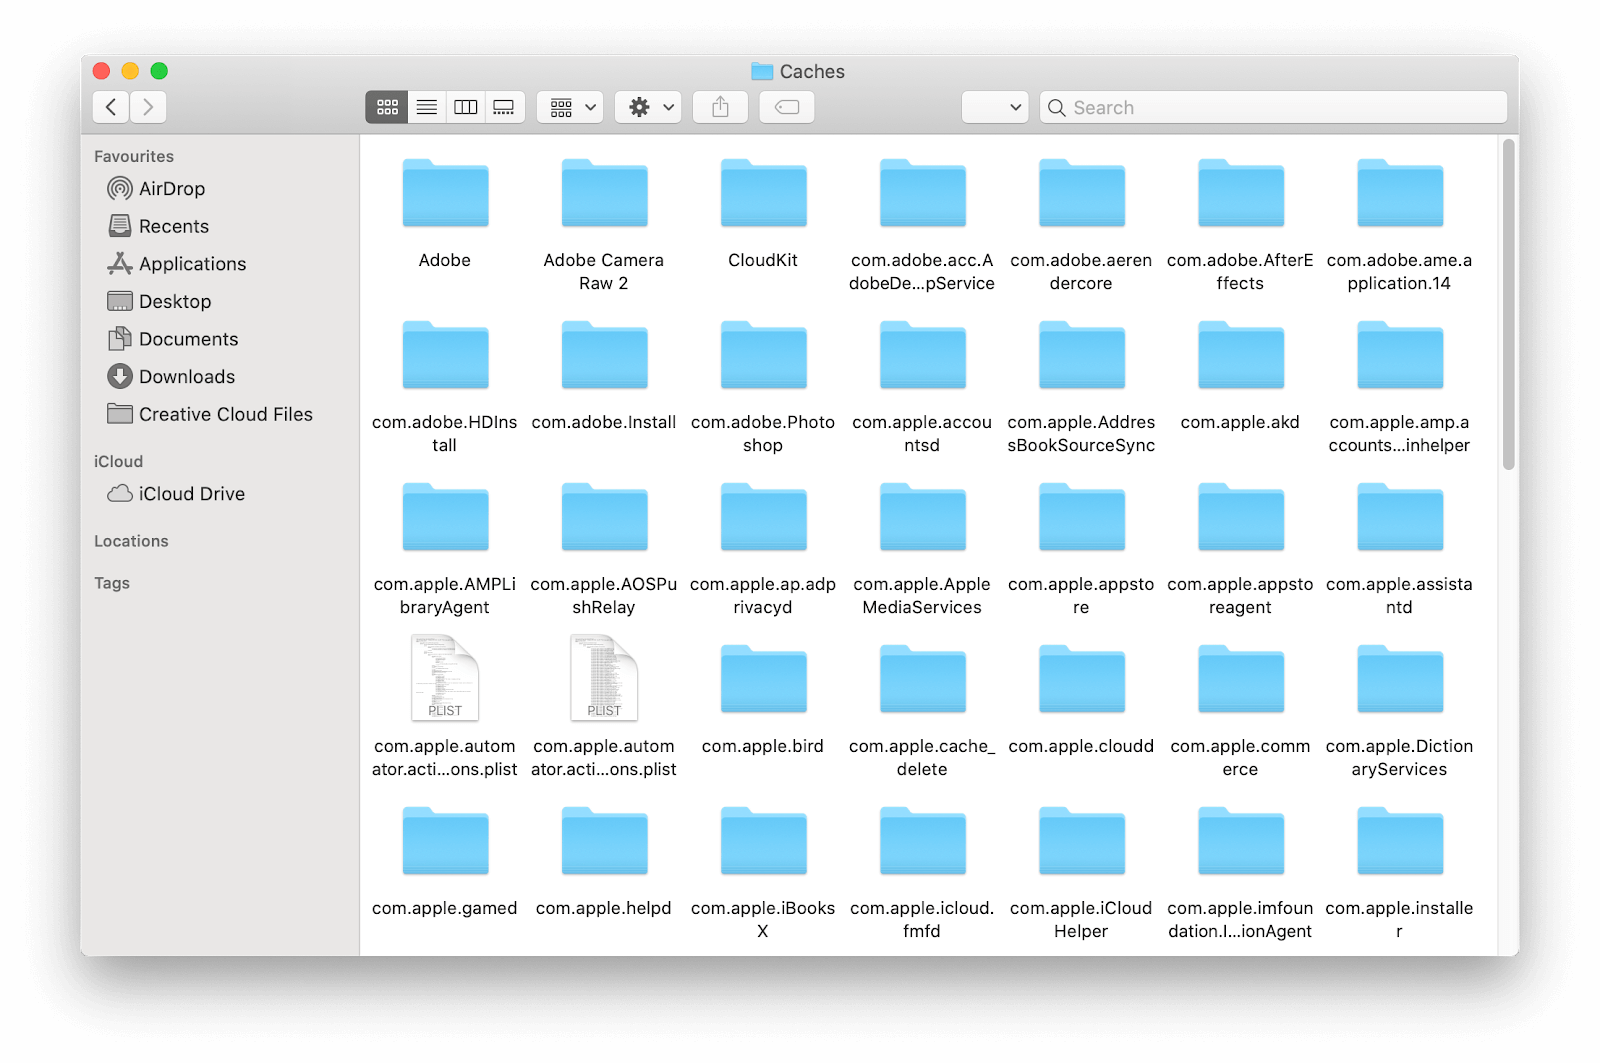
- Open the Finder and hit the ⌘ Command + Shift + G keys on your keyboard to bring up the Go to Folder… utility.
- Type in ~/Library/Caches/ and hit enter.
- From here, you have a few options:
- To delete all cache, press the ⌘ command + A button to select everything and move it to the Trash. This is not recommended as you might delete important cache files.
- To only delete cache from apps you don’t use regularly, search the app’s name and move all the files that come up to the Trash.
3. Remove log files
Log files are temporary files stored on your Mac which can often be deleted with no harm. After you ensure that a log file is no longer needed, use the following guide to remove it.
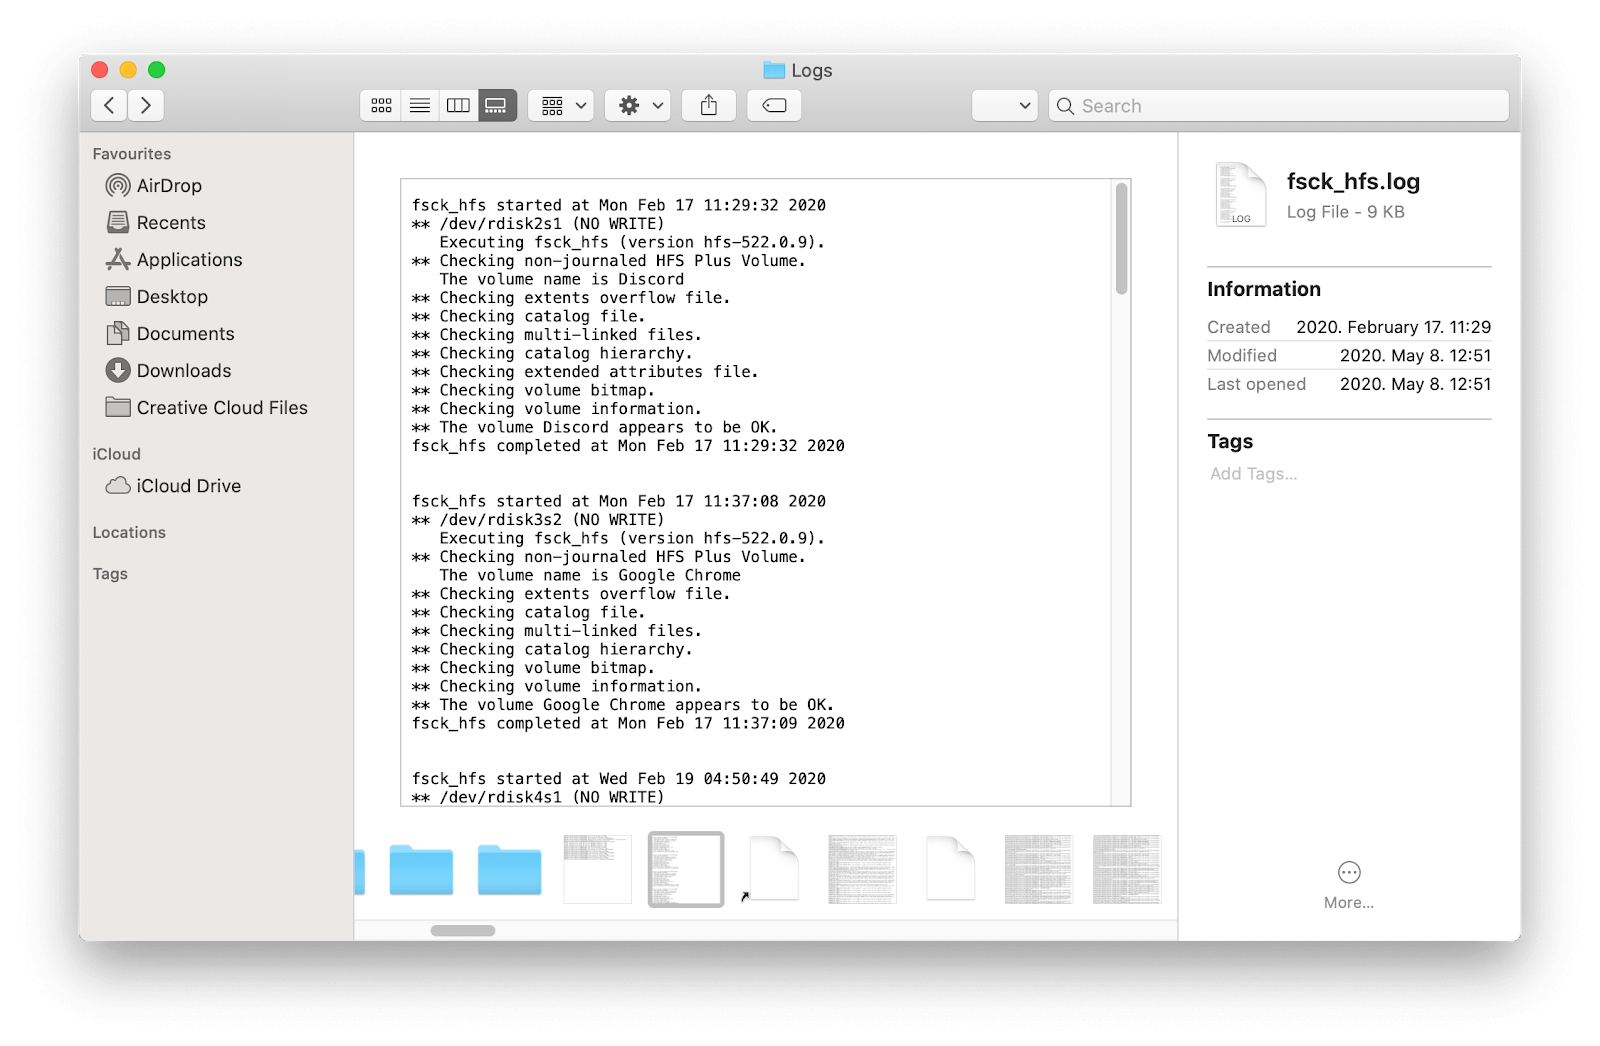
- Open the Finder and hit the ⌘ Command + Shift + G keys on your keyboard to bring up the Go to Folder… utility.
- Type in ~/Library/Logs/ and hit enter.
- Move any unneeded .log file into the Trash/Bin. Don’t forget to empty the Trash to permanently delete the unwanted files!
4. Delete unwanted language resources
Most applications come with multiple languages available to make things accessible for users. For instance, a popular application such as Spotify is available in over 40 different languages including German, French, Italian, Russian, Hindi, Japanese, Chinese, and Korean.
If you know you won’t be using different languages in the future to operate an app, we recommend deleting the resources to free up space on your Mac. This can be done in a few easy steps by following our guide below.
- Open the Finder from your Dock, then click on the Applications folder in the left-side panel.
- Right-click on the app you want to delete language resources from. (In our example, we’ll be using Spotify.)
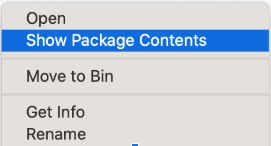
-
Select the Show Package Contents option from the context menu.
-
Open Contents → Resources, then find all folders with the .lproj extension. These are language files — you can usually tell what language it is by looking at the first two letters.
Warning: Make sure you don’t delete the English language files! Most apps use the English language as a base, so you should leave files such as en.lproj untouched.

- Delete any unwanted language resource by moving it to your Trash/Bin. Don’t forget to empty the Trash to permanently delete the unwanted files!
5. Clear your Mail Downloads folder
Do you use the standard macOS Mail app? You might have a bunch of email attachments stored on your device, taking up several gigabytes of space.
On average, users accommodate upwards to 5GB worth of email attachments in a span of several months. We recommend regularly clearing your Mail Downloads folder by following the steps below.
-
Press the ⌘ Command + Space keys on your keyboard to bring up the Spotlight utility. Here, all you have to do is type in “mail downloads” to access the folder.

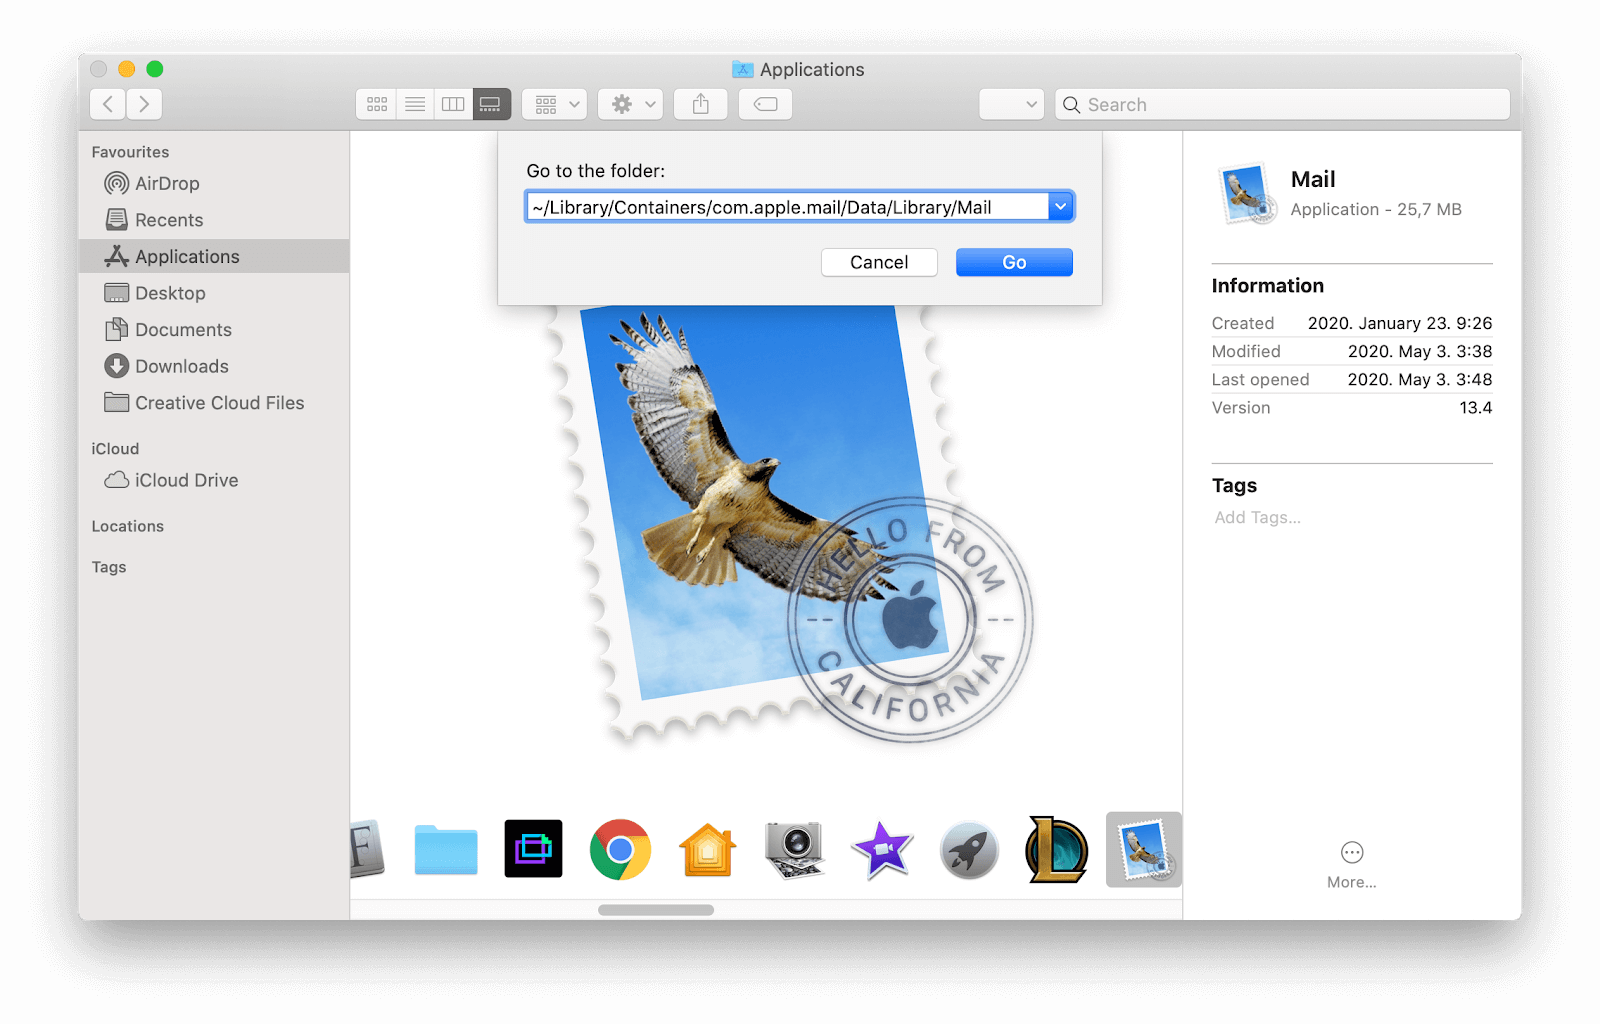
-
Alternatively, you can use the Go to Folder tool and navigate to the ~/Library/Containers/com.apple.mail/Data/Library/Mail folder from the Finder.
- From here, you have a few options:
- To delete all mail attachments, press the ⌘ Command + A button to select everything and move it to the Trash.
- To only delete attachments from apps you don’t want to keep, manually go through the files listed in this folder and move unwanted attachments to the Trash.
6. Completely uninstall unused apps
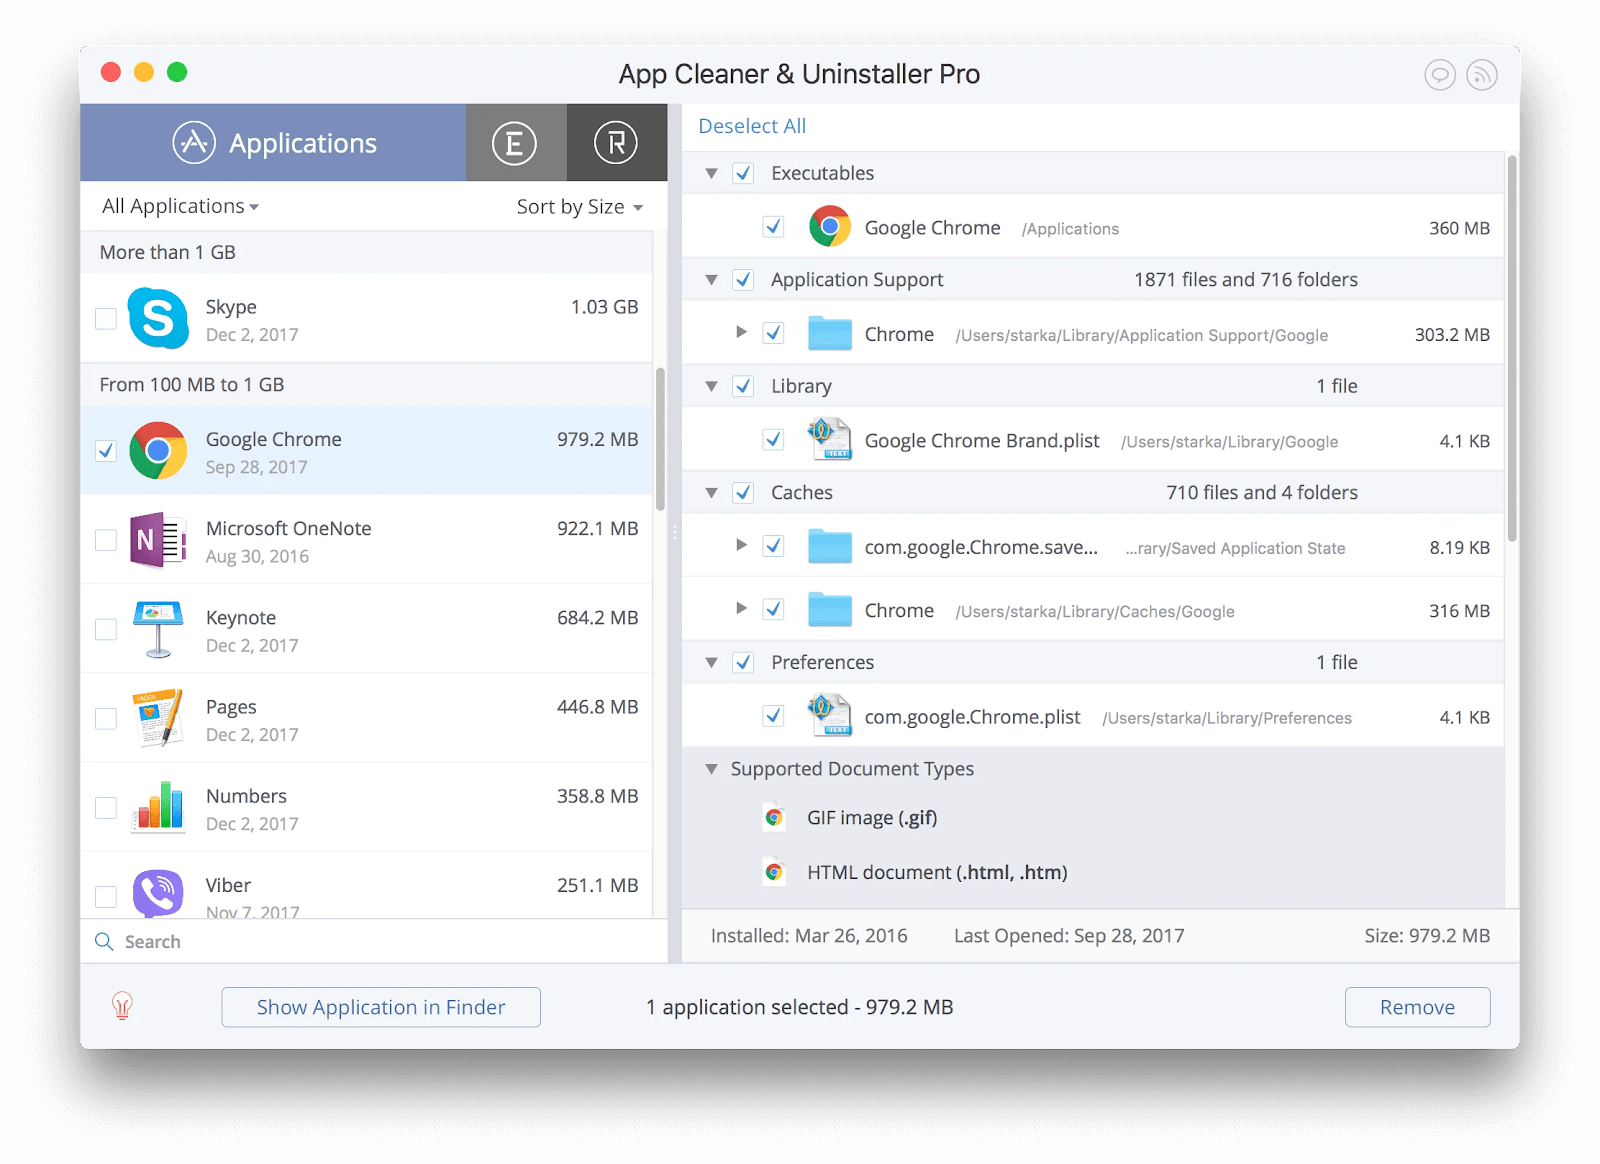
If you’ve been using your Mac for a long time, chances are you have had a ton of applications installed on your device.
Apps you delete often leave behind junk files and other traces that can build up to be a hefty amount of occupied storage space for virtually nothing. To completely remove apps, we recommend using the free App Cleaner & Uninstaller software.
It’s easy to use and effectively gets rid of applications you no longer want on your Mac. If you purchase the Pro version, you can even clear all leftover traces of old software with ease. This is definitely worth it — all bytes count when trying to save storage space.
7. Find your large files
One effective way you can clear space on your startup disk is by finding your largest files. You may delete them, or move them to an external location.
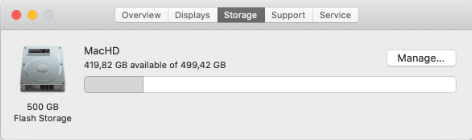
- Click on the Apple icon in the top-left of your screen, then choose About This Mac.
-
Go to the Storage tab and click on the Manage button.
-
Click on the Review Files button in the Reduce Clutter category. This will open up a new window where you can see a detailed breakdown of your largest files that are most likely not crucial parts of applications.

- To delete large files, simply select them on this screen and choose the Delete button. You can select multiple files by pressing down the ⌘ command key. If you wish to move these files to the cloud, jump to the next section.
8. Store files in the cloud
We highly recommend looking into cloud-based storage solutions to store important or large files. This ensures that your files are safe, while also freeing up disk space on your local drive.
Check out our article on The Best Cloud Storage Services in 2020 to see our top picks for solutions you should try.
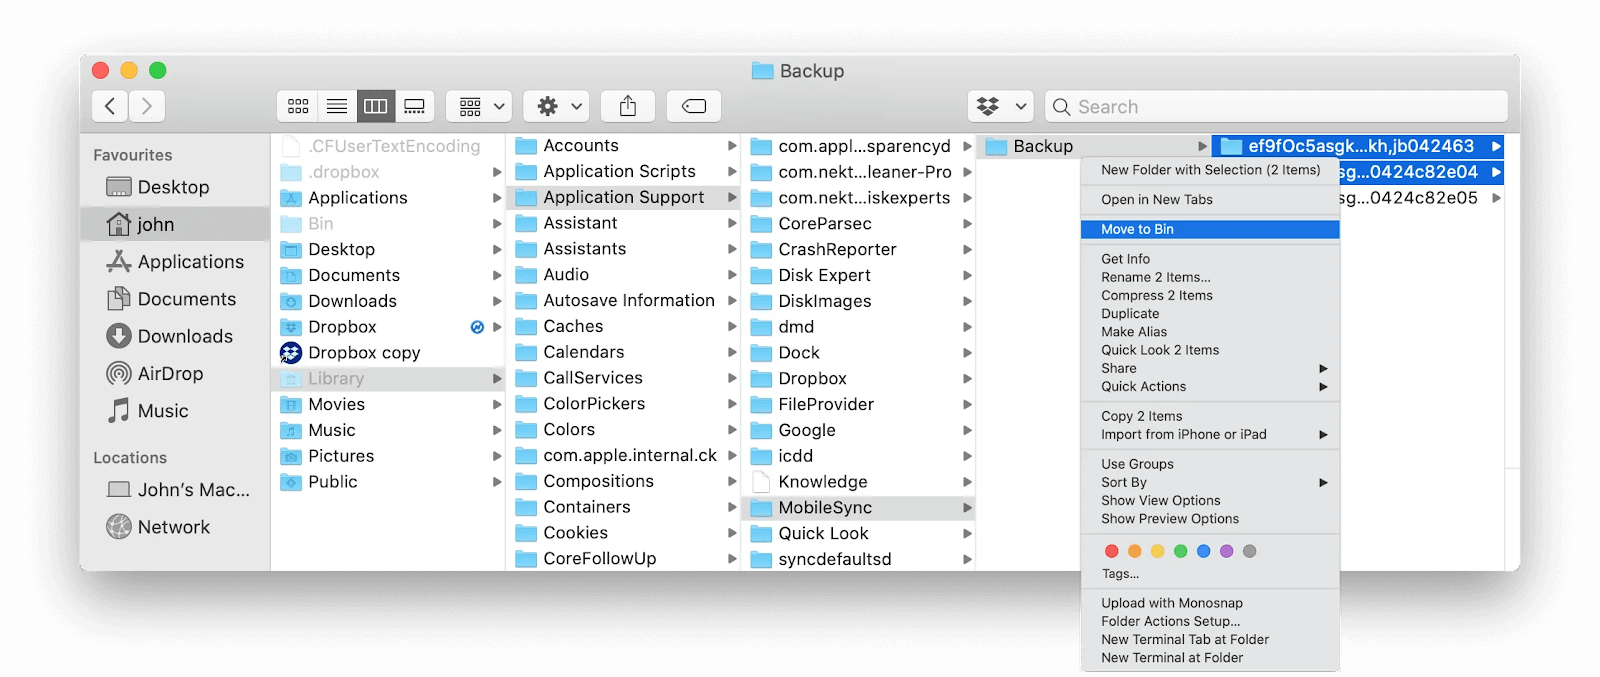
9. Remove old iTunes backups
If you tend to connect your iPhone to your Mac using the iTunes application, there’s a possibility that your computer stores backups of the system for future use. These backups can be quite large, taking up a large chunk of your storage.
While backups, in general, are useful, keeping dozens of them is more harmful than good. To delete your old iTunes backups, follow the steps below.
- Open the Finder and hit the ⌘ Command + Shift + G keys on your keyboard to bring up the Go to Folder… utility.
- Type in ~/Library/Application Support/MobileSync/Backup/ and hit enter.
-
Delete old backup folders by selecting them, right-clicking, and choosing the Move to Trash/Bin option from the context menu. Don’t forget to empty the trash after moving your backups there to permanently delete them.
10. Empty your Trash

The Trash (in some places called Bin) is where your files go when you "delete" them. What you might not know is that they don't actually get deleted right away. This is to make sure you have an easy way to restore files you accidentally move to the Trash.
The simplest way to make some space on your Mac is by taking out the trash. If you're sure that you don't have anything you want to keep, follow the steps below to empty the Trash.
- Locate the Trash/Bin icon in your Dock. It should look like an ordinary recycling bin. If your Trash has files in it, the icon will change to show a bunch of items inside the bin. This is when you need to empty it.
- Right-click on the Trash/Bin icon and select the Empty Trash/Bin option.
- Click Empty Trash/Bin to permanently delete the contents.
Conclusion
We hope this article was able to help you learn how to create space on the macOS system. If you need further assistance regarding technical questions, don’t be afraid to reach out to our support team. We’re always ready to help you out!
If you’re looking to read more articles related to modern technology, consider subscribing to our newsletter. We regularly publish tutorials, news articles, and guides to help you in your day-to-day tech life.