Formatting text in Microsoft Word can be a daunting task, especially if you're not familiar with the various tools and features available in the program. However, with the proper knowledge and tools, you can create professional-looking, easily read visually appealing documents.
This guide will provide step-by-step instructions on formatting text in Microsoft Word. We'll cover topics ranging from simple formatting to advanced techniques to help you familiarize yourself with the tools and features of Word. Whether you're a Word newbie or a seasoned user, this guide has something for everyone.

Table of Contents
- How to Design and Edit Text in Microsoft Word
- Formatting in Microsoft Word
- How to Change Font Size in Word
- How to Change Font Color in Word
- How to Change the Font in Word
- How to Make Text Bold, Italic, or Underlined in Word
- How to Highlight Text in Word
- How to Use Text Styles and Headings in Microsoft Word
- How to Align Text in Word
- How to Clear Formatting in Word
How to Design and Edit Text in Microsoft Word
Microsoft Word offers a wide range of tools that you can use to design and edit your text. These tools include formatting options, styles, themes, and more. In this section, we will guide you through the design tab in Word, where you can easily access these tools to make your text stand out.
Where is the Design Tab in Word?
The design tab in Word is located on the Ribbon at the top of the screen. It is situated between the Layout tab and the Page Layout tab. To access the design tab, click on it with your mouse, or use the Alt + P + G keyboard shortcut.
Using the Design Tab in Word
The design tab in Word is divided into several groups of tools. These include themes, document formatting, page background, and paragraph formatting. Let's take a closer look at each of these groups of devices and how you can use them to design your text.
- Themes: The themes group contains a variety of pre-designed color schemes and font combinations that you can apply to your document. To access the themes, click the Themes button, and choose a theme you like.
- Document Formatting: The document formatting group contains several formatting options for your text. These include font styles, font sizes, and font colors. You can also apply shadows and reflections to your text to make it stand out. To access these formatting options, click the appropriate button in the document formatting group.
- Page Background: The page background group contains several options for changing the background color or adding a watermark to your document. You can also add a border or change the page color. To access these options, click on the Page Background button.
- Paragraph Formatting: The paragraph formatting group contains several tools for adjusting the spacing and alignment of your text. You can also apply borders and shading to your paragraphs to make them stand out. To access these options, click on the Paragraph button.
With these tools, you can easily design and edit your text to create professional-looking documents that stand out.
Formatting in Microsoft Word
Formatting text is the foundation of any document and can be a challenge if you don't know how to do it correctly. To make editing text easier, Word offers a variety of tools that allow you to format your documents quickly.
When writing a document, you want to ensure that it's easy to read and that important information stands out. One way to do this is by formatting the text. Formatting text means changing how it looks, such as changing the font or size, making it bold or italic, or changing the color. These changes can help draw the reader's attention to specific parts of the document and make it easier to read and understand.
In Microsoft Word, there are several options for formatting text. You can adjust the font, which is the type of lettering used, to make it look more formal or casual, depending on the purpose of your document. You can also adjust the text size to make it larger or smaller, depending on how much space you have and how important the text is. Additionally, you can change the reader's color to make it stand out or match other elements in the document.
Another important aspect of formatting text is alignment. Alignment refers to how the text is positioned on the page. You can align the reader to the carrier's left, right, or center or justify it to align it on both sides. This can help make the document look more professional and organized. By using these formatting options in Microsoft Word, you can make your documents stand out and convey your message effectively to your intended audience.
How to Change Font Size in Word
Have you ever looked at a document and thought that the text was too small or too big? Reading something that is hard to see or takes up too much space on the page can be frustrating. Luckily, Microsoft Word makes it easy to change the font size of your text. So, let's learn how to adjust the font size in Word.
- Open Microsoft Word and open the document you want to work on.
- Select the text that you want to change the font size of by clicking and dragging your cursor over it.
-
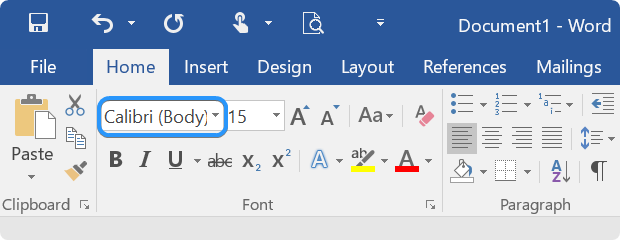
Once the text is selected, go to the "Home" tab at the top of the screen. Locate the "Font" section and click on the "Font Size" dropdown menu with a number next to it indicating the current font size.
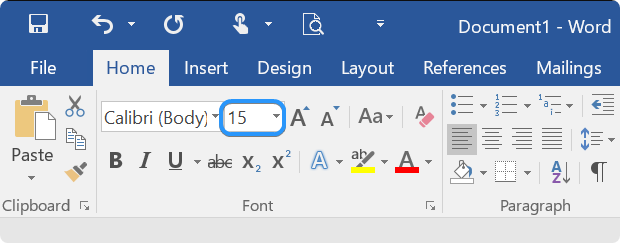
- Select the desired font size from the list of available options, or manually type in the font size you want to use.
The text should automatically change to the new font size you selected. Alternatively, you can use keyboard shortcuts to change the font size quickly. Here's how:
- Select the text you want to change the font size of.
- Hold down the "Ctrl" key on your keyboard and simultaneously press the"]" key to increase the font size or the "["key to decrease the font size.
- The text should automatically change to the new font size.
Remember to use font sizes that are legible and appropriate for your document. Headings and titles can be larger, while body text should generally be smaller. By following these steps, you can easily change the font size of your text in Microsoft Word.
How to Change Font Color in Word
Changing the color of your text can be a great way to make your document stand out. Whether you want to highlight important points or add some flair, Microsoft Word offers several options that allow you to quickly and easily change the color of your text. So, let's look at how to change font color in Word.
- Select the text you want to change the color of by clicking and dragging your cursor over it.
-
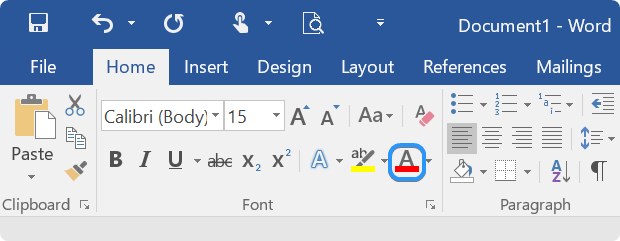
Go to the "Home" tab on the Ribbon at the top of the screen. Locate the "Font" group and click the down arrow next to the "Font Color" icon to open the color menu.
-
Choose one of the pre-defined colors by clicking on it. If you don't see the color you want, click "More Colors" at the bottom of the menu.
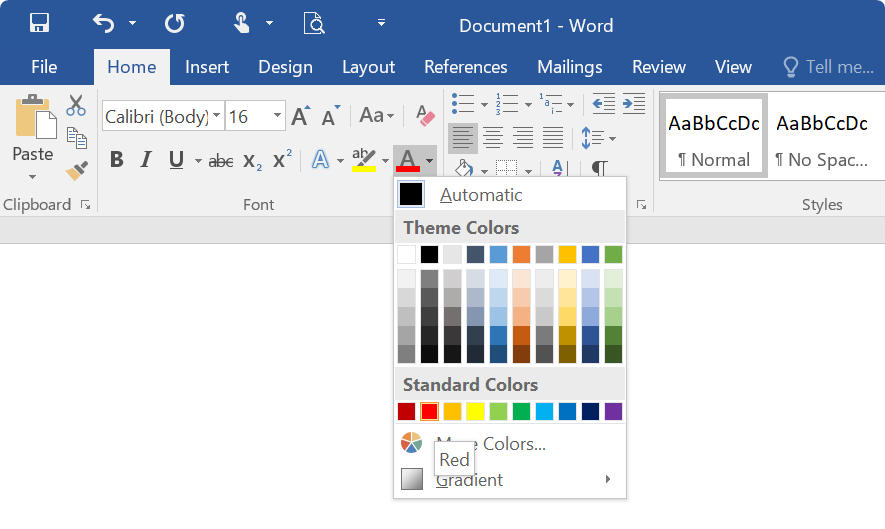
- Enter the HEX or RGB values for the color you want to use. You can also use the color wheel or slider to create your custom color. Once you've selected your color, click "OK" to apply the new font color to your text.
Remember that changing the font color can affect the readability of your text, so be sure to choose a color that is easy to read against your background color. Also, remember that some printers may be unable to print specific colors accurately, so it's a good idea to test your document before printing it out.
How to Change the Font in Word
Changing the font in Microsoft Word is an easy way to give your text a new look. The default font in Microsoft Word is Calibri, a standard font that is easy to read. However, changing the font is a great way to make your document stand out if you want something more unique or exciting.
- Open the Word document you want to edit. To change the font style, you need to select the text first.
-
Once you have selected the text, go to the "Home" tab on the Ribbon at the top of the screen. You should see a font section with a dropdown box displaying the current font style used in the selected text.
- Click on the dropdown box and scroll through the list to preview the available font styles. You can choose from the fonts installed on your device. If you want to use a custom font, you can download it and install it on your device.
- When you have found a font style, click on it to apply it to the selected text. The text will change to the new font style immediately.
When you install new fonts on your device, they'll become available in Word. If you're using Microsoft 365, you can also access many fonts from the Cloud fonts in Office.
How to Make Text Bold, Italic, or Underlined in Word
Formatting your text is an essential part of creating professional-looking documents. By making your text bold, italic, or underlined, you can draw attention to specific pieces of your paper and emphasize important information. Using bold, italic, and underlined formatting can also help highlight particular words or phrases in a document and make it easier for readers to scan through important information.
This section will guide you through making text bold, italic, or underlined in Microsoft Word. After you launch Word, open an existing document or create a new one from the welcome screen and start formatting your text.
How to Make Text Bold in Word
Making your text bold in Word is a great way to stand out. Here's how to do it:
- Highlight the text you want to make bold.
-
Click on the "B" button in the "Home" tab of the Ribbon, or press "Ctrl + B" on your keyboard.

- Your text will now be displayed in bold font.
How to Make Text Italicized in Word
If you want to change the text style to italicized, Word has an easy way to do this as well:
- Highlight the text you want to make italicized.
-
Click on the "I" button in the "Home" tab of the Ribbon, or press "Ctrl + I" on your keyboard.
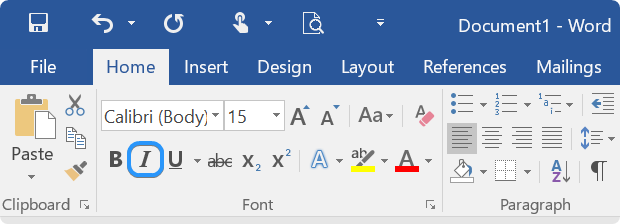
- Your text will now be displayed in an italicized font.
How to Make Text Underlined in Word
If you want to add an underline to selected text, Word makes it simple to do:
- Highlight the text you want to underline.
-
Click on the "U" button in the "Home" tab of the Ribbon, or press "Ctrl + U" on your keyboard.
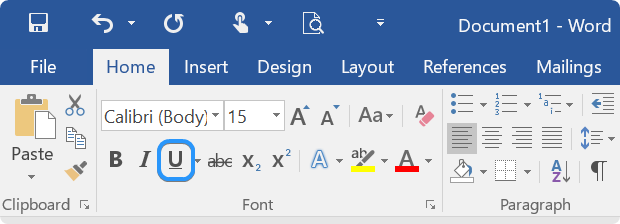
- Your text will now be displayed with an underline.
How to Make Text Bold and Underlined in Word
If you want to combine the effects of bold and underline on your text, follow these steps:
- Highlight the text you want to format.
- Click on the "B" button and the "U" button in the "Home" tab of the Ribbon, or press "Ctrl + B" and "Ctrl + U" on your keyboard.
- Your text will now be displayed in a bold font with an underline.
How to Make Text Italicized and Underlined in Word
If you want to combine the effects of italicized and underlining on your text, follow these steps:
- Highlight the text you want to format.
- Click on the "I" button and the "U" button in the "Home" tab of the Ribbon, or press "Ctrl + I" and "Ctrl + U" on your keyboard.
- Your text will now be displayed in an italicized font with an underline.
Making your text bold, italicized, or underlined in Microsoft Word is a simple way to make your documents more visually appealing and emphasize important information. With just a few clicks or keyboard shortcuts, you can create text that stands out and communicates your message effectively.
How to Highlight Text in Word
Highlights in your document can draw attention to certain words or phrases and make it easier for readers to scan a document quickly. Microsoft Word offers several options for highlighting text. This is great if you want to create a document with multiple levels of emphasis or call out significant sections.
- Select the text you want to highlight.
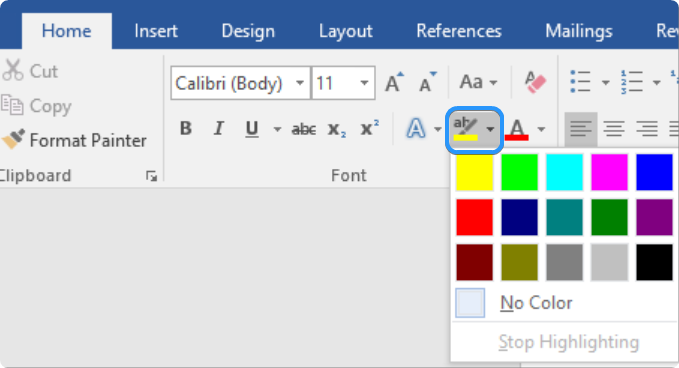
- Once you've selected the text, click the "Home" tab in the top menu bar. Look for the "Font" group in the menu bar. There, you'll see an icon that looks like a highlighter. Click on it.
-
You'll see a dropdown menu with several pre-defined highlight colors to choose from. Select the color you want to use for highlighting your text.
- Once you've chosen your highlight color, click on it to apply the highlight to the selected text.
- To remove the highlight from text, select the highlighted text and click on the highlighter icon in the "Font" group. Then, click on "No Color" in the dropdown menu.
How to Use Text Styles and Headings in Microsoft Word
Text styles and headings can help make your documents look more professional and easier to read. Headings are particularly useful for breaking up longer documents into sections or chapters. They can also help the reader quickly locate specific information in your document.
How to Make a Heading in Word
Headings are an essential part of any document, as they help to organize your content and make it easy for readers to navigate. In this guide, we will show you how to make a heading in Word in just a few easy steps.
- Select the text that you want to use as a heading.
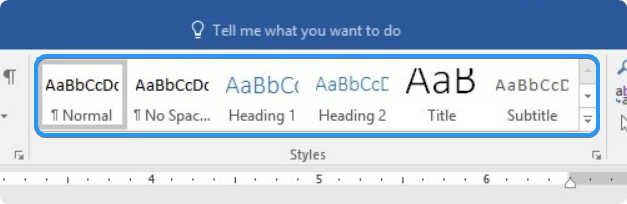
- On the Home tab of the Ribbon at the top of your Word screen, locate the "Styles" section. This section contains different styles that you can apply to your text.
-
Hover over the different styles to preview how your text will look when you apply the style. The heading styles are at the top of the "Styles" section, numbered 1 to 9, with 1 being the largest size.
- Click on the heading style you want to apply to your text. The selected text will now be formatted as a heading.
- To add another heading to your document, select the text you want to use as the heading and follow steps 2-4 to apply a heading style.
Tips for Creating Headings in Word
It's important to create consistent, visually appealing headings for your documents. Here are a few tips to help you make the most of the heading styles in Word:
- Use H1 for titles: H1 should be used for your document's or section's main title. This helps signal to the reader what the document is about and what they can expect to find.
- Use H2 for subheadings: H2 should be used for subheadings that break up the main sections of your document. These can help to organize your content and make it easier to read and navigate.
- Use H3 for subsections: H3 should be used for subsections within your subheadings. This can help to break down your content further and make it more digestible for your reader.
- Use consistent colors and fonts: Using consistent colors and fonts for your headings can help to create a more professional and polished look. Choose a color and font that is easy to read and complements the rest of your document.
- Keep it simple: When creating headings, it's essential to keep them straightforward. Avoid using too many words or complex phrasing; ensure your titles accurately reflect the following content.
How to Add Headings With Styles in Word
Adding headings in Word can help organize your text and make it easier to read. The best way to add headings is by using heading styles. With one click, you can format text and create a table of contents in your document.
- Start by opening Word and either creating a new document or opening an existing one. Once your document is open, select the text you want to turn into a heading by pressing the left mouse button and dragging it over the text.
- Next, go to the "Home" tab in the Ribbon at the top of the screen. Look for the section called "Styles," which contains different headings. The Styles section is longer than others, making it easy to find.
- Hover over each heading to see a preview of how it will look in your document. This makes it easier to choose the right one.
- When you find the heading you want, click on it to apply it to your selected text.
Using heading styles not only helps organize your text but also makes it easy to change the formatting of your document later on without having to adjust each heading manually.
How to Customize Text Styles in Word
Using text styles is an excellent way to format your document quickly without doing it manually. Now that you know how to use text styles for headings, you can learn how to use styles for different parts of your document. You can even customize a text style, allowing you to change the look of your entire file without manual edits.
-
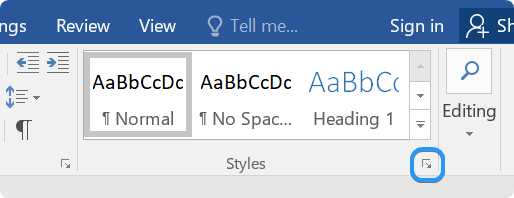
First, go to the "Home" tab in the Ribbon at the top of your Word screen. Look for the "Styles" section, and click the "More" button in the bottom right.
-
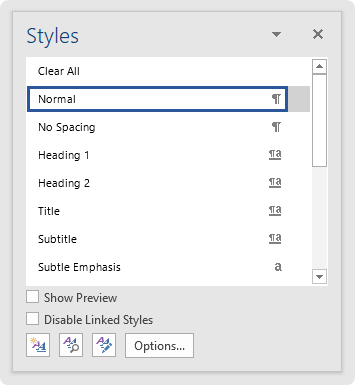
You'll see a new window with all the pre-made styles in Word. You can choose from formatting styles like emphasis, subtitles, quotes, or references. To apply a style, select the text you want to format and click on the style you want to use.
-
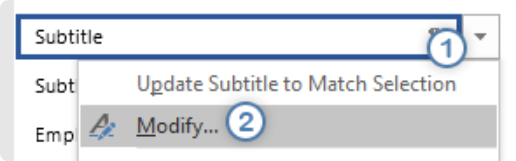
To modify an existing style, hover over the style with your mouse pointer and click on the arrow that appears. Select "Modify" from the dropdown menu.
- Make the changes you want, such as font size, color, or spacing, and click the OK button.
With these simple steps, you can format your document easily and quickly using text styles in Word.
How to Align Text in Word
When creating a document in Microsoft Word, you may need to adjust the alignment of your text. Aligning your text correctly can make your document look more professional and easier to read. Here's a step-by-step guide on how to align text in Word.
- Select the text you want to align.
- Choose the "Home" tab in the Ribbon at the top of your Word screen.
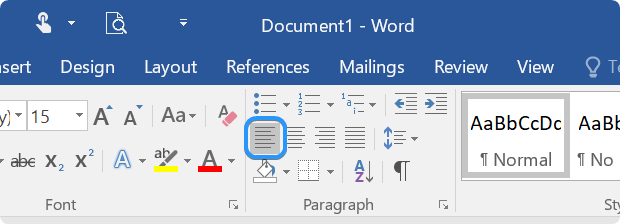
-
In the "Paragraph" section, you will see several alignment options: left align, center, right align, and justify.
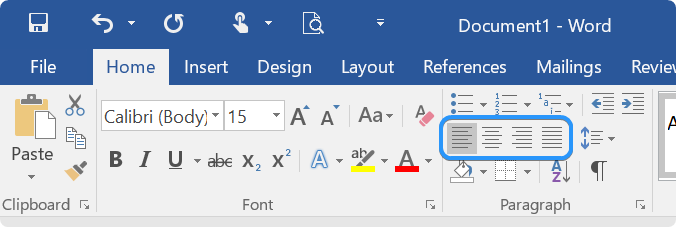
- Click the alignment option you want to apply to your selected text.
How to Left Align Text in Word
To align text to the left in Word, follow these steps:
- Select the text you want to align.
- Choose the "Home" tab in the RRibbonlocated at the top of your Word screen.
-
In the "Paragraph" section, click the left align button.