In today’s digital world, cloud storage is a necessity. It allows you to store data and access it from any device. Microsoft added a built-in option to access OneDrive in Windows 10, but what if you want to access other cloud storage options in File Explorer? Thankfully, there are a few simple steps that can help you add your preferred cloud storage solutions to File Explorer.
What is Cloud Storage?
Cloud storage is a type of online storage that allows you to store data and access it from any device connected to the internet. This can be useful for backing up files, collaborating on projects, accessing important documents while you're away from home or work, and more.
There are a variety of cloud storage options available, including Dropbox, Google Drive, and OneDrive. Each one offers different features and levels of security, so it's important to choose the right option based on your specific needs.
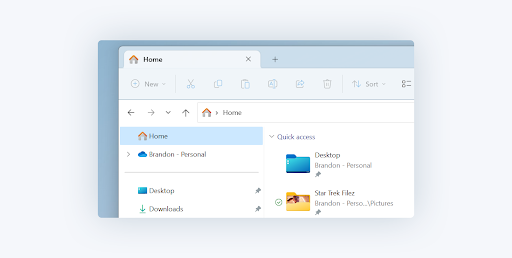
To ensure your cloud files are always within reach, you can integrate your cloud storage into File Explorer on both Windows 10 and Windows 11. This gives easy access to anything in your cloud drive so you can quickly open and edit your files and share them with others.
Adding Cloud Storage to the File Explorer in Windows 10/11
It's easy to add cloud storage to File Explorer on your Windows 10 or 11 device. Here are the steps to follow:
1. How to Add OneDrive to File Explorer
OneDrive is one of the most popular cloud-storage services amongst Windows users as it provides great storage options and seamless integration with the operating system.
If you want to pin your OneDrive storage to File Explorer, follow these steps:
- To launch OneDrive, begin by entering "OneDrive" into the Start search box. Once it appears in the results, select it to open.
- If you already have a OneDrive account, simply enter the associated email address and click "Sign in." Once you've signed in with your password. If not, no worries - just follow the prompts to create an account.
- Select your OneDrive folder by following the on-screen instructions. If you've logged in to OneDrive on your computer before, there's a chance that you have an existing OneDrive folder; if so, simply click "Use this folder" and continue.
Upon completion of these steps, your OneDrive files will instantly appear in File Explorer. With this newfound capability, you can quickly and simply move documents into or out of OneDrive with ease!
2. How to Add Google Drive to File Explorer
Another popular cloud storage option is Google Drive. The free plan is perfect for individuals and small businesses, offering 15 GB of storage space.
To integrate it into File Explorer on your Windows device, follow these steps:
- Before you get started, make sure to download the Google Drive desktop app. Navigate to the download page and choose your plan: Individual, Team, or Enterprise - all found at the top of the page.
- To get started, download Google Drive for Desktop and sign in with your Google account. Make sure you're using the account that has your Google Drive files on it.
- After completing the installation and signing in, Google Drive will be visible as the “G:” drive in File Explorer of Windows.
Your G: drive will operate similarly to a traditional hard disk on your device. Whenever you make any changes or additions, they'll instantly be synced with Google Drive. However, by default, deletions made from your PC are not removed from the cloud unless you select this option.
3. How to Add Dropbox to File Explorer
For both personal and professional use, Dropbox is a widely-used cloud storage platform. It offers flexible pricing plans, high levels of security, and the ability to collaborate with others on shared files.
To get Dropbox set up in File Explorer, simply follow these steps:
- Head over to the Dropbox website to begin the process. From there, simply click the "Download the app" button and you'll be on your way to secure cloud storage.
- To get started, open the downloaded installer file and input your account email address as well as password. After that click “Sign in” to move forward.
- After successfully signing in, click on the "Open my Dropbox" button, and then click "Get Started."
- Click "Next" and then click "Finish." You should see the Dropbox drive show up in File Explorer. With your Dropbox account set up in File Explorer, you can now easily access and share your files on the go.
Now, you have easy access to all of your cloud-stored files on Dropbox. This means that you can collaborate with others in real time and share your files with ease. Whether it's for personal or professional use, Dropbox offers a reliable, secure platform to store your files in the cloud.
4. How to Add MEGA to File Explorer
In 2013, MEGA came onto the scene and revolutionized cloud storage security with its pioneering zero-knowledge protocol and user-controlled end-to-end encryption. Now, it offers users peace of mind in terms of data safety as well as 20 GB of free space.
To make your cloud-stored information easily accessible on a local machine, consider using Air Live Drive to mount your MEGA account as an actual hard drive. After mounting, you can access all of the stored files directly from File Explorer and edit them with any standard desktop software.
This convenient solution allows you to quickly find what you need without needing to search through multiple folders in the cloud.
5. How to Add iCloud Drive to File Explorer
If you're an iCloud user, you can also access your cloud storage in File Explorer on Windows 10 or 11. Simply follow these simple steps to add iCloud Drive to your file explorer:
- Start the Microsoft Store on your PC.
- Type "iCloud" into the search bar at the top right-hand corner and hit enter. In your search results, look for iCloud and select it to proceed.
- Once you've navigated to the store page, simply click on "Get" to quickly and easily download the app onto your PC.
- To initiate the installation of your app, select "Install" from the Microsoft Store after downloading. Wait for the installation to complete. After the installation process is completed, your computer may need a reboot.
- Following the restart of your PC, locate iCloud in the recently installed apps section within the Start menu and launch it. To get started, sign in to your iCloud account with your Apple ID.
- In the new window, be sure to select the box for iCloud Drive, or choose to sync Photos, Mail, and Bookmarks with your PC, and then press "Apply" in order to pin it on File Explorer.
Conclusion
Adding cloud storage options like Dropbox or Google Drive into Windows 10's File explorer may not be as straightforward as using Microsoft's OneDrive option but it's still relatively easy if you know how! All it takes is a few simple steps and all of your data can be accessed without having to switch between different applications.
By taking these steps today, you can enjoy easier and more efficient access to all of your important data no matter where it’s stored!
One More Thing
Looking for more tips? Check out our other guides in the SoftwareKeep Blog and our Help Center! You’ll find a wealth of information on how to troubleshoot various issues and find solutions to your tech problems.
Sign up for our newsletter and get early access to our blog posts, promotions, and discount codes. Plus, you'll be the first to know about our latest guides, deals, and other exciting updates!
Recommended Articles
» How To Fix File Explorer Search Box Not Working
» How to Fix the Windows Explorer Not Responding on Windows 10
» 11 Methods How to Fix Window Explorer Keeps Crashing
Feel free to reach out with questions or requests you’d like us to cover.