Are you currently struggling with the NVIDIA Control Panel not opening on Windows? If the NVIDIA Control Panel won't open, this could be the result of outdated drivers, Windows updates, or hung processes. This is a useful tool dedicated to managing various settings related to your graphics card. Your antivirus might be interfering with the app, so consider checking its settings or disabling it.

For systems running with an NVIDIA branded graphics card, the NVIDIA Control Panel is a necessity. It allows you to dig deep into the controls of your card and customize its performance on a system-level.
If this panel is not reachable, you might be in trouble: you’ll miss out on optimization options, customization, and possible performance gain. It also implies that something is definitely wrong with your NVIDIA installations, or your system itself. So, what can you do to be able to open the NVIDIA Control panel? Continue reading to find out.
Table of Contents
- What is the NVIDIA Control Panel?
- Solved: NVIDIA Control Panel not opening on Windows
- Method 1. Restart the NVIDIA Control Panel
- Method 2. Restart these NVIDIA services
- Method 3. Update your NVIDIA drivers
- Method 4. Quit the NVIDIA Display Container process
- Method 5. Disable Fast Startup in Windows 10
- Method 6. Reinstall your drivers from NVIDIA GeForce Experience
- Method 7. How to unhide the NVIDIA Control Panel (Bonus)
- Final thoughts
What is the NVIDIA Control Panel?
“The NVIDIA Control Panel provides control of NVIDIA graphics driver settings as well as other NVIDIA utilities that you might have installed on your system.” — from NVIDIA Control Panel Help
The NVIDIA Control Panel should be installed on your device as soon as you acquire the necessary drivers to operate your NVIDIA graphics card. It allows you to gain deeper control over your settings, such as your resolution, color correction, and 3D application settings.
This software is especially useful for people who work with 3D applications, or Windows gamers. It allows you to get deep into customizing how your system handles rendering 3D elements. You can, for example, enable or disable antialiasing, texture filtering, and VSync.
Solved: NVIDIA Control Panel not opening on Windows
Use the following methods to solve the NVIDIA Control Penal not opening on Windows problem:
Method 1. Restart the NVIDIA Control Panel
The first thing to try is simply quitting the NVIDIA Control Panel task entirely, and then trying to re-open the application.
-
Right-click on an empty space in your taskbar and choose Task Manager.

-
Select the NVIDIA Control Panel and click on the End task button in the bottom-right of the window.
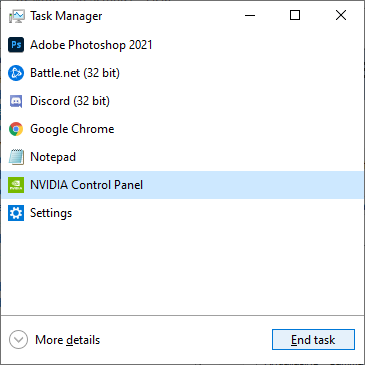
- Wait a few seconds and open the NVIDIA Control Panel.
Method 2. Restart these NVIDIA services
NVIDIA installs some necessary services onto your system. If these services are stopped, your software most likely won’t function as intended. Luckily, this is something you can fix and prevent with the same steps below.
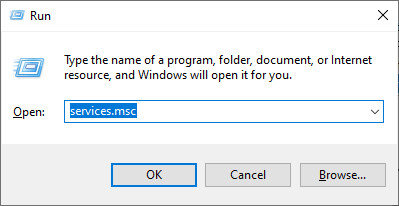
- Press the Windows + R keys on your keyboard. This is going to bring up the Run utility.
-
Type in “services.msc” without the quotation marks and press the Enter key on your keyboard. This will open the Services window.
-
Locate the “NVIDIA Display Container LS” service from the list. Right-click on it, and select Restart from the context menu.
- Repeat the step above for the following services: NVIDIA LocalSystem Container, NVIDIA NetworkService Container, and NVIDIA Telemetry Container.
- After you restarted all of the NVIDIA services, check if you can see the panel in your system tray or desktop context menu.
Method 3. Update your NVIDIA drivers
It's extremely important that your graphics card driver is always up-to-date. Especially after major Windows 10 updates, compatibility issues can appear and cause all sorts of errors.
Your NVIDIA display driver being outdated or damaged may have led to the Control Panel missing. There are 3 ways to fix this:
Option 1. Update display adapter driver manually
-
Check the type of graphics card you’re using:
- Press the Windows and R keys on your keyboard at the same time.
-
This will bring up the Run utility. Type in “dxdiag” without the quotation marks, and press the OK button.

- This is the shortcut to reach the DirectX Diagnostics tool, which allows you to view information about your system.
-
Switch to the Display tab.
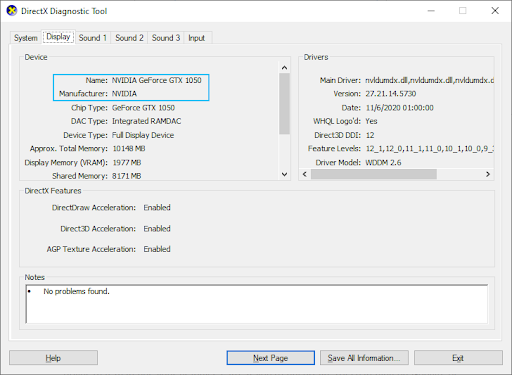
- Under Device, take note of the name and manufacturer of your graphics card.
-
Go to the corresponding manufacturer’s website, and then navigate to their download page. Here are some of the most common manufacturers’ web pages where you can find driver downloads:
Intel Drivers & Software page.
NVIDIA Driver download page.
AMD Drivers and support page -
Find your graphics card model using the provided search tools, and download its newest driver.
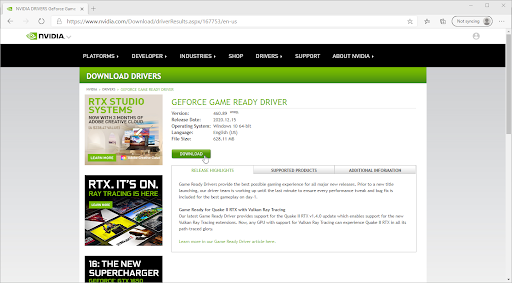
- Download and install the latest driver by double-clicking on the downloaded file and follow the on-screen instructions. You might be prompted to restart your device.
Note: Always make sure that you’re always downloading and installing the correct driver that matches your graphics card. If you’re uncertain, try searching on Google, or contact the customer service of your manufacturer.
Option 2. Update display adapter driver automatically
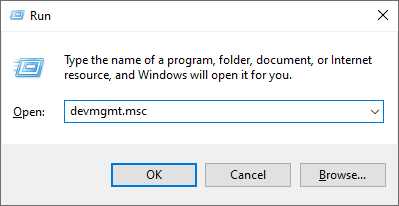
- Press the Windows and R keys on your keyboard at the same time. This will bring up the Run utility.
-
Type in “devmgmt.msc” without the quotation marks, and press the OK button. This will take you to the Device Manager window.
-
Expand the Display adapters section by clicking on the arrow icon to the left.

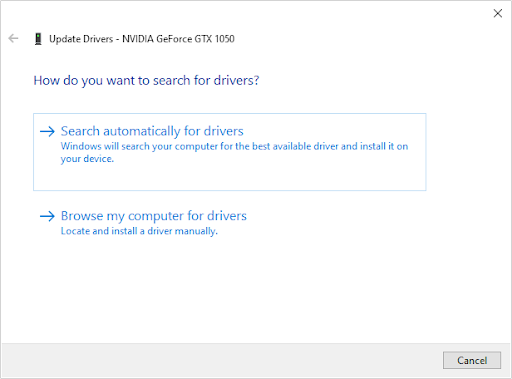
- Right-click on your current driver, and then select the Update driver option.
-
Click on Search automatically for updated driver software to allow Windows 10 to automatically update your driver. When you’re done, feel free to exit out of the Device Manager and restart your computer.
Option 3. Update your drivers with a third-party app
While it’s not necessary to use a third-party app for driver updates, it’s an option that is available to all Windows 10 users. You can also find and download third-party updater tools such as Driver Booster, DriverHub, or DriverPack Solution to automatically update drivers.
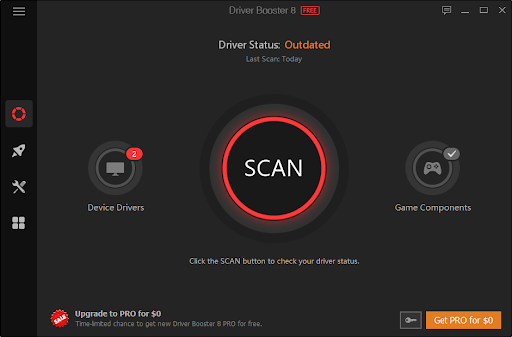
Most of these tools are free and easy to use. If you’re not satisfied with the service, we recommend searching the internet for more advanced apps.
Always make sure that the app you’re using is trustworthy. Some applications that offer to fix or update your drivers contain malware, adware, or spyware. We recommend searching the name of the product and reading reviews made by real users before downloading any software.
Method 4. Quit the NVIDIA Display Container process
A quick fix for the Control Panel, not opening could be related to another NVIDIA process, namely NVIDIA Display Container. If you quit this task, you may be able to launch the utility.
-
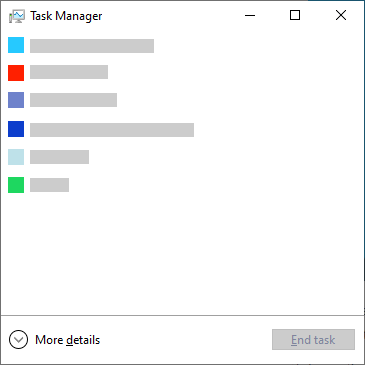
Right-click on an empty space in your taskbar and choose Task Manager.

-
If the Task Manager launched in compact mode, make sure to expand details by clicking on the “Mode details” button.
-
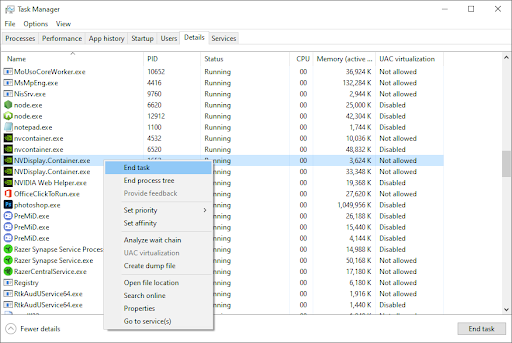
Switch to the Details tab. Scroll down until you see the NVIDIA Display Container process. Right-click on it and choose End task. Note that there could be multiple of these processes — make sure to quit all of them.
- Wait for the process to restart itself, and then try to open the NVIDIA Control Panel again.
Method 5. Disable Fast Startup in Windows 10
Some users suggest that the Fast Startup setting may cause issues with the NVIDIA Control Panel. For example, if the necessary files and services aren’t loaded during startup, the NVIDIA Control Panel may not be able to launch properly.
You can test if this feature is the culprit by simply disabling Fast Startup using the guide below.
-
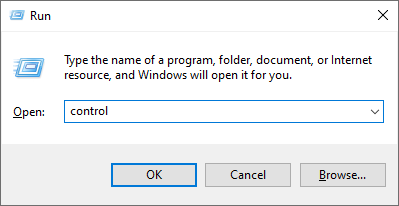
Press the Windows + R keys using the on-screen keyboard to bring up the Run utility, then type in “control” and click the OK button. Doing so will launch the Windows 10 Control Panel.
-
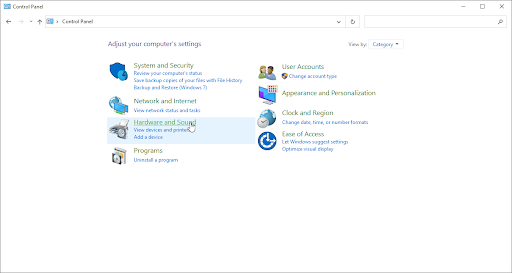
Make sure that your view mode is set to Category. Next, click on the Hardware and Sound heading.
-
Click on the Choose what the power buttons do link in the Power Options section.
-
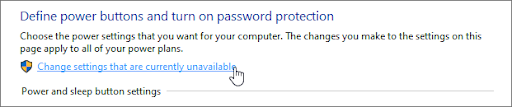
Here, you should see options to change the way your computer boots up. To be able to modify these settings, you need to click on Change settings that are currently unavailable.
-
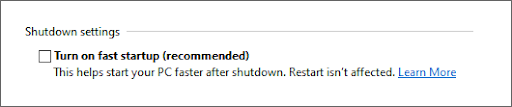
Simply make sure that Turn on fast startup is unchecked, then click the Save changes button. When done, restart your device and see if the NVIDIA Control Panel is able to launch.
Method 6. Reinstall your drivers from NVIDIA GeForce Experience
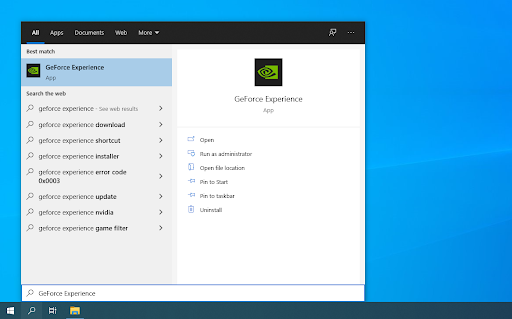
- Open the search bar in your taskbar by clicking on the magnifying glass icon. You can also bring it up with the Windows + S keyboard shortcut.
-
Type in GeForce Experience and click on the first search result to launch the application.
-
Switch to the Drivers tab, and look for the Currently Installed section. Here, click on the More… icon and choose Reinstall driver.
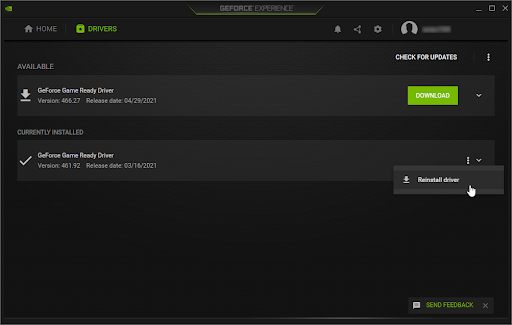
- Follow the on-screen instructions to reinstall your current driver. If needed, reboot your computer and try opening the NVIDIA Control Panel.
Method 7. How to unhide the NVIDIA Control Panel (Bonus)
It's a common mistake to hide the NVIDIA Control Panel, causing it to go missing from your system tray. In rare cases, Windows 10 itself or a later installed third-party application automatically hid the icon. Here’s how to unhide the NVIDIA Control Panel:
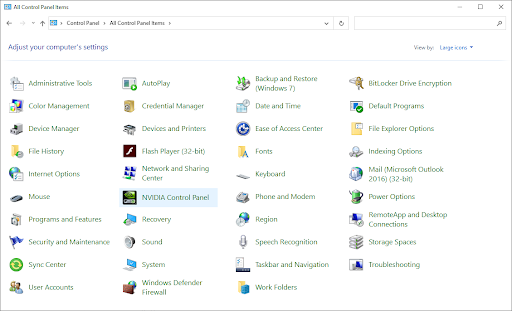
-
Go to the Windows 10 Control Panel. Change the view mode to Large icons, and then click on NVIDIA Control Panel from the items.
-
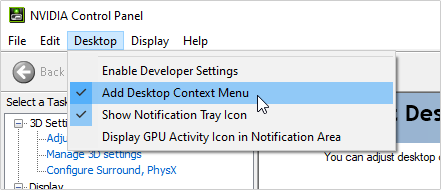
Once the NVIDIA Control Panel is open, click on the Desktop menu on the top. Make sure there’s a checkmark next to Add Desktop Context Menu and Show Notification Tray Icon. If there isn’t, simply click on them to add it.
- Close the NVIDIA Control Panel and try opening it by right-clicking on your desktop or using the system tray.