
Printing large Excel sheets with multiple pages can be time-consuming and tedious. However, with the Print Titles feature, you can easily include row titles on every printed page, making it easier for readers to navigate and understand your data.
Discover how to set up Print Titles in Excel and streamline your printing process. Follow our step-by-step guide to ensure your row one titles appear consistently on all printed pages.
Table of Contents
- Print Row and Column Headings in Excel
- How to set Row 1 on every page
- How to Remove Row 1 Set to Print on Every Page in Excel
- Importance of Removing Repeating Rows in Excel Print
- Challenges of Repeating Rows in Printed Files
- FAQs
- Final Thoughts
Print Row and Column Headings in Excel
To print row and column headings in Excel, follow these steps:
- Click on the sheet you want to print.
-
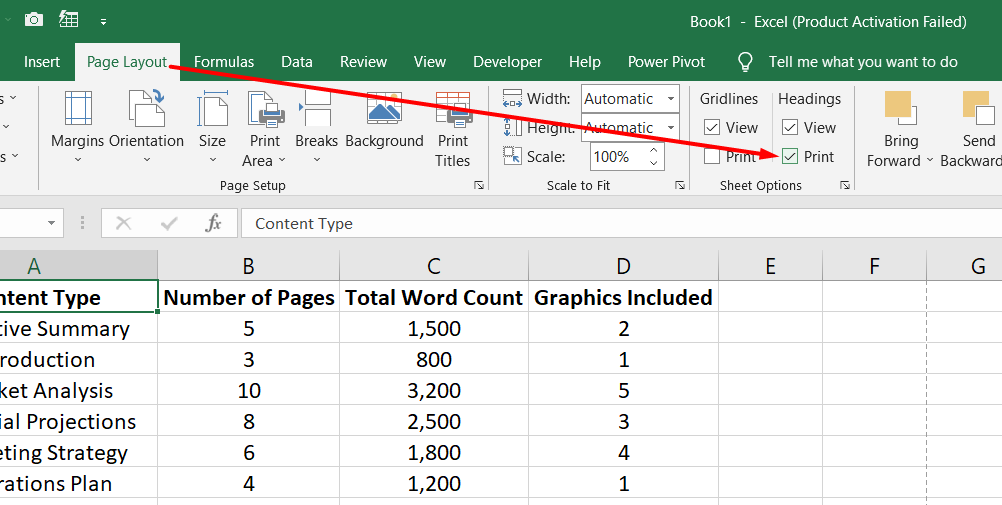
Go to the Page Layout tab and locate the Sheet Options group. Under this group, check the Print box under Headings. Alternatively, you can find the Headings section on the Page Layout tab and select the Print option.
-
Access the File menu and click Print to open the print settings.

-
In the preview pane, you can review how your sheet will appear when printed.

To print row or column titles on every page, use the following steps:
- Click on the sheet you want to modify.
-
Navigate to the Page Layout tab and locate the Page Setup group. Click on Page Setup.
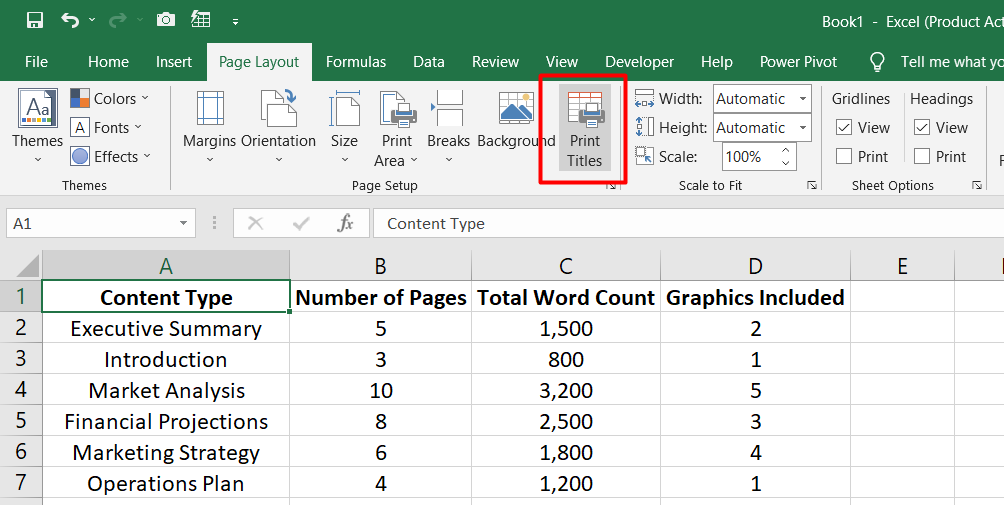
- On the Page Setup dialog box, find the Print Titles section.
-
To repeat row titles at the top of each printed page, click in the Rows to repeat at top field. Then, select the row containing the titles you want to repeat.

-
Alternatively, to repeat column titles at the left side of each printed page, click in the Columns to repeat at left field. Then, select the column containing the titles you want to repeat.

- Click OK to save the changes.
- Access the File menu and click Print to adjust print settings.
- Review the preview pane to see how your sheet will look when printed.
By following these steps, you can ensure that row and column headings are included in your printed Excel sheets, allowing for improved readability and data understanding.
How to set Row 1 on every page
To set Row 1 on every page:
- Access the Print Preview of your worksheet by clicking the Print Preview button (consider adding it to the Quick Access Toolbar for quick access).
- In Print Preview, observe that the headings in Row 1 are present on the first page but missing on subsequent pages.
- To ensure the headings appear on every page, avoid copying and pasting the titles underneath the page break.
Instead, follow these steps:
- Go to the Page Layout tab and click on Print Titles.
- In the Rows to repeat at top text box, click and select Row 1 (or multiple rows if needed).
- Click OK to save the changes.
Return to Print Preview and navigate to the second page to see that the column titles in Row 1 are now visible.
This setting will continue to repeat the headings on every subsequent page, ensuring consistency and clarity.
How to Remove Row 1 Set to Print on Every Page in Excel
If you encounter a file with Row 1 set to print on every page and want to remove this repeating row, follow these straightforward steps:
- Access the Page Layout tab in Excel.
- Click on Print Titles to open the Print Titles settings.
-
Delete the reference to Row 1 in the Print titles area by selecting it and removing it.
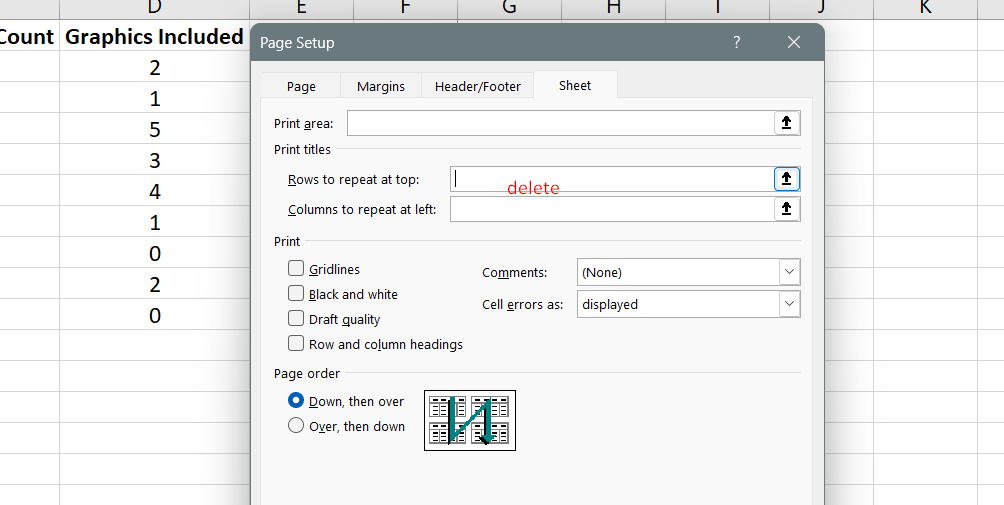
- Click OK to save the changes.
- Switch to Print Preview to verify the result.
- Navigate to the second page, and you will notice that the repeating row from Row 1 is now removed.
By following these steps, you can easily remove the setting that causes Row 1 to print on every page, eliminating any unnecessary repetition of the row heading. This allows you to view and print the data without the repeated header interfering with the clarity of your document.
Importance of Removing Repeating Rows in Excel Print
It is important to remove a repeating row that has been set to print on every page in Excel for the following reasons:
- Clarity and readability: When a row is set to repeat on every page, it can create unnecessary redundancy and clutter in the printed document. Removing the repeating row ensures a cleaner and more concise presentation of the data.
- Avoid confusion: Repeating rows can lead to confusion, especially when working with large datasets. It may become unclear which row represents the actual headers and which rows are duplicates. Removing the repeating row eliminates this confusion and allows for better data interpretation.
- Space optimization: By removing the repeating row, you can utilize the freed-up space for displaying additional rows of data. This can be particularly beneficial when dealing with extensive reports or worksheets that require maximum space for content.
- Professional appearance: Removing the repeating row contributes to a more professional and polished look of the printed document. It creates a streamlined and consistent format that enhances the overall presentation quality.
- Efficient data analysis: Without the distraction of repeating rows, users can focus more effectively on analyzing and interpreting the data presented in the worksheet. This leads to improved productivity and decision-making.
Challenges of Repeating Rows in Printed Files
Working with files that have repeating rows set for printing can present several potential issues or challenges:
- Redundancy and clutter: Repeating rows can lead to unnecessary duplication of data, making the printed document appear cluttered and less streamlined. It may also take up valuable space, especially in situations where the data set is large.
- Confusion in data interpretation: Repeating rows can create confusion when analyzing and interpreting data, particularly when it is not clear which row represents the actual headers. This can result in errors or misinterpretation of the information.
- Inconsistency in data presentation: Repeating rows disrupt the consistency of the document's layout, especially if subsequent pages do not align with the initial page. It can make the document appear unprofessional and unpolished.
- Printing inefficiency: Printing repeating rows on every page can consume unnecessary ink and paper, leading to increased printing costs. It also extends the printing time, which can be a concern when dealing with large datasets or tight deadlines.
- Difficulties in data analysis and navigation: Repeating rows may hinder the ease of data analysis, as users need to distinguish between actual headers and repeated rows. It can make navigation within the document more challenging, especially when searching for specific information.
To overcome these challenges, it is essential to properly manage and adjust the print settings to remove the repeating rows, ensuring a more concise and clear presentation of the data.
FAQs
How do I make row 1 print on every page?
To make row 1 print on every page in Excel, you can use the "Print Titles" feature by selecting "Page Layout," then "Print Titles," and specify the row range you want to repeat.
How do I repeat row 1 on each page in Excel?
To repeat row 1 on each page in Excel, go to "Page Layout," select "Print Titles," click on the "Sheet" tab, enter "1:1" in the "Rows to repeat at top" box, and click "OK."
How do I set the number of rows to print in Excel?
To set the number of rows to print in Excel, go to "Page Layout," click on "Print Area," select "Set Print Area," and adjust the print range by dragging the selection handles or manually entering the desired row range.
How do I change the default range to print in Excel?
To change the default range to print in Excel, go to "Page Layout," click on "Print Area," select "Set Print Area," and adjust the print range as needed. Then, click on "Print Titles" and choose the appropriate rows or columns to repeat on each page.
How do you set the first row so it remains visible?
To set the first row so it remains visible while scrolling in Excel, select the row below the desired row (e.g., row 2), go to "View," click on "Freeze Panes," and choose "Freeze Panes." This will keep the first row visible as you scroll through the worksheet.
Final Thoughts
Setting Row 1 to print on every page in Excel using Print Titles can greatly enhance the readability and organization of printed documents. By ensuring that column headings or titles are consistently displayed, readers can easily understand and navigate the data.
This feature eliminates the need for manual adjustments and saves valuable time when dealing with large worksheets spanning multiple pages. It promotes a professional appearance and prevents confusion caused by missing headers on subsequent pages.
One More Thing
If you have a second, please share this article on your socials; someone else may benefit too.
Subscribe to our newsletter and be the first to read our future articles, reviews, and blog post right in your email inbox. We also offer deals, promotions, and updates on our products and share them via email. You won’t miss one.
Related Articles
» Set Excel as the Default Application on Mac | Excel for Mac
» How to Set up Office apps and email on Windows Phone
» How to Shade Rows and Columns in Excel: Step-by-Step Guide